Love this? Save it for later!
Share the inspiration with your friends
“You know that moment when you want to make something festive but honestly don’t have the time or energy to spend hours in the kitchen? That was me last Fourth of July, staring at my pantry and fridge, trying to figure out a dessert that looked impressive but was actually simple. I wasn’t expecting to find the perfect solution in a dusty box of instant pudding mix I’d bought ages ago for a lazy weekend treat.
It all started when my neighbor, Lisa, popped over with her kids, and they were begging for something sweet. I grabbed those pudding mixes and some colorful berries from the market, and in less than twenty minutes—no bake, no fuss—these Easy No-Bake Pudding Flag Cups came together. The kids loved layering the pudding with whipped cream and fresh fruit, making their own little edible flags, which honestly made me smile more than the dessert itself. The whole kitchen ended up a little messy (I forgot to close the pudding packet properly), but that’s part of the charm, right?
Maybe you’ve been there—craving a dessert that’s fun to make, looks fantastic, and doesn’t require turning on the oven in the summer heat. These pudding flag cups are exactly that. They’re playful, colorful, and perfect for celebrations or simple family nights. Plus, layering those smooth vanilla pudding layers with bright strawberries and blueberries feels like a little victory every time. Let me tell you, this recipe has stuck around my house ever since—because sometimes, the easiest recipes turn out to be the most memorable.”
Why You’ll Love This Recipe
Honestly, these Easy No-Bake Pudding Flag Cups are a game-changer for anyone who wants a dessert that’s as delightful to make as it is to eat. I’ve tested this recipe multiple times—sometimes with hurried prep, other times with a bit more care—and it always comes through beautifully. Here’s why you might want to keep this recipe handy:
- Quick & Easy: Ready in under 20 minutes, making it perfect for busy weeknights, last-minute parties, or those unexpected sweet cravings.
- Simple Ingredients: Uses pantry staples like instant pudding mix, whipped cream, and fresh fruit—no fancy or hard-to-find items needed.
- Perfect for Celebrations: Great for holidays, potlucks, or summer barbecues where you want a light, refreshing dessert.
- Crowd-Pleaser: Kids and adults alike love the colorful layers, and it’s a fun way to get little helpers involved in the kitchen.
- Unbelievably Delicious: The creamy pudding paired with fresh berries and fluffy whipped cream creates a texture and flavor combo that feels like a party in every spoonful.
What makes this pudding cup recipe stand out is the layering technique. It’s not just about dumping pudding into cups; it’s about creating those vibrant flag-like layers that make the dessert visually exciting. Plus, the no-bake aspect means you avoid the summer oven heat and still get that homemade dessert feeling. Honestly, once you try these, they’ll be your go-to for any occasion where you want something sweet but fuss-free.
What Ingredients You Will Need
This recipe relies on simple, wholesome ingredients to deliver that bold, satisfying flavor and fun texture without fuss. Most of these are pantry staples or easy to find fresh items, so you probably have everything on hand.
- Instant Vanilla Pudding Mix (1 package, about 3.4 oz / 96 g) – The star for creamy, smooth layers. I usually go for the Jell-O brand for best consistency.
- Cold Milk (2 cups / 480 ml) – Whole milk gives the richest texture, but 2% works fine too.
- Whipped Cream (1 cup / 240 ml) – Freshly whipped is ideal, but store-bought works in a pinch. Adds lightness between pudding layers.
- Fresh Strawberries (1 cup, sliced) – For the red stripes; ripe and sweet is best, but frozen thawed can work.
- Fresh Blueberries (1 cup) – The blue part of the flag, adds a burst of freshness and color.
- Granulated Sugar (optional, 1-2 tbsp) – To sweeten the fruit if it’s a little tart.
- Vanilla Extract (optional, 1 tsp) – Adds a subtle warmth to the pudding if you like a more homemade flavor.
- Mint Leaves (optional, for garnish) – Adds a fresh finish and a splash of green contrast.
If you want a dairy-free version, almond or oat milk works well with the pudding mix labeled as suitable for those alternatives. You can swap the whipped cream with coconut whipped cream for a vegan twist. Also, in summer, swap berries for other seasonal fruits like raspberries or blackberries for a different flavor profile.
Equipment Needed
To keep things easy, you don’t need anything fancy. Here’s what I use for these pudding flag cups:
- Mixing Bowl: A medium-sized bowl to whisk the pudding mix and milk together. A glass or ceramic bowl works well to see the smooth texture forming.
- Whisk or Hand Mixer: Whisk by hand for a little arm workout or a hand mixer if you want super smooth pudding fast.
- Measuring Cups and Spoons: For precise amounts, especially with milk and pudding mix.
- Clear Plastic or Glass Cups: To show off those gorgeous layers. I love using small mason jars or clear disposable cups for easy serving.
- Spoons or Small Spatula: For spreading the pudding and whipped cream evenly in layers.
- Knife: To slice the strawberries thinly, making neat red stripes.
If you don’t have a hand mixer, a fork or balloon whisk works, but it might take a bit more elbow grease. Also, a piping bag or zip-top bag with a corner snipped can help with neat layers, but I usually just spoon it in—imperfections add character! No need to stress about perfect tools here.
Preparation Method
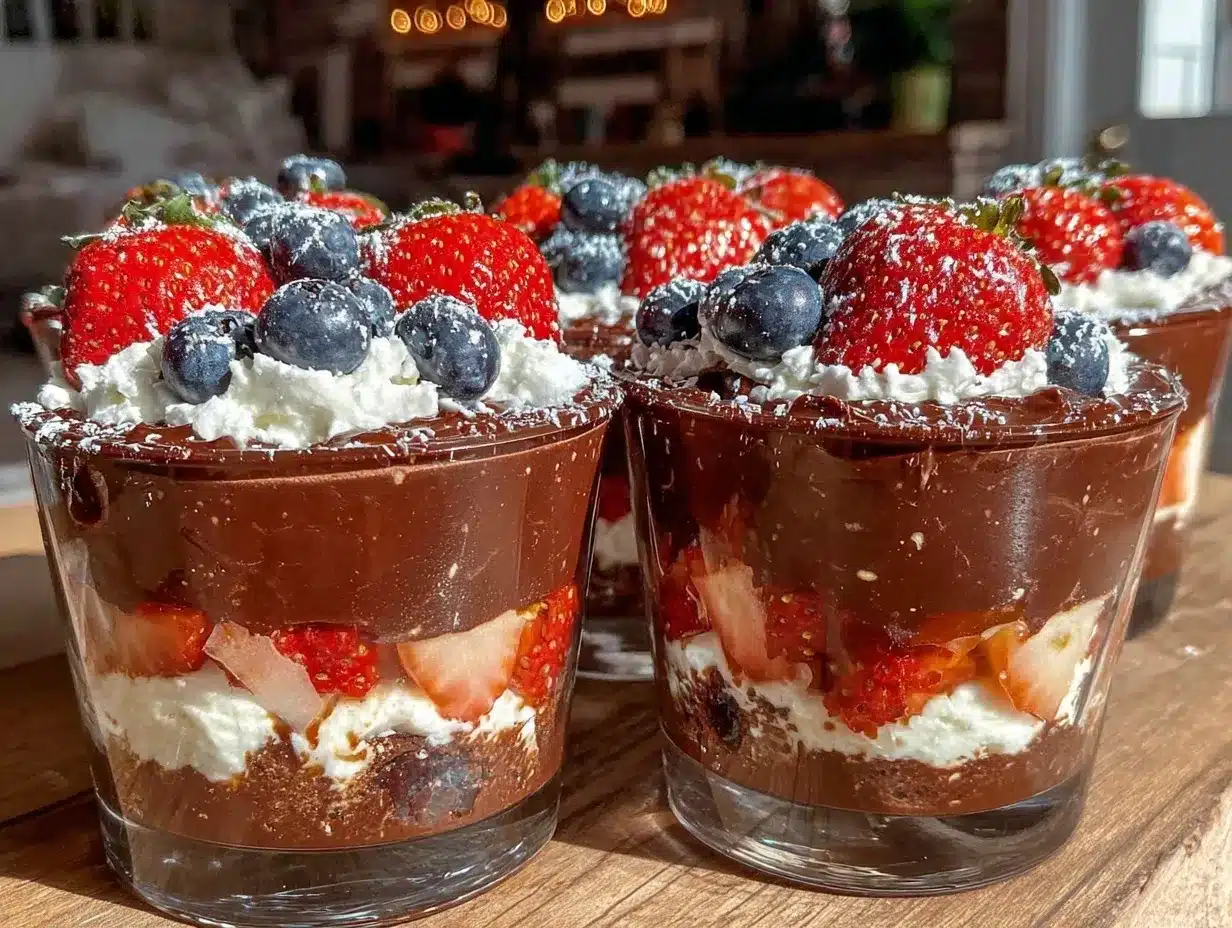
- Prepare the Pudding: In a medium bowl, whisk together the instant vanilla pudding mix and cold milk (2 cups / 480 ml) for about 2 minutes until thickened. If using vanilla extract, stir it in now. Let it sit for 5 minutes to fully set. The pudding should be smooth, glossy, and slightly thickened.
- Slice the Strawberries: While the pudding sets, wash and slice 1 cup of fresh strawberries thinly. If they’re not very sweet, sprinkle a tablespoon of sugar and toss gently. Set aside.
- Prepare Whipped Cream: If whipping fresh cream, beat 1 cup (240 ml) of heavy cream until soft peaks form. If using store-bought, give it a quick stir to soften it up for spreading.
- Layer the Cups – First Layer (Red): Spoon a thin layer of vanilla pudding (about 2 tablespoons) into each clear cup. Arrange a few strawberry slices on top to create the red stripes effect. Gently press the fruit into the pudding so it sticks well. Chill the cups for 5 minutes to help it set.
- Second Layer (White): Add a thin layer of whipped cream (about 1-2 tablespoons) over the strawberries. Use the back of a spoon to spread evenly. Return to fridge for another 5 minutes to keep layers distinct.
- Third Layer (Blue): Add another layer of vanilla pudding (2 tablespoons), then carefully place blueberries on top to form the blue section of the flag. Press lightly to embed the berries without breaking them.
- Top with Whipped Cream and Garnish: Finish with a generous dollop of whipped cream and a few blueberries scattered on top. Add a mint leaf for color if desired.
- Chill Before Serving: Let the cups chill in the fridge for at least 20 minutes before serving so layers firm up and flavors meld. They taste even better after a short rest!
Pro tip: If you want cleaner layers, chill each layer for a bit before adding the next—patience pays off, but honestly, these look great even if you’re a little rushed. Just try to keep the pudding and whipped cream chilled so they don’t blend too much.
Cooking Tips & Techniques
Making these pudding flag cups perfect is really about a few simple tricks that I’ve learned through trial and error. Let me share some tips that might save you from little kitchen headaches:
- Mix Pudding Thoroughly: Whisk the pudding mix and milk for a full two minutes to avoid lumps. I once rushed this step, and the texture was off—don’t skip it!
- Chill Between Layers: If you have the time, chilling between layers helps keep distinct colors and textures. But if you’re in a hurry, just be gentle when adding layers.
- Use Fresh, Firm Fruit: Soft or overripe berries can bleed color into the layers, making them less defined. I learned this the hard way once when my blueberries turned everything purple!
- Don’t Overfill Cups: Leave a bit of space at the top to avoid spills and make room for the final whipped cream topping.
- Multitask by Preparing Fruit and Whipping Cream While Pudding Sets: Saves time and keeps the process flowing smoothly.
One of my favorite little tricks is to spoon the pudding into a piping bag to get neat, even layers. But honestly, spooning works just fine and feels more homemade. The key is to keep everything cool and fresh.
Variations & Adaptations
One of the best parts about this recipe is how easy it is to tweak based on your preferences or what you have on hand. Here are a few variations I’ve enjoyed:
- Chocolate Lover’s Version: Swap out vanilla pudding for instant chocolate pudding and layer with raspberries and blackberries for a rich, decadent twist.
- Vegan/Dairy-Free: Use dairy-free pudding mix or make your own with coconut milk and cornstarch. Replace whipped cream with coconut whipped cream or aquafaba-based topping.
- Seasonal Fruit: In autumn, try layering with spiced apple compote and pear slices. In spring, swap berries for kiwi and mango for a tropical vibe.
- Crunchy Add-In: Add a layer of crushed graham crackers or granola between the pudding and whipped cream for an extra texture boost.
- Personal Favorite: I once added a thin drizzle of caramel sauce between layers for a surprise sweetness that had everyone asking for more.
Feel free to get creative with the fruits and flavors you love. The layering technique works with just about any pudding and fruit combo you can dream up.
Serving & Storage Suggestions
These pudding flag cups are best served chilled. I like to pull them out of the fridge about 10 minutes before serving to let the flavors come alive without losing that cool, refreshing texture. They look great on a festive platter, and you can garnish with a few extra berries and mint sprigs for a pop of color.
They pair wonderfully with light, fruity beverages like iced tea or sparkling lemonade—perfect for warm-weather gatherings. For a brunch or casual dinner, these cups add that sweet finish without being too heavy.
Store leftovers in the refrigerator, covered tightly with plastic wrap or lids, for up to 2 days. The layers hold up well, but the fruit may release some juice, softening the layers slightly. If you want to make these ahead, assembling them a few hours before is ideal, but avoid making them more than a day in advance.
To reheat? Honestly, these are best cold, but if you want to soften the pudding slightly, let them sit at room temperature for 10 minutes before serving.
Nutritional Information & Benefits
This dessert is relatively light, especially compared to traditional baked sweets. One serving (about 1 cup / 240 ml) contains approximately:
| Calories | 180-220 |
|---|---|
| Fat | 8-10 g |
| Carbohydrates | 25-30 g |
| Protein | 4-5 g |
The fresh berries provide antioxidants and vitamin C, while the pudding offers calcium and some protein, especially if made with milk rather than water. For those watching carbs, using sugar-free pudding mix and low-carb whipped cream substitutes can make this dessert more diet-friendly without sacrificing flavor.
Personally, I appreciate how this dessert satisfies a sweet tooth without feeling heavy or leaving me overly full. It’s a way to enjoy something fun and festive while keeping things relatively balanced.
Conclusion
So, if you’re looking for an easy, no-fuss dessert that packs a fun visual punch and tastes like a little celebration in every bite, these Easy No-Bake Pudding Flag Cups are your new best friend. The layering technique makes it look like you spent way more time than you actually did, and honestly, the kids having fun assembling them is just the cherry on top.
Feel free to customize with your favorite fruits, flavors, or toppings—this recipe is forgiving and adaptable. I love how it brings a bit of joy and color to any table, whether it’s a casual family night or a festive holiday spread.
If you try this recipe, please drop a comment and tell me how your pudding flags turned out or what fun variations you tried. Sharing your kitchen wins (and little messes) is what makes this community so special. Happy layering and sweet moments ahead!
FAQs
Can I make these pudding cups ahead of time?
Yes! They keep well in the fridge for up to 2 days. Just cover them tightly and add fresh fruit or whipped cream topping right before serving for the best look.
What can I use instead of instant pudding mix?
You can make homemade pudding using milk, sugar, cornstarch, and flavorings, but it will require cooking and cooling time. Instant pudding is quickest and easiest for this recipe.
Can I use other fruits besides strawberries and blueberries?
Absolutely! Raspberries, blackberries, kiwi, mango, or even canned fruit can work well. Just consider how the colors will layer to keep that flag effect.
Is there a vegan version of this dessert?
Yes, substitute dairy milk with almond or oat milk, use vegan pudding mixes, and swap whipped cream with coconut whipped cream or aquafaba-based toppings.
How do I keep the layers from mixing together?
Chilling the cups between layers helps a lot. Also, adding layers gently with a spoon or piping bag and keeping the pudding and whipped cream cold helps maintain distinct layers.
Pin This Recipe!
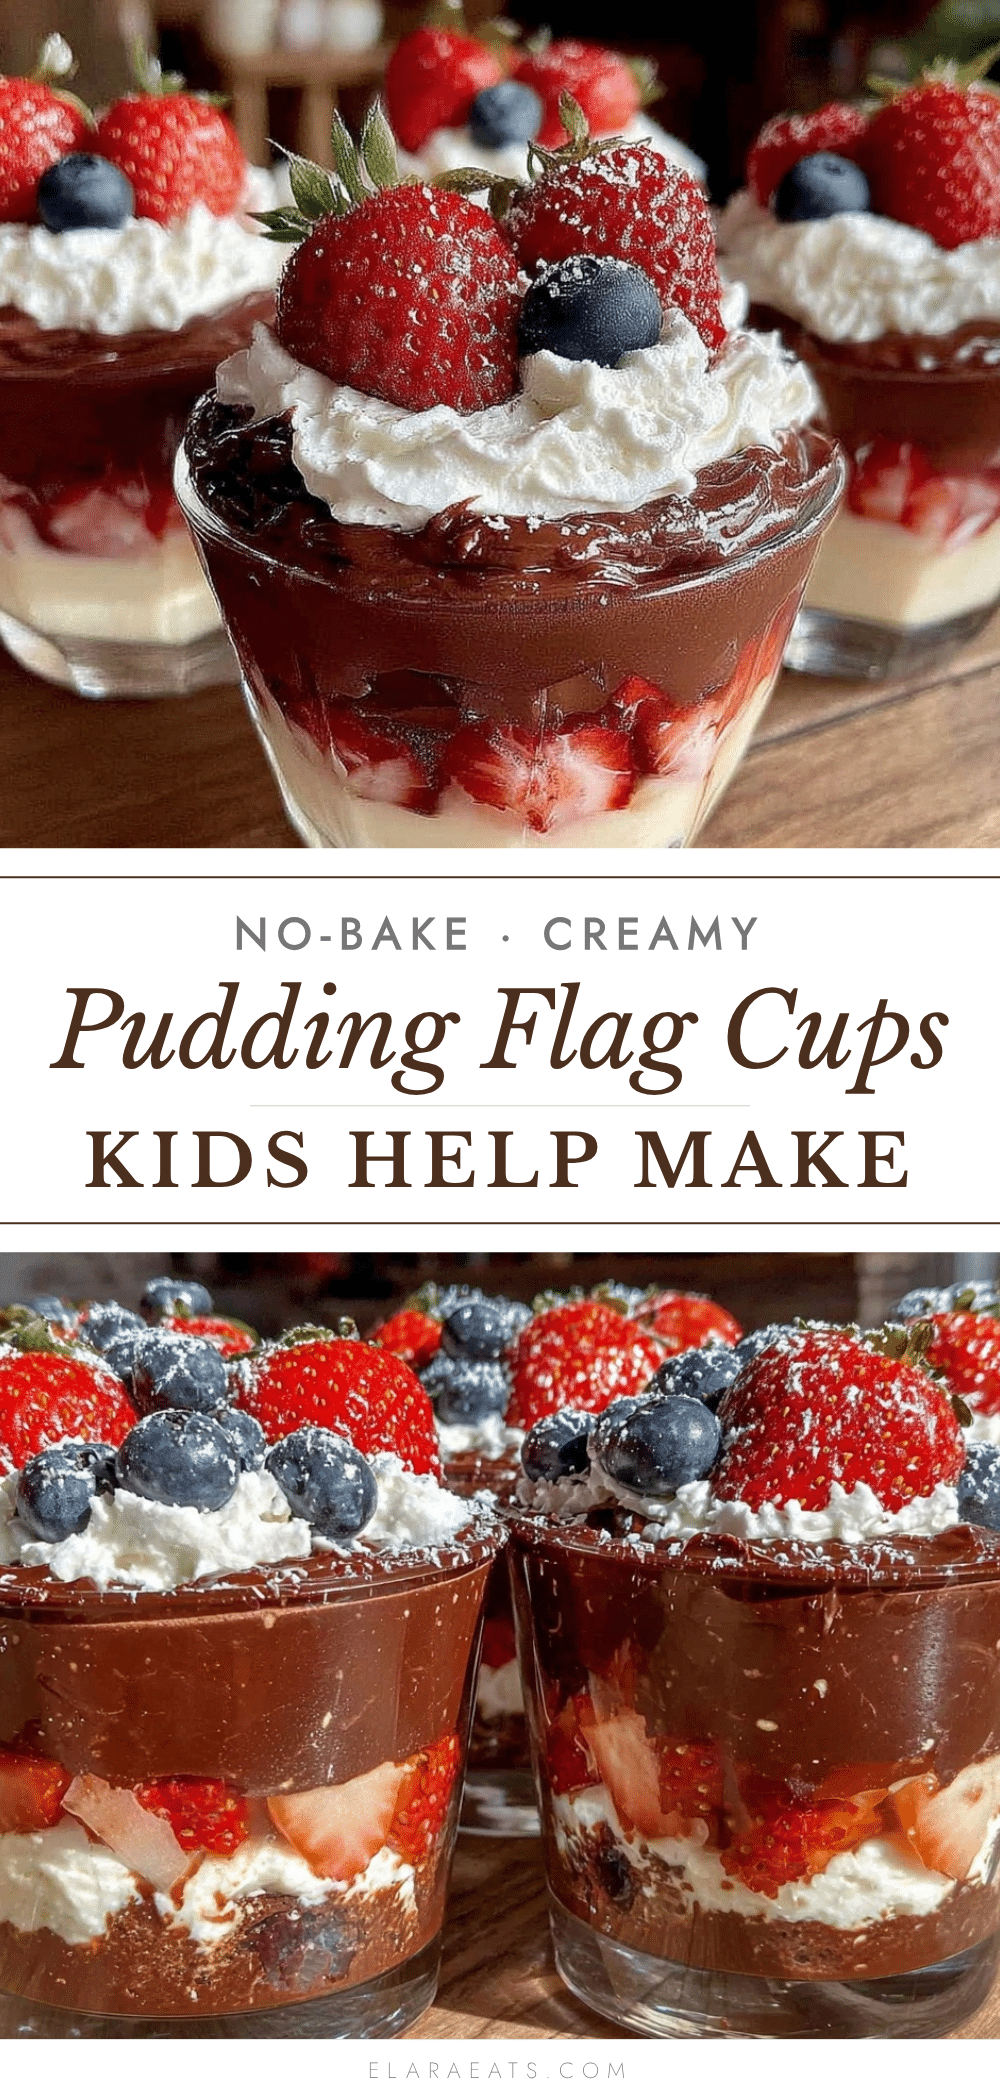
Easy No-Bake Pudding Flag Cups
A quick and festive no-bake dessert featuring layered vanilla pudding, whipped cream, and fresh berries arranged to look like a flag. Perfect for celebrations or simple family nights.
- Prep Time: 10 minutes
- Cook Time: 0 minutes
- Total Time: 20 minutes
- Yield: 6 servings 1x
- Category: Dessert
- Cuisine: American
Ingredients
- 1 package (3.4 oz / 96 g) instant vanilla pudding mix
- 2 cups (480 ml) cold milk (whole or 2%)
- 1 cup (240 ml) whipped cream (freshly whipped or store-bought)
- 1 cup fresh strawberries, sliced
- 1 cup fresh blueberries
- 1–2 tablespoons granulated sugar (optional, to sweeten fruit)
- 1 teaspoon vanilla extract (optional)
- Mint leaves for garnish (optional)
Instructions
- In a medium bowl, whisk together the instant vanilla pudding mix and cold milk for about 2 minutes until thickened. Stir in vanilla extract if using. Let sit for 5 minutes to fully set.
- Wash and slice strawberries thinly. If not very sweet, sprinkle with 1 tablespoon sugar and toss gently. Set aside.
- If whipping fresh cream, beat 1 cup of heavy cream until soft peaks form. If using store-bought whipped cream, stir to soften for spreading.
- Spoon about 2 tablespoons of vanilla pudding into each clear cup. Arrange a few strawberry slices on top to create red stripes. Press fruit gently into pudding. Chill cups for 5 minutes.
- Add a thin layer (1-2 tablespoons) of whipped cream over the strawberries. Spread evenly with the back of a spoon. Return to fridge for 5 minutes.
- Add another 2 tablespoons of vanilla pudding, then carefully place blueberries on top to form the blue section of the flag. Press lightly to embed berries.
- Top with a generous dollop of whipped cream and a few blueberries. Garnish with a mint leaf if desired.
- Chill the cups in the refrigerator for at least 20 minutes before serving to let layers firm up and flavors meld.
Notes
Chill each layer before adding the next for cleaner layers. Use fresh, firm fruit to prevent color bleeding. Leave space at the top of cups to avoid spills. Piping bags can help with neat layers but spooning works fine. For dairy-free or vegan versions, use almond or oat milk and coconut whipped cream.
Nutrition
- Serving Size: 1 cup (240 ml)
- Calories: 200
- Sugar: 20
- Sodium: 150
- Fat: 9
- Saturated Fat: 5
- Carbohydrates: 28
- Fiber: 2
- Protein: 4.5
Keywords: no-bake dessert, pudding cups, layered dessert, Fourth of July dessert, easy dessert, flag dessert, summer dessert, kid-friendly dessert


