Love this? Save it for later!
Share the inspiration with your friends
There used to be a little diner off Route 9 called The Skillet that made the most ridiculous Halloween specials. I’m not talking about those sad, store-bought cookies—they went all out. Their mummy hot dogs were legendary: perfectly wrapped, oozing with cheese, and served with a side of spicy mustard that cut through all that richness. When The Skillet closed in 2019 (the owner retired to Florida, lucky guy), I honestly went through a weird mourning period. For two Halloweens straight, I tried to recreate those mummy dogs. The first batch? A total disaster—the cheese leaked out, the dough was soggy, and my kids looked at me like I’d lost my mind.
After maybe six or seven tries—some burnt, some undercooked, one where I accidentally used crescent rolls that turned into a sweet, sticky mess—I finally cracked the code. The secret, let me tell you, is in the cheese-to-dough ratio and the way you wrap the strips. This recipe for Easy Mummy Hot Dogs with Melted Cheese is the one. It’s the one that made my youngest say, “These are better than The Skillet’s, Mom.” And honestly, I almost cried.
Maybe you’ve been there—chasing a flavor from a place that no longer exists. Or maybe you just need a fun, foolproof Halloween dinner that doesn’t require a culinary degree. Either way, this is it. These little mummies are crispy, cheesy, and so ridiculously easy that you’ll wonder why you ever bought the frozen version. They’ve become our family’s October tradition, and I’m pretty sure they’re about to become yours too.
Why You’ll Love This Recipe
Let me tell you why these Easy Mummy Hot Dogs with Melted Cheese are about to become your go-to Halloween dinner. I’ve tested this recipe more times than I care to admit, and every single batch has taught me something new. Here’s what makes them absolutely unbeatable:
- Quick & Easy: From start to table in under 25 minutes. Seriously, you can make these on a school night without breaking a sweat. Perfect for those October evenings when you’re juggling costume preparations and homework.
- Simple Ingredients: You need exactly five ingredients—hot dogs, crescent roll dough, cheese sticks, mustard, and butter. No fancy grocery trips, no obscure spices. I bet you have most of these in your kitchen right now.
- Perfect for Halloween Parties: These little guys are the life of any spooky gathering. Kids love them, adults sneak them, and they disappear faster than candy at a piñata party.
- Crowd-Pleaser: I’ve served these at three different Halloween parties now, and each time, someone asks for the recipe. Even picky eaters gobble them up because, let’s face it, it’s hot dogs and cheese wrapped in buttery dough.
- Unbelievably Delicious: The contrast between the flaky, golden dough and the gooey, melted cheese inside is next-level comfort food. The mustard eyes add this tiny tangy pop that makes each bite interesting.
What makes this recipe different from the dozens of others out there? It’s the wrapping technique. Most recipes tell you to just wrap the dough around the hot dog, but I’ve found that cutting the cheese into thin strips and layering them against the hot dog creates this perfect cheese pull in every single bite. No cheese leakage, no sad, empty pockets. It’s my best version, and I’m not holding back.
This recipe isn’t just good—it’s the kind that makes you close your eyes after the first bite. It’s comfort food reimagined for Halloween: faster, cheesier, but with the same soul-soothing satisfaction as a cozy dinner. Perfect for impressing guests without stress, or turning a simple Tuesday night into something memorable.
What Ingredients You Will Need
This recipe uses simple, everyday ingredients to deliver big flavor and that irresistible cheese pull. Most of these are probably already in your kitchen, which is exactly how I like my weeknight dinners to be.
- For the Mummies:
- 8 hot dogs (I prefer beef hot dogs like Nathan’s for the best snap, but any brand works—use turkey or chicken for a lighter option)
- 1 can (8 oz) refrigerated crescent roll dough (Pillsbury is my go-to, but store brands work fine too—just make sure it’s the original, not the flaky layers version)
- 4 string cheese sticks (Mozzarella works best for that perfect stretch, but cheddar or provolone adds a fun twist—cut each stick in half lengthwise, then into thin strips)
- Mustard for eyes (Yellow mustard gives the best color contrast, but Dijon or honey mustard work if that’s what you have—use a toothpick for precise dots)
- For the Glaze:
- 1 tablespoon butter, melted (Salted butter adds a nice touch, but unsalted works too—brush it on for that golden, bakery-style finish)
- Optional: Everything bagel seasoning or sesame seeds (Not traditional, but I tried this once and it adds a lovely crunch—skip if you want classic mummies)
Ingredient Selection Tips: Look for hot dogs that are all-beef or all-pork for the best flavor—the cheaper ones tend to get rubbery when baked. For the crescent rolls, I recommend Pillsbury because they’re consistently flaky and easy to work with. If you’re feeling adventurous, you can make your own pizza dough from scratch, but honestly, the canned stuff works perfectly here and saves so much time.
Substitution Guidance: Use gluten-free crescent roll dough if you need a gluten-free option—it’s available at most grocery stores now. For dairy-free, skip the cheese and use vegan butter for the glaze. The hot dogs themselves are naturally gluten-free, so this recipe is easy to adapt. I’ve also made these with cocktail sausages for appetizer-sized mummies, and they were a huge hit at my daughter’s Halloween class party.
Equipment Needed
You don’t need fancy equipment for these Easy Mummy Hot Dogs with Melted Cheese—just a few basics that every kitchen has. Here’s what you’ll need:
- Baking sheet (A standard 13×18 inch sheet works perfectly—line it with parchment paper for easy cleanup)
- Parchment paper or silicone baking mat (Trust me on this—without it, the cheese that inevitably escapes will stick to your pan and create a nightmare scrub session)
- Sharp knife or pizza cutter (For cutting the crescent dough into strips—a pizza cutter makes this so much faster)
- Small bowl (For melting butter—I use a microwave-safe bowl and zap it for 10 seconds)
- Pastry brush (For brushing the melted butter—a silicone one is easiest to clean, but a regular brush works too)
- Toothpick (For applying the mustard eyes—you could use a squeeze bottle, but a toothpick gives you way more control)
- Cooling rack (Optional but helpful—lets the mummies cool evenly without getting soggy on the bottom)
Budget-Friendly Options: Don’t have a pastry brush? Use a folded paper towel to dab the butter on. No pizza cutter? A sharp knife works just as well. I actually prefer using a knife because it gives me more control over the strip width. And if you don’t have a cooling rack, just transfer the mummies to a plate after a minute or two—they’ll be fine.
Preparation Method
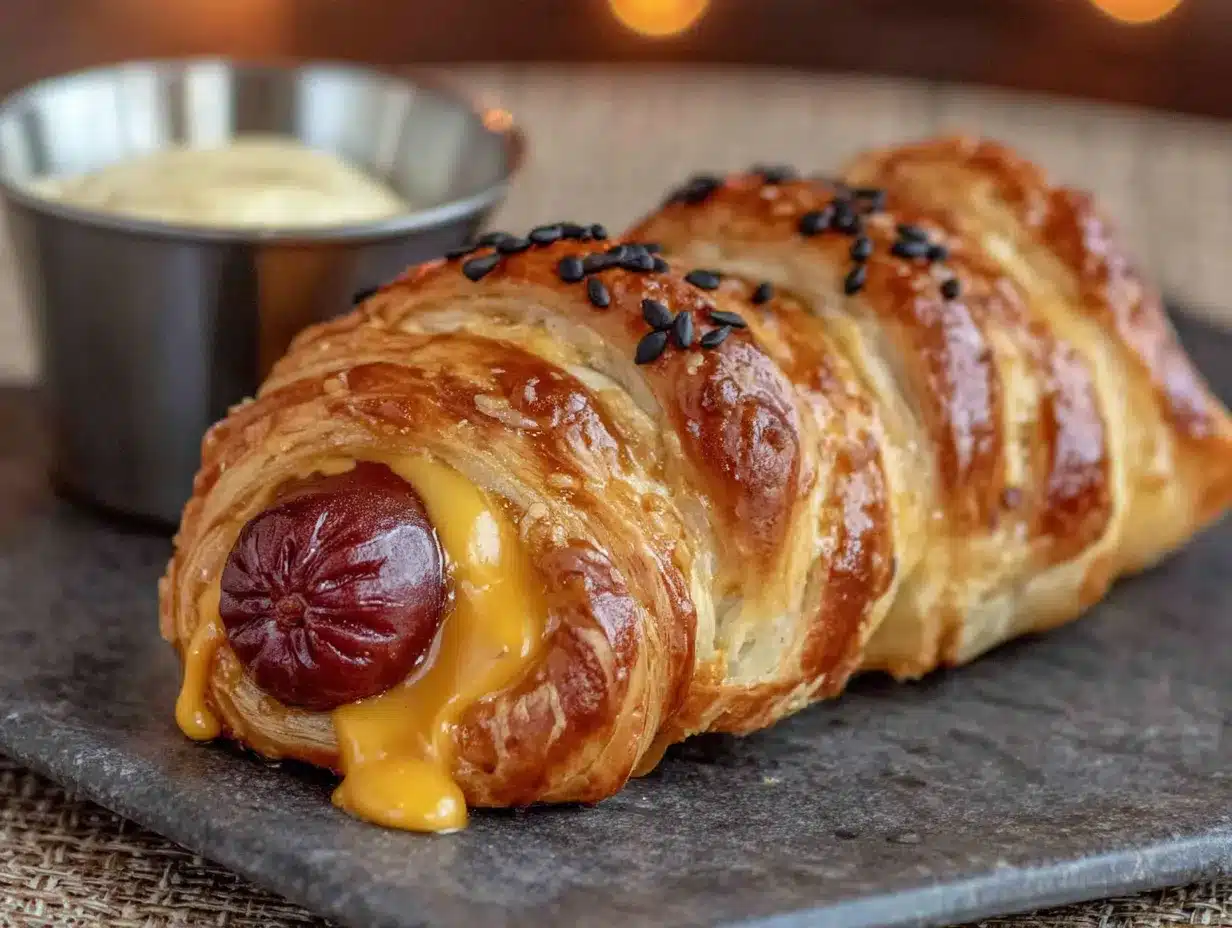
Alright, let’s make these Easy Mummy Hot Dogs with Melted Cheese. I’ve broken this down into simple steps, and I’ll share all the little tricks I learned from my many, many attempts. Trust me, by the end of this, you’ll be wrapping mummies like a pro.
- Preheat your oven to 375°F (190°C). Line a baking sheet with parchment paper. This is non-negotiable—I learned the hard way when my first batch stuck to the pan and I spent 20 minutes scraping cheese off aluminum foil. Not fun.
- Prepare your cheese. Take your 4 string cheese sticks and cut each one in half lengthwise. Then cut each half into thin strips, about ¼ inch wide. You want these to be thin enough to wrap around the hot dog without making it too bulky. I usually get about 4-5 strips per cheese stick half. Set these aside.
- Open the crescent roll dough. Carefully unroll it on a clean cutting board. You’ll see it’s perforated into 8 triangles. Don’t separate them yet—just press the seams together gently with your fingers to create one large rectangle. Use a rolling pin if you want, but your fingers work fine.
- Cut the dough into strips. Using a sharp knife or pizza cutter, cut the dough lengthwise into thin strips, about ½ inch wide. You should get about 12-14 strips from the whole sheet. The strips don’t have to be perfect—in fact, uneven strips give your mummies a more authentic, “wrapped” look.
- Assemble the mummies. Take one hot dog and lay a few cheese strips along its length. Start wrapping a dough strip around the hot dog, overlapping slightly as you go. Leave a small gap at the top for the “face” (about 1 inch) and a tiny gap at the bottom. The cheese should be visible peeking out from the dough. Don’t wrap too tightly—the dough needs room to puff up as it bakes. Repeat with the remaining hot dogs. You’ll use about 1.5 to 2 dough strips per hot dog.
- Place the mummies on the baking sheet. Space them about 2 inches apart—they’ll puff up a bit, and you don’t want them sticking together. If you have any leftover dough strips, you can tuck them under the mummies for extra crispiness.
- Brush with melted butter. Melt your 1 tablespoon of butter in a small bowl (about 10 seconds in the microwave). Using your pastry brush, gently brush the tops of each mummy. This is what gives them that beautiful golden color. Don’t skip this step—plain dough looks sad and pale.
- Bake for 12-14 minutes. Keep an eye on them around the 10-minute mark. You’re looking for the dough to be golden brown and puffed, and the cheese should be bubbly and slightly browned in spots. If your oven runs hot, check at 10 minutes. Every oven is different—I’ve had batches that needed 15 minutes and others that were done at 11.
- Let them cool for 2-3 minutes. This is crucial—the cheese inside is molten hot and will burn your mouth if you dive in immediately. I speak from experience. A very painful experience.
- Add the eyes. Dip a toothpick into yellow mustard and dot two small eyes on each mummy’s face. You can make them look scared, angry, or just plain silly—my kids love making different expressions. The mustard adds a tiny tangy kick that balances the richness perfectly.
- Serve immediately. These are best eaten warm, when the cheese is still stretchy and the dough is at its flakiest. Watch them disappear!
Sensory Cues: When the mummies are done, the kitchen will smell like buttery, toasty dough and warm cheese—basically the smell of pure comfort. The dough should be golden brown with darker brown spots where the butter caramelized. If you tap the top, it should feel firm and sound slightly hollow. The cheese will be bubbling at the edges, and some might have escaped onto the parchment—that’s totally normal and honestly, those crispy cheese bits are the cook’s reward.
Cooking Tips & Techniques
After making these Easy Mummy Hot Dogs with Melted Cheese more times than I can count, I’ve picked up a few tricks that make all the difference. Let me share what I’ve learned—including the mistakes that taught me the most.
The Cheese Placement is Everything. I learned this the hard way. On my third attempt, I just stuck a whole cheese stick next to the hot dog and wrapped it up. The cheese melted into one big blob that oozed out the bottom, leaving a hollow dough mummy with no cheese inside. Now, I cut the cheese into thin strips and layer them against the hot dog, not on top of it. This way, the cheese melts into the hot dog and stays put, creating that perfect cheese pull in every bite.
Don’t Overcrowd the Pan. I know it’s tempting to cram all eight mummies onto one baking sheet, but give them space. When they’re too close together, the steam gets trapped and the dough gets soggy instead of crispy. I learned this when I made a batch for a party and ended up with sad, limp mummies. Space them about 2 inches apart, and if you have to, use two baking sheets.
The Mustard Eyes are a Precision Job. Here’s a trick I figured out after too many blobby mustard dots: dip the toothpick into the mustard, then gently touch it to the dough and lift straight up. Don’t drag or smear. If you want bigger eyes, dot the mustard twice in the same spot. For smaller eyes, just touch once. My kids now compete to see who can make the cutest mummy faces.
Timing is Everything. These mummies go from perfectly golden to burnt surprisingly fast. I always set a timer for 10 minutes, then check every minute after that. If you see the cheese starting to brown too much, pull them out immediately. Burnt cheese tastes bitter and ruins the whole experience—trust me, I’ve been there.
Multitasking Strategy: While the mummies are baking, I set out the mustard and toothpicks, and get the plates ready. This way, as soon as they’re cool enough to handle, I can add the eyes and serve them immediately. Hot mummies are happy mummies.
Variations & Adaptations
One of the best things about these Easy Mummy Hot Dogs with Melted Cheese is how customizable they are. I’ve experimented with all sorts of variations, and here are my favorites:
- Spicy Mummies: Before wrapping, spread a thin layer of sriracha or chipotle mayo on the hot dog. The heat cuts through the richness beautifully. I made these for a Halloween party and they were the first to disappear—adults went crazy for them.
- Cheese Lover’s Mummies: Use a combination of mozzarella and cheddar string cheese. The mozzarella gives you that stretchy pull, while the cheddar adds a sharp, tangy flavor. I also tried pepper jack once, and the little bits of jalapeño were a pleasant surprise.
- Breakfast Mummies: Swap the hot dogs for breakfast sausages and use cheddar cheese. Serve with a side of maple syrup for dipping. I made these for a Halloween morning breakfast and my kids thought it was the best thing ever.
- Vegetarian Option: Use vegetarian hot dogs or even carrots (blanched first) as the base. The dough and cheese are already vegetarian, so this is an easy swap. I’ve made these for my vegetarian friend, and she said they were better than the real thing—high praise!
- Gluten-Free Mummies: Use gluten-free crescent roll dough—it’s available at most major grocery stores now. The texture is slightly different (a bit more crumbly), but the taste is still fantastic. Just handle the dough gently because it’s more fragile.
- Air Fryer Mummies: Cook at 350°F (175°C) for 6-8 minutes, flipping halfway through. The air fryer gives them an extra-crispy exterior. I tried this on a lazy Sunday and honestly, they were the crispiest mummies I’ve ever made.
Serving & Storage Suggestions
How to Serve: These Easy Mummy Hot Dogs with Melted Cheese are best served warm, straight from the oven. The cheese is at its stretchiest, the dough at its flakiest, and the mustard eyes are still fresh and bright. I like to arrange them on a platter with a bowl of ketchup, mustard, or ranch dressing for dipping. For a Halloween party, I sometimes add a few “spider” decorations—just black olives with legs made from chive pieces—to make the platter extra festive.
What to Serve With: These mummies pair perfectly with a simple side salad or some roasted vegetables to balance out the richness. My kids love them with apple slices and a handful of baby carrots. For a full Halloween meal, I serve them alongside a bowl of tomato soup (it’s orange, so it fits the theme!) and some creepy-crawly fruit snacks for dessert.
Storage Instructions: If you have leftovers (which rarely happens in my house), let them cool completely, then store them in an airtight container in the refrigerator for up to 3 days. The dough will soften a bit, but they’re still delicious. To reheat, pop them in a 350°F (175°C) oven for 5-7 minutes, or in the air fryer at 350°F for 3-4 minutes. I don’t recommend microwaving them—the dough gets rubbery and the cheese becomes tough.
Freezer Instructions: You can freeze these mummies before baking! Assemble them completely, but don’t brush with butter or add the mustard eyes. Place them on a baking sheet and freeze until solid, then transfer to a freezer bag. When you’re ready to bake, just brush with butter and bake straight from frozen, adding 3-4 minutes to the cooking time. This is a lifesaver for busy Halloween weeks.
Flavor Development: Honestly, these are best fresh. The dough loses its crispiness after a few hours, and the cheese sets as it cools. But I’ve found that leftover mummies are still great chopped up and added to a breakfast scramble or mac and cheese. Waste not, want not!
Nutritional Information & Benefits
Let’s be real—these Easy Mummy Hot Dogs with Melted Cheese are a treat, not a health food. But here’s what you’re looking at per serving (one mummy):
- Calories: Approximately 280-320 calories per mummy (depending on the brand of hot dogs and cheese)
- Protein: About 12-14 grams (thanks to the hot dog and cheese)
- Carbohydrates: Around 18-22 grams (mostly from the dough)
- Fat: 18-22 grams (the cheese and butter contribute most of this)
- Sodium: 700-900 mg (hot dogs are naturally high in sodium, so keep this in mind)
Health Benefits: While this isn’t a health food, there are a few bright spots. The hot dogs provide protein and iron, and the cheese offers calcium and vitamin D. If you use turkey or chicken hot dogs, you’ll cut the fat and calories significantly. And honestly, the joy these mummies bring to a Halloween dinner is a mental health benefit in itself—sometimes we need fun food to make memories.
Dietary Considerations: This recipe contains gluten (from the crescent dough) and dairy (from the cheese and butter). For a gluten-free version, use gluten-free dough. For a dairy-free version, skip the cheese and use vegan butter. The hot dogs themselves are usually gluten-free, but always check the label. If you’re watching your sodium, look for low-sodium hot dogs and use less cheese.
Conclusion
These Easy Mummy Hot Dogs with Melted Cheese are more than just a Halloween dinner—they’re a tradition waiting to happen. They’re the recipe that turned my kitchen into a happy, messy, cheese-filled memory factory. Every time I make them, I think about that little diner on Route 9 and how a closed restaurant led me to create something even better in my own home.
I hope you’ll give these a try, whether it’s for a Halloween party, a fun weeknight dinner, or just because you want to eat something that looks like a mummy. Don’t be afraid to customize them—add your favorite cheese, experiment with different sausages, or let your kids design their own mummy faces. The best recipes are the ones that become yours.
I’d love to hear how yours turn out! Drop a comment below and tell me about your mummy-making adventures. Did you try a fun variation? Did your kids love them? Share a photo on Pinterest and tag me—I can’t wait to see your creations. Until next time, happy cooking and happy Halloween!
Frequently Asked Questions
Can I make these mummy hot dogs ahead of time?
Absolutely! You can assemble them completely (without the butter wash and mustard eyes), then refrigerate them for up to 24 hours. When you’re ready to bake, just brush with butter and add a couple of minutes to the baking time. You can also freeze them for up to 3 months—bake straight from frozen, adding 3-4 minutes.
What if I don’t have crescent roll dough?
No problem! You can use puff pastry, pizza dough, or even refrigerated biscuits (flattened and cut into strips). Puff pastry gives you an extra-flaky result, while pizza dough makes them more substantial. I’ve tried all three, and each version has its own charm.
Can I use different types of cheese?
Definitely! While mozzarella is classic for its stretch, cheddar adds a sharp flavor, provolone gives a buttery taste, and pepper jack brings the heat. I’ve even used gouda for a smoky twist. Just make sure to use cheese that melts well—avoid hard cheeses like parmesan.
How do I prevent the cheese from leaking out?
This was my biggest struggle! The key is to cut the cheese into thin strips and layer them against the hot dog, not on top of it. Also, don’t wrap the dough too tightly—leave a little room for the cheese to expand. And make sure the dough overlaps slightly to seal everything in.
Can I make these in an air fryer?
Yes! Cook them at 350°F (175°C) for 6-8 minutes, flipping halfway through. The air fryer gives them an extra-crispy exterior. Just keep an eye on them because air fryers cook faster than ovens. I recommend checking at the 5-minute mark to avoid burning.
Pin This Recipe!
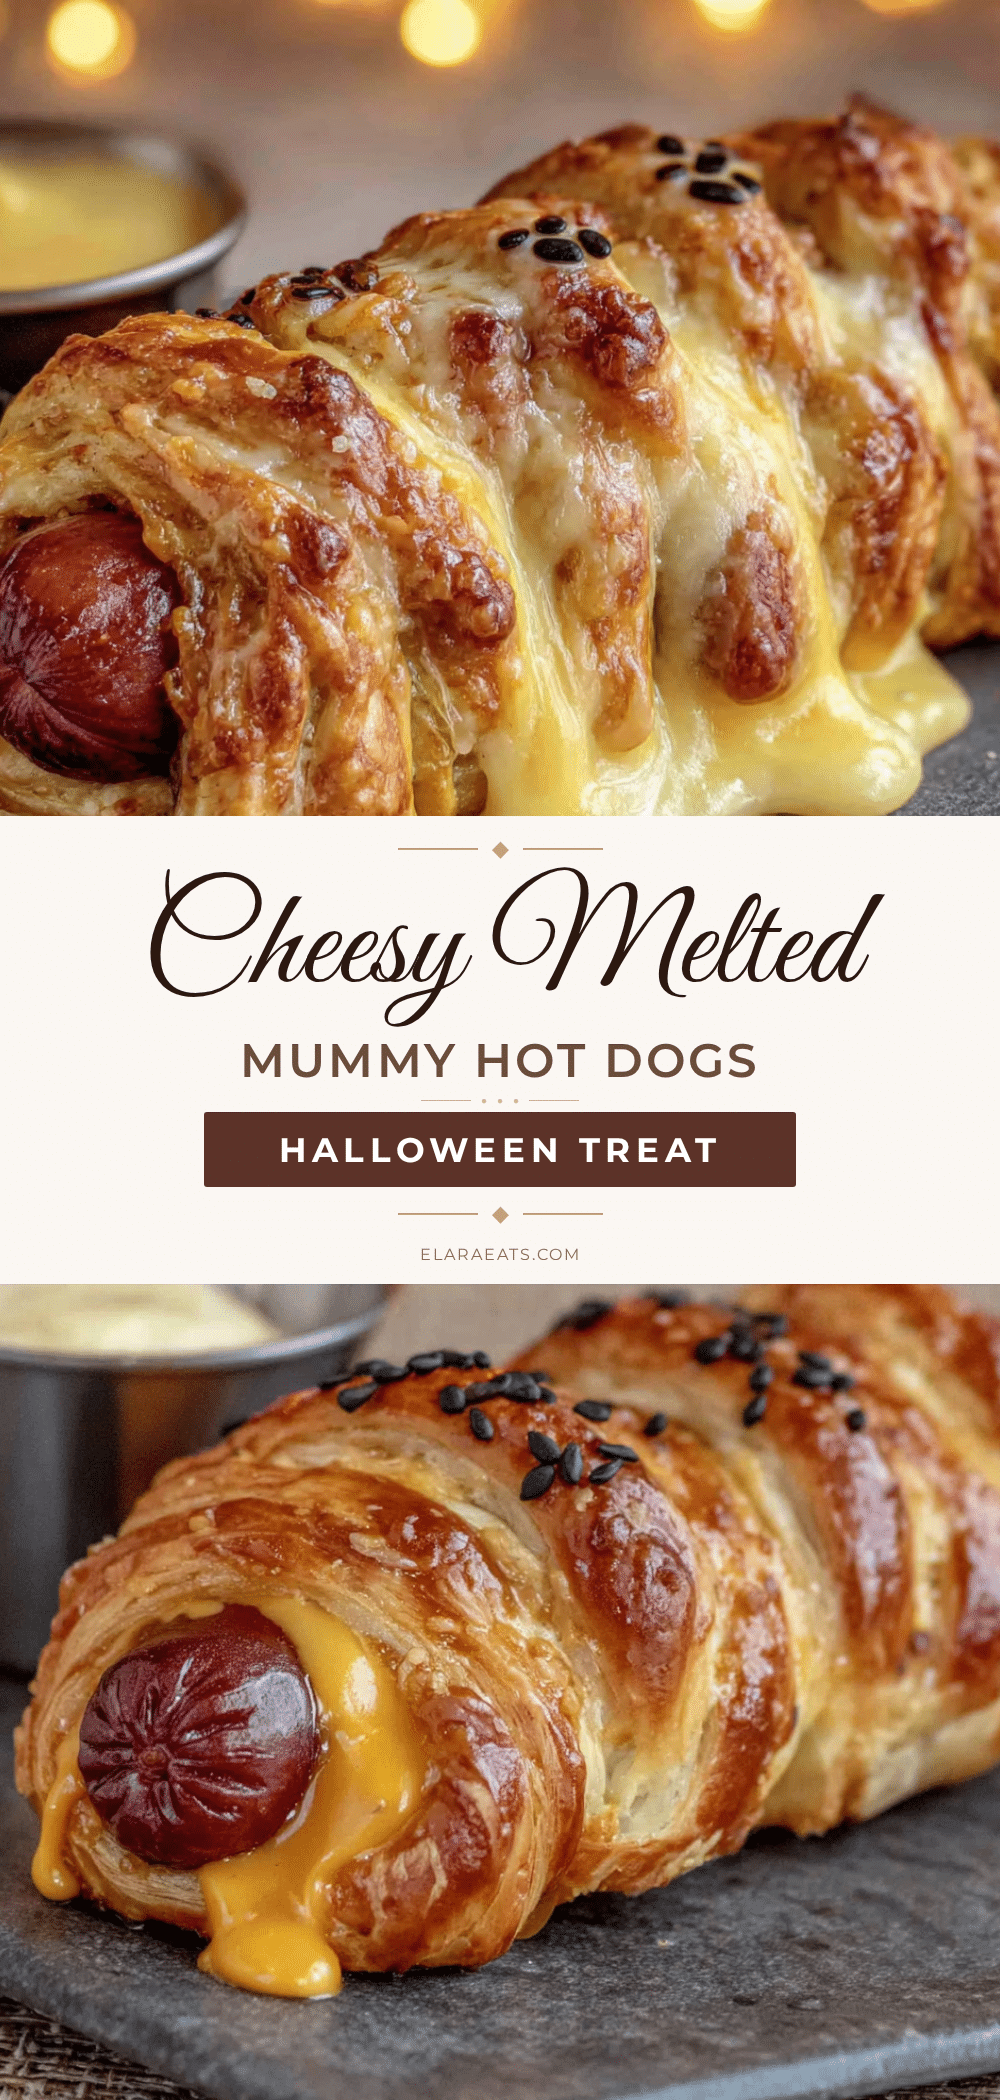
Best Easy Mummy Hot Dogs with Melted Cheese

These mummy hot dogs are perfectly wrapped, oozing with cheese, and served with a side of spicy mustard. They’re crispy, cheesy, and so ridiculously easy that you’ll wonder why you ever bought the frozen version.
- Prep Time: 10 minutes
- Cook Time: 12-14 minutes
- Total Time: 22-24 minutes
- Yield: 8 servings 1x
- Category: Main Course
- Cuisine: American
Ingredients
- 8 hot dogs (preferably beef, like Nathan’s)
- 1 can (8 oz) refrigerated crescent roll dough (e.g., Pillsbury original)
- 4 string cheese sticks (mozzarella, cut into thin strips)
- Mustard for eyes (yellow, Dijon, or honey mustard)
- 1 tablespoon butter, melted (salted or unsalted)
- Optional: Everything bagel seasoning or sesame seeds
Instructions
- Preheat your oven to 375°F (190°C). Line a baking sheet with parchment paper.
- Prepare your cheese: Cut each string cheese stick in half lengthwise, then cut each half into thin strips, about ¼ inch wide. Set aside.
- Open the crescent roll dough and unroll it on a clean cutting board. Press the seams together gently to create one large rectangle.
- Cut the dough lengthwise into thin strips, about ½ inch wide, using a sharp knife or pizza cutter. You should get about 12-14 strips.
- Assemble the mummies: Take one hot dog and lay a few cheese strips along its length. Start wrapping a dough strip around the hot dog, overlapping slightly. Leave a small gap at the top for the ‘face’ (about 1 inch) and a tiny gap at the bottom. Repeat with remaining hot dogs, using about 1.5 to 2 dough strips per hot dog.
- Place the mummies on the baking sheet, spacing them about 2 inches apart.
- Brush the tops of each mummy with melted butter using a pastry brush.
- Bake for 12-14 minutes, until the dough is golden brown and puffed, and the cheese is bubbly.
- Let them cool for 2-3 minutes before adding the eyes.
- Dip a toothpick into mustard and dot two small eyes on each mummy’s face.
- Serve immediately.
Notes
The secret is cutting the cheese into thin strips and layering them against the hot dog to prevent leakage. Don’t wrap too tightly—the dough needs room to puff. For best results, serve immediately while the cheese is stretchy.
Nutrition
- Serving Size: 1 mummy
- Calories: 280320
- Sodium: 700900
- Fat: 1822
- Carbohydrates: 1822
- Protein: 1214
Keywords: mummy hot dogs, Halloween recipe, easy hot dogs, cheese hot dogs, crescent roll hot dogs, spooky dinner, kid-friendly