Love this? Save it for later!
Share the inspiration with your friends
This was supposed to be a batch of my grandmother’s famous butterscotch haystacks. You know the ones—chow mein noodles and butterscotch chips, a holiday classic that tastes like childhood. But somewhere between the grocery store chaos and my three-year-old deciding the kitchen floor was a slip-and-slide, I grabbed a bag of candy corn instead of butterscotch chips. Honestly, I didn’t even realize until the marshmallows were already melting in the pot. I stood there, spatula in hand, staring at this bag of orange and yellow triangles like they’d personally betrayed me. The butter was bubbling, the marshmallows were getting that perfect stretchy consistency, and I had about thirty seconds to make a decision. So I dumped the candy corn in anyway, figuring I’d salvage it somehow. What came out was nothing like the plan—and better.
The first batch vanished at a preschool bake sale in under fifteen minutes. A dad actually asked me if I had a recipe card. Me, the one who regularly burns toast. That moment of accidental brilliance taught me something I still think about: sometimes the best recipes come from the messiest moments. These Easy Candy Corn Rice Krispie Treats are proof that you don’t need fancy techniques or a perfectly stocked pantry. You just need a little bit of chaos and the willingness to let things go wrong. I mean, let’s face it—most of us are already running on caffeine and good intentions anyway.
Maybe you’ve been there, standing in your kitchen with the wrong ingredient and no backup plan. If so, these treats are for you. They’re sweet, chewy, and have that unmistakable candy corn flavor that somehow works even better than you’d expect. The colors alone make them perfect for fall parties, Halloween gatherings, or just a Tuesday when you need something fun. And the best part? They come together in about ten minutes with zero baking required. I’ve made them at least a dozen times since that first accident, and every single batch reminds me that perfection is overrated.
Why You’ll Love This Recipe
Let me tell you why these Easy Candy Corn Rice Krispie Treats have earned a permanent spot in my fall rotation. After testing this recipe with six different marshmallow brands and three types of butter (yes, I went that deep), I can confidently say this version is the one. It’s the kind of recipe that makes you look like you planned the whole thing, even when you absolutely didn’t.
- Quick & Easy: From start to finish, you’re looking at about 10 minutes of active time. No oven, no complicated steps, no waiting around. Perfect for those after-school snack emergencies or last-minute party contributions.
- Simple Ingredients: You need exactly four ingredients—marshmallows, butter, Rice Krispies cereal, and candy corn. Chances are you already have most of them in your pantry right now.
- Perfect for Fall Gatherings: These treats scream autumn without requiring pumpkin spice or complicated baking. They’re great for Halloween parties, Thanksgiving dessert tables, or classroom celebrations.
- Crowd-Pleaser: I’ve served these to kids, adults, and even my picky mother-in-law. Every single person went back for seconds. The candy corn skeptics? They were the ones asking for the recipe.
- Unbelievably Delicious: The texture is next-level—crispy on the outside, chewy in the middle, with little pockets of melted candy corn that create these amazing sweet bursts. It’s comfort food reimagined.
What makes this recipe different from every other Rice Krispie treat out there is the technique. Instead of just stirring candy corn into the finished mixture, I melt it with the marshmallows. This distributes the flavor evenly and creates that gorgeous orange-yellow hue throughout. No weird chunks of unmelted candy, just pure, consistent sweetness. It’s the kind of small tweak that transforms a simple recipe into something memorable.
These treats aren’t just good—they’re the kind that makes you close your eyes after the first bite. They’re perfect for impressing guests without stress, or turning a simple afternoon into something special. And honestly, after the week most of us have had, don’t we deserve that?
What Ingredients You Will Need
This recipe uses simple, wholesome ingredients to deliver bold flavor and satisfying texture without the fuss. Most of these are pantry staples, which means you can whip up a batch whenever the craving strikes.
For the Treats
- 3 tablespoons unsalted butter (salted butter works too, just reduce any added salt) — I prefer Land O’Lakes for consistent results, but any brand works fine
- 1 package (10 ounces) regular marshmallows (about 40 large marshmallows) — Jet-Puffed is my go-to for maximum fluffiness
- 6 cups Rice Krispies cereal — generic brands work, but the name brand gives the best crunch
- 1 cup candy corn — Brach’s is the classic choice, but any brand works. Look for fresh candy corn that’s still soft and chewy
Optional Add-Ins
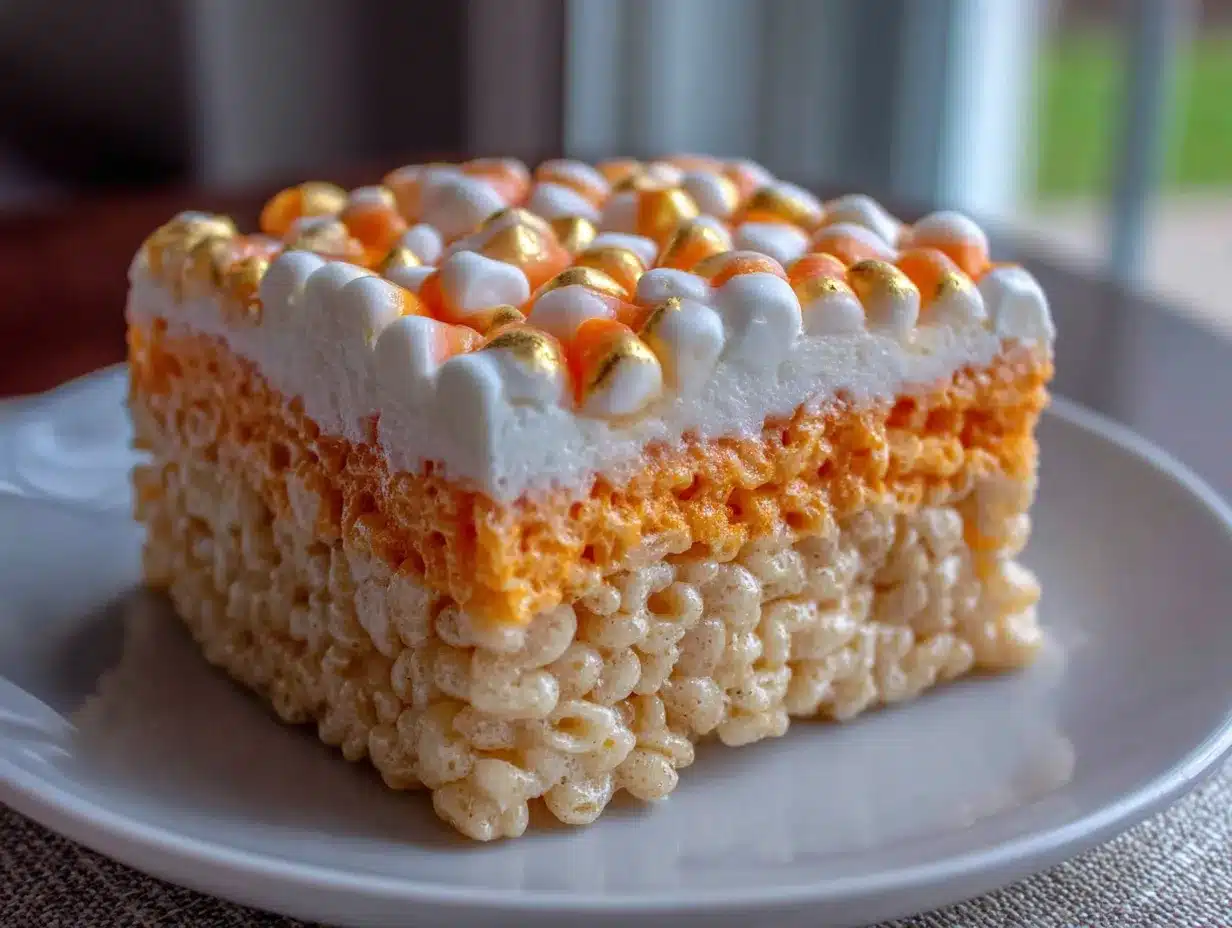
- 1/2 cup white chocolate chips — adds an extra layer of sweetness and helps the treats hold together better
- 1/4 teaspoon vanilla extract — enhances the overall flavor profile
- Pinch of sea salt — balances the sweetness and makes the candy corn flavor pop
When selecting candy corn, here’s a tip I learned the hard way: check the expiration date. Stale candy corn is hard and doesn’t melt properly. Fresh candy corn should be soft enough that you can easily squish it between your fingers. If it’s rock hard, it’s going to stay that way in your treats.
For the marshmallows, I recommend using full-size marshmallows rather than mini ones. Mini marshmallows contain more cornstarch, which can affect how smoothly they melt. Full-size marshmallows create a creamier, more consistent texture. If you’re in a pinch and only have minis, add an extra tablespoon of butter to compensate.
Butter quality matters here because it’s one of only four ingredients. I’ve tested this with margarine and it works in a technical sense, but the flavor just isn’t the same. Real butter gives these treats that rich, slightly savory undertone that makes the candy corn sweetness sing.
One more thing about the cereal—measure it after you crush it slightly. I know that sounds weird, but hear me out. Gently crushing the Rice Krispies with your hands before measuring creates a more uniform texture and helps the treats hold together better. Plus, it releases that toasty aroma that makes these things irresistible.
Equipment Needed
You don’t need a fancy kitchen to make these Easy Candy Corn Rice Krispie Treats. Here’s what you’ll actually use:
- Large pot (4-quart or bigger) — You need room to stir everything without spilling. I use my trusty Dutch oven, but any heavy-bottomed pot works
- Wooden spoon or silicone spatula — Metal utensils can scratch non-stick pots and don’t fold the cereal in as gently
- 9×13-inch baking pan — Glass is ideal because you can see if the mixture is evenly distributed. Metal works too, just grease it well
- Parchment paper — This is non-negotiable. Trust me, I’ve learned the hard way that wax paper melts and foil creates a sticky mess
- Sharp knife — A chef’s knife gives cleaner cuts than a butter knife. Run it under hot water between cuts for perfect edges
- Measuring cups and spoons — For accuracy, though I’ll admit I eyeball the cereal sometimes
If you don’t have parchment paper, you can grease the pan generously with butter. Just be prepared for a little extra cleanup. I’ve also used silicone baking mats with success, though they don’t sit as flat in the pan.
For cutting, a bench scraper works beautifully if you have one. It creates those clean, professional-looking edges that make people think you bought these from a bakery. I found mine at a thrift store for two dollars, and it’s become one of my most-used tools.
Preparation Method
Let me walk you through this step by step. I’ve made this recipe so many times I could do it in my sleep, but I still follow these exact steps every time. Consistency is key.
- Prep your pan. Line your 9×13-inch baking pan with parchment paper, leaving some overhang on two sides. This creates handles that let you lift the whole block out later. Grease the parchment lightly with butter or non-stick spray. Don’t skip this step—candy corn gets sticky when it melts.
- Melt the butter. Place your large pot over medium-low heat and add the 3 tablespoons of butter. Let it melt slowly, swirling the pan occasionally. You want it fully melted but not bubbling or browning. If it starts to sizzle, your heat is too high. This should take about 2 minutes.
- Add the marshmallows. Dump in the entire 10-ounce bag of marshmallows. Stir constantly with your wooden spoon or silicone spatula. The marshmallows will start to puff up and then collapse into a gooey mass. Keep stirring until they’re about 90% melted—you should still see a few small lumps. This takes about 3-4 minutes. The mixture should be smooth, glossy, and stretchy when you lift the spoon.
- Add the candy corn. Here’s the crucial part. Pour in 1 cup of candy corn and stir for exactly 30 seconds. You don’t want it fully melted—just softened enough that it starts to blend into the marshmallow mixture. The candy corn will create beautiful orange and yellow streaks. If you stir too long, the colors will turn into a muddy brown. I learned this the hard way with my second batch.
- Fold in the cereal. Remove the pot from heat. Add the 6 cups of Rice Krispies cereal all at once. Fold gently with your spatula, using a cutting motion rather than stirring. You want to coat every piece of cereal without crushing it. This should take about 1 minute. If you see any white patches of unmixed marshmallow, keep folding.
- Transfer to the pan. Scrape the mixture into your prepared pan. Don’t dump it all in one spot—try to spread it evenly as you go. Use a second piece of parchment paper or greased spatula to press it down firmly. Press firmly, especially in the corners. Uneven pressing leads to crumbly edges.
- Let them set. Let the treats cool at room temperature for at least 30 minutes. Don’t rush this by putting them in the fridge—condensation will make them soggy. They should be firm to the touch but still slightly warm in the center when you cut them.
- Cut and serve. Lift the whole block out using the parchment handles. Use a sharp knife to cut into squares. For clean cuts, run the knife under hot water and wipe it dry between each cut. I usually get 12 large squares or 24 smaller ones.
A few sensory cues to watch for: the mixture should look glossy and pull away from the sides of the pot easily. When you press it into the pan, it should feel springy, not sticky. The candy corn streaks should be visible but not chunky. And the smell—oh, the smell is pure nostalgia. Buttery, sweet, with that unmistakable candy corn aroma that somehow smells exactly like autumn.
Cooking Tips & Techniques
After making these Easy Candy Corn Rice Krispie Treats more times than I care to count, I’ve collected a few tricks that make the difference between good and unforgettable.
Low and slow is the way to go. I cannot stress this enough. Medium-low heat for melting the marshmallows. If you rush it on high heat, the sugar will seize up and you’ll end up with a grainy, brittle mess. I ruined my first three batches this way before I learned patience. The marshmallows should melt like a gentle hug, not a sprint.
Wet your hands for pressing. This sounds weird, but it works. Lightly wet your fingers before pressing the mixture into the pan. The water creates a steam barrier that prevents sticking. Just don’t use too much water—a few drops on your fingertips is plenty. I keep a small bowl of water nearby just for this purpose.
Don’t overmix the cereal. Once you add the Rice Krispies, you have about 60 seconds of folding time before the mixture starts to set. Overmixing crushes the cereal and creates dense, hard treats. I count my folds—about 15 gentle folds is usually perfect. The cereal should be evenly coated but still maintain its shape.
Room temperature is your friend. I know it’s tempting to pop these in the fridge to speed things up, but resist the urge. Rapid cooling creates condensation that makes the treats soggy. Let them cool naturally on the counter. If you’re in a humid climate, leave them uncovered to prevent moisture buildup.
Use a sharp knife. A dull knife will squish the treats rather than cut them. I sharpen my chef’s knife before every batch. And I always cut with a sawing motion rather than pressing straight down. The difference in presentation is night and day.
One more thing about candy corn quality: I’ve tested this with generic store brand candy corn and with Brach’s. The generic stuff tends to be harder and doesn’t melt as smoothly. If you’re using a budget brand, add an extra 2 tablespoons of butter to help it soften. Your treats will be a bit richer, but nobody’s complaining about that.
Variations & Adaptations
One of the best things about this recipe is how adaptable it is. Here are some variations I’ve tried and loved:
Chocolate Drizzle Version
Melt 1/2 cup of semi-sweet chocolate chips with 1 teaspoon of coconut oil. Drizzle it over the cooled treats for a sophisticated twist. The bitterness of the chocolate balances the candy corn sweetness beautifully. I made this for a Halloween party and people literally fought over the last piece.
Peanut Butter Candy Corn Treats
Add 1/3 cup of creamy peanut butter to the marshmallow mixture along with the candy corn. Stir until just combined. The peanut butter adds a savory richness that makes these taste almost like a candy bar. My kids call these “the orange ones with the surprise.”
Vegan Version
Use vegan marshmallows (Dandies brand works best), plant-based butter, and certified vegan candy corn. The texture is slightly different—a bit denser—but the flavor is spot on. I’ve served these to vegan and non-vegan friends alike, and nobody could tell the difference.
Gluten-Free Version
Rice Krispies are naturally gluten-free, but check the label because some generic brands add malt flavoring. Use certified gluten-free cereal and you’re good to go. I’ve also made these with puffed rice cereal for a different texture—crunchier and more rustic.
Spiced Autumn Treats
Add 1/2 teaspoon of pumpkin pie spice to the marshmallow mixture along with the candy corn. The warm spices complement the sweetness and make these taste even more like fall. I tried this on a whim last October and it’s now my go-to version for Thanksgiving.
White Chocolate Chunk Version
Fold in 1/2 cup of white chocolate chips along with the cereal. The white chocolate adds creamy pockets of sweetness that pair perfectly with the candy corn. Just be careful not to overmix, or the chocolate will melt and disappear into the mixture.
For a fun presentation, press the mixture into a Halloween-themed cookie cutter before it fully sets. Ghost shapes, pumpkin shapes, or even simple circles work great. Just make sure the treats are still slightly warm when you do this, or they’ll crumble.
Serving & Storage Suggestions
These Easy Candy Corn Rice Krispie Treats are best served at room temperature. The texture is perfectly chewy with just the right amount of crunch. If you’re serving them at a party, arrange them on a platter lined with festive napkins or parchment paper. They look gorgeous on a wooden board next to a bowl of caramel apples.
For a fun presentation, cut them into small bite-sized squares and serve them in cupcake liners. This makes them perfect for grab-and-go snacking at parties or school events. I’ve also stacked them in a mason jar for a cute homemade gift—just layer them with parchment paper between each row.
These treats pair beautifully with hot apple cider, pumpkin spice lattes, or even a cold glass of milk. The sweetness of the candy corn is balanced by the creaminess of whatever you’re drinking. For an adult twist, serve them alongside a warm mug of spiced chai or a dark stout beer.
Storage instructions: Store these treats in an airtight container at room temperature for up to 5 days. Layer them with parchment paper to prevent sticking. Do not refrigerate—the cold temperature makes them hard and dry. If you live in a humid climate, add a piece of bread to the container to absorb excess moisture. Replace the bread every day.
Freezer instructions: These freeze beautifully for up to 3 months. Wrap each square individually in plastic wrap, then place them in a freezer-safe bag. To thaw, leave them at room temperature for about 30 minutes. The texture will be slightly softer than fresh, but the flavor remains perfect. I always keep a batch in the freezer for unexpected guests or late-night cravings.
One thing I’ve noticed: these treats actually get better after a day or two. The flavors meld together and the texture becomes perfectly chewy. If you can resist eating them all on day one, you’re in for a treat on day three.
Nutritional Information & Benefits
Let’s be real—these are a treat, not a health food. But here’s what you need to know:
| Nutritional Value | Per Serving (1 large square) |
|---|---|
| Calories | 210 |
| Total Fat | 6g |
| Saturated Fat | 3.5g |
| Carbohydrates | 38g |
| Sugar | 24g |
| Protein | 2g |
| Sodium | 180mg |
On the bright side, these treats are gluten-free (check your cereal label), nut-free, and contain no artificial colors if you use natural candy corn. The Rice Krispies provide a small amount of iron and B vitamins. And honestly, sometimes you just need a little sweetness in your life.
If you’re watching your sugar intake, you can reduce the candy corn to 3/4 cup and add an extra 1/2 cup of cereal. The treats will be less sweet but still plenty flavorful. For a lower-calorie version, use light butter and sugar-free marshmallows—though I’ll warn you, the texture won’t be quite as good.
Potential allergens: dairy (butter), corn (candy corn and cereal). If you’re serving these at a gathering, I recommend labeling them clearly. I once had a guest with a corn allergy who didn’t realize candy corn was off-limits.
My personal philosophy? Life is short. Eat the treat. Balance it out with a salad later.
Conclusion
These Easy Candy Corn Rice Krispie Treats are proof that the best recipes often come from happy accidents. They’re simple enough for a weeknight craving, festive enough for a Halloween party, and delicious enough to convert even the biggest candy corn skeptics. I’ve made them for bake sales, potlucks, and lazy Sunday afternoons, and every single time, they disappear faster than I expect.
What I love most about this recipe is how forgiving it is. You can swap ingredients, adjust the sweetness, or change up the presentation, and it still works. It’s the kind of recipe that builds confidence in the kitchen—even if you’ve never made Rice Krispie treats before, you can nail this on your first try. And if you mess up? Well, that’s how I discovered this recipe in the first place.
I’d love to hear how these turn out for you. Did you try any of the variations? Did you discover your own happy accident? Drop a comment below and let me know. And if you’re looking for more easy fall treats, check out my pumpkin spice popcorn mix or my caramel apple bites for more no-bake goodness. Happy cooking, friends—and remember, sometimes the best things in life come from what you didn’t plan.
Frequently Asked Questions
Can I use mini marshmallows instead of regular ones?
Yes, but you’ll need about 4 cups of mini marshmallows to replace one 10-ounce bag of regular marshmallows. Keep in mind that mini marshmallows have more cornstarch, which can make the mixture slightly less smooth. Add an extra tablespoon of butter to compensate.
Why did my treats turn out hard and brittle?
This usually happens when the marshmallows are overheated. Always melt them over medium-low heat and remove from the heat as soon as they’re about 90% melted. The residual heat will finish the job. Overcooked marshmallows create a hard, candy-like texture that’s difficult to cut.
Can I use stale candy corn?
Technically yes, but the texture won’t be as good. Stale candy corn is hard and doesn’t melt properly, leaving crunchy chunks in your treats. If you only have stale candy corn, microwave it for 10 seconds to soften it before adding it to the marshmallow mixture.
How do I make these treats less sweet?
Reduce the candy corn to 3/4 cup and add an extra 1/2 cup of cereal. You can also use unsalted butter and add a generous pinch of sea salt to balance the sweetness. Some readers have reported success using sugar-free marshmallows, though I haven’t tested that myself.
Can I double this recipe?
Absolutely. Just use a larger pot and a 12×17-inch half-sheet pan. You’ll need to work quickly because the mixture sets fast in larger quantities. I recommend having a helper for the pressing step. The doubled recipe makes about 24 large squares—perfect for big gatherings.
Pin This Recipe!
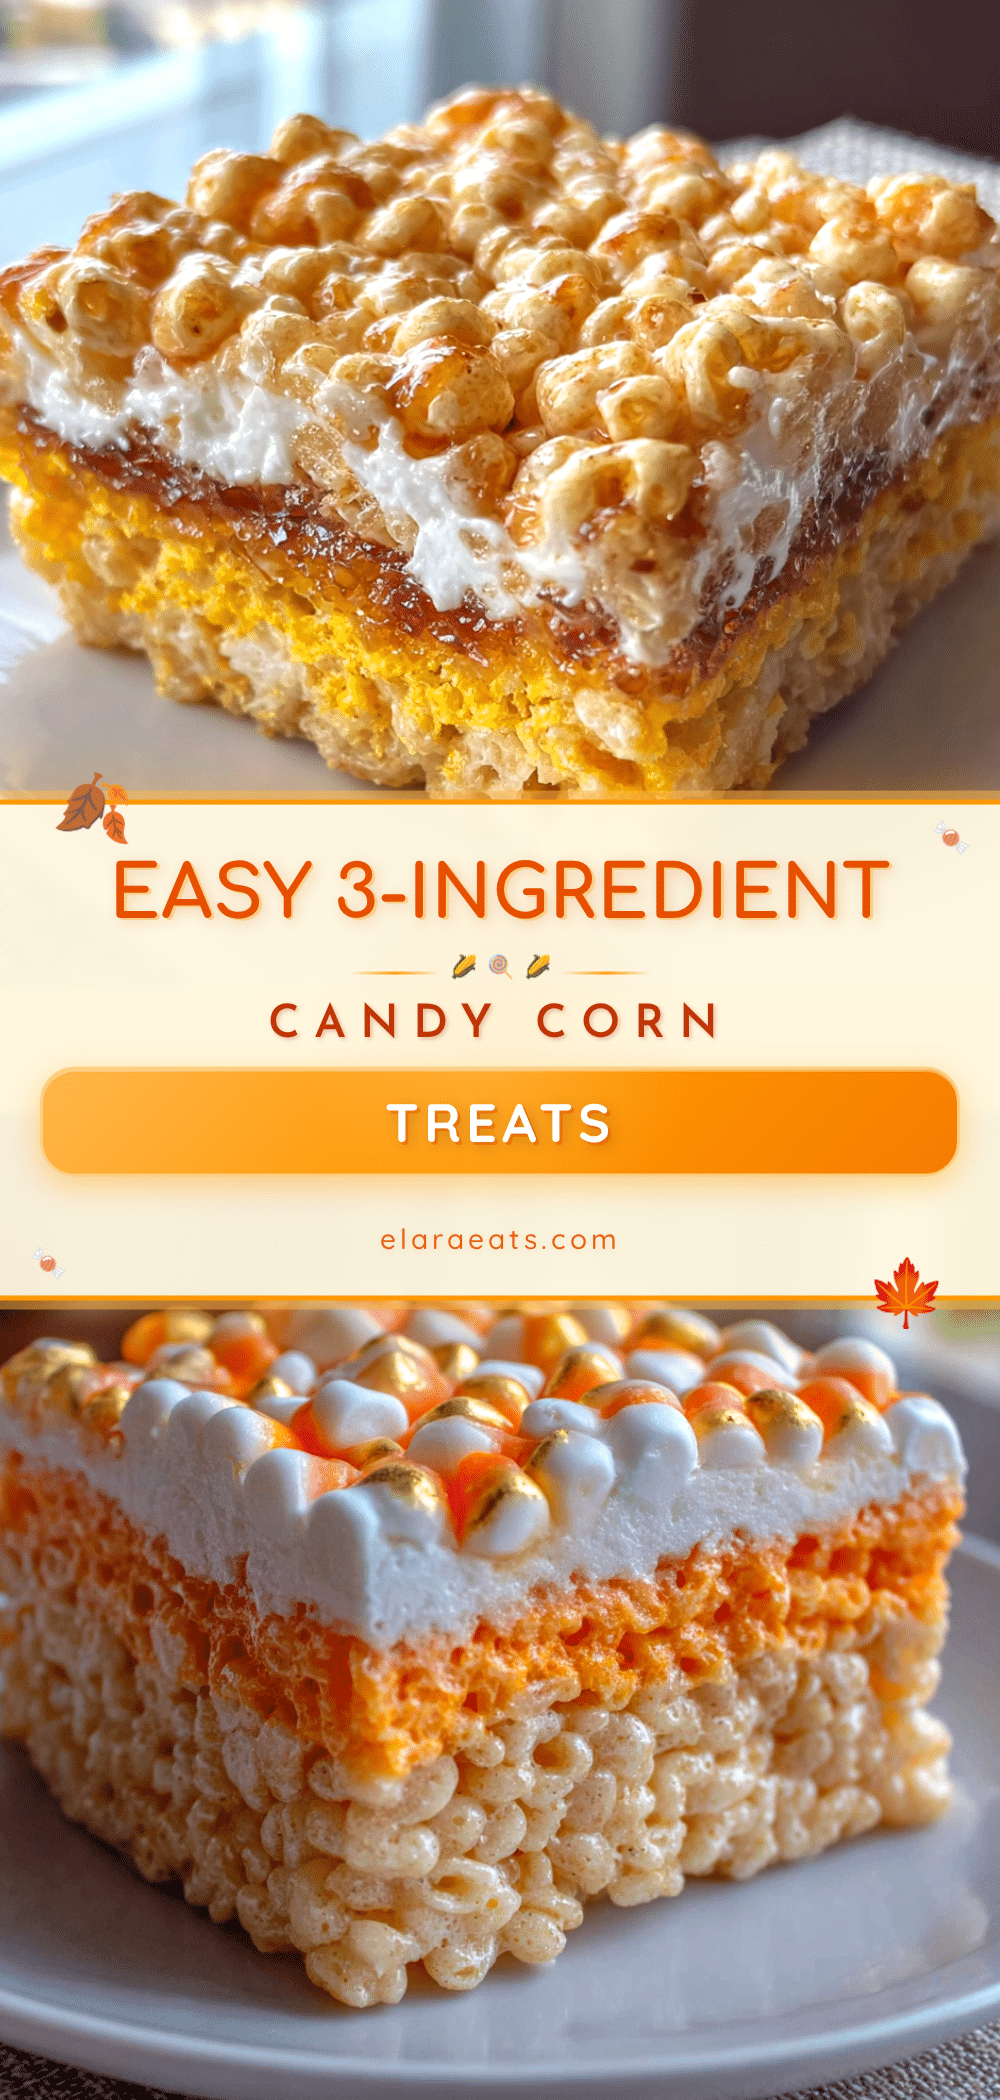
Easy Candy Corn Rice Krispie Treats: Best No-Bake Fall Dessert

These Easy Candy Corn Rice Krispie Treats are a sweet, chewy no-bake fall dessert that comes together in about 10 minutes. Made with just four simple ingredients, they’re perfect for Halloween parties, bake sales, or any autumn gathering.
- Prep Time: 10 minutes
- Cook Time: 5 minutes
- Total Time: 45 minutes
- Yield: 12 servings 1x
- Category: Dessert
- Cuisine: American
Ingredients
- 3 tablespoons unsalted butter
- 1 package (10 ounces) regular marshmallows (about 40 large marshmallows)
- 6 cups Rice Krispies cereal
- 1 cup candy corn
- 1/2 cup white chocolate chips (optional)
- 1/4 teaspoon vanilla extract (optional)
- Pinch of sea salt (optional)
Instructions
- Prep your pan. Line a 9×13-inch baking pan with parchment paper, leaving some overhang on two sides. Grease the parchment lightly with butter or non-stick spray.
- Melt the butter. Place a large pot over medium-low heat and add 3 tablespoons of unsalted butter. Let it melt slowly, swirling occasionally, until fully melted but not bubbling or browning (about 2 minutes).
- Add the marshmallows. Dump in the entire 10-ounce bag of marshmallows. Stir constantly until about 90% melted, with a few small lumps remaining (about 3-4 minutes). The mixture should be smooth, glossy, and stretchy.
- Add the candy corn. Pour in 1 cup of candy corn and stir for exactly 30 seconds. You want it softened but not fully melted, creating orange and yellow streaks.
- Fold in the cereal. Remove the pot from heat. Add 6 cups of Rice Krispies cereal all at once. Fold gently with a spatula using a cutting motion until every piece is coated (about 1 minute).
- Transfer to the pan. Scrape the mixture into the prepared pan, spreading evenly. Use a second piece of parchment paper or greased spatula to press it down firmly, especially in the corners.
- Let them set. Let the treats cool at room temperature for at least 30 minutes. Do not refrigerate.
- Cut and serve. Lift the whole block out using the parchment handles. Use a sharp knife to cut into squares. For clean cuts, run the knife under hot water and wipe dry between cuts. Makes 12 large squares or 24 smaller ones.
Notes
For best results, use fresh candy corn that is soft and chewy. Full-size marshmallows create a creamier texture than mini marshmallows. Gently crush the Rice Krispies with your hands before measuring for a more uniform texture. Do not refrigerate the treats as condensation will make them soggy. Store in an airtight container at room temperature for up to 5 days. Freeze for up to 3 months.
Nutrition
- Serving Size: 1 large square
- Calories: 210
- Sugar: 24
- Sodium: 180
- Fat: 6
- Saturated Fat: 3.5
- Carbohydrates: 38
- Protein: 2
Keywords: candy corn, Rice Krispie treats, no-bake, fall dessert, Halloween treats, easy dessert, kid-friendly


