Love this? Save it for later!
Share the inspiration with your friends
The fall bake sale was in twelve hours and I’d completely forgotten. I was standing in my kitchen at ten o’clock on a Tuesday night, staring into a pantry that had exactly one can of pumpkin puree, a box of gingersnaps I’d bought on a whim, and half a block of cream cheese. Everyone else would be bringing those elaborate layer cakes with hand-piped frosting or those fancy French pastries that take three days. I had a baking dish and a prayer, honestly.
I almost gave up and grabbed a store-bought pie, but then I remembered this trick my aunt used to do with crushed cookies and butter. It wasn’t a real plan, more of a desperate hope. I started smashing those gingersnaps with the bottom of a measuring cup—messy, loud, and frankly, a little cathartic. The kitchen smelled like a Christmas market within minutes, and I thought, okay, maybe this isn’t a total disaster.
The bars came out of the oven looking… well, rustic. The edges were a little jagged, and I’d spilled some filling on the side of the pan. I let them cool, cut them into uneven squares, and tossed them onto a platter with zero confidence. The next day, I watched people pass by the fancy cakes and head straight for my humble little tray. One woman actually closed her eyes after the first bite. Someone asked me for the recipe before I’d even had my coffee.
That’s the thing about these Perfect Pumpkin Cheesecake Bars with Gingersnap Crust. They don’t look like they tried too hard. They just taste like fall in a way that makes people stop and remember something good. Maybe you’ve been there—staring down a kitchen timer and a half-empty pantry, wondering if simple is enough. Let me tell you, with this recipe, it absolutely is.
Why You’ll Love This Recipe
I’ve tested this recipe about seven times now, tweaking the spice ratio and the baking time until it felt just right. That’s the kind of thing I do on a lazy Sunday—bake the same thing over and over until my neighbors start knocking. These bars are the result of all that obsessive tinkering, and I’m pretty proud of them.
- Quick & Easy: From pantry to plate in under an hour. No water baths, no fussy crust rolling, no stress.
- Simple Ingredients: You probably have most of this in your kitchen right now. The gingersnaps are the only “special” item, and they’re in every grocery store this time of year.
- Perfect for Fall Gatherings: Thanksgiving, Friendsgiving, potlucks, or just a Tuesday night when you need something cozy.
- Crowd-Pleaser: I’ve served these to kids, grandparents, and my picky brother-in-law. They disappear every single time.
- Unbelievably Delicious: The creamy pumpkin filling against that spicy, crunchy crust? It’s a texture and flavor combo that just works.
What makes these different from every other pumpkin bar out there is the crust. Most recipes use a plain graham cracker base, which is fine, but it’s not memorable. The gingersnap crust brings a warm, molasses-y kick that plays off the pumpkin in a way that feels intentional. It’s not just another version—it’s the version I keep coming back to.
Honestly, this is the kind of recipe that makes you close your eyes after the first bite. It’s comfort food reimagined—faster than a full cheesecake, but with the same soul-soothing satisfaction. Perfect for impressing guests without the stress, or turning a simple fall evening into something a little more special.
What Ingredients You Will Need
This recipe uses simple, wholesome ingredients to deliver that bold, spiced flavor without any fuss. Most of these are pantry staples, especially if you’re already a fall baker.
For the Gingersnap Crust
- 2 cups (240g) gingersnap cookie crumbs (about 30 cookies, crushed fine)
- 6 tablespoons (85g) unsalted butter, melted
- 2 tablespoons (25g) granulated sugar
- ¼ teaspoon salt
I recommend using store-bought gingersnaps for convenience—Nabisco or Anna’s both work great. If you have homemade ones, even better. Just make sure they’re crisp, not soft, for the best texture.
For the Pumpkin Cheesecake Filling
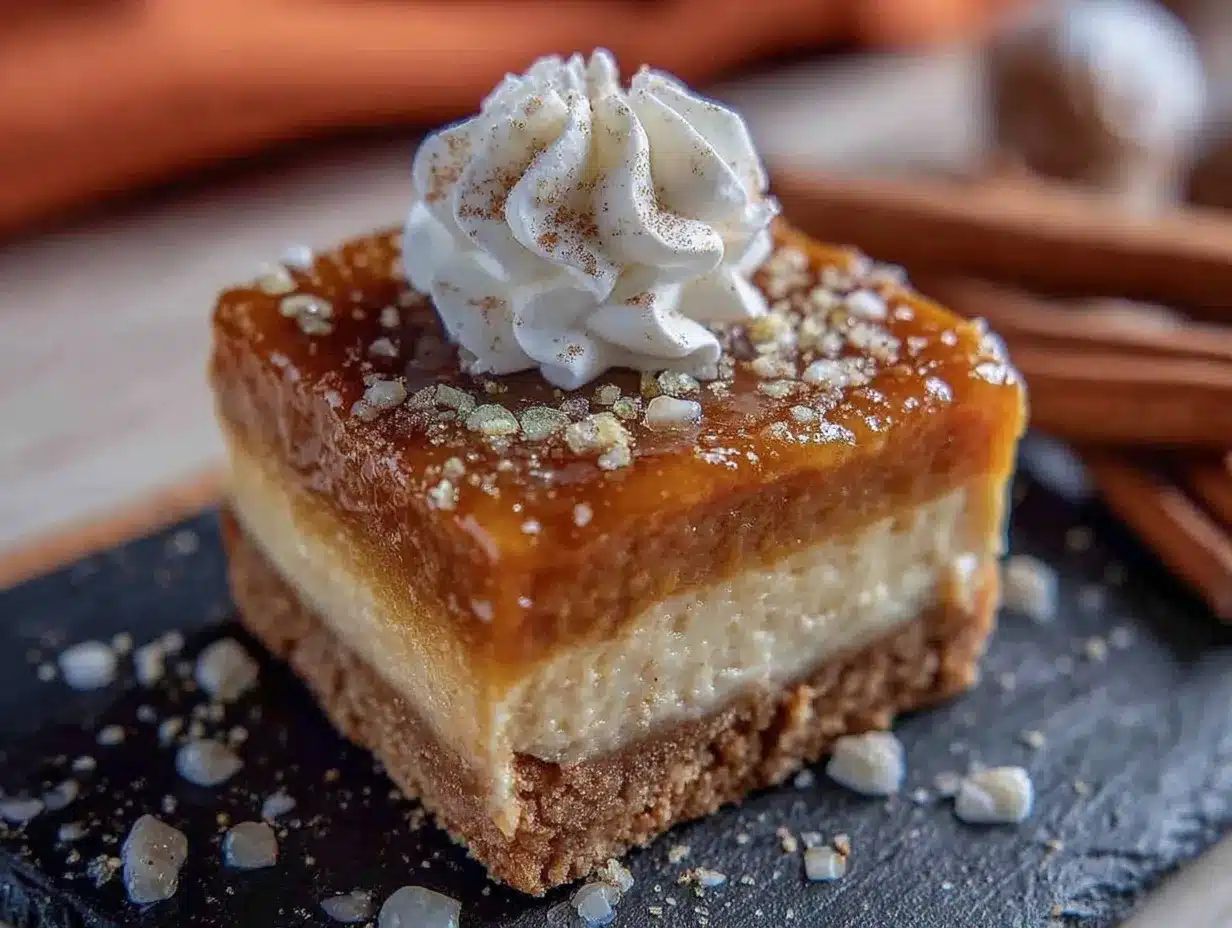
- 16 oz (450g) cream cheese, softened (full-fat is best for creaminess)
- 1 cup (200g) granulated sugar
- 1 cup (245g) pumpkin puree (not pumpkin pie filling)
- 3 large eggs, room temperature
- 1 teaspoon vanilla extract
- 1 teaspoon pumpkin pie spice
- ½ teaspoon ground cinnamon
- ¼ teaspoon ground ginger
- ¼ teaspoon salt
For the pumpkin puree, I always reach for Libby’s—it’s consistent and not too watery. If you’re using a different brand, just make sure it’s 100% pure pumpkin. The spice blend is flexible; if you don’t have pumpkin pie spice, use ½ teaspoon cinnamon, ¼ teaspoon nutmeg, and a pinch of cloves instead.
For the Topping (Optional but Recommended)
- ½ cup (120ml) heavy cream, cold
- 1 tablespoon (10g) powdered sugar
- ¼ teaspoon vanilla extract
- Pinch of cinnamon for dusting
The whipped cream topping is totally optional, but it adds a lovely lightness that balances the dense cheesecake. You could also skip it and drizzle with caramel sauce if that’s more your style.
Equipment Needed
You don’t need a fancy kitchen to pull these off. Here’s what you’ll need:
- 9×9-inch baking pan (or an 8×8, just adjust baking time slightly)
- Parchment paper (for easy removal—trust me, don’t skip this)
- Mixing bowls (one large, one medium)
- Electric hand mixer or stand mixer (a whisk and some elbow grease works too)
- Rolling pin or food processor (for crushing the cookies)
- Measuring cups and spoons
- Spatula
- Cooling rack
If you don’t have a food processor, just put the gingersnaps in a zip-top bag and go at them with a rolling pin. It’s a little messy, but honestly, it’s kind of fun. I’ve done it both ways, and the texture is actually better when you crush them by hand—you get those little uneven bits that make the crust interesting.
Preparation Method
Let’s get baking. I’ll walk you through every step so you don’t miss a thing.
- Preheat your oven to 350°F (175°C). Line your 9×9-inch pan with parchment paper, leaving some overhang on two sides. This makes lifting the bars out later super easy.
- Make the crust. In a medium bowl, combine the gingersnap crumbs, melted butter, sugar, and salt. Stir until the mixture looks like wet sand and holds together when you pinch it. If it’s too dry, add another tablespoon of melted butter.
- Press the crust into the pan. Dump the crumb mixture into your prepared pan and press it down firmly and evenly. I use the bottom of a measuring cup for this—it gives you a flat, compact surface. Don’t press it up the sides, just the bottom. Bake for 10 minutes, then set aside to cool slightly.
- Make the filling. In a large bowl, beat the softened cream cheese with an electric mixer until smooth and creamy, about 2 minutes. Scrape down the sides of the bowl. Add the sugar and beat until combined, another minute.
- Add the pumpkin and eggs. Mix in the pumpkin puree, vanilla, and all the spices until smooth. Then add the eggs one at a time, mixing on low speed after each addition. Don’t overmix—you don’t want to incorporate too much air, which can cause cracks. The batter should be thick, smooth, and a gorgeous orange color.
- Pour the filling over the crust. Scrape the filling onto the pre-baked crust and spread it evenly with a spatula. Give the pan a gentle tap on the counter to release any air bubbles.
- Bake. Place the pan in the oven and bake for 35-40 minutes, or until the edges are set and the center is just slightly jiggly—like a firm Jell-O. A toothpick inserted an inch from the edge should come out clean, but the center will still wobble a little. That’s perfect.
- Cool completely. Let the bars cool in the pan on a wire rack for about 1 hour. Then transfer to the refrigerator and chill for at least 4 hours, preferably overnight. This step is non-negotiable—the bars need to set properly to slice cleanly.
- Slice and serve. Once chilled, use the parchment overhang to lift the whole slab out of the pan. Place on a cutting board and slice into 16 squares (or 9 if you want bigger bars). Wipe the knife clean between cuts for neat edges.
A quick note: if your filling cracks on top, don’t panic. It happens to the best of us. A dollop of whipped cream hides a multitude of sins, and honestly, it still tastes incredible.
Cooking Tips & Techniques
I’ve made this recipe enough times to know where things can go wrong. Here’s what I’ve learned the hard way so you don’t have to.
Room temperature ingredients matter. Cold cream cheese makes lumpy filling. Cold eggs can seize the batter. Let everything sit out for about 30 minutes before you start. I usually take the cream cheese out first, then the eggs while I’m crushing the cookies.
Don’t overbake. This is the number one mistake I see. A slightly jiggly center is what you want. If you bake until the whole thing is firm, you’ll end up with dry, cracked bars. The residual heat will continue cooking the center as it cools.
Chill time is not optional. I know, waiting is hard. But if you try to cut these bars while they’re still warm, you’ll get a crumbly mess. The cheesecake needs time to set up. I once made the mistake of slicing after only two hours, and it was a sad, goopy situation. Learn from my impatience.
Use a sharp knife. When slicing, use a long, sharp knife and wipe it clean between each cut. This gives you those beautiful, clean edges that look so professional. A bench scraper also works great for this.
One more thing: if you’re making these for a party, bake them the day before. They actually taste better after a full night in the fridge—the flavors meld together and the texture gets even creamier. It’s one of those rare recipes that improves with a little patience.
Variations & Adaptations
This recipe is flexible, and I love playing around with different twists. Here are a few I’ve tried:
- Gluten-Free Version: Use gluten-free gingersnap cookies for the crust. I’ve tested this with a few brands, and it works perfectly. Just make sure the cookies are crisp.
- Vegan Adaptation: Substitute the cream cheese with a plant-based alternative (like Kite Hill or Miyoko’s) and use a flax egg (1 tablespoon flaxseed meal + 3 tablespoons water per egg). The texture will be slightly softer, but the flavor is still fantastic.
- Spice It Up: Add a pinch of cayenne or black pepper to the filling for a subtle heat that plays off the sweetness. I tried this on a whim last year, and it was surprisingly good—like pumpkin pie with a kick.
- Chocolate Drizzle: Melt some dark chocolate and drizzle it over the top before serving. The bitterness of the chocolate balances the sweet, spiced filling beautifully.
- Pecan Topping: Sprinkle chopped pecans over the top before baking for a crunchy finish. Toast them first for extra flavor.
My personal favorite variation is the pecan one. I did it for a Thanksgiving potluck once, and someone actually asked if I’d cater their holiday dinner. I said no, but it was a nice ego boost.
Serving & Storage Suggestions
These bars are best served cold, straight from the fridge. The filling is firm and creamy, and the crust stays crunchy. If you prefer a softer texture, let them sit at room temperature for about 10 minutes before serving.
For presentation, I like to top each bar with a small dollop of whipped cream and a light dusting of cinnamon. It looks pretty and adds a little something extra. You could also serve them with a scoop of vanilla ice cream or a drizzle of caramel sauce.
Storage: Keep the bars in an airtight container in the refrigerator for up to 5 days. They actually get better after the first day as the flavors meld. To freeze, wrap individual bars tightly in plastic wrap, then place them in a freezer-safe bag. They’ll keep for up to 3 months. Thaw overnight in the fridge before serving.
I’ve also been known to eat one straight from the freezer on a hot day—it’s like a frozen cheesecake bite, and it’s surprisingly delicious. Don’t judge me until you’ve tried it.
Nutritional Information & Benefits
Here’s the approximate nutritional breakdown for one bar (based on 16 servings):
- Calories: 285
- Fat: 18g
- Carbohydrates: 28g
- Protein: 5g
- Fiber: 1g
- Sugar: 19g
Pumpkin is packed with vitamin A and fiber, making these bars a slightly better-for-you indulgence. The cream cheese adds calcium, and the gingersnaps bring a dose of warming spices that can help with digestion. It’s not health food, but it’s a treat that has some redeeming qualities.
If you’re watching your sugar, you can reduce it to ¾ cup in the filling without sacrificing too much sweetness. I’ve done it, and they’re still delicious—just a little less decadent.
Conclusion
These Perfect Pumpkin Cheesecake Bars with Gingersnap Crust have become my go-to fall recipe for a reason. They’re simple enough for a weeknight bake, but impressive enough to steal the show at any gathering. The spicy, crunchy crust and the creamy, spiced filling come together in a way that just feels right.
I hope you give them a try and make them your own. Maybe you’ll add a little extra cinnamon, or swap in a different cookie for the crust. That’s the beauty of a good recipe—it’s a starting point, not a rulebook.
If you do make them, I’d love to hear how they turned out. Drop a comment below or tag me in your photos. And if you’ve got a favorite variation, share that too. Happy baking, friends. Fall is waiting.
Frequently Asked Questions
Can I use a different type of cookie for the crust?
Absolutely. Graham crackers, shortbread, or even vanilla wafers work well. The flavor will change, but the texture will be similar. I’ve used speculoos cookies before, and it was amazing.
Why did my cheesecake filling crack?
Overbaking is the most common cause. Make sure you pull the bars out while the center is still slightly jiggly. Also, avoid overmixing the batter once you add the eggs—too much air can cause cracks as it bakes.
Can I make these bars ahead of time?
Yes, and I actually recommend it. They taste even better after a day in the fridge. Bake them up to two days in advance, and store them covered in the refrigerator.
How do I get clean slices?
Use a sharp knife and wipe it clean between each cut. Chilling the bars thoroughly (at least 4 hours) is essential. For extra clean cuts, dip the knife in hot water and dry it before slicing.
Can I freeze these bars?
Yes. Wrap individual bars tightly in plastic wrap, then place them in a freezer-safe bag. They’ll keep for up to 3 months. Thaw overnight in the fridge before serving.
Pin This Recipe!
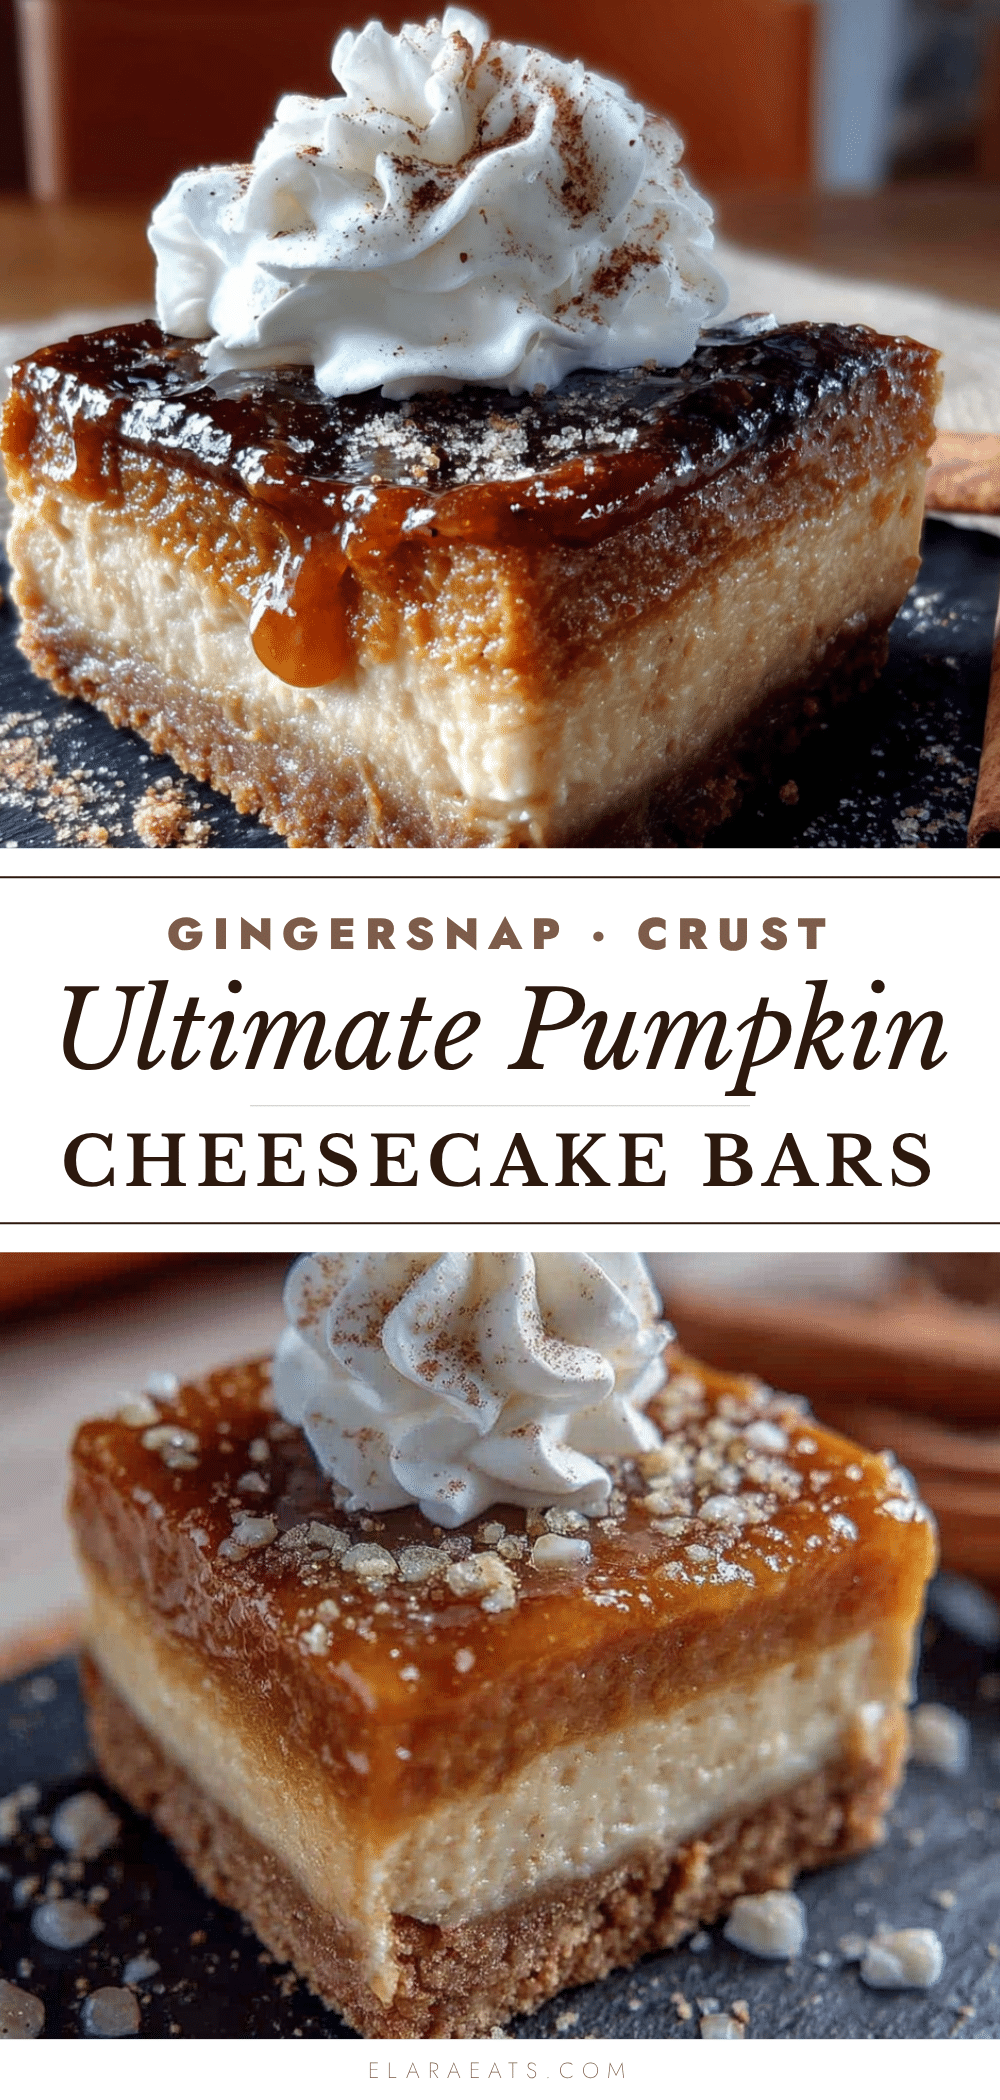
Perfect Pumpkin Cheesecake Bars with Gingersnap Crust
These Perfect Pumpkin Cheesecake Bars with Gingersnap Crust are a simple yet impressive fall dessert. With a spicy, crunchy crust and a creamy, spiced pumpkin filling, they’re perfect for gatherings or a cozy night in.
- Prep Time: 20 minutes
- Cook Time: 40 minutes
- Total Time: 5 hours (includes chilling)
- Yield: 16 servings 1x
- Category: Dessert
- Cuisine: American
Ingredients
- 2 cups (240g) gingersnap cookie crumbs (about 30 cookies, crushed fine)
- 6 tablespoons (85g) unsalted butter, melted
- 2 tablespoons (25g) granulated sugar
- ¼ teaspoon salt
- 16 oz (450g) cream cheese, softened
- 1 cup (200g) granulated sugar
- 1 cup (245g) pumpkin puree (not pumpkin pie filling)
- 3 large eggs, room temperature
- 1 teaspoon vanilla extract
- 1 teaspoon pumpkin pie spice
- ½ teaspoon ground cinnamon
- ¼ teaspoon ground ginger
- ¼ teaspoon salt
- ½ cup (120ml) heavy cream, cold
- 1 tablespoon (10g) powdered sugar
- ¼ teaspoon vanilla extract
- Pinch of cinnamon for dusting
Instructions
- Preheat your oven to 350°F (175°C). Line your 9×9-inch pan with parchment paper, leaving some overhang on two sides.
- Make the crust: In a medium bowl, combine the gingersnap crumbs, melted butter, sugar, and salt. Stir until the mixture looks like wet sand and holds together when pinched.
- Press the crust into the pan: Dump the crumb mixture into the prepared pan and press it down firmly and evenly. Bake for 10 minutes, then set aside to cool slightly.
- Make the filling: In a large bowl, beat the softened cream cheese with an electric mixer until smooth and creamy, about 2 minutes. Add the sugar and beat until combined, another minute.
- Add the pumpkin and eggs: Mix in the pumpkin puree, vanilla, and all the spices until smooth. Add the eggs one at a time, mixing on low speed after each addition. Do not overmix.
- Pour the filling over the crust: Scrape the filling onto the pre-baked crust and spread it evenly. Give the pan a gentle tap to release air bubbles.
- Bake for 35-40 minutes, or until the edges are set and the center is just slightly jiggly.
- Cool completely in the pan on a wire rack for about 1 hour. Then refrigerate for at least 4 hours, preferably overnight.
- Slice and serve: Use the parchment overhang to lift the slab out of the pan. Slice into 16 squares. Wipe the knife clean between cuts.
- Optional topping: Whip the heavy cream, powdered sugar, and vanilla until soft peaks form. Top each bar with a dollop and a dusting of cinnamon.
Notes
Room temperature ingredients are key for a smooth filling. Do not overbake; the center should be slightly jiggly. Chilling for at least 4 hours is essential for clean slices. For gluten-free, use gluten-free gingersnaps. For vegan, use plant-based cream cheese and flax eggs.
Nutrition
- Serving Size: 1 bar
- Calories: 285
- Sugar: 19
- Sodium: 220
- Fat: 18
- Saturated Fat: 10
- Carbohydrates: 28
- Fiber: 1
- Protein: 5
Keywords: pumpkin cheesecake bars, gingersnap crust, fall dessert, pumpkin bars, cheesecake bars


