Love this? Save it for later!
Share the inspiration with your friends
I was standing in my kitchen last Tuesday, staring at a half-eaten sandwich my son had brought home from school. The bread was soggy, the lettuce was wilted, and the turkey had that weird, sweaty texture that happens when ingredients sit too long. Honestly, it broke my heart a little. I mean, I had tried so hard that morning—layered everything just right, used fresh ingredients, even packed it with a little ice pack. And still, by lunchtime, it was a sad, limp mess.
You know that feeling when you’re a kid and you open your lunchbox, and everyone else’s sandwich looks perfect, but yours is falling apart? I remember that feeling all too well from my own school days. My mom would pack me these amazing turkey clubs—she really tried—but by noon, the bread was always a disaster. I swore back then that if I ever had kids, I’d figure out the secret to a lunchbox sandwich that actually made it to lunchtime in one piece.
Well, let me tell you, it took some trial and error. More soggy sandwiches than I care to admit. But I finally cracked the code. This Perfect No-Sog Turkey Club Lunchbox Sandwich is the result of all those experiments. It stays crisp, fresh, and delicious for hours. No more sad lunchbox surprises. No more wasting food. Just a perfect, satisfying sandwich that tastes as good at noon as it did when you made it at 6 AM. And honestly, it’s become a total game-changer in our house.
Why You’ll Love This Recipe
This isn’t just another sandwich recipe. This is the one that finally solves the soggy lunchbox problem for good. I’ve tested every possible combination of ingredients, layering techniques, and assembly tricks to make sure this works. Here’s why you’ll absolutely love it:
- No More Soggy Bread: The secret is all in the layering and a few strategic ingredient choices. Your bread will stay perfectly crisp and fresh.
- Quick & Easy: This sandwich comes together in under 10 minutes. Perfect for busy mornings when every second counts.
- Simple Ingredients: Nothing fancy here. You probably already have everything you need in your fridge and pantry.
- Perfect for Lunchboxes: Whether it’s for school, work, or a picnic, this sandwich holds up beautifully for hours.
- Crowd-Pleaser: Both kids and adults go crazy for this one. It’s a classic turkey club with all the flavor and none of the mess.
- Unbelievably Delicious: The combination of crispy bacon, fresh turkey, crunchy lettuce, and juicy tomato—all held together by perfectly toasted bread—is absolute comfort food perfection.
What makes this recipe different from the rest is the technique. It’s not just about what you put in the sandwich, but how you put it together. I use a special moisture barrier method that keeps the bread from absorbing any liquid from the veggies or condiments. Plus, I’ve found the perfect toasting level that stays crunchy even after hours in a lunchbox. This isn’t just another version of a turkey club—it’s the best version. The one that finally works for real life.
This sandwich is the kind that makes you close your eyes after the first bite. It’s comfort food reimagined—fresher, smarter, but with the same soul-soothing satisfaction. Perfect for impressing your kids at lunchtime or treating yourself to a workday lunch that doesn’t disappoint.
What Ingredients You Will Need
This recipe uses simple, wholesome ingredients to deliver bold flavor and satisfying texture without the fuss. Most of these are pantry staples or easy to find at any grocery store. The key is choosing the right forms and preparations to ensure no sogginess.
- Bread: 2 slices of sturdy bread per sandwich (sourdough, whole wheat, or a hearty white bread works best). Avoid soft, airy breads that get mushy easily. I prefer Pepperidge Farm or Dave’s Killer Bread for their structure.
- Turkey: 3-4 ounces of sliced deli turkey breast. Go for oven-roasted or smoked turkey for the best flavor. Avoid pre-packaged lunch meat that’s too watery—ask for fresh-sliced at the deli counter.
- Bacon: 3 slices of bacon, cooked until crispy. This is non-negotiable for the club experience. Cook it extra crispy so it stays crunchy in the sandwich.
- Lettuce: 2-3 leaves of romaine or iceberg lettuce. These varieties are crunchier and hold up better than softer lettuces like butter or spring mix. Pat them completely dry with paper towels before using.
- Tomato: 2-3 thin slices of a firm tomato. Roma or vine-ripened tomatoes work well because they have less moisture. Remove the seeds and pat the slices dry with paper towels.
- Mayonnaise: 1 tablespoon of full-fat mayonnaise. This acts as a moisture barrier on the bread. Don’t use low-fat or light mayo—they have more water content and can make the bread soggy.
- Mustard: 1 teaspoon of Dijon or yellow mustard (optional). Adds a nice tangy kick without adding excess moisture.
- Salt and Pepper: A pinch each, to taste. Sprinkle on the tomato slices to enhance their flavor.
- Optional Add-ons: Thinly sliced red onion, avocado slices (use sparingly and pat dry), or a slice of cheese (Swiss or cheddar are classic).
For the best results, I recommend using high-quality ingredients. The turkey from the deli counter is always better than pre-packaged options—it’s less watery and has more flavor. And please, take the time to pat your lettuce and tomato completely dry. This single step is the difference between a perfect sandwich and a soggy one.
Equipment Needed
You don’t need any fancy gadgets for this recipe, which is part of the beauty. Here’s what you’ll need:
- Frying Pan or Skillet: For cooking the bacon. A non-stick pan makes cleanup easier.
- Paper Towels: Essential for patting dry your lettuce, tomato, and even the bacon after cooking. This is your number one weapon against sogginess.
- Toaster or Oven: For toasting the bread. A toaster is quick and easy, but an oven gives you more control over the level of toastiness.
- Butter Knife: For spreading the mayonnaise and mustard evenly on the bread.
- Cutting Board: For assembling the sandwich and cutting it in half.
- Sharp Knife: A serrated bread knife works best for cutting the sandwich cleanly without squishing it.
- Lunchbox or Container: An airtight container that fits the sandwich snugly. If using a lunchbox, consider wrapping the sandwich in parchment paper or beeswax wrap for extra protection.
If you don’t have a toaster, you can toast the bread in a dry skillet over medium heat for about 1-2 minutes per side. It gives the bread a nice, even crunch. I’ve also used a panini press in a pinch, which works great and adds those lovely grill marks.
Preparation Method
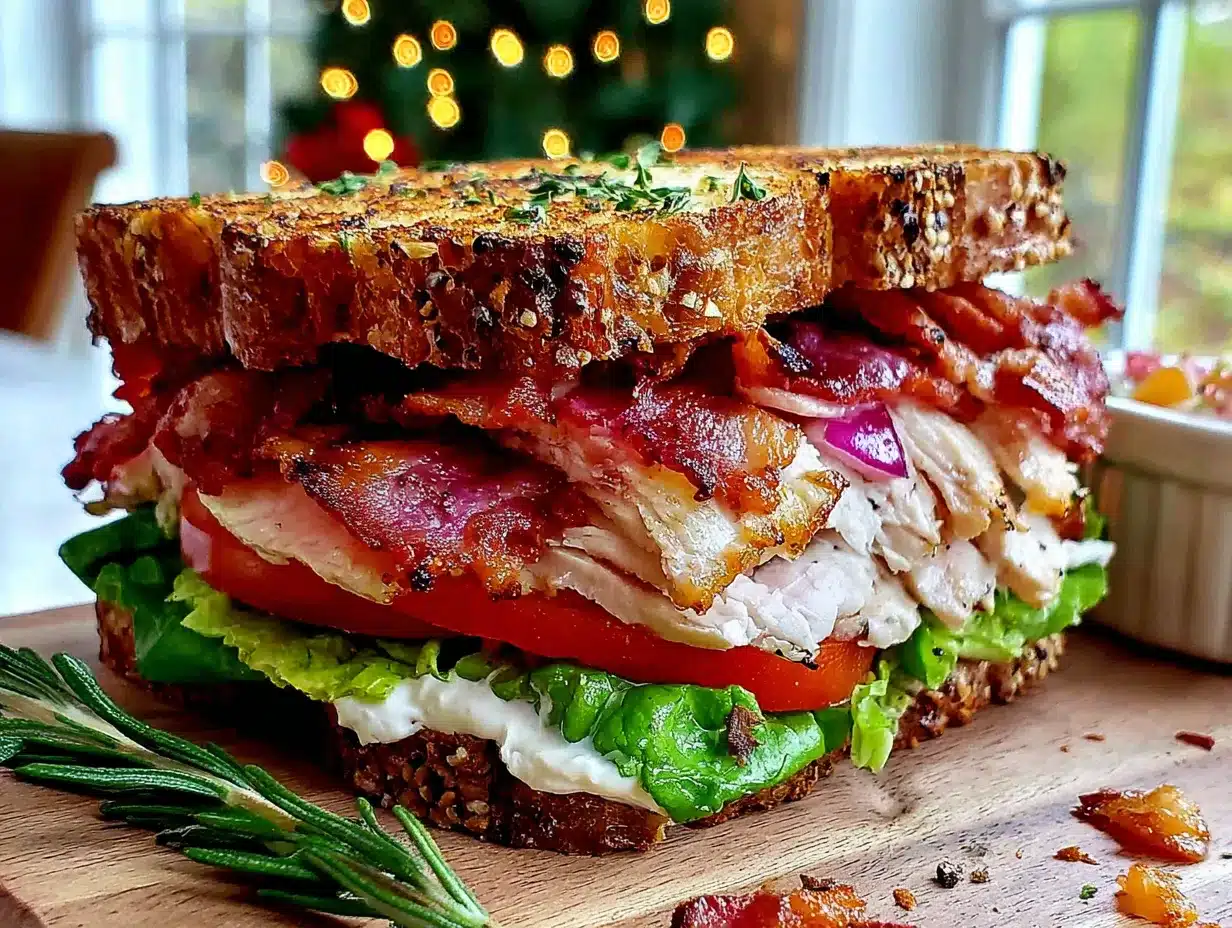
Follow these steps carefully, and you’ll have a perfect no-sog turkey club every single time. The order of assembly is crucial, so don’t skip ahead!
- Cook the Bacon (5 minutes): Place the bacon slices in a cold frying pan. Turn the heat to medium and cook for 4-6 minutes, flipping once, until the bacon is deeply golden and crispy. Transfer to a plate lined with paper towels to drain and cool completely. The bacon needs to be fully cool before assembling the sandwich, or the heat will create steam and make the bread soggy.
- Prepare the Vegetables (3 minutes): While the bacon cooks, wash and dry your lettuce leaves. Lay them on a paper towel and pat them dry—really dry. Then, slice your tomato into thin rounds. Use a small spoon to scoop out the seeds and jelly-like center from each slice. Place the tomato slices on another paper towel and gently pat them dry. Sprinkle with a tiny pinch of salt and pepper.
- Toast the Bread (3 minutes): Toast your bread slices until they are lightly golden and firm to the touch. You want them toasted all the way through, not just on the surface. A medium toast setting on your toaster usually works well. Let the toast cool completely on a wire rack for about 2 minutes. Warm toast creates condensation inside the sandwich, which leads to sogginess.
- Create the Moisture Barrier (1 minute): This is the most important step. Spread the full-fat mayonnaise evenly on one side of each toast slice. The mayonnaise creates a waterproof barrier that prevents any moisture from the turkey, tomato, or lettuce from soaking into the bread. If you’re using mustard, spread it on top of the mayonnaise on one slice only.
- Layer the Ingredients (2 minutes): Now, assemble in this specific order from bottom to top:
- Bottom slice of toast (mayo side up)
- Half of the turkey slices, folded or layered evenly
- 2-3 tomato slices (the tomato goes next to the turkey, not next to the bread, so the mayo barrier has extra protection)
- Lettuce leaves (place them flat, not bunched up, to create another barrier layer)
- Cooled bacon slices (break them in half to fit evenly)
- Remaining turkey slices
- Top slice of toast (mayo side down, facing the ingredients)
- Press and Wrap (1 minute): Gently press down on the top of the sandwich with your palm to compact it slightly. This helps everything hold together. Wrap the sandwich tightly in parchment paper or beeswax wrap. If using a container, place the wrapped sandwich inside. The wrapping is crucial—it keeps the sandwich from sliding apart and provides an extra layer of protection against moisture.
- Refrigerate Until Lunchtime: Store the wrapped sandwich in the refrigerator until you’re ready to pack it. For best results, make the sandwich the night before and let it chill overnight. The chilling time allows the flavors to meld while the moisture barriers do their job.
Pro Tip: If you’re packing the sandwich for school or work, consider adding a small ice pack to the lunchbox. This keeps everything cool and fresh, especially if the sandwich will be sitting for more than 4 hours.
Cooking Tips & Techniques
I’ve made more soggy sandwiches than I care to count, so trust me when I say these tips are hard-earned. Here’s what I’ve learned:
The Moisture Barrier is Everything: I cannot stress this enough. The full-fat mayonnaise spread all the way to the edges of the bread is your best friend. It’s not just for flavor—it’s a functional layer that repels moisture. I once tried using low-fat mayo to save calories, and the bread was a disaster by lunch. Don’t make that mistake.
Cool Everything Completely: This was my biggest learning curve. Hot bacon, warm toast, even room-temperature turkey—they all create condensation inside the sandwich. That condensation turns into soggy bread. Let every single component cool to room temperature or colder before assembling. I usually cook the bacon and toast the bread first, then let them cool while I prepare the veggies.
Pat, Pat, Pat Dry: You might think you’ve dried your lettuce and tomato enough, but do it again. I use three paper towels per sandwich—one for the lettuce, one for the tomato, and one for blotting the bacon. It feels excessive, but it works. Wet veggies are the number one cause of soggy sandwiches.
Layer Strategically: The order of ingredients matters more than you think. Wet ingredients (tomato) should never touch the bread directly. That’s why the turkey goes first, then the tomato, then the lettuce. The lettuce acts as a second barrier. And the bacon goes on top of the lettuce, not underneath it, so it stays crunchy.
Don’t Overstuff: I know it’s tempting to pile on the ingredients, but a too-thick sandwich is harder to eat and more likely to fall apart. Keep it balanced. If you want more filling, use a third slice of bread to make a double-decker club sandwich instead.
Wrap It Tight: A loose sandwich is a sad sandwich. Wrap it snugly in parchment paper, wax paper, or beeswax wrap. The wrapping keeps everything compact and prevents the ingredients from shifting around. Plus, it creates a seal that locks in freshness.
One time, I was in a rush and skipped the cooling step. I assembled the sandwich with warm toast and hot bacon, wrapped it up, and sent it off. My son came home and said the bread was “sweaty.” He was right. It was a total fail. Learn from my mistakes—patience pays off here.
Variations & Adaptations
This no-sog turkey club is incredibly versatile. Here are some of my favorite variations:
- Avocado Turkey Club: Add 2-3 thin slices of ripe avocado. Pat the avocado slices dry with a paper towel before adding them to the sandwich. Place them between the turkey and the lettuce for the best moisture protection.
- Cheesy Turkey Club: Add a slice of Swiss, cheddar, or provolone cheese. Place the cheese directly on the bottom toast, under the turkey. The cheese adds another layer of protection against moisture.
- Spicy Turkey Club: Spread a thin layer of sriracha or chipotle mayo on the top slice of bread. Or add a few slices of pickled jalapeños (patted dry, of course) for a kick.
- Gluten-Free Option: Use sturdy gluten-free bread. Look for one that toasts well and has a firm texture. I’ve had good luck with Canyon Bakehouse or Schär brands. Toast it a little longer than regular bread to ensure it stays crunchy.
- Low-Carb Option: Use large, sturdy lettuce leaves (romaine works best) instead of bread. Wrap the ingredients tightly in the lettuce leaves and secure with toothpicks. This version is best eaten the same day.
- Veggie-Packed Version: Add thinly sliced cucumber, bell pepper strips, or shredded carrots. Pat all veggies completely dry before adding. This version is fresh and crunchy, perfect for summer lunches.
I personally love the avocado version. I was skeptical at first—avocado is so soft and moist—but patting it dry really works. It adds a creamy richness that pairs perfectly with the crispy bacon and turkey. Just make sure the avocado is ripe but still firm enough to slice cleanly.
Serving & Storage Suggestions
This sandwich is designed to be served cold or at room temperature, which makes it perfect for lunchboxes. Here’s how to make the most of it:
Serving Temperature: Serve the sandwich straight from the refrigerator. The chilled ingredients keep the bread crisp and the flavors bright. If you prefer a room-temperature sandwich, let it sit out for about 10-15 minutes before eating. Don’t leave it out longer than that, especially if it contains mayo.
Presentation: Cut the sandwich diagonally for a classic club look. Use a sharp serrated knife and a gentle sawing motion to avoid squishing the layers. Secure each half with a toothpick if you’re feeling fancy. The toothpick also helps hold everything together in the lunchbox.
What to Serve With: This turkey club pairs beautifully with a handful of crunchy potato chips, a side of fresh fruit (apple slices or grapes), or a small cup of soup. For a complete lunchbox, add a fun snack like baby carrots with ranch dip or a yogurt tube.
Storage Instructions: The wrapped sandwich can be stored in the refrigerator for up to 24 hours before serving. In fact, it actually gets better after a few hours as the flavors meld together. For longer storage, you can freeze the assembled (unwrapped) sandwich for up to 1 month. Wrap it tightly in plastic wrap, then in foil. Thaw overnight in the refrigerator before serving. Note that the lettuce may lose some crunch after freezing, so you might want to add fresh lettuce after thawing.
Reheating: This sandwich is meant to be eaten cold, so no reheating needed. If you want to warm it slightly, remove the lettuce and tomato, toast the bread again, and reassemble with fresh veggies. But honestly, it’s perfect as-is straight from the fridge.
Flavor Development: The flavors of this sandwich really come together after a few hours in the fridge. The turkey absorbs a bit of the mayo and mustard, the bacon’s smokiness permeates everything, and the tomato adds just a hint of acidity. It’s one of those rare dishes that tastes even better as leftovers.
Nutritional Information & Benefits
Here’s an approximate nutritional breakdown for one sandwich (using whole wheat bread, full-fat mayo, and standard ingredients):
| Nutrient | Amount |
|---|---|
| Calories | 450-500 |
| Protein | 30-35g |
| Carbohydrates | 35-40g |
| Fiber | 4-5g |
| Fat | 20-25g |
| Saturated Fat | 6-8g |
| Sodium | 900-1100mg |
This sandwich is a great source of lean protein from the turkey, which helps keep you full and satisfied. The whole wheat bread provides complex carbohydrates and fiber for sustained energy. Lettuce and tomato add vitamins A and C, plus hydration. Bacon, while higher in fat and sodium, adds flavor and a satisfying crunch—just enjoy it in moderation.
For a lighter version, you can use turkey bacon (cook it extra crispy), light mayonnaise (though it won’t work as well as a moisture barrier), and low-sodium turkey. You can also skip the bacon altogether and add extra veggies for crunch. This sandwich is easily adaptable to fit different dietary needs.
From a wellness perspective, I love that this sandwich feels indulgent but is actually quite balanced. It’s a complete meal in one hand—protein, carbs, veggies, and healthy fats. Perfect for a busy day when you need something satisfying that won’t weigh you down.
Conclusion
This Perfect No-Sog Turkey Club Lunchbox Sandwich is more than just a recipe—it’s a solution to a problem that has plagued lunchboxes for generations. No more sad, soggy sandwiches. No more disappointed kids (or adults). Just a perfectly constructed, delicious meal that holds up beautifully from morning to lunchtime.
I love this recipe because it’s proof that a little technique can make a huge difference. It’s not about complicated ingredients or fancy equipment. It’s about understanding how moisture works and using simple strategies to keep everything crisp and fresh. Anyone can make this sandwich, and once you do, you’ll never go back to the old way of doing things.
I encourage you to make this recipe your own. Try different breads, add your favorite veggies, or spice it up with some hot sauce. The basic principles of the moisture barrier and strategic layering will work no matter what you put inside. And please, when you make it, let me know how it turns out. Share your variations in the comments below, or tag me in your photos. I love seeing your creations!
Here’s to perfect lunchbox sandwiches, every single time. Happy eating!
Frequently Asked Questions
Can I make this sandwich the night before?
Absolutely! In fact, making it the night before is ideal. The flavors meld together beautifully overnight, and the moisture barriers do their job perfectly. Just wrap it tightly and store it in the refrigerator. It will be even better the next day.
What’s the best bread to use for a no-sog sandwich?
Sturdy breads like sourdough, whole wheat, or a hearty white bread work best. Avoid soft, airy breads like brioche or white sandwich bread—they absorb moisture too easily and get mushy. The bread should have enough structure to hold up to the fillings and toasting.
Can I use turkey bacon instead of regular bacon?
Yes, you can. Cook the turkey bacon until it’s very crispy, almost to the point of being brittle. Turkey bacon has a higher water content than regular bacon, so it’s more prone to getting soggy. Cooking it extra crispy helps it stay crunchy longer. Pat it dry with paper towels after cooking.
How long will this sandwich stay fresh in a lunchbox?
With proper preparation and an ice pack, this sandwich will stay fresh for up to 5-6 hours. The key is keeping it cold. Without an ice pack, aim to eat it within 3-4 hours. If you’re packing it for a full school or work day, definitely include an ice pack to be safe.
Can I add cheese without making the sandwich soggy?
Yes, cheese is actually a great addition because it acts as another moisture barrier. Place a slice of cheese directly on the bottom toast, under the turkey. The cheese’s fat content helps repel moisture from the other ingredients. Swiss, cheddar, and provolone are all excellent choices.
Pin This Recipe!
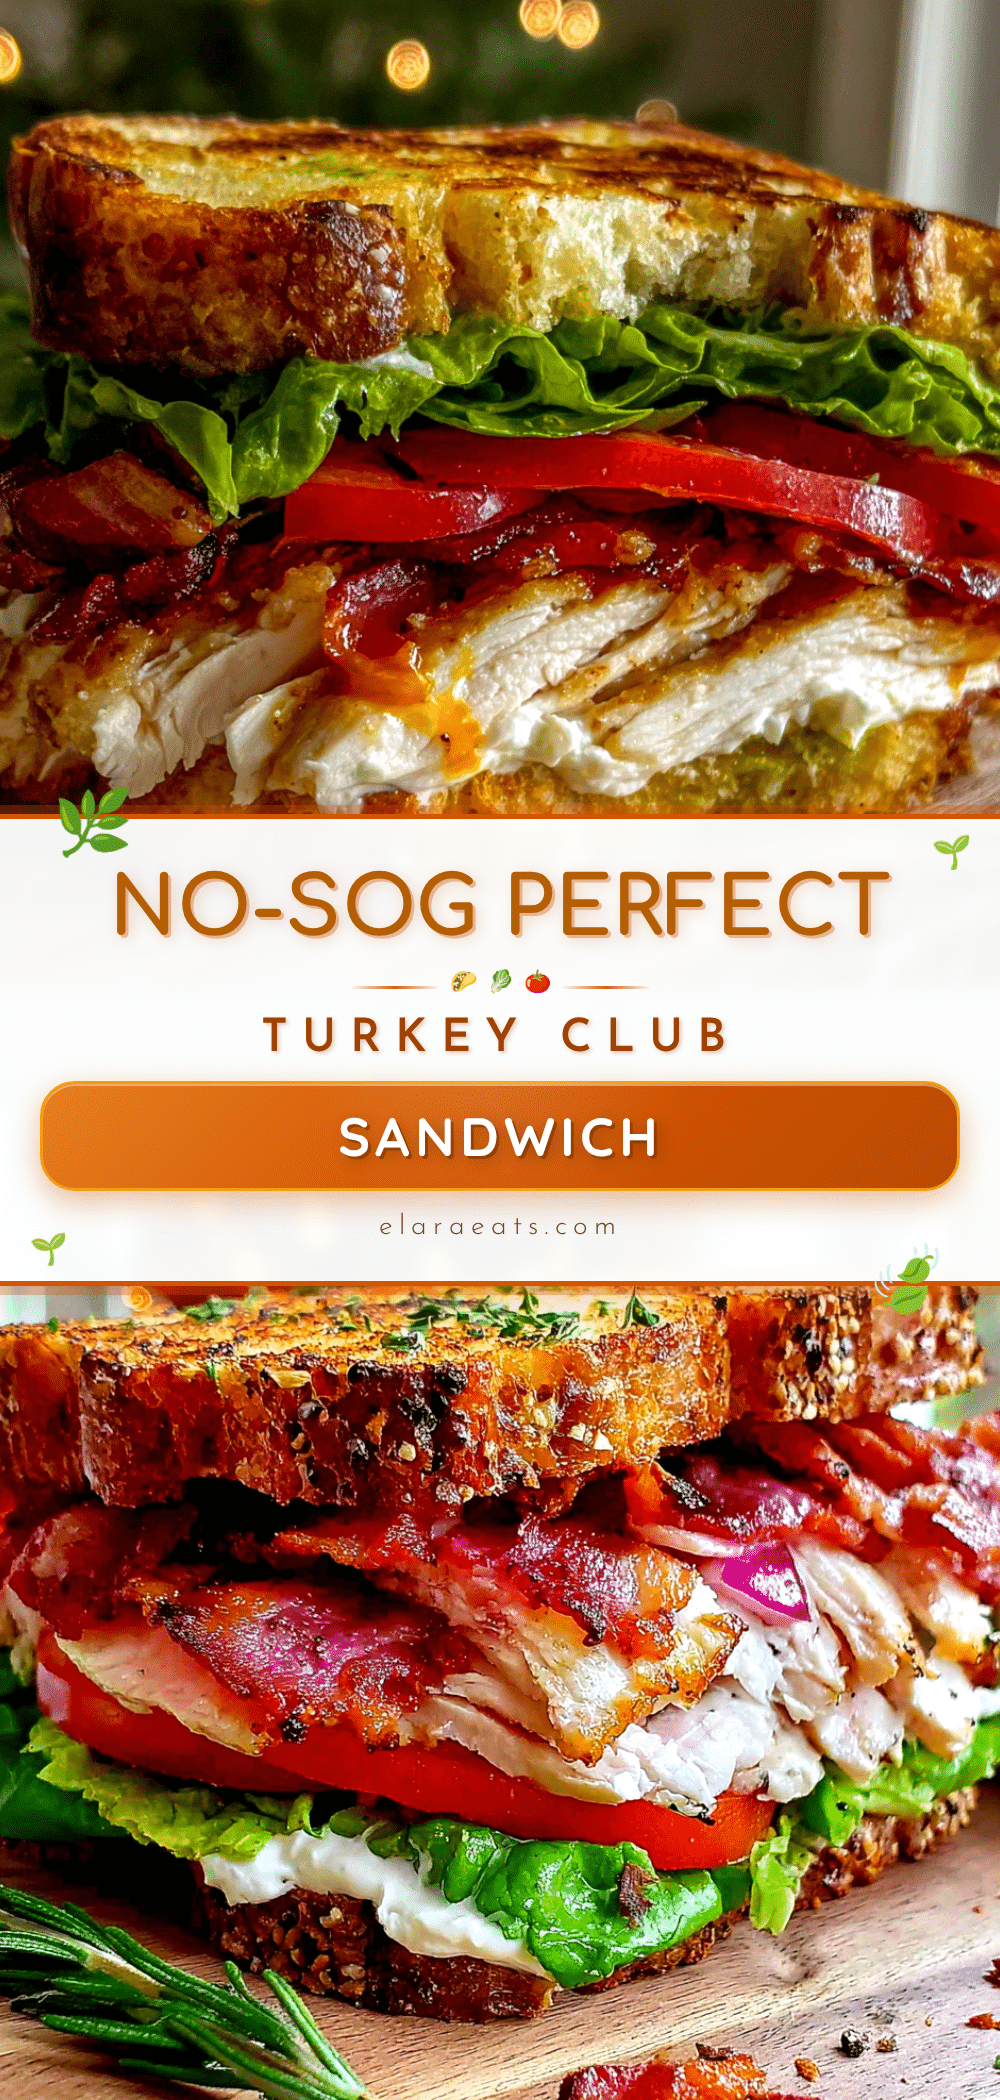
Perfect No-Sog Turkey Club Lunchbox Sandwich

This turkey club sandwich stays crisp, fresh, and delicious for hours, solving the soggy lunchbox problem with strategic layering and a moisture barrier method.
- Prep Time: 10 minutes
- Cook Time: 5 minutes
- Total Time: 15 minutes
- Yield: 1 sandwich 1x
- Category: Main Course
- Cuisine: American
Ingredients
- 2 slices sturdy bread (sourdough, whole wheat, or hearty white)
- 3–4 ounces sliced deli turkey breast (oven-roasted or smoked)
- 3 slices bacon, cooked until crispy
- 2–3 leaves romaine or iceberg lettuce, patted dry
- 2–3 thin slices firm tomato (Roma or vine-ripened), seeds removed and patted dry
- 1 tablespoon full-fat mayonnaise
- 1 teaspoon Dijon or yellow mustard (optional)
- Pinch of salt and pepper
- Optional: thinly sliced red onion, avocado slices (patted dry), or a slice of Swiss or cheddar cheese
Instructions
- Cook the bacon: Place bacon slices in a cold frying pan. Turn heat to medium and cook for 4-6 minutes, flipping once, until deeply golden and crispy. Transfer to a paper towel-lined plate to drain and cool completely.
- Prepare the vegetables: Wash and dry lettuce leaves. Pat them dry with paper towels. Slice tomato into thin rounds, scoop out seeds and jelly-like center, and pat slices dry with paper towels. Sprinkle with a pinch of salt and pepper.
- Toast the bread: Toast bread slices until lightly golden and firm. Let cool completely on a wire rack for about 2 minutes.
- Create the moisture barrier: Spread full-fat mayonnaise evenly on one side of each toast slice. If using mustard, spread it on top of the mayonnaise on one slice only.
- Layer the ingredients in this order from bottom to top: bottom slice of toast (mayo side up), half of the turkey slices, tomato slices, lettuce leaves, cooled bacon slices, remaining turkey slices, top slice of toast (mayo side down).
- Press and wrap: Gently press down on the sandwich with your palm to compact slightly. Wrap tightly in parchment paper or beeswax wrap.
- Refrigerate until lunchtime: Store wrapped sandwich in the refrigerator. For best results, make the night before and let chill overnight.
Notes
The moisture barrier of full-fat mayonnaise is crucial. Cool all components completely before assembling to prevent condensation. Pat lettuce and tomato very dry. Layer strategically: wet ingredients should never touch bread directly. Wrap sandwich tightly to keep it compact and fresh.
Nutrition
- Serving Size: 1 sandwich
- Calories: 475
- Sugar: 5
- Sodium: 1000
- Fat: 22
- Saturated Fat: 7
- Carbohydrates: 38
- Fiber: 4
- Protein: 32
Keywords: turkey club sandwich, no-sog sandwich, lunchbox sandwich, turkey sandwich, club sandwich, easy lunch, school lunch, work lunch