Love this? Save it for later!
Share the inspiration with your friends
My neighbor was not trying to impress anyone. I had stopped by to borrow a cup of sugar—cliché, I know—and something chocolatey and nutty hit me before I even made it past her front door. She was standing in her kitchen, completely unfazed, twisting little chocolate cones onto a baking sheet while her toddler played with measuring cups on the floor. “Oh, these?” she said when I asked. “Just something silly for the kids.” Let me tell you, there was nothing silly about them. They were adorable, clever, and honestly, the most fun I had seen come out of a kitchen in a long time.
She handed me one still warm, and the combination of fudgy chocolate, creamy peanut butter, and that perfect crunch of a sugar cone was ridiculous. I mean, I stood there in her kitchen eating three of them while pretending to chat about the weather. Maybe you have been there—where you stumble onto a recipe so simple and so good that you immediately start planning when you are going to make them yourself. That was exactly this moment with these easy witch hat cookies.
Now, I make them every Halloween without fail. They have become my signature contribution to every costume party, school event, and spooky movie night. The best part? They look like you spent hours piping and decorating, but really, you are just dipping, twisting, and chilling. That is my kind of baking. Honest, unfussy, and impossible to resist.
Why You Will Love This Recipe
I have tested this recipe more times than I care to admit, and let me tell you, each batch disappeared faster than the last. Here is why these witch hat cookies have earned a permanent spot in my fall baking rotation:
- Quick & Easy: From start to finish, these come together in under 30 minutes of active work. No complicated piping bags or fancy tools needed.
- Simple Ingredients: You probably already have most of these in your pantry. Sugar cones, chocolate chips, peanut butter, and a few extras—that is it.
- Perfect for Halloween: These are the star of any costume party, classroom treat, or spooky snack table. Kids and adults both go wild for them.
- Crowd-Pleaser: The chocolate-peanut butter combination is universally loved. I have yet to meet someone who can eat just one.
- Unbelievably Delicious: The texture is what gets me every time—that snap of chocolate shell, the creamy peanut butter filling, and the crispy cone. Pure magic.
What makes these different from every other Halloween cookie out there? It is the way the peanut butter filling binds everything together. Instead of a dry cookie base, you get this rich, salty-sweet center that complements the chocolate perfectly. I tried a few versions before landing on this one—some were too crumbly, others too sweet. This is the Goldilocks version. Just right.
These cookies are not just good. They are the kind that makes you close your eyes after the first bite. That is comfort food reimagined—faster, easier, but with the same soul-soothing satisfaction. Perfect for impressing at a party without any of the stress.
What Ingredients You Will Need
This recipe relies on simple, everyday ingredients that come together to create something truly special. Nothing fancy, nothing hard to find. Here is what you need and why each one matters:
For the Cookie Base
- Sugar cones (12 cones): Look for flat-bottomed cones so they stand upright easily. I prefer the ones from the grocery store baking aisle—they are sturdier than the thin waffle cones.
- Semi-sweet chocolate chips (1 cup, 175g): These melt into a smooth, glossy coating. I like Ghirardelli or Guittard for the best flavor and texture.
- Creamy peanut butter (½ cup, 130g): Use the regular kind, not natural or oily peanut butter. The stabilizers in processed peanut butter help the filling set properly. Trust me on this one—I learned the hard way.
- Unsalted butter (2 tablespoons, 28g): Softened to room temperature. This adds richness and helps the filling come together smoothly.
- Powdered sugar (1 cup, 120g): Sifted to avoid lumps. This sweetens the filling without making it grainy.
- Vanilla extract (1 teaspoon): Pure vanilla adds warmth and depth. Imitation works in a pinch, but pure is better.
For Decoration
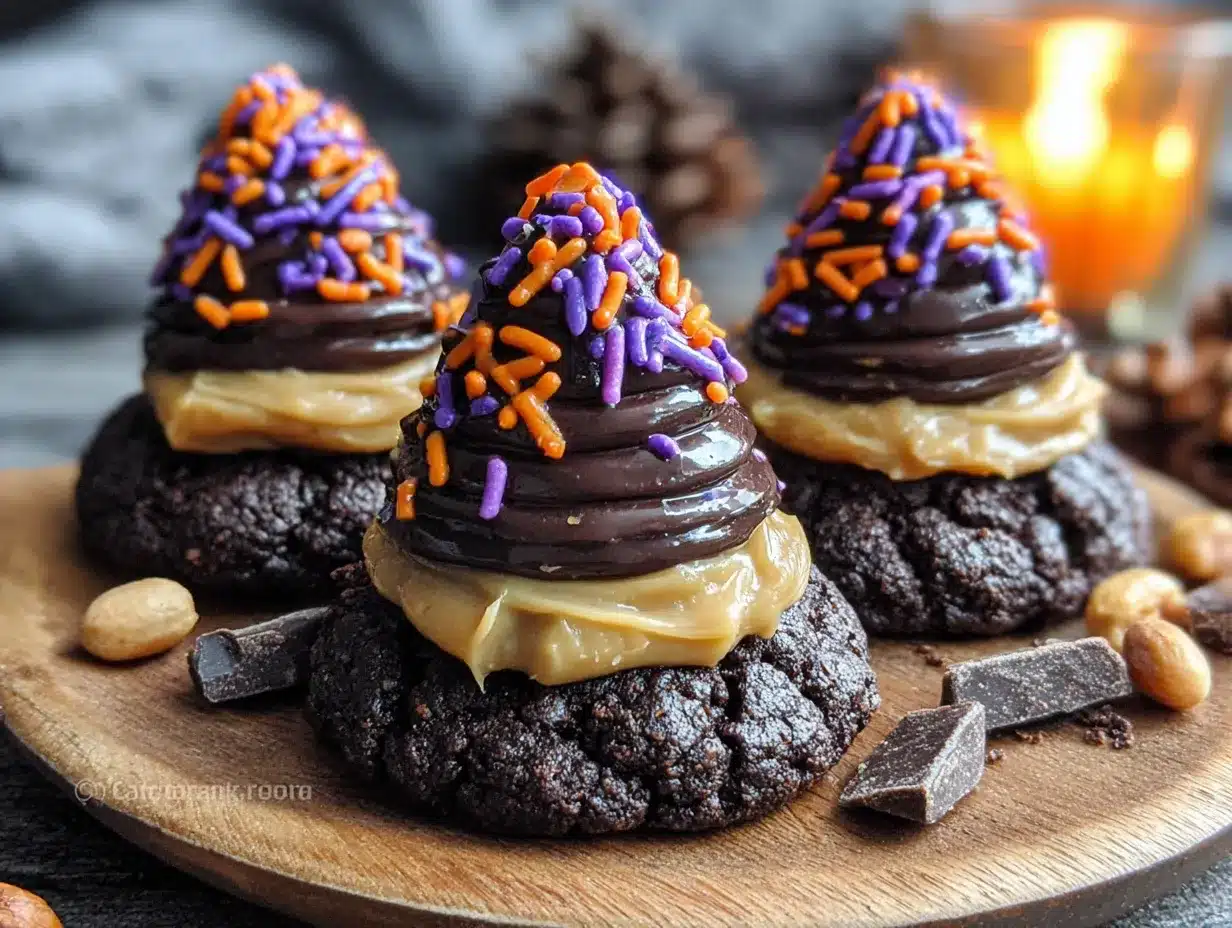
- Orange and black sprinkles (¼ cup): Any Halloween-themed sprinkles work. I like the jimmies-style ones for better adhesion.
- Pretzel sticks (12): These become the witch hat stems. Break them in half if they are too long.
- Coconut oil or shortening (1 teaspoon): Optional, but helps thin the chocolate for easier dipping. Use if your chocolate seems thick.
Substitution Guidance
If you need a peanut-free version, sunflower seed butter works beautifully. Just note that the filling will be slightly greener due to a natural reaction—still delicious, just not as pretty. For a dairy-free option, use vegan butter and dairy-free chocolate chips. The texture holds up perfectly. And if you cannot find sugar cones, flat-bottomed waffle cones work too, though they are wider and make slightly larger hats.
Equipment Needed
You do not need a professional bakery setup for these. Here is what I use every time:
- Baking sheet: A standard half-sheet pan lined with parchment paper or a silicone baking mat. The silicone mat helps the chocolate release more easily.
- Microwave-safe bowls (2): One for melting chocolate, one for the peanut butter filling. Glass or ceramic works best.
- Small offset spatula or butter knife: For spreading the filling inside the cones. A regular knife works, but the offset spatula makes it neater.
- Piping bag or zip-top bag: For drizzling chocolate. Honestly, a zip-top bag with the corner snipped off works perfectly and saves on cleanup.
- Wire cooling rack: Placed over the baking sheet for dipping. This catches drips and allows excess chocolate to fall off cleanly.
- Tweezers or toothpicks: For placing sprinkles precisely. My fingers work too, but tweezers keep things tidy.
I have made these with just a fork and a plate before—during a power outage, no less—and they still turned out great. Do not overthink the equipment. If you have a bowl and a spoon, you are halfway there.
Preparation Method
Let me walk you through this step by step. I have included all the little details I wish someone had told me the first time.
- Make the peanut butter filling (5 minutes): In a medium bowl, combine the softened butter, creamy peanut butter, powdered sugar, and vanilla extract. Stir until smooth and fully combined. The mixture should be thick but spreadable—like a soft cookie dough. If it seems too dry, add a teaspoon of milk. If too wet, add a tablespoon more powdered sugar.
- Fill the cones (10 minutes): Take each sugar cone and use your offset spatula or a small knife to spread about 1 tablespoon of the peanut butter mixture inside. Push it all the way to the tip of the cone. You want a thin, even layer coating the interior. Do not overfill—leave about ½ inch at the open end so the chocolate can seal it later. Place the filled cones upright on your parchment-lined baking sheet. I use a small shot glass or egg cup to hold them steady while I work.
- Chill the filled cones (15 minutes): Pop the baking sheet into the refrigerator for at least 15 minutes. This firms up the filling so it does not squish out when you dip them in chocolate. You can even do this step a day ahead if you are planning ahead.
- Melt the chocolate (2 minutes): In a microwave-safe bowl, combine the semi-sweet chocolate chips and coconut oil (if using). Microwave in 30-second bursts, stirring between each, until smooth and fully melted. Be careful not to overheat—chocolate seizes up if it gets too hot. Stop when most of the chips are melted and stir until the residual heat finishes the job.
- Dip the cones (10 minutes): Working one at a time, hold each chilled cone by the wide open end and dip the pointed tip into the melted chocolate. Submerge about 1 inch deep—enough to cover the tip and create the “hat” shape. Lift it out and let the excess drip back into the bowl. Gently tap your wrist against the bowl edge to encourage drips to fall. Place each dipped cone on the wire rack set over the baking sheet.
- Add the brim (5 minutes): Here is where the magic happens. While the chocolate is still wet, take a small spoon and drizzle a ring of chocolate around the open edge of the cone. This creates the brim of the witch hat. Let it drip slightly for a more rustic look. If the chocolate starts to thicken, pop it back in the microwave for 10 seconds.
- Attach the stem (2 minutes): Before the brim chocolate sets, gently press a pretzel stick into the top of the cone tip. The chocolate will hold it in place. If your pretzel sticks are too long, snap them in half first. Work quickly—the chocolate sets fast once it hits the cold cone.
- Decorate (5 minutes): While the chocolate is still wet, sprinkle your Halloween sprinkles over the hat and brim. I like to do a mix of orange and black for contrast. Use tweezers for precise placement if you are feeling fancy. For a cleaner look, you can dip just the tip in sprinkles instead.
- Set the chocolate (20 minutes): Let the cookies sit at room temperature until the chocolate is fully set, about 20 minutes. Do not refrigerate them at this stage—condensation can make the chocolate bloom and look cloudy. Patience here pays off.
- Serve or store: Once set, these are ready to eat. Arrange them on a platter with the hats pointing up for maximum visual impact. They look incredible on a cake stand surrounded by other Halloween treats.
Cooking Tips & Techniques
I have made these witch hat cookies at least a dozen times, and I have made every mistake you can imagine. Here is what I learned so you do not have to:
Keep the filling cold. The first time I made these, I skipped the chilling step because I was in a hurry. Big mistake. The warm filling oozed out of the cones when I dipped them, creating a chocolate-peanut butter mess that looked nothing like a hat. Now I chill them for a full 20 minutes, and they hold their shape perfectly.
Thin your chocolate if needed. If your melted chocolate looks thick and gloppy, add a teaspoon of coconut oil or shortening. This makes it flow more smoothly and gives a thinner, more even coating. I learned this after a batch of hats that looked more like chocolate blobs than elegant witch hats.
Work in small batches. Do not fill all 12 cones before you start dipping. The filling warms up as it sits, and the chocolate can start to set. I fill and dip 4 cones at a time, keeping the rest in the fridge until I am ready for them.
Use a wire rack for dipping. Placing the cones on a wire rack over a baking sheet allows excess chocolate to drip off cleanly. If you put them directly on parchment, the chocolate pools around the base and creates a messy footprint. A wire rack gives you those clean, professional-looking edges.
Double dip for a thicker shell. If you want a more substantial chocolate coating, let the first dip set for 5 minutes, then dip again. This creates a satisfying snap when you bite into the hat. I do this when I am making them for adults who appreciate that extra chocolate hit.
Timing is everything. I like to make the filling and fill the cones the night before. Then on party day, I just dip and decorate. It breaks the work into manageable chunks and makes the whole process feel effortless.
Variations & Adaptations
One of the things I love most about this recipe is how flexible it is. Here are some variations I have tried and loved:
White Chocolate Witch Hats
Swap the semi-sweet chocolate for white chocolate chips. The contrast between the white chocolate and the dark peanut butter filling is stunning. Add a drop of orange food coloring to the white chocolate for a festive twist. My kids went absolutely nuts over these.
Gluten-Free Version
Sugar cones are naturally gluten-free, but double-check the label to be sure. Some brands use wheat flour. If you need a certified gluten-free option, look for brands like Let’s Do Organic or make your own cones from gluten-free flour. The filling and chocolate are naturally gluten-free, so this adaptation is incredibly easy.
Spicy Chocolate Hats
Add ¼ teaspoon of cayenne pepper and a pinch of cinnamon to the melted chocolate. The heat sneaks up on you after the sweetness, and it pairs beautifully with the peanut butter. I made these for a Halloween party and they were the talk of the night. Just warn people if you are serving them to kids!
Vegan Witch Hats
Use dairy-free chocolate chips, vegan butter, and maple syrup instead of honey in the filling. The texture holds up perfectly, and no one will know the difference. I have served these to mixed crowds and they disappeared just as fast as the regular version.
Nut-Free Alternative
Replace peanut butter with sunflower seed butter and use a dedicated nut-free chocolate brand. The filling will be slightly greener due to the chlorophyll in sunflower seeds, but the taste is still amazing. I made these for a school event with nut-free requirements and they were a huge hit.
Serving & Storage Suggestions
These witch hat cookies are best served at room temperature, arranged on a platter with the pointed ends facing up. I love placing them on a black cake stand with some fake spiderwebs and plastic spiders scattered around for a spooky vibe. They also look incredible on a tiered tray surrounded by other Halloween treats like caramel apples or pumpkin cupcakes.
For a Halloween party, I like to serve them alongside a warm mug of apple cider or hot chocolate. The combination of the cold, crisp cookie and the warm drink is pure autumn comfort. If you are serving them at a kids’ party, set them out on a low table where little hands can easily reach them—they will disappear fast.
Storage: Store these in an airtight container at room temperature for up to 5 days. Do not refrigerate them—the chocolate can bloom and develop white streaks from condensation. If you need to store them longer, place them in a single layer in a freezer-safe container and freeze for up to 3 months. Thaw at room temperature for about 30 minutes before serving.
Reheating: These are best enjoyed as-is, but if you want a warm, gooey center, pop one in the microwave for 10 seconds. The chocolate softens and the peanut butter filling becomes almost molten. It is a completely different experience—equally delicious, just different.
The flavors actually develop over time. Day-old witch hats taste even better because the peanut butter filling has had time to meld with the chocolate. If you can resist eating them all on day one, you are in for a treat on day two.
Nutritional Information & Benefits
Here is the estimated nutritional breakdown per cookie (based on 12 servings):
| Nutrient | Amount |
|---|---|
| Calories | 245 |
| Total Fat | 14g |
| Saturated Fat | 6g |
| Carbohydrates | 28g |
| Sugar | 18g |
| Protein | 5g |
| Fiber | 2g |
| Sodium | 95mg |
These cookies are a treat, but they do offer some surprising benefits. Peanut butter provides plant-based protein and healthy monounsaturated fats that help keep you full. Dark chocolate contains antioxidants called flavonoids that support heart health. And the sugar cones are lower in calories than traditional cookie dough bases, so you get that satisfying crunch without the extra fat.
For those with dietary restrictions, please note that this recipe contains peanuts, dairy, and gluten (from the cones). Always check labels if you are serving to someone with allergies. I personally love that these are naturally smaller than most Halloween treats—one is perfectly satisfying without feeling overly indulgent.
Conclusion
These easy witch hat chocolate peanut butter cone cookies have become my go-to Halloween treat for good reason. They are fun to make, impossible to resist, and somehow manage to look both impressive and effortless at the same time. Every time I bring them to a party, someone asks for the recipe. And honestly, I love sharing it.
What I love most is how customizable they are. You can make them spooky, cute, elegant, or playful depending on your sprinkles and chocolate choices. They are the kind of recipe that invites creativity, and I hope you make them your own. Try adding a drizzle of white chocolate, swap in dark chocolate for a richer flavor, or use colorful sprinkles for a non-Halloween version.
I would love to hear how yours turn out. Drop a comment below and tell me about your favorite Halloween traditions or any twists you added to the recipe. And if you share them on social media, tag me so I can see your beautiful creations. Happy baking, and may your Halloween be filled with chocolate, peanut butter, and a little bit of magic.
Frequently Asked Questions
Can I make these witch hat cookies ahead of time?
Absolutely. You can fill the cones and store them in the refrigerator for up to 2 days before dipping. Alternatively, you can fully assemble them and store in an airtight container at room temperature for up to 5 days. They actually taste better on day two.
Why did my chocolate seize up?
Chocolate seizes when it comes into contact with even a tiny amount of water. Make sure your bowl and utensils are completely dry. If your chocolate does seize, you can try adding a tablespoon of vegetable oil or coconut oil and stirring vigorously to bring it back. Sometimes it works, sometimes it does not—better to start fresh if it is too far gone.
Can I use crunchy peanut butter?
You can, but I do not recommend it. The crunchy bits make it harder to spread evenly inside the cone, and they can poke through the chocolate coating. Stick with creamy for the smoothest results. If you want a little texture, sprinkle crushed peanuts on top after dipping instead.
How do I keep the cones from breaking?
Sugar cones are delicate, so handle them gently. If you find them cracking, try warming them slightly in a 300°F oven for 2-3 minutes. This makes them more pliable. Also, make sure your peanut butter filling is soft enough to spread without forcing it. Cold filling can crack the cone from the inside.
Can I use regular cookies instead of cones?
Yes! If you cannot find sugar cones or prefer a different base, you can use fudge-striped cookies or shortbread cookies. Just spread the peanut butter filling on top and shape it into a cone, then dip in chocolate. The texture will be different, but the flavor combination is still amazing. I have made a batch using Keebler Fudge Stripes and they were a huge hit.
Pin This Recipe!

Easy Witch Hat Cookies: Chocolate Peanut Butter Cones

These easy witch hat cookies are made with sugar cones, creamy peanut butter filling, and a chocolate coating. They are quick to assemble, require no baking, and are perfect for Halloween parties or spooky movie nights.
- Prep Time: 20 minutes
- Cook Time: 0 minutes
- Total Time: 55 minutes (includes chilling and setting time)
- Yield: 12 servings 1x
- Category: Dessert
- Cuisine: American
Ingredients
- 12 sugar cones (flat-bottomed)
- 1 cup (175g) semi-sweet chocolate chips
- ½ cup (130g) creamy peanut butter (not natural or oily)
- 2 tablespoons (28g) unsalted butter, softened
- 1 cup (120g) powdered sugar, sifted
- 1 teaspoon vanilla extract
- ¼ cup Halloween-themed sprinkles (orange and black)
- 12 pretzel sticks
- 1 teaspoon coconut oil or shortening (optional, for thinning chocolate)
Instructions
- Make the peanut butter filling: In a medium bowl, combine softened butter, creamy peanut butter, powdered sugar, and vanilla extract. Stir until smooth and fully combined. The mixture should be thick but spreadable—like soft cookie dough. If too dry, add a teaspoon of milk; if too wet, add a tablespoon more powdered sugar.
- Fill the cones: Take each sugar cone and use an offset spatula or small knife to spread about 1 tablespoon of the peanut butter mixture inside, pushing it all the way to the tip. Leave about ½ inch at the open end. Place filled cones upright on a parchment-lined baking sheet (use a small shot glass or egg cup to hold them steady).
- Chill the filled cones: Refrigerate the baking sheet for at least 15 minutes to firm up the filling. This can be done a day ahead.
- Melt the chocolate: In a microwave-safe bowl, combine semi-sweet chocolate chips and coconut oil (if using). Microwave in 30-second bursts, stirring between each, until smooth and fully melted. Do not overheat.
- Dip the cones: Working one at a time, hold each chilled cone by the wide open end and dip the pointed tip into the melted chocolate, submerging about 1 inch deep. Lift out and let excess drip back into the bowl. Place each dipped cone on a wire rack set over a baking sheet.
- Add the brim: While the chocolate is still wet, use a small spoon to drizzle a ring of chocolate around the open edge of the cone to create the brim. Let it drip slightly for a rustic look.
- Attach the stem: Before the brim chocolate sets, gently press a pretzel stick into the top of the cone tip. Break pretzel sticks in half if too long.
- Decorate: While the chocolate is still wet, sprinkle Halloween sprinkles over the hat and brim. Use tweezers for precise placement if desired.
- Set the chocolate: Let the cookies sit at room temperature until the chocolate is fully set, about 20 minutes. Do not refrigerate at this stage.
- Serve or store: Once set, arrange on a platter with hats pointing up. Store in an airtight container at room temperature for up to 5 days, or freeze for up to 3 months.
Notes
Keep the filling cold to prevent oozing during dipping. Thin chocolate with coconut oil if needed. Work in small batches, keeping remaining cones in the fridge. For a thicker chocolate shell, double dip after first coat sets for 5 minutes. The flavors develop over time—day-old cookies taste even better.
Nutrition
- Serving Size: 1 cookie
- Calories: 245
- Sugar: 18
- Sodium: 95
- Fat: 14
- Saturated Fat: 6
- Carbohydrates: 28
- Fiber: 2
- Protein: 5
Keywords: witch hat cookies, Halloween cookies, chocolate peanut butter cones, no-bake Halloween treats, easy Halloween dessert


