Love this? Save it for later!
Share the inspiration with your friends
I wasn’t expecting lunchbox advice from my accountant, but there I was, stuck in his office during tax season, watching him unwrap a stack of these perfect little spirals from a beat-up Tupperware container. He saw me staring—honestly, I couldn’t help it—and just slid one across his cluttered desk. “Try it,” he said, not even looking up from my messy spreadsheets. “My kids won’t eat anything else.”
That first bite was a revelation. Creamy, savory, with that satisfying chew from the tortilla and the cool crunch of fresh veggies tucked inside. I mean, I’d made pinwheels before, but these were different. They held together perfectly, didn’t get soggy, and somehow tasted even better than the sum of their simple parts. I asked for the recipe, expecting some elaborate secret, and he just shrugged and scribbled it on a sticky note. Four ingredients. That’s it.
Maybe you’ve been there—standing in the kitchen at 7 AM, staring into the fridge, wondering what on earth you’re going to pack that won’t come back uneaten. These Easy Turkey and Cheese Pinwheel Lunchbox Wraps became my answer that very week, and honestly, they’ve never let me down since.
This recipe stuck with me because it’s not trying to be fancy. It’s just good, practical food that solves a real problem. And sometimes, the best recipes come from the most unexpected places—like a tax accountant’s lunch break.
Why You’ll Love This Recipe
Let me tell you why these little spirals have earned a permanent spot in my weekly rotation. I’ve tested this recipe more times than I can count—through soggy lunchboxes, picky toddler phases, and even a few disastrous attempts with the wrong kind of tortilla. What I’m sharing with you is the version that actually works, every single time.
- Quick & Easy: These come together in under 15 minutes. Seriously, you can make a batch while your coffee brews. Perfect for those chaotic weekday mornings when every minute counts.
- Simple Ingredients: No fancy grocery trips needed. You likely already have everything in your kitchen right now. Tortillas, deli turkey, cream cheese, and cheese slices—that’s the foundation.
- Perfect for Lunchboxes: These hold up beautifully for hours. No sogginess, no falling apart. They’re the lunchbox hero you didn’t know you needed.
- Crowd-Pleaser: Kids devour them. Adults sneak them from the fridge. I’ve brought these to potlucks and watched them disappear before the main dishes even hit the table.
- Unbelievably Delicious: The texture combo is next-level—creamy filling, tender tortilla, and that satisfying bite of melty cheese. It’s comfort food in spiral form.
What makes this recipe different from the rest? It’s the cream cheese spread technique. Most recipes skip this step, but spreading a thin layer of cream cheese on the tortilla before adding the fillings creates a barrier that prevents sogginess. It’s a tiny trick that makes a massive difference. This isn’t just another pinwheel recipe—it’s the one that actually stays fresh and delicious from morning until lunchtime.
This recipe isn’t just good—it’s the kind that makes you close your eyes after the first bite. It’s lunchbox food reimagined: faster, sturdier, but with the same soul-soothing satisfaction of a favorite sandwich.
What Ingredients You Will Need
This recipe uses simple, everyday ingredients to deliver big flavor and satisfying texture without any fuss. Here’s what you’ll need to grab from your kitchen:
For the Pinwheels
- Large flour tortillas (10-inch) – Look for burrito-sized tortillas for the best rolling results. I prefer Mission brand for their flexibility, but any large flour tortilla works. (Avoid “low-carb” or “high-fiber” varieties—they tend to crack when rolled.)
- 8 oz cream cheese, softened to room temperature – This is non-negotiable for easy spreading. Philadelphia cream cheese gives the smoothest results. (Use dairy-free cream cheese if needed—just make sure it’s softened.)
- 8-10 slices deli turkey breast – Go for oven-roasted or smoked turkey for the best flavor. I like Boar’s Head or Applegate Farms for clean ingredients. (Thin-sliced works better than thick-cut for rolling.)
- 8-10 slices provolone cheese – Provolone melts perfectly and has a mild flavor that kids love. Swiss, mozzarella, or cheddar also work great. (Use dairy-free cheese slices if needed.)
- 1/2 cup fresh spinach leaves, optional – Adds color and nutrients without changing the flavor much. (Finely chop them if your kids are picky about greens.)
- 1/4 cup roasted red peppers, thinly sliced, optional – Adds a pop of color and a hint of sweetness. (Pat them dry with paper towels to avoid sogginess.)
For the Cream Cheese Spread

- 1/4 cup mayonnaise – This helps the cream cheese spread more smoothly and adds a tangy flavor. (Greek yogurt works as a substitute.)
- 1/2 teaspoon garlic powder – Adds savory depth without being overpowering. (Fresh minced garlic works too, but use just 1/4 teaspoon.)
- 1/4 teaspoon black pepper – A little goes a long way for seasoning. (Skip this for younger kids if you prefer.)
- Pinch of salt – Just a tiny bit to bring everything together.
Ingredient Selection Tips: For the best texture, look for cream cheese that’s at room temperature—cold cream cheese will tear your tortillas. If you forgot to take it out of the fridge, microwave it for 10-15 seconds on low power. Also, check the expiration date on your tortillas; fresher tortillas roll much more easily than older ones that have started to dry out.
Substitution Guidance: Use gluten-free tortillas for a gluten-free option, though they can be more delicate—warm them slightly before rolling. Swap turkey with ham, roast beef, or even grilled chicken strips. For a vegetarian version, use hummus instead of cream cheese and add extra veggies like cucumber strips and shredded carrots.
Equipment Needed
You don’t need any fancy gadgets for this recipe, which is part of its charm. Here’s what you’ll need:
- Cutting board – A large, sturdy board gives you plenty of room to work. I use a bamboo board that’s seen better days, but it gets the job done.
- Sharp knife – A serrated bread knife works best for cutting clean pinwheels without squishing them. A chef’s knife works too, but you’ll need to use a gentle sawing motion.
- Small mixing bowl – For combining the cream cheese spread ingredients. Any bowl works—even a cereal bowl in a pinch.
- Spatula or butter knife – For spreading the cream cheese mixture evenly across the tortillas. An offset spatula gives the smoothest results.
- Plastic wrap or parchment paper – For wrapping the rolled tortillas tightly before chilling. This helps them hold their shape.
- Refrigerator space – You’ll need room to chill the rolls for at least 30 minutes. A flat surface is best so they don’t get squished.
- Toothpicks (optional) – If you’re packing these for lunch, toothpicks help keep them from unrolling. Just remember to warn kids about them!
Budget-Friendly Tip: Don’t have plastic wrap? You can use a clean, damp kitchen towel to wrap the rolls before chilling. Just make sure it’s not too wet, or the tortillas will get soggy.
Preparation Method
Let me walk you through this step by step. Trust me, after the first time, you’ll have this memorized.
-
Make the cream cheese spread. In your small mixing bowl, combine the softened cream cheese, mayonnaise, garlic powder, black pepper, and salt. Mix until smooth and completely combined—no lumps allowed. (If your cream cheese is stubbornly lumpy, microwave the mixture for 10 seconds and stir again.) Set this aside while you prep your other ingredients.
-
Prep your tortillas. Lay one tortilla flat on your cutting board. If your tortillas are cold from the fridge, warm them in the microwave for 10-15 seconds. This makes them more pliable and less likely to crack when you roll them. (I learned this the hard way after my first batch looked like a tortilla crime scene.)
-
Spread the cream cheese mixture. Using your spatula or butter knife, spread about 2 tablespoons of the cream cheese mixture evenly across the entire surface of the tortilla. Go all the way to the edges—this creates that moisture barrier I mentioned earlier. The layer should be thin but visible; you don’t want it oozing out when you roll.
-
Layer the turkey. Place 2-3 slices of turkey breast flat across the cream cheese-covered tortilla. Overlap them slightly so there are no gaps. (If you’re using thicker turkey slices, you might only need 2 slices. Adjust based on what you have.)
-
Add the cheese. Lay 2-3 slices of provolone cheese on top of the turkey. Again, overlap them slightly for full coverage. (Pro tip: If your cheese slices are square, arrange them in a diamond pattern—this gives better coverage on a round tortilla.)
-
Add optional fillings. If you’re using spinach or roasted red peppers, scatter them evenly over the cheese now. Don’t pile them in the center—spread them out so every bite has some. (For picky eaters, chop the spinach very finely—they’ll never notice it.)
-
Roll it up tight. Starting from one edge, roll the tortilla tightly toward the opposite edge. Use your fingers to keep the filling tucked in as you go. Roll it like you mean it—not so tight that the filling squeezes out, but firm enough that there are no air pockets. (Imagine rolling a sleeping bag—that’s the pressure you want.)
-
Wrap and chill. Place the rolled tortilla seam-side down on a piece of plastic wrap. Roll it up tightly in the plastic, twisting the ends like a candy wrapper. This keeps the roll compact while it chills. Repeat with remaining tortillas. Refrigerate for at least 30 minutes, or up to 24 hours. (The longer they chill, the cleaner your cuts will be.)
-
Slice into pinwheels. When you’re ready to serve, unwrap the chilled rolls and place them on your cutting board. Using a sharp serrated knife, slice each roll into 1-inch thick rounds. Use a gentle sawing motion—don’t press down hard, or you’ll squish them. (For perfectly even slices, trim off the very ends first—they’re usually uneven and make great chef’s snacks.)
-
Arrange and serve. Place the pinwheels on a plate or pack them directly into lunchboxes. If you’re serving them immediately, they’re delicious at room temperature. For lunchboxes, they’ll stay fresh for hours.
Sensory Cues: When you’re spreading the cream cheese, it should glide smoothly without tugging at the tortilla. When you roll, you should feel the tortilla wrapping snugly around the fillings without any resistance. When you slice, you’ll see the beautiful spiral pattern emerge—that’s your reward for rolling tightly!
Cooking Tips & Techniques
I’ve made these pinwheels more times than I can count, and let me tell you—I’ve made every mistake in the book so you don’t have to. Here’s what I’ve learned:
The Temperature Trap: Cold tortillas crack. Cold cream cheese tears. Warm everything before you start. I leave my cream cheese on the counter for 30 minutes before making these, and I microwave my tortillas for 10 seconds. This one tip alone will save you from the frustration of torn tortillas and lumpy spreads.
The Overfilling Mistake: I once piled on so many fillings that my pinwheels looked like exploded burritos. Less is more here. You want a thin, even layer of everything. Think of it as a deli sandwich that’s been flattened and rolled—not a stuffed wrap.
The Cutting Conundrum: Using a dull knife is the fastest way to ruin your beautiful pinwheels. A serrated knife with a gentle sawing motion gives clean cuts without squishing the filling. And please, for the love of lunchboxes, chill them first. I learned this after cutting into a room-temperature roll and watching it flatten into a sad, messy oval.
Timing Strategy: Make these the night before. Seriously. They actually taste better after resting overnight—the flavors meld together, and the texture firms up perfectly. Plus, morning you will thank evening you when lunch packing takes 30 seconds.
Multitasking Tip: While your cream cheese is softening on the counter, prep your other ingredients. Slice your roasted peppers, wash your spinach, and lay out your tortillas. Having everything ready makes the assembly process feel like a breeze.
Variations & Adaptations
One of the best things about this recipe is how easily it adapts. Here are some variations I’ve tried and loved:
Vegetarian Version
Skip the turkey and double up on the veggies. I’ve made these with hummus instead of cream cheese, layered with cucumber strips, shredded carrots, and bell pepper slices. They’re fresh, crunchy, and incredibly satisfying. My vegetarian friend requests these every time she comes over.
Low-Carb Option
Use low-carb tortillas or large lettuce leaves instead of flour tortillas. For lettuce wraps, use romaine or butter lettuce leaves—they’re sturdy enough to hold the fillings. Just be aware that lettuce wraps don’t hold up as well in lunchboxes; they’re better for immediate serving.
Spicy Southwest Twist
Add a layer of refried beans (about 2 tablespoons) under the cream cheese, swap the provolone for pepper jack, and add some sliced jalapeños. The cream cheese tames the heat, so it’s flavorful without being overwhelming. My husband calls these his “grown-up lunchbox” pinwheels.
Breakfast Pinwheels
Use the same technique but fill with scrambled eggs, crispy bacon bits, and cheddar cheese. These are perfect for brunch or a grab-and-go breakfast. I’ve brought them to office breakfast meetings and watched them disappear in minutes.
Kid-Approved Simple Version
Stick to just cream cheese and turkey. No extra veggies, no fancy seasonings. Sometimes the simplest version is the biggest hit. My nephew calls these “spiral sandwiches” and asks for them every time he visits.
Serving & Storage Suggestions
These pinwheels are incredibly versatile when it comes to serving. Here’s how to get the most out of them:
Serving Temperature: They’re delicious cold, straight from the fridge, or at room temperature. I actually prefer them slightly chilled—the cream cheese firms up and the flavors are more pronounced. If you’re serving them at a party, take them out of the fridge 10 minutes before serving to take the chill off.
Presentation Ideas: Arrange the pinwheels cut-side up on a platter with the spiral pattern showing. Garnish with fresh herbs like parsley or chives for a pop of color. For lunchboxes, pack them in a single layer with a small ice pack to keep them fresh. (The spiral pattern makes them look way fancier than they actually are—your kids’ friends will be jealous.)
Complementary Dishes: These pair beautifully with fresh fruit, veggie sticks with ranch dip, or a simple side salad. For a full lunch, add some cherry tomatoes, cucumber slices, and a handful of grapes. For parties, serve them alongside other finger foods like mini quiches or stuffed mushrooms.
Storage Instructions: Store leftover pinwheels in an airtight container in the refrigerator for up to 3 days. Place a paper towel at the bottom of the container to absorb any excess moisture. (Change the paper towel daily if storing for multiple days.)
Freezer Instructions: Yes, you can freeze these! Wrap the uncut rolls tightly in plastic wrap, then place them in a freezer bag. Freeze for up to 2 months. To thaw, transfer to the refrigerator overnight. Slice and serve cold. The texture is slightly softer after freezing, but they’re still delicious.
Reheating: Honestly, these are best served cold. But if you prefer them warm, microwave individual pinwheels for 10-15 seconds. The cheese will soften slightly, and the tortilla will become more pliable. Just don’t overheat them, or the cream cheese will turn into a puddle.
Flavor Development: These actually taste better the next day. The flavors meld together overnight, and the cream cheese spreads evenly throughout the pinwheels. If you can, make them a day ahead—your taste buds will thank you.
Nutritional Information & Benefits
Here’s the nutritional breakdown for one serving (about 4 pinwheels, based on the basic turkey and provolone version):
| Nutrient | Amount Per Serving |
|---|---|
| Calories | 320-380 |
| Protein | 22-26g |
| Carbohydrates | 18-22g |
| Fat | 18-22g |
| Saturated Fat | 10-12g |
| Fiber | 1-2g |
| Sugar | 2-4g |
| Sodium | 800-1000mg |
Health Benefits: Turkey breast is an excellent source of lean protein, which keeps you full and satisfied for hours. Cream cheese provides calcium for bone health, while the tortillas offer energy-boosting carbohydrates. If you add spinach, you’re getting a dose of iron, vitamin K, and antioxidants. This is a balanced lunch that won’t leave you crashing mid-afternoon.
Dietary Considerations: This recipe can be made gluten-free with appropriate tortillas. It’s naturally nut-free, making it safe for school lunchboxes. For a lower-sodium version, use low-sodium turkey and skip the added salt in the cream cheese spread.
Potential Allergens: This recipe contains dairy (cream cheese, provolone) and gluten (tortillas). Check your deli turkey for any added allergens—some brands use fillers that may contain soy or other allergens.
Personal Wellness Perspective: I love that this recipe feels indulgent but is actually quite balanced. You get protein, carbs, and fat in one neat little package. It’s the kind of lunch that keeps me going through afternoon meetings without that heavy, sluggish feeling. Plus, knowing exactly what’s in it gives me peace of mind.
Conclusion
These Easy Turkey and Cheese Pinwheel Lunchbox Wraps have become a staple in my kitchen, and I have a feeling they’ll become one in yours too. They’re quick, simple, and endlessly adaptable—everything a busy cook could want in a recipe.
I love that this recipe started with an unexpected moment in my accountant’s office. It’s a reminder that the best recipes often come from the most ordinary places. You don’t need fancy techniques or exotic ingredients to make something truly delicious. Sometimes, all you need is a flour tortilla, some cream cheese, and a little bit of creativity.
I encourage you to make this recipe your own. Add your favorite veggies, swap the turkey for ham or roast beef, or go completely vegetarian. The technique is the same, and the results will be just as satisfying. And when you pack these in your lunchbox or serve them at your next gathering, remember—good food doesn’t have to be complicated.
I’d love to hear how these turned out for you! Drop a comment below and let me know what variations you tried. Did your kids love them? Did they disappear at your party? Share your pinwheel adventures—I read every comment and I’m always inspired by your creativity. Happy rolling, friends!
Frequently Asked Questions
Can I make these pinwheels ahead of time?
Absolutely! In fact, they taste better when made a day ahead. Prepare the rolls, wrap them tightly in plastic wrap, and refrigerate for up to 24 hours before slicing. The flavors meld together beautifully, and the texture firms up perfectly for clean slicing.
Why are my pinwheels falling apart?
This usually happens for one of three reasons: your tortillas are too cold (warm them for 10 seconds in the microwave), you’re overfilling them (use thin, even layers), or you didn’t chill them long enough before slicing (30 minutes minimum is key). Also, make sure you’re using a sharp serrated knife with a gentle sawing motion.
Can I use flavored cream cheese?
Yes! Chive and onion cream cheese adds a savory kick, while strawberry cream cheese makes a surprisingly delicious sweet version (just skip the turkey and cheese). Garden vegetable cream cheese is another great option. Just make sure whatever flavor you choose complements your fillings.
How do I keep pinwheels from getting soggy in lunchboxes?
The cream cheese layer is your secret weapon here—it creates a moisture barrier between the tortilla and the fillings. Also, pat any wet ingredients (like roasted red peppers or cucumber) dry with paper towels before adding them. Pack the pinwheels with a small ice pack to keep them cool and fresh.
Can I use corn tortillas instead of flour?
I don’t recommend it. Corn tortillas are smaller and more brittle than flour tortillas, making them difficult to roll without cracking. If you need a gluten-free option, look for large gluten-free flour tortillas or use lettuce wraps instead. Brown rice tortillas also work well if you warm them slightly before rolling.
Pin This Recipe!
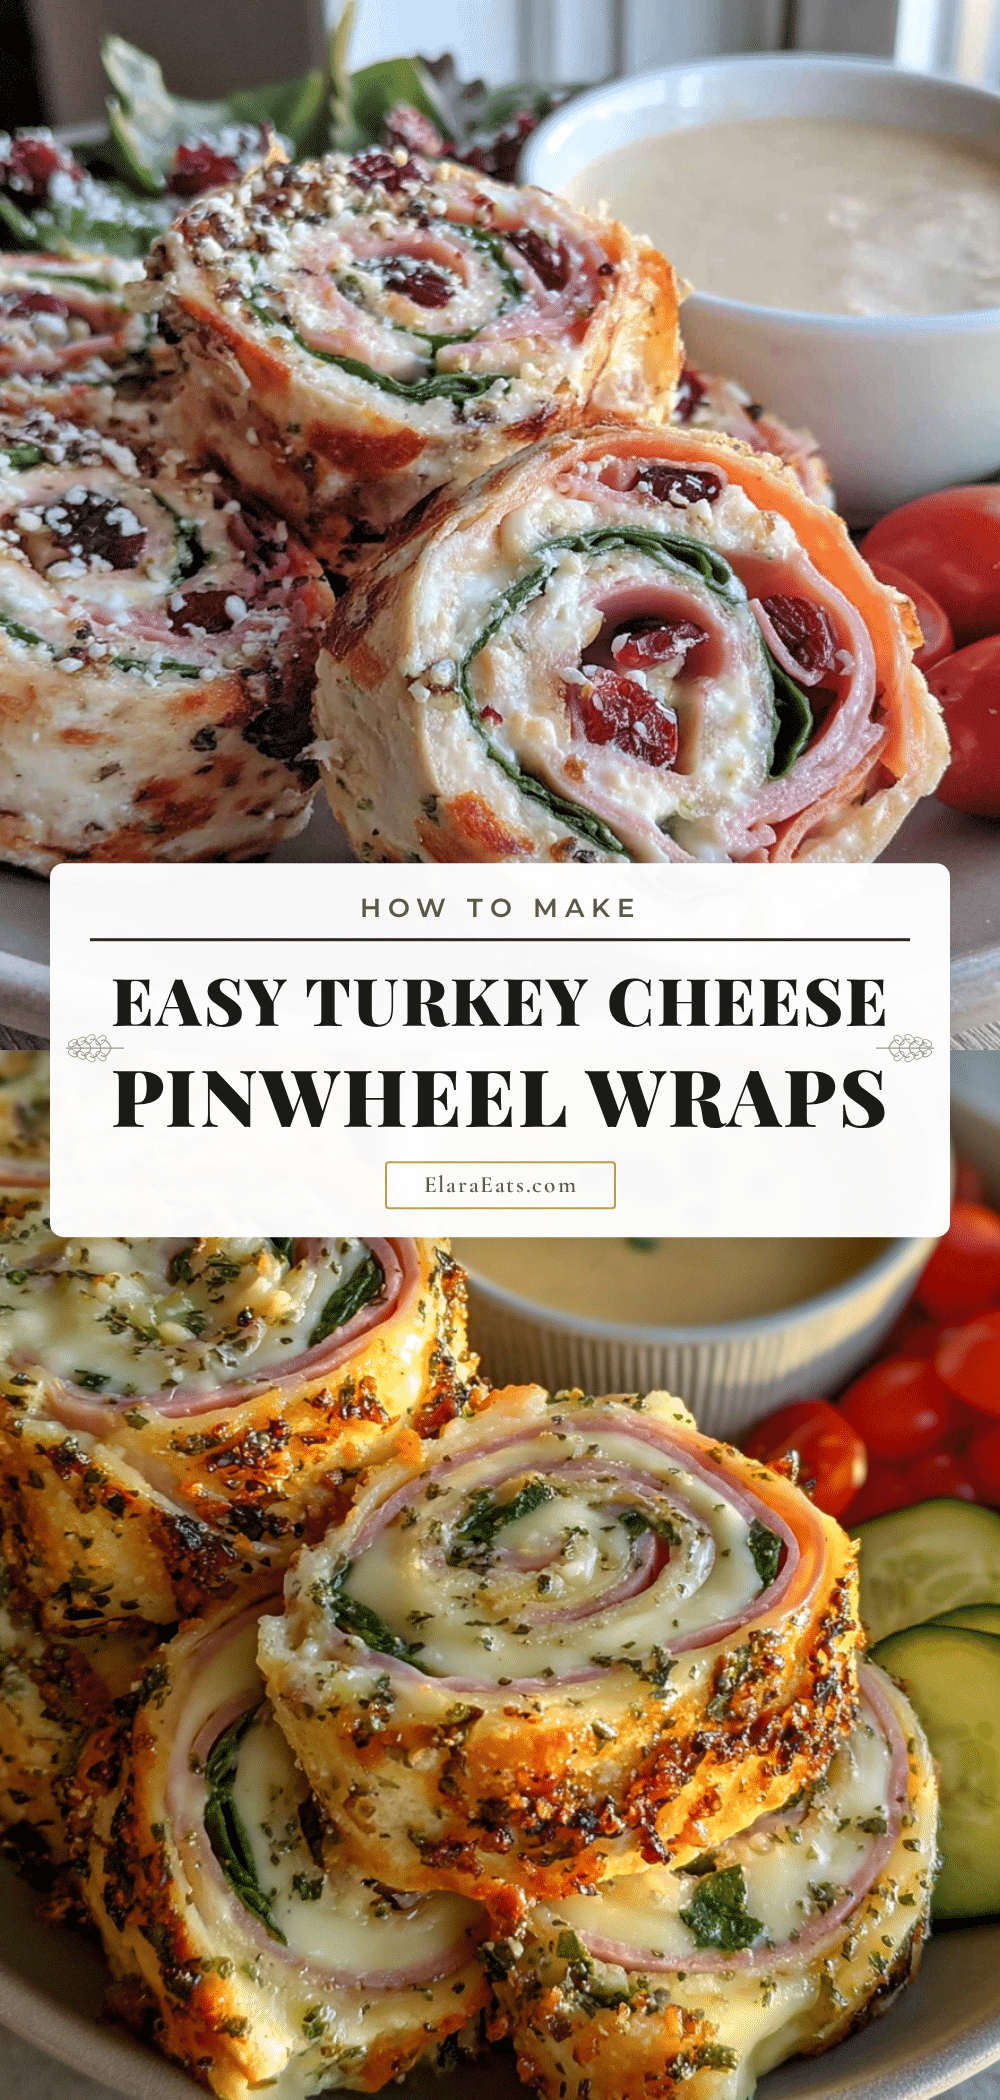
Easy Turkey and Cheese Pinwheel Wraps for Lunch

These easy turkey and cheese pinwheel wraps are perfect for lunchboxes, made with simple ingredients like tortillas, deli turkey, cream cheese, and provolone. They hold together perfectly, don’t get soggy, and are a crowd-pleaser for both kids and adults.
- Prep Time: 15 minutes
- Cook Time: 0 minutes
- Total Time: 45 minutes (includes 30 minutes chilling)
- Yield: 4 servings 1x
- Category: Lunch
- Cuisine: American
Ingredients
- 4 large flour tortillas (10-inch)
- 8 oz cream cheese, softened to room temperature
- 8–10 slices deli turkey breast
- 8–10 slices provolone cheese
- 1/2 cup fresh spinach leaves (optional)
- 1/4 cup roasted red peppers, thinly sliced (optional)
- 1/4 cup mayonnaise
- 1/2 teaspoon garlic powder
- 1/4 teaspoon black pepper
- Pinch of salt
Instructions
- Make the cream cheese spread: In a small mixing bowl, combine the softened cream cheese, mayonnaise, garlic powder, black pepper, and salt. Mix until smooth and completely combined.
- Prep your tortillas: Lay one tortilla flat on your cutting board. If cold, warm in the microwave for 10-15 seconds to make more pliable.
- Spread the cream cheese mixture: Using a spatula or butter knife, spread about 2 tablespoons of the cream cheese mixture evenly across the entire surface of the tortilla, going all the way to the edges.
- Layer the turkey: Place 2-3 slices of turkey breast flat across the cream cheese-covered tortilla, overlapping slightly so there are no gaps.
- Add the cheese: Lay 2-3 slices of provolone cheese on top of the turkey, overlapping slightly for full coverage.
- Add optional fillings: If using spinach or roasted red peppers, scatter them evenly over the cheese.
- Roll it up tight: Starting from one edge, roll the tortilla tightly toward the opposite edge, keeping the filling tucked in as you go. Roll firmly but not so tight that the filling squeezes out.
- Wrap and chill: Place the rolled tortilla seam-side down on a piece of plastic wrap. Roll it up tightly in the plastic, twisting the ends like a candy wrapper. Repeat with remaining tortillas. Refrigerate for at least 30 minutes, or up to 24 hours.
- Slice into pinwheels: When ready to serve, unwrap the chilled rolls and place on a cutting board. Using a sharp serrated knife, slice each roll into 1-inch thick rounds using a gentle sawing motion.
- Arrange and serve: Place the pinwheels on a plate or pack directly into lunchboxes. They are delicious at room temperature or cold.
Notes
For best results, use room temperature cream cheese and warm tortillas to prevent cracking. Chill rolls for at least 30 minutes before slicing for clean cuts. These can be made a day ahead and taste even better the next day. For gluten-free, use large gluten-free flour tortillas. For a vegetarian version, replace turkey with hummus and extra veggies.
Nutrition
- Serving Size: 4 pinwheels
- Calories: 320380
- Sugar: 24
- Sodium: 8001000
- Fat: 1822
- Saturated Fat: 1012
- Carbohydrates: 1822
- Fiber: 12
- Protein: 2226
Keywords: turkey pinwheels, cheese pinwheels, lunchbox wraps, easy lunch, kid-friendly lunch, turkey and cheese wraps, pinwheel sandwiches


