Love this? Save it for later!
Share the inspiration with your friends
This was supposed to be a full batch. A double batch, actually. I had pulled out two sticks of butter, two bags of chocolate chips, and my biggest mixing bowl. I was hosting a little get-together—nothing fancy, just a few friends coming over after work for wine and what I hoped would be an endless supply of warm cookies. But somewhere between answering a text from my sister and realizing I was out of vanilla extract, things went sideways. I grabbed the last bottle from the back of the pantry, only to find it was maple extract. I used it anyway. I melted one stick of butter on the stove while the other sat forgotten on the counter. I cracked an egg, then dropped the shell into the bowl. I fished it out with a fork, but by then, I had lost my rhythm. The dough looked wrong. Too soft, too shiny, and definitely not enough of it.
I was already annoyed. The whole point was to have cookies piled high on a plate, the kind you can grab two of without anyone noticing. Instead, I had maybe enough for eight cookies. I almost threw the whole thing out. But I had already preheated the oven—that felt like a commitment—so I scooped the dough onto a parchment-lined sheet and slid it in, muttering under my breath. When the timer went off, I pulled them out and stared. They were small, golden, and cracked on top in a way that looked almost intentional. I let them cool for exactly four minutes (I was impatient), then bit into one. And honestly? I stopped being annoyed. The edges were crisp, the center was soft, and the chocolate was pooling in a way that felt like a happy secret. I ate two more before anyone even rang the doorbell.
When my friends arrived, I set out the plate with a shrug and said, “Sorry, I only made a small batch.” They disappeared in about twelve minutes. Someone asked for the recipe before they left. Maybe you’ve been there—standing in your kitchen, convinced you’ve ruined something, only to realize you accidentally made the best version of it. That’s this cookie. It’s the one I keep coming back to, not despite the small batch, but because of it.
Why You’ll Love This Recipe
Let me tell you why this small-batch chocolate chip cookie recipe has become my secret weapon for hosting. It’s not just about the taste—though, honestly, the taste is ridiculous. It’s about the confidence you feel when you pull a tray of perfect, golden cookies out of the oven just as your guests are walking through the door. You look like a hero, and you barely broke a sweat.
- Quick & Easy : From start to finish, these cookies come together in under 30 minutes. No chilling required. No fancy techniques. Just mix, scoop, and bake.
- Simple Ingredients : You probably have everything in your kitchen right now. Butter, sugar, an egg, flour, chocolate chips. That’s it. No trips to a specialty store.
- Perfect for Hosting : This recipe makes exactly 8 cookies. That’s the sweet spot for a dinner party, a game night, or a casual hangout. You won’t be stuck with a mountain of leftovers, and you won’t run out too fast.
- Unbelievably Delicious : The texture is everything. Crispy edges, chewy centers, and pools of melted chocolate in every bite. It’s comfort food at its finest.
- Crowd-Pleaser : I’ve served these to kids, adults, picky eaters, and self-proclaimed cookie snobs. They disappear every single time.
What makes this recipe different from the rest? It’s the technique. Melting the butter instead of creaming it gives the cookies a denser, chewier texture. And using a single egg yolk instead of a whole egg adds richness without making the dough too wet. It’s a small tweak, but it changes everything. This isn’t just another chocolate chip cookie recipe—it’s my best version. The one I make when I want to impress without stress.
What Ingredients You Will Need
This recipe uses simple, pantry-friendly ingredients to deliver big flavor and that perfect texture. Here’s what you’ll need to gather before you start.
- Unsalted butter (4 tablespoons, melted) — I recommend using a good-quality butter like Kerrygold for the richest flavor. Melting the butter is key here; it gives the cookies that dense, chewy texture.
- Granulated sugar (¼ cup) — This adds sweetness and helps create those crispy edges.
- Light brown sugar (2 tablespoons, packed) — Brown sugar adds moisture and a subtle molasses flavor. Make sure it’s packed firmly into the measuring spoon.
- One large egg yolk — Using just the yolk adds richness and fat without thinning out the dough. Save the egg white for an omelet or a face mask!
- Vanilla extract (½ teaspoon) — Pure vanilla extract is best. Avoid imitation vanilla if you can—it makes a difference.
- All-purpose flour (½ cup, plus 1 tablespoon) — Spoon and level the flour into your measuring cup. Don’t scoop directly from the bag, or you’ll end up with too much.
- Baking soda (¼ teaspoon) — This helps the cookies spread just the right amount.
- Salt (¼ teaspoon) — I prefer flaky sea salt for a subtle crunch, but fine salt works too.
- Semi-sweet chocolate chips (⅓ cup) — I’m partial to Ghirardelli or Guittard chips. They hold their shape and melt beautifully. You can also chop a chocolate bar for bigger puddles of chocolate.
Substitution Guidance: If you only have salted butter, skip the added salt. For a dairy-free version, use vegan butter and dairy-free chocolate chips. And if you’re out of brown sugar, use all granulated sugar—the cookies will be slightly crisper, but still delicious.
Equipment Needed
You don’t need a lot of fancy tools for this recipe, which is part of the beauty. Here’s what you’ll need:
- Mixing bowls — One medium bowl for the wet ingredients, one small bowl for the dry. I use glass or ceramic bowls; they’re easy to clean and don’t retain odors.
- Whisk — For combining the wet ingredients. A fork works in a pinch.
- Rubber spatula or wooden spoon — For folding in the dry ingredients and chocolate chips.
- Measuring cups and spoons — Accurate measurements matter here since the batch is small.
- Baking sheet — A standard half-sheet pan works perfectly. No need to grease it; just line it with parchment paper.
- Parchment paper — This prevents sticking and makes cleanup a breeze. I always keep a roll in my drawer.
- Cookie scoop or tablespoon — For evenly sized cookies. I use a 1.5-tablespoon scoop for consistent results.
- Cooling rack — Optional, but it helps the cookies cool evenly without getting soggy on the bottom.
Budget-Friendly Tip: If you don’t have a cookie scoop, just use two spoons—one to scoop, one to scrape. It’s not as pretty, but the cookies will taste the same.
Preparation Method
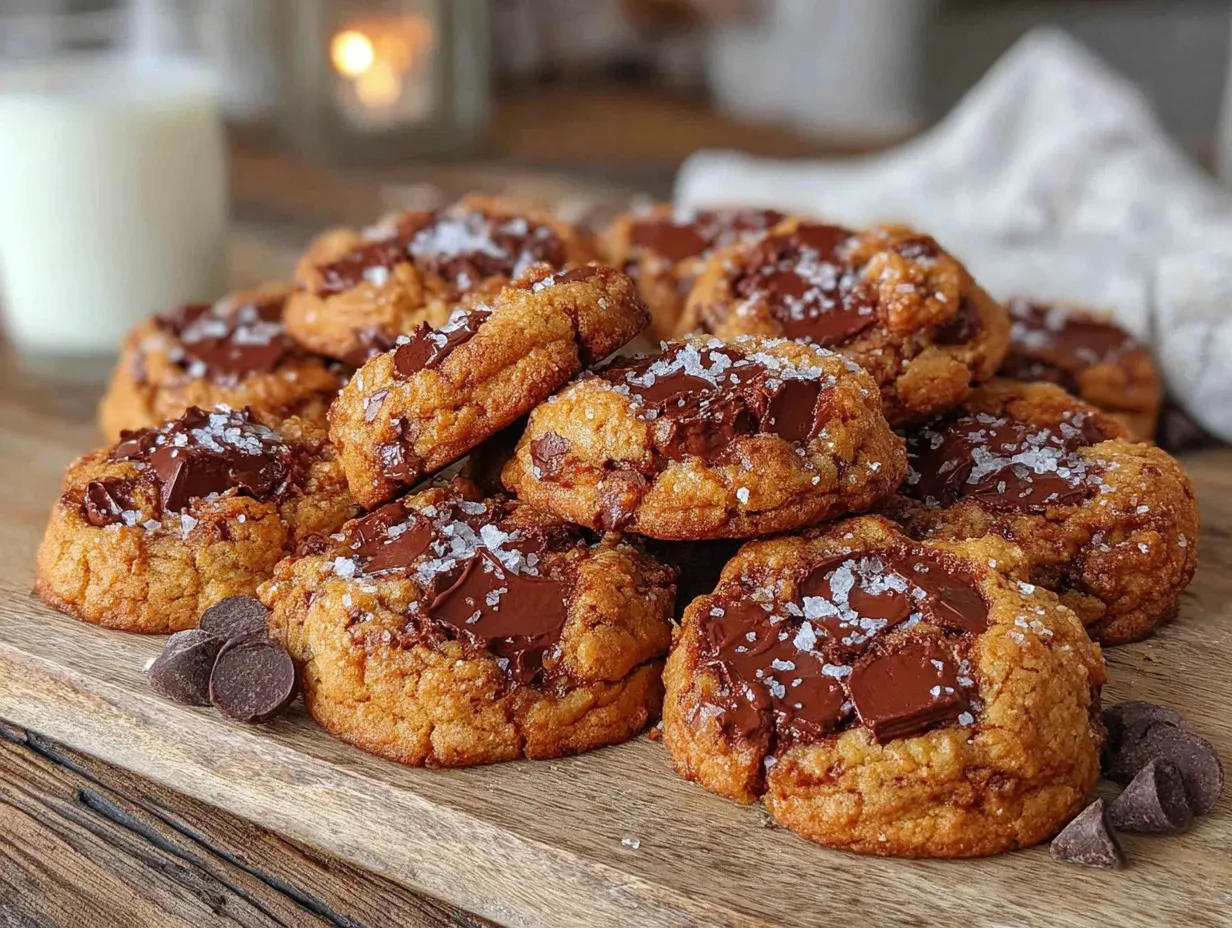
Follow these steps carefully, and you’ll have perfect cookies every time. I’ve included time estimates and sensory cues so you know exactly what to look for.
- Preheat your oven to 350°F (175°C). Line a baking sheet with parchment paper. This is a small step, but it makes a big difference. The parchment helps the cookies spread evenly and prevents burning on the bottom.
- Melt the butter. Place 4 tablespoons of unsalted butter in a microwave-safe bowl and heat in 15-second bursts until just melted. You don’t want it hot—just liquid. If it’s too hot, let it cool for a minute. (I once used hot butter and the cookies spread into flat, greasy pucks. Learn from my mistake.)
- Combine the sugars and butter. In a medium mixing bowl, whisk together the melted butter, ¼ cup granulated sugar, and 2 tablespoons packed light brown sugar. Whisk vigorously for about 30 seconds. The mixture should look smooth and slightly glossy. This is where the magic starts.
- Add the egg yolk and vanilla. Crack an egg and separate the yolk into the bowl. Add ½ teaspoon of vanilla extract. Whisk until everything is fully combined. The mixture will look thick and almost paste-like. That’s good.
- Mix the dry ingredients. In a separate small bowl, whisk together ½ cup plus 1 tablespoon all-purpose flour, ¼ teaspoon baking soda, and ¼ teaspoon salt. Make sure there are no lumps. (I use a fork for this—it’s faster than a whisk.)
- Combine wet and dry. Pour the dry ingredients into the wet mixture. Use a rubber spatula to fold everything together. Stir gently until just combined. You should see no streaks of flour, but don’t overmix. Overmixing develops gluten and makes the cookies tough.
- Fold in the chocolate chips. Add ⅓ cup semi-sweet chocolate chips. Fold them in with a few quick strokes. The dough will be thick and slightly sticky. If it feels too soft, pop it in the fridge for 10 minutes—but honestly, I rarely need to.
- Scoop the dough. Use a cookie scoop or a tablespoon to portion the dough into 8 equal balls. Place them on the prepared baking sheet, spacing them about 2 inches apart. They will spread, so give them room. (I once crowded them, and they merged into one giant cookie. Delicious, but not what I was going for.)
- Bake. Place the baking sheet in the preheated oven and bake for 9 to 11 minutes. At 9 minutes, the cookies will look underdone in the center—pale and puffy. That’s exactly what you want. The edges should be golden brown. If you like softer cookies, pull them at 9 minutes. For crisper cookies, go to 11.
- Cool on the pan. Let the cookies rest on the baking sheet for 5 minutes. They will continue to set as they cool. After 5 minutes, transfer them to a cooling rack. Or, you know, eat one immediately. I won’t judge.
Cooking Tips & Techniques
I’ve made this recipe more times than I can count, and I’ve learned a few things along the way. Here are my best tips for cookie success.
Don’t skip the parchment paper. I know it’s tempting to just spray the pan, but parchment prevents the bottoms from burning and makes cleanup effortless. It’s worth the extra 10 seconds.
Measure your flour correctly. This is the most common mistake. Scooping directly from the bag packs the flour down, giving you too much. Instead, spoon the flour into your measuring cup and level it off with a knife. Your cookies will thank you.
Watch the bake time. Ovens vary. My old oven ran hot, and I burned two batches before I figured it out. Start checking at 9 minutes. The cookies should be golden around the edges and still soft in the center. They’ll continue to cook on the hot pan after you pull them out.
Let them cool. I know the smell is intoxicating, but if you try to move them right away, they’ll fall apart. Give them those 5 minutes on the pan. Use the time to pour yourself a glass of milk or wine.
Toast the butter for extra flavor. If you want to go next-level, brown the butter instead of just melting it. Cook it in a saucepan over medium heat until it turns amber and smells nutty. Then let it cool before using. It adds a deep, caramel-like flavor that’s incredible.
Variations & Adaptations
This recipe is a great base, and you can tweak it to suit your mood or your guests’ preferences. Here are some variations I’ve tried and loved.
- Double Chocolate Chip : Swap 1 tablespoon of flour for 1 tablespoon of unsweetened cocoa powder. Use white chocolate chips instead of semi-sweet. The contrast is stunning.
- Nutty Crunch : Add ¼ cup of toasted, chopped walnuts or pecans along with the chocolate chips. Toast the nuts first in a dry pan for 3-4 minutes—it brings out their flavor.
- Sea Salt Finish : Sprinkle a pinch of flaky sea salt on each cookie right after they come out of the oven. The salty-sweet combination is addictive.
- Gluten-Free Option : Substitute the all-purpose flour with a 1:1 gluten-free baking flour blend. I’ve used Bob’s Red Mill with great results. The texture will be slightly more delicate, but still delicious.
- Vegan Version : Use vegan butter and a flax egg (1 tablespoon ground flaxseed mixed with 3 tablespoons water, left to sit for 5 minutes). Use dairy-free chocolate chips. They won’t be as chewy, but they’ll still be good.
Personal Variation: I once added a teaspoon of instant espresso powder to the dry ingredients. It doesn’t make the cookies taste like coffee—it just deepens the chocolate flavor. My friends couldn’t figure out what was different, but they ate them faster than usual.
Serving & Storage Suggestions
These cookies are best served warm, right after they’ve cooled for those 5 minutes. The chocolate is still melty, the edges are crisp, and the center is soft. It’s cookie heaven.
For a gathering: Arrange the cookies on a wooden board or a pretty plate. Add a small bowl of flaky sea salt on the side for sprinkling. Pair them with a cold glass of milk, a hot cup of coffee, or—if it’s a cocktail night—a dark rum or bourbon. The sweetness of the cookie balances the warmth of the spirits.
Storage: If you have leftovers (unlikely, but possible), store them in an airtight container at room temperature for up to 3 days. They’ll soften slightly, but they’ll still be tasty. To revive them, pop one in the microwave for 10 seconds.
Freezing: You can freeze the baked cookies for up to 2 months. Wrap them individually in plastic wrap, then place them in a freezer bag. Thaw at room temperature for 15 minutes. Or freeze the dough balls instead. Scoop them onto a baking sheet, freeze until solid, then transfer to a freezer bag. Bake from frozen, adding 2 extra minutes to the bake time. This is my secret for last-minute hosting.
Flavor Development: These cookies are actually better the next day. The flavors meld together, and the texture becomes even more chewy. If you can resist eating them all, save a few for tomorrow.
Nutritional Information & Benefits
Let’s be honest—these are cookies, not health food. But knowing what’s in them helps you enjoy them mindfully. Here are the approximate values per cookie (based on 8 cookies):
- Calories: 195
- Total Fat: 11g
- Saturated Fat: 7g
- Carbohydrates: 24g
- Sugar: 16g
- Protein: 2g
Health Benefits: Dark chocolate contains antioxidants called flavonoids, which can support heart health. Butter provides fat-soluble vitamins like A and E. And let’s not underestimate the mental health benefits of a warm cookie shared with friends. Sometimes, that’s the most important nutrient of all.
Dietary Considerations: This recipe contains gluten, dairy, and eggs. For allergen-friendly options, see the variations section above.
Conclusion
This small-batch chocolate chip cookie recipe is proof that you don’t need a lot of ingredients or a lot of time to create something memorable. It started as a mistake—a failed attempt at a double batch—and turned into my go-to recipe for hosting. It’s the cookie I make when I want to impress without stress. It’s the cookie that disappears before I can grab a second one.
I hope you give it a try. Customize it to your liking—add nuts, sprinkle sea salt, or double the chocolate. Make it your own. And when you do, I’d love to hear about it. Leave a comment below and tell me how it went. Did your guests love them? Did you eat the whole batch yourself? No judgment here.
Happy baking, friend. Your guests are in for a treat.
Frequently Asked Questions
Can I make these cookies ahead of time?
Absolutely. You can prepare the dough, scoop it into balls, and refrigerate them for up to 48 hours. Bake them fresh when your guests arrive. The flavor actually improves after a day in the fridge.
Why did my cookies spread too much?
This usually happens if the butter was too hot or if you used too much sugar. Make sure your melted butter has cooled slightly before mixing. Also, measure your flour correctly—too little flour causes excess spread.
Can I double this recipe?
Yes, you can double or triple the ingredients easily. Just use a whole egg instead of just the yolk if you’re scaling up. The bake time may increase by a minute or two.
What’s the best chocolate to use?
I recommend semi-sweet chocolate chips from Ghirardelli or Guittard. You can also chop a high-quality dark chocolate bar for bigger, more irregular chocolate pieces.
How do I get perfectly round cookies?
Right after the cookies come out of the oven, use a round cookie cutter or a glass to gently scoot the edges into a perfect circle. Do this while they’re still warm and soft on the pan.
Pin This Recipe!
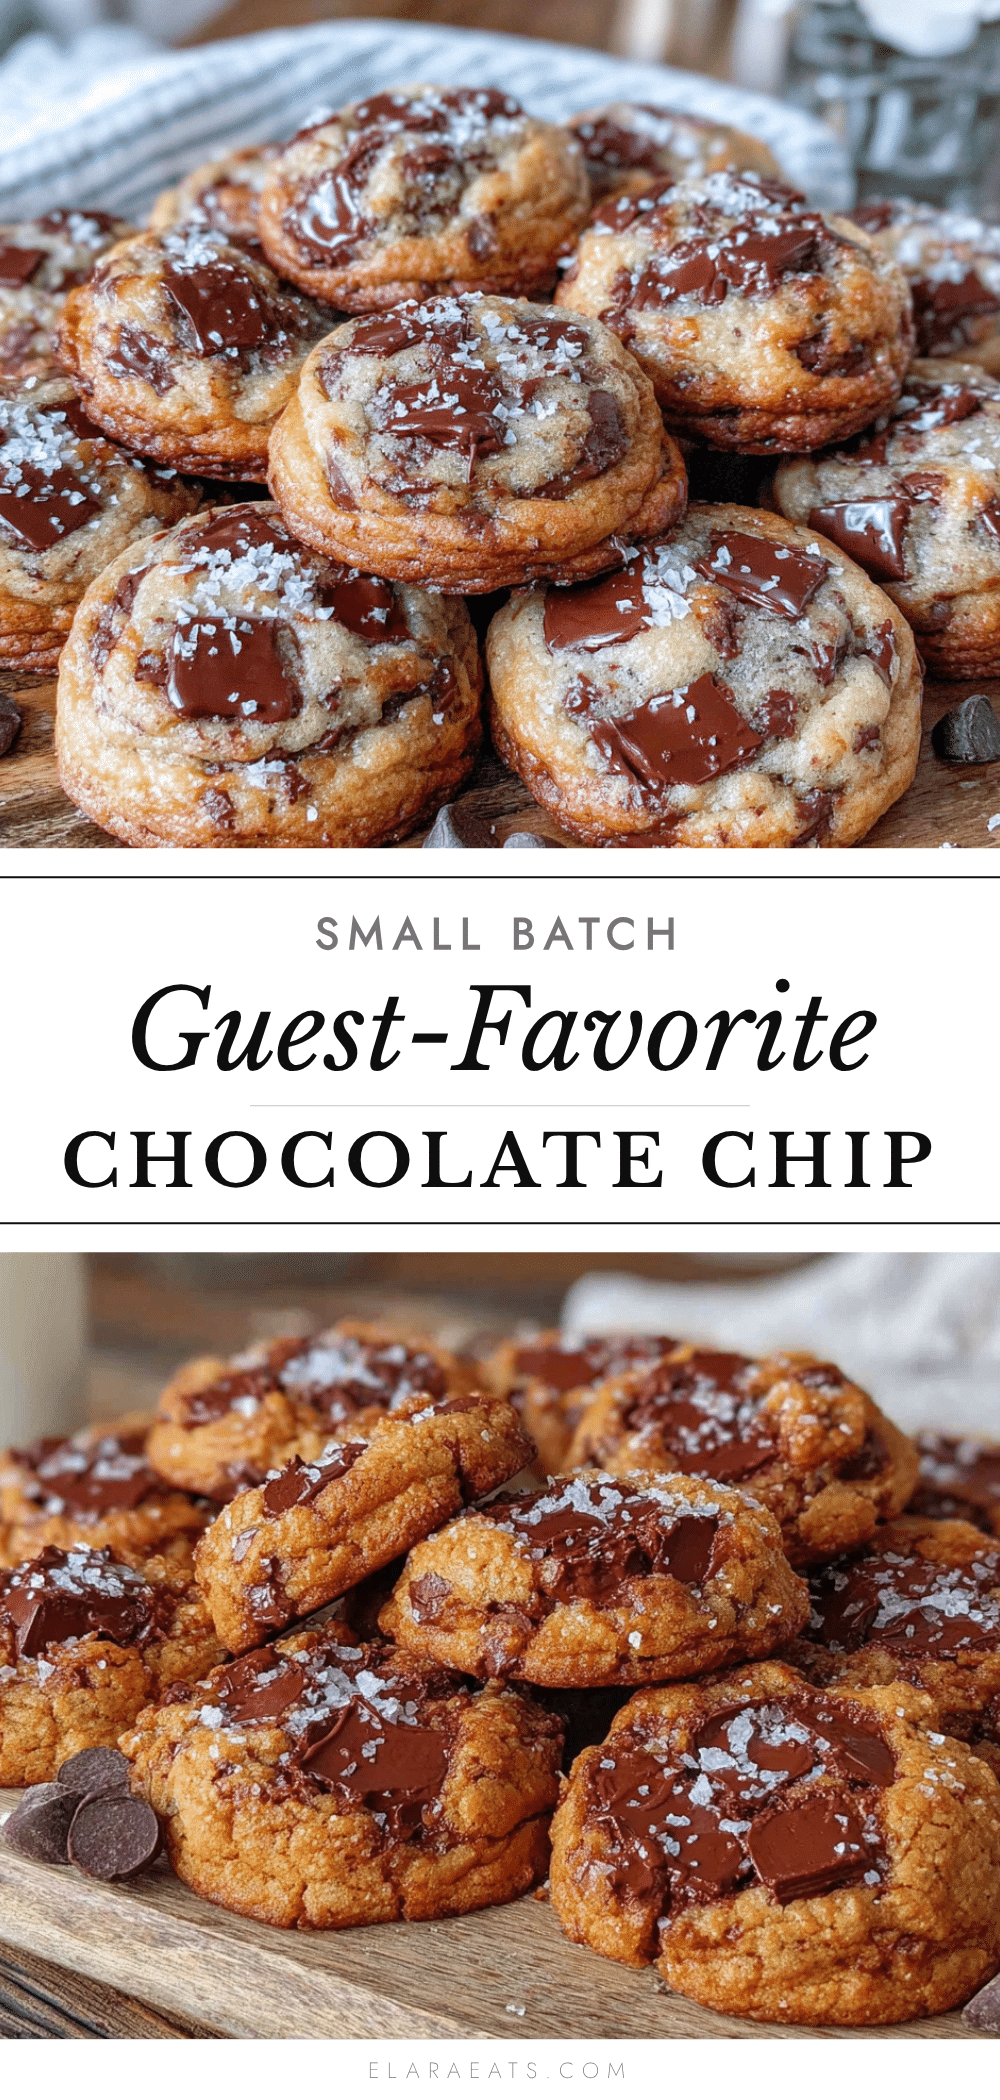
Best Small-Batch Chocolate Chip Cookies Recipe

This small-batch chocolate chip cookie recipe makes exactly 8 perfect cookies with crispy edges, chewy centers, and pools of melted chocolate. It’s quick, easy, and ideal for hosting without leftovers.
- Prep Time: 10 minutes
- Cook Time: 10 minutes
- Total Time: 20 minutes
- Yield: 8 cookies 1x
- Category: Dessert
- Cuisine: American
Ingredients
- 4 tablespoons unsalted butter, melted
- ¼ cup granulated sugar
- 2 tablespoons light brown sugar, packed
- 1 large egg yolk
- ½ teaspoon vanilla extract
- ½ cup plus 1 tablespoon all-purpose flour
- ¼ teaspoon baking soda
- ¼ teaspoon salt
- ⅓ cup semi-sweet chocolate chips
Instructions
- Preheat oven to 350°F (175°C). Line a baking sheet with parchment paper.
- Melt the butter in a microwave-safe bowl in 15-second bursts until just melted. Let cool slightly if hot.
- In a medium bowl, whisk together melted butter, granulated sugar, and brown sugar for about 30 seconds until smooth and glossy.
- Add egg yolk and vanilla extract; whisk until thick and paste-like.
- In a small bowl, whisk together flour, baking soda, and salt.
- Pour dry ingredients into wet mixture; fold with a rubber spatula until just combined (no streaks of flour).
- Fold in chocolate chips until evenly distributed. Dough will be thick and slightly sticky.
- Scoop dough into 8 equal balls (about 1.5 tablespoons each) and place on prepared baking sheet, spacing 2 inches apart.
- Bake for 9 to 11 minutes. At 9 minutes, edges should be golden and centers pale and puffy. For softer cookies, bake 9 minutes; for crisper, bake 11.
- Let cookies rest on baking sheet for 5 minutes, then transfer to a cooling rack. Serve warm.
Notes
For extra flavor, brown the butter instead of just melting it. Measure flour by spooning and leveling. Start checking cookies at 9 minutes. Let cookies cool on pan for 5 minutes before moving. Cookies are even better the next day.
Nutrition
- Serving Size: 1 cookie
- Calories: 195
- Sugar: 16
- Sodium: 95
- Fat: 11
- Saturated Fat: 7
- Carbohydrates: 24
- Fiber: 1
- Protein: 2
Keywords: small-batch chocolate chip cookies, easy cookie recipe, quick cookies, hosting dessert, chewy chocolate chip cookies


