Love this? Save it for later!
Share the inspiration with your friends
There used to be a tiny bakery tucked behind a vintage shop in my neighborhood that made a Black Velvet cake that haunted my dreams. When they closed suddenly two years ago—a handwritten sign on the door, just like that—I honestly felt a little lost. That cake was my go-to for every Halloween party, every spooky movie night, every October 31st that rolled around. After twelve tries—some so dry they crumbled into dust, one that looked more gray than black—I finally got it. This Best Black Velvet Halloween Layer Cake with Ganache Drip is the exact recreation of that bakery’s masterpiece, and let me tell you, it was worth every single failed batch.
The first time I attempted it, I forgot the buttermilk entirely and ended up with what I can only describe as a chocolate-flavored hockey puck. My kitchen looked like a crime scene—black cocoa powder everywhere, including somehow on the ceiling. But you know that feeling when you just know a recipe is in there somewhere, waiting for you to get it right? That kept me going. I called the bakery’s old number for weeks hoping someone would pick up and share the secret. No luck. So I did what any obsessed home baker would do—I reverse-engineered it, bite by bite, batch by batch.
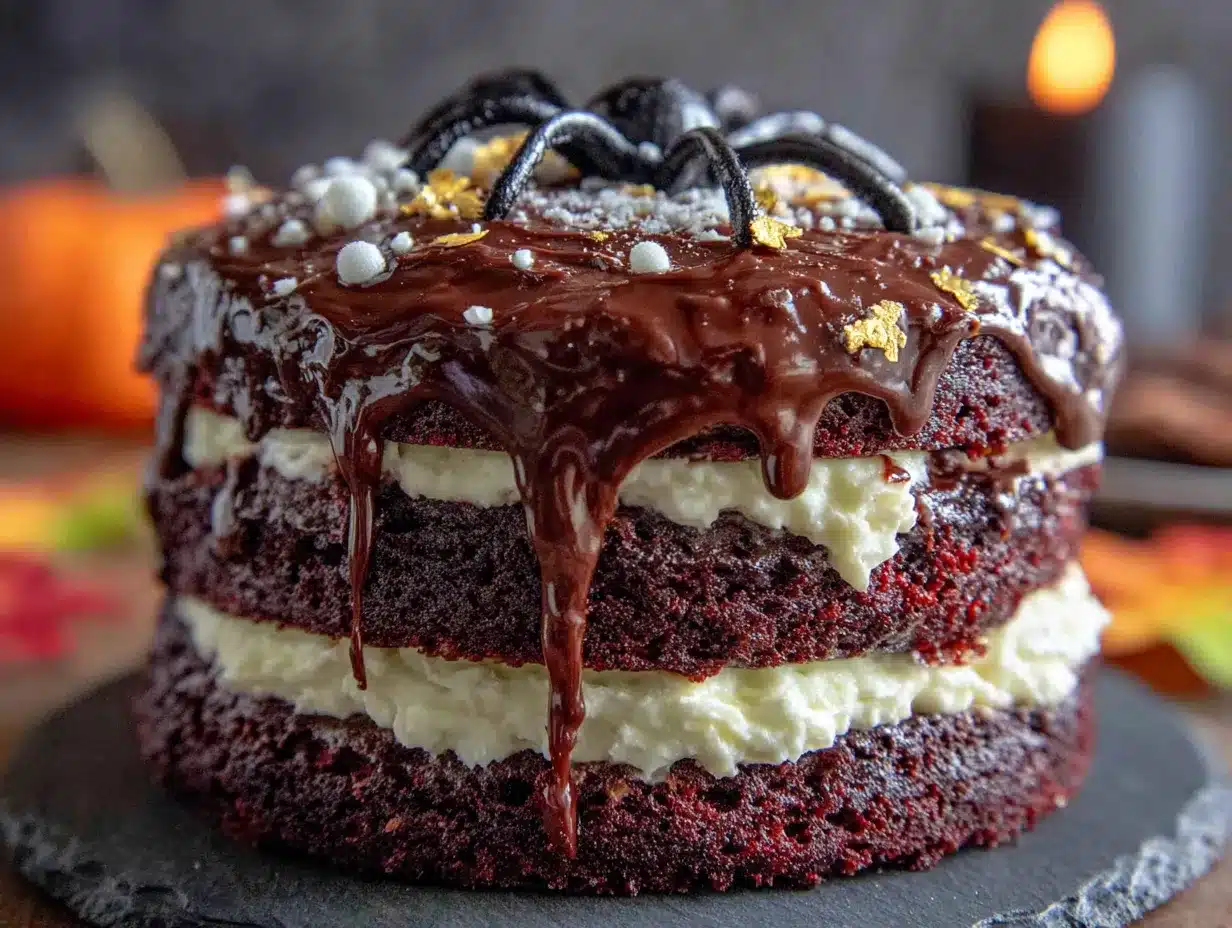
This cake is the result of that obsession. It’s impossibly moist, deeply chocolatey with that signature black velvet color, and topped with a glossy ganache drip that looks like it belongs in a professional bakery window. Maybe you’ve been there—chasing a recipe that feels just out of reach, tweaking and testing until it finally clicks. That’s this cake. And honestly, once you make it, you’ll understand why I couldn’t let it go.
Why You’ll Love This Recipe
This isn’t just another Halloween cake recipe. After testing this Black Velvet cake more times than I care to admit, I can confidently say it delivers on every level. Here’s what makes it stand out:
- Stunning Visual Impact: The deep black crumb against the white cream cheese frosting and dark chocolate ganache drip creates a showstopper that gets photographed before anyone dares cut into it.
- Perfectly Moist Texture: The combination of buttermilk, oil, and a specific mixing method gives you a tender crumb that stays moist for days—no dry cake here.
- Simple Ingredients: No specialty black food coloring required. Just black cocoa powder and a little gel coloring do the trick with ingredients you can find at any grocery store.
- Make-Ahead Friendly: The cake layers freeze beautifully, and the frosting and ganache can be prepared in advance. This is a stress-free showstopper.
- Crowd-Pleaser: Kids love the dramatic color, adults appreciate the sophisticated chocolate flavor, and everyone goes back for seconds.
What makes this version different from the rest? It’s the balance. So many black velvet cakes taste like artificial coloring or end up dry and crumbly. This one tastes like real chocolate—deep, rich, with that slight bitterness from the black cocoa that makes it feel grown-up. The cream cheese frosting cuts through the richness perfectly, and the ganache drip adds that professional finish without requiring a pastry degree. It’s the kind of cake that makes you close your eyes after the first bite. Honestly, it’s comfort food reimagined for Halloween—spooky on the outside, soul-soothing on the inside.
What Ingredients You Will Need
This recipe uses simple, wholesome ingredients to deliver that signature black velvet color and tender texture without any weird additives. Most of these are pantry staples, with a couple of special additions that make all the difference.
For the Black Velvet Cake Layers
- All-purpose flour, 2 ½ cups (315g) — spoon and level for accuracy
- Black cocoa powder, ½ cup (50g) — I prefer Rodelle or King Arthur for deepest color
- Unsweetened cocoa powder, ¼ cup (20g) — regular natural cocoa adds depth
- Baking soda, 1 ½ teaspoons
- Salt, 1 teaspoon
- Unsalted butter, ½ cup (113g), softened — adds richness
- Vegetable oil, ½ cup (120ml) — keeps the cake moist
- Granulated sugar, 2 cups (400g)
- Large eggs, 3, room temperature
- Vanilla extract, 2 teaspoons
- Buttermilk, 1 cup (240ml), room temperature — this is non-negotiable for texture
- Black gel food coloring, 1-2 teaspoons — Americolor Super Black works best
- Hot coffee, 1 cup (240ml), freshly brewed — enhances chocolate flavor
For the Cream Cheese Frosting
- Cream cheese, 16 oz (452g), softened — full-fat for best stability
- Unsalted butter, ½ cup (113g), softened
- Powdered sugar, 4 cups (480g), sifted
- Vanilla extract, 2 teaspoons
- Pinch of salt
For the Ganache Drip
- Semi-sweet chocolate chips, ½ cup (85g) — Ghirardelli gives a nice shine
- Heavy cream, ⅓ cup (80ml)
- Unsalted butter, 1 tablespoon (14g) — for that glossy finish
For Decoration (Optional)
- Halloween sprinkles — ghosts, pumpkins, or bats
- Chocolate spiders or candy eyes
- Edible glitter in orange or black
For the black cocoa powder, look for it in the baking aisle or order online. It’s what gives this cake its dramatic color and that Oreo-like flavor. If you can’t find it, you can use all regular cocoa and extra food coloring, but the flavor won’t be quite the same. I’ve tried both—trust me on this one.
Equipment Needed
You don’t need a professional bakery setup for this cake, but having the right tools makes the process smoother. Here’s what you’ll need:
- Three 8-inch round cake pans — I use Fat Daddio’s anodized aluminum pans for even baking
- Stand mixer or hand mixer — either works, but a stand mixer makes the frosting easier
- Parchment paper rounds — for lining the pans
- Cooling racks — at least two, so layers cool evenly
- Offset spatula — for smooth frosting application
- Turntable — not required but makes decorating much easier
- Bench scraper — for clean edges on the frosting
- Small saucepan — for making the ganache
- Piping bags or zip-top bags — for the ganache drip
- Kitchen scale — highly recommended for consistent results
If you don’t have three cake pans, you can bake in batches—just make sure to cool the batter between batches. I learned that the hard way when my second batch overflowed because the pan was still warm. A cake leveler or serrated knife helps if your layers dome, but honestly, a gentle press with a kitchen towel right out of the oven flattens them nicely too.
Preparation Method
Take your time with this one. Each step builds on the last, and rushing leads to a cake that doesn’t live up to its potential. Trust me—I’ve rushed, and I’ve regretted it.
- Preheat and Prep: Preheat your oven to 350°F (175°C). Grease three 8-inch cake pans, line the bottoms with parchment paper rounds, and dust lightly with cocoa powder instead of flour—it prevents white streaks on the dark cake. Set aside.
- Mix Dry Ingredients: In a large bowl, whisk together the all-purpose flour, black cocoa powder, natural cocoa powder, baking soda, and salt. Make sure there are no lumps—black cocoa tends to clump. Sift if necessary.
- Cream Butter and Oil: In the bowl of a stand mixer fitted with the paddle attachment, beat the softened butter, vegetable oil, and granulated sugar on medium speed for 3-4 minutes until light and fluffy. The mixture should look pale and increased in volume. Scrape down the bowl halfway through.
- Add Eggs and Vanilla: Add the eggs one at a time, beating well after each addition. Add the vanilla extract and beat until combined. The mixture might look slightly curdled at this point—that’s normal, don’t panic.
- Add Food Coloring: Add the black gel food coloring and beat on low until evenly distributed. The batter should look dark gray at this point. It will darken further with the cocoa and coffee.
- Alternate Dry and Wet: With the mixer on low speed, add the dry ingredients in three additions, alternating with the buttermilk in two additions. Start and end with the dry ingredients. Mix just until combined—overmixing makes the cake tough.
- Add Hot Coffee: With the mixer still on low, slowly pour in the hot coffee. The batter will be very thin—that’s exactly what you want. The coffee doesn’t make it taste like coffee; it just deepens the chocolate flavor. Scrape the bowl and give it one final stir.
- Divide and Bake: Divide the batter evenly among the three prepared pans, about 1 ½ cups each. Bake for 25-30 minutes, rotating the pans halfway through. The cakes are done when a toothpick inserted in the center comes out with a few moist crumbs, not wet batter. The tops should spring back when lightly touched.
- Cool Completely: Let the cakes cool in the pans for 10 minutes, then turn them out onto cooling racks. Remove the parchment paper and let them cool completely—at least 1 hour. Don’t rush this step. Warm cake will melt your frosting into a sad puddle.
- Make the Frosting: While the cakes cool, beat the softened cream cheese and butter together until smooth and creamy, about 2 minutes. Gradually add the sifted powdered sugar, one cup at a time, beating on low speed. Add the vanilla and salt, then increase to medium speed and beat for 2 minutes until light and fluffy. Don’t overbeat or the frosting will become too soft.
- Make the Ganache: Place the chocolate chips in a small heatproof bowl. Heat the heavy cream in a small saucepan until it just begins to simmer—small bubbles around the edge, not a rolling boil. Pour the hot cream over the chocolate chips and let sit for 2 minutes. Add the butter, then whisk gently until smooth and glossy. Let cool at room temperature for 15-20 minutes until it thickens to a drippy consistency.
- Assemble the Cake: Place one cake layer on your serving plate or cake board. Spread about ¾ cup of cream cheese frosting evenly on top. Repeat with the second layer and more frosting. Top with the third layer. Apply a thin crumb coat—a thin layer of frosting that seals in the crumbs—and refrigerate for 30 minutes.
- Frost the Cake: Apply the remaining frosting to the chilled cake, using an offset spatula and bench scraper for smooth sides. The black cake against the white frosting creates that dramatic Halloween look. Refrigerate for another 30 minutes.
- Add the Ganache Drip: Transfer the cooled ganache to a piping bag or zip-top bag with a small corner snipped off. Pipe small drips around the top edge of the cake, letting some run down the sides. Then pour the remaining ganache into the center and spread it to the edges with an offset spatula. Work quickly—ganache sets fast.
- Decorate and Serve: Add Halloween sprinkles, chocolate spiders, or candy eyes before the ganache sets completely. Refrigerate for 20 minutes to firm up, then bring to room temperature before serving. This cake tastes best after the flavors have melded for a few hours.
Cooking Tips & Techniques
After making this Black Velvet cake more times than I care to count, I’ve picked up a few tricks that make the difference between good and unforgettable. Here’s what I wish someone had told me:
Temperature Matters More Than You Think: Room temperature ingredients aren’t just a suggestion. Cold eggs and buttermilk will seize the butter and give you a dense, heavy cake. Leave everything out on the counter for at least an hour before starting. I once tried to speed this up by warming the buttermilk in the microwave—it curdled. Don’t be me.
Black Cocoa Is Thirsty: Black cocoa powder absorbs more liquid than regular cocoa. That’s why the batter seems thin—it needs that extra moisture. Don’t be tempted to add more flour. The thin batter bakes into the most tender cake you’ve ever had.
The Coffee Secret: I know it sounds weird, but don’t skip the hot coffee. It doesn’t make the cake taste like coffee at all. It just makes the chocolate taste more chocolatey. If you’re truly opposed, use hot water instead, but the flavor won’t be as deep.
Ganache Temperature Is Everything: If your ganache is too warm, it will run straight off the cake and pool on your plate. Too cold, and it won’t drip at all—it’ll just plop. The sweet spot is when it’s still liquid but thick enough to hold its shape for a second when you lift the spoon. Test a drip on the side of the bowl first.
Chill Between Steps: I cannot stress this enough. A chilled cake is a stable cake. The crumb coat needs that 30-minute chill to seal everything in. The final frosting needs that 30-minute chill to hold the ganache. Rushing this step is the number one reason homemade cakes look messy.
Variations & Adaptations
One of the best things about this recipe is how adaptable it is. Here are some variations I’ve tried and loved:
Gluten-Free Version: Substitute the all-purpose flour with a 1:1 gluten-free baking flour blend that contains xanthan gum. I’ve used Bob’s Red Mill with great results. The texture is slightly more delicate, so handle the layers gently when stacking.
Dairy-Free Adaptation: Use vegan butter sticks (not tub spread), full-fat coconut cream instead of buttermilk, and a dairy-free cream cheese alternative. For the ganache, use coconut cream instead of heavy cream. The flavor is slightly different but still delicious.
Cupcake Version: This batter makes about 24 cupcakes. Bake at 350°F (175°C) for 18-20 minutes. Pipe a swirl of cream cheese frosting on each and add a mini ganache drip. Perfect for Halloween parties.
Blood Drip Variation: For a spookier look, use red gel food coloring to tint half the ganache and create a “blood” drip effect. I did this for a zombie-themed party and people couldn’t stop talking about it.
Layer Flavor Twist: Add a layer of raspberry jam or blackberry preserves between the cake and frosting for a fruity surprise. The tartness cuts through the richness beautifully.
Serving & Storage Suggestions
This cake is best served at room temperature—the texture is softer, the frosting is creamier, and the ganache has just the right amount of give. Take it out of the refrigerator about 45 minutes before serving. Slice with a sharp serrated knife, wiping the blade clean between cuts for those perfect Instagram-worthy slices.
For storage, this cake keeps remarkably well. Cover any exposed cake with plastic wrap or store in an airtight cake carrier in the refrigerator for up to 5 days. The flavors actually deepen after a day or two—the black cocoa and cream cheese meld together in a way that’s even more satisfying than day one.
To freeze, place the unfrosted cake layers in the freezer on a baking sheet until solid, then wrap each layer tightly in plastic wrap and foil. They’ll keep for up to 3 months. When you’re ready to assemble, thaw the layers in the refrigerator overnight, then bring to room temperature before frosting. The ganache and frosting can also be made ahead and refrigerated—just bring the frosting to room temperature and rewhip before using, and gently reheat the ganache in the microwave in 10-second bursts.
Leftover cake slices can be wrapped individually and frozen for up to a month. Perfect for when you need a chocolate fix at 10 PM on a Tuesday. Not that I speak from experience or anything.
Nutritional Information & Benefits
Let’s be real—this is a celebration cake, not a health food. But here’s the estimated nutritional breakdown per slice (based on 14 servings):
| Nutrient | Amount per Slice |
|---|---|
| Calories | 485 |
| Total Fat | 28g |
| Saturated Fat | 15g |
| Cholesterol | 85mg |
| Sodium | 320mg |
| Total Carbohydrates | 56g |
| Dietary Fiber | 3g |
| Sugars | 40g |
| Protein | 6g |
That said, there are some redeeming qualities. Black cocoa powder is rich in antioxidants—more than regular cocoa. The buttermilk adds calcium and probiotics. And honestly, there’s something to be said for the mental health benefits of sharing a beautiful, homemade cake with people you love. That counts for something, right?
This recipe contains dairy, eggs, gluten, and chocolate. Not suitable for those with allergies to these ingredients unless substitutions are made.
Conclusion
This Best Black Velvet Halloween Layer Cake with Ganache Drip is more than just a recipe—it’s the result of obsession, persistence, and a whole lot of failed attempts. It’s the cake I chased for two years, the one that finally brought that closed bakery back to life in my kitchen. And now it can be yours too.
What I love most about this cake is how it brings people together. There’s something magical about watching someone’s face light up when they see that dramatic black crumb against the white frosting. It’s a conversation starter, a photo moment, and honestly, just a really, really good cake.
I’d love to hear how yours turns out. Did you add your own twist? Did the ganache drip perfectly on the first try? Share your photos and stories in the comments below—I read every single one. And if you make this for a Halloween party, tag me so I can see your masterpiece. Happy baking, friend. You’ve got this.
Frequently Asked Questions
Can I use regular cocoa powder instead of black cocoa?
You can, but the cake won’t be as dark or have that distinctive Oreo-like flavor. If using regular cocoa, increase the black gel food coloring to 2-3 teaspoons to achieve a similar color. The texture will still be great, but the flavor profile will be different.
Why did my cake layers dome so much?
Doming happens when the oven temperature is too high or the batter is overmixed. Try reducing your oven temperature by 25°F and make sure you’re not overbeating the batter after adding the flour. Also, using cake strips around your pans helps create flat layers.
Can I make this cake ahead of time?
Absolutely. You can bake the cake layers up to 2 days in advance and store them wrapped tightly at room temperature. The frosting can be made 3 days ahead and refrigerated. The assembled cake keeps in the refrigerator for up to 5 days. Just bring to room temperature before serving.
My ganache is too runny—what did I do wrong?
The most common cause is the cream being too hot when added to the chocolate, or not letting the ganache cool enough before using. If it’s too runny, let it sit at room temperature for another 10-15 minutes, stirring occasionally. If it’s still too thin, add a few more chocolate chips and stir until melted.
How do I get clean slices without the cake crumbling?
Use a sharp serrated knife and run it under hot water, drying it off between each cut. The heat helps the knife glide through the frosting and cake without dragging. Wipe the blade clean after each slice for the best presentation.
Pin This Recipe!
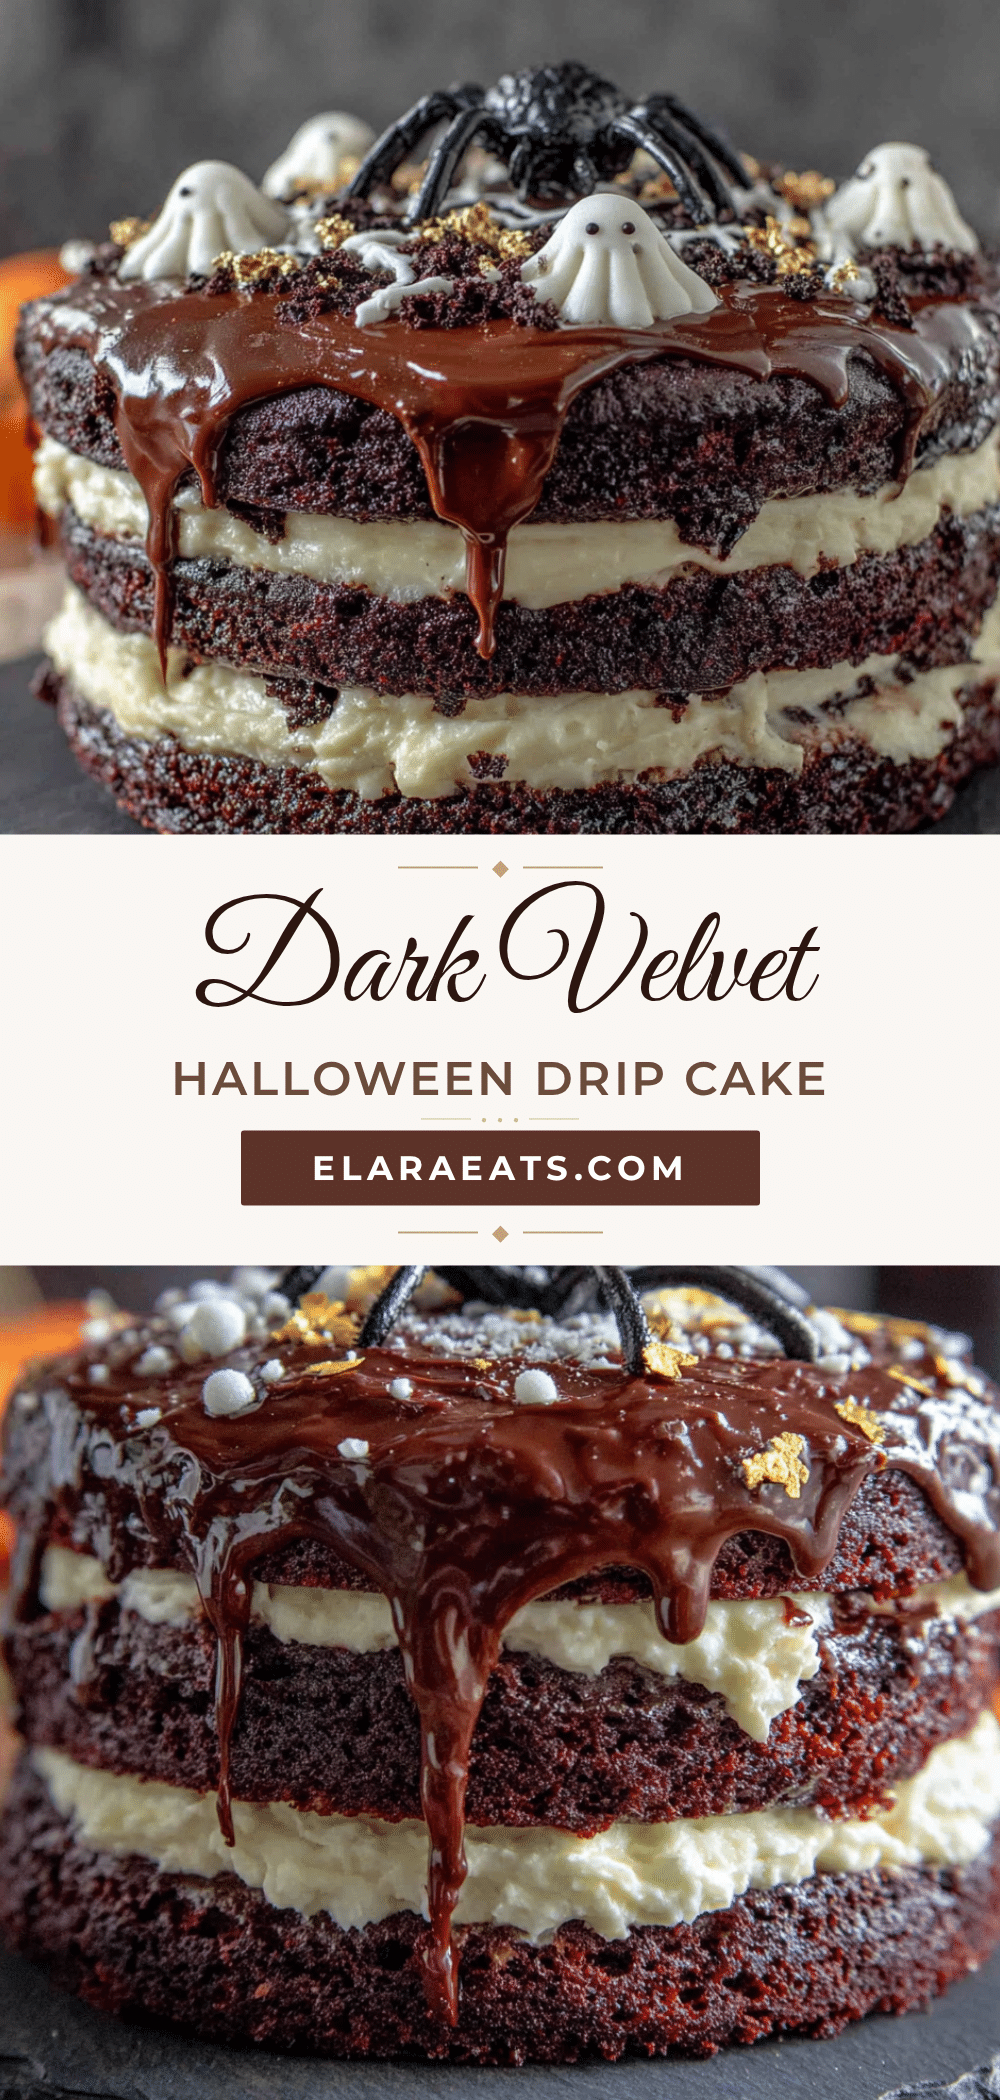
Best Black Velvet Halloween Layer Cake with Easy Ganache Drip
This Best Black Velvet Halloween Layer Cake with Ganache Drip is the exact recreation of a beloved bakery’s masterpiece—impossibly moist, deeply chocolatey with that signature black velvet color, and topped with a glossy ganache drip that looks like it belongs in a professional bakery window.
- Prep Time: 30 minutes
- Cook Time: 30 minutes
- Total Time: 1 hour 30 minutes
- Yield: 14 servings 1x
- Category: Dessert
- Cuisine: American
Ingredients
- 2 ½ cups (315g) all-purpose flour
- ½ cup (50g) black cocoa powder
- ¼ cup (20g) unsweetened cocoa powder
- 1 ½ teaspoons baking soda
- 1 teaspoon salt
- ½ cup (113g) unsalted butter, softened
- ½ cup (120ml) vegetable oil
- 2 cups (400g) granulated sugar
- 3 large eggs, room temperature
- 2 teaspoons vanilla extract
- 1 cup (240ml) buttermilk, room temperature
- 1–2 teaspoons black gel food coloring
- 1 cup (240ml) hot coffee, freshly brewed
- 16 oz (452g) cream cheese, softened
- ½ cup (113g) unsalted butter, softened
- 4 cups (480g) powdered sugar, sifted
- 2 teaspoons vanilla extract
- Pinch of salt
- ½ cup (85g) semi-sweet chocolate chips
- ⅓ cup (80ml) heavy cream
- 1 tablespoon (14g) unsalted butter
- Halloween sprinkles (optional)
- Chocolate spiders or candy eyes (optional)
- Edible glitter in orange or black (optional)
Instructions
- Preheat oven to 350°F (175°C). Grease three 8-inch cake pans, line bottoms with parchment paper rounds, and dust lightly with cocoa powder.
- In a large bowl, whisk together flour, black cocoa powder, natural cocoa powder, baking soda, and salt. Sift if necessary to remove lumps.
- In the bowl of a stand mixer fitted with the paddle attachment, beat butter, vegetable oil, and sugar on medium speed for 3-4 minutes until light and fluffy.
- Add eggs one at a time, beating well after each addition. Add vanilla extract and beat until combined.
- Add black gel food coloring and beat on low until evenly distributed.
- With mixer on low, add dry ingredients in three additions, alternating with buttermilk in two additions, starting and ending with dry ingredients. Mix just until combined.
- With mixer on low, slowly pour in hot coffee. Batter will be thin. Scrape bowl and stir once more.
- Divide batter evenly among prepared pans (about 1 ½ cups each). Bake for 25-30 minutes, rotating pans halfway through. Cakes are done when a toothpick inserted in center comes out with a few moist crumbs.
- Let cakes cool in pans for 10 minutes, then turn out onto cooling racks. Remove parchment paper and cool completely (at least 1 hour).
- For frosting: Beat softened cream cheese and butter together until smooth and creamy, about 2 minutes. Gradually add sifted powdered sugar, one cup at a time, beating on low. Add vanilla and salt, then increase to medium speed and beat for 2 minutes until light and fluffy.
- For ganache: Place chocolate chips in a small heatproof bowl. Heat heavy cream in a small saucepan until it just begins to simmer. Pour hot cream over chocolate chips and let sit for 2 minutes. Add butter, then whisk gently until smooth and glossy. Let cool at room temperature for 15-20 minutes until drippy consistency.
- Assemble cake: Place one cake layer on serving plate. Spread about ¾ cup cream cheese frosting evenly on top. Repeat with second layer and more frosting. Top with third layer. Apply a thin crumb coat and refrigerate for 30 minutes.
- Apply remaining frosting to chilled cake, using offset spatula and bench scraper for smooth sides. Refrigerate for another 30 minutes.
- Transfer cooled ganache to a piping bag or zip-top bag with a small corner snipped off. Pipe small drips around top edge of cake, letting some run down sides. Pour remaining ganache into center and spread to edges with offset spatula.
- Add Halloween sprinkles, chocolate spiders, or candy eyes before ganache sets completely. Refrigerate for 20 minutes to firm up, then bring to room temperature before serving.
Notes
Room temperature ingredients are crucial for best texture. Black cocoa powder absorbs more liquid, so don’t add extra flour. The hot coffee deepens chocolate flavor without adding coffee taste. Chill cake between steps for clean assembly. Ganache should be drippy but not runny—test on bowl first.
Nutrition
- Serving Size: 1 slice
- Calories: 485
- Sugar: 40
- Sodium: 320
- Fat: 28
- Saturated Fat: 15
- Carbohydrates: 56
- Fiber: 3
- Protein: 6
Keywords: black velvet cake, Halloween cake, layer cake, chocolate cake, ganache drip, cream cheese frosting, black cocoa


