Love this? Save it for later!
Share the inspiration with your friends
My kid had sworn off breakfast. For three straight months. Every morning was the same battle—cereal went soggy, toast got ignored, and I was this close to just handing him a granola bar in the car and calling it a win. Then Teacher Appreciation Week rolled around, and his classroom was doing a “breakfast bar” for the staff. Parents were supposed to bring something easy, portable, and preferably not a donut. I signed up without thinking, then panicked. What do you even make that won’t turn into a sad, lukewarm mess by 9 AM?
That’s when I stumbled onto these overnight oats. Honestly, I was skeptical. Oats soaked in milk overnight? It sounded like something that would taste like wet cardboard. But I had a jar of maple syrup, some vanilla, and a bag of frozen berries I needed to use up. I threw it together one Tuesday night, forgot about it, and found my kid standing at the fridge the next morning, spoon in hand, eating straight from the jar. “Can you make this for Mrs. Davis?” he asked, mouth half-full. That was the moment I knew I had something good.
These overnight oats became my go-to for every teacher event that week. They’re the kind of recipe that makes you look like you planned ahead when really, you just didn’t want to deal with a hot stove at 6 AM. Maybe you’ve been there—standing in your kitchen, trying to figure out how to show appreciation without spending your whole evening cooking. These oats are that solution. They’re creamy, naturally sweet, and they actually keep you full through a morning of grading papers or chasing toddlers. I keep making them because they work, no matter how chaotic the week gets.
Why You’ll Love This Recipe
Let me tell you why these overnight oats have become my secret weapon for Teacher Appreciation Week. I’ve tested this recipe about a dozen times, tweaking the ratios and toppings until it felt just right. It passed the “kid test” and the “tired teacher test” with flying colors.
- Quick & Easy: Comes together in under 10 minutes. You mix everything in a jar, pop it in the fridge, and breakfast is done before you’ve even finished your coffee.
- Simple Ingredients: You probably have rolled oats, milk, yogurt, and maple syrup in your kitchen right now. No fancy grocery trips required.
- Perfect for Teacher Appreciation Week: These are portable, mess-free, and can sit out on a staff room table without going bad. Teachers can grab one between classes or during a quick break.
- Crowd-Pleaser: I’ve brought these to three different school events and they disappeared every single time. Even the teachers who claimed they “don’t like oatmeal” asked for the recipe.
- Unbelievably Delicious: The texture is what gets people. It’s creamy without being mushy, and the berries burst with sweetness overnight. It’s comfort food that feels indulgent but is actually pretty wholesome.
What makes this recipe different from all the other overnight oat recipes out there? It’s the ratio. I spent a few weeks getting the milk-to-oats balance just right so you don’t end up with a soupy mess or a dry brick. The secret is a splash of Greek yogurt for creaminess and a pinch of salt that makes everything pop. This isn’t just another version—it’s the one that actually works on a busy morning.
This recipe is the kind that makes you close your eyes after the first bite. It’s comfort food reimagined—healthier, faster, but with the same soul-soothing satisfaction. Perfect for showing your kid’s teacher you care without adding more stress to your plate.
What Ingredients You Will Need
This recipe uses simple, wholesome ingredients that come together to deliver a creamy, naturally sweet breakfast without any fuss. Most of these are pantry staples you probably already have on hand.
- Rolled oats (1 cup / 90g) – Use old-fashioned rolled oats for the best texture. Quick oats will turn mushy, and steel-cut oats won’t soften enough overnight. I prefer Bob’s Red Mill for consistent results.
- Milk (1 cup / 240ml) – Whole milk gives the creamiest result, but 2% or oat milk work great too. If you’re using a dairy-free option, go with unsweetened vanilla almond milk for extra flavor.
- Greek yogurt (1/2 cup / 120g) – This adds thickness and a tangy richness. Plain yogurt works best—vanilla-flavored can make it too sweet. For a dairy-free option, use coconut yogurt.
- Maple syrup (2 tablespoons / 30ml) – Pure maple syrup adds a warm, natural sweetness. Honey works as a substitute, but maple has a deeper flavor that pairs beautifully with the oats.
- Chia seeds (1 tablespoon / 12g) – These little seeds are the magic ingredient. They absorb liquid and create that pudding-like texture. Plus, they’re packed with omega-3s and fiber.
- Vanilla extract (1 teaspoon / 5ml) – Pure vanilla extract makes a difference here. Imitation vanilla can taste artificial, so spring for the real stuff if you can.
- Mixed berries (1/2 cup / 75g) – Fresh or frozen both work. I use frozen wild blueberries in winter because they’re smaller and burst more evenly. In summer, fresh strawberries or raspberries are lovely.
- Pinch of salt (1/8 teaspoon) – Don’t skip this. Salt balances the sweetness and makes the oat flavor pop. Trust me on this one.
- Optional toppings – Sliced almonds, shredded coconut, or a drizzle of almond butter for extra crunch and protein.
For substitution guidance, you can swap the Greek yogurt with dairy-free coconut yogurt if needed. Use almond flour instead of oats? That won’t work here—oats are essential for the texture. But you can use certified gluten-free oats if you’re cooking for someone with celiac disease.
Equipment Needed
You don’t need fancy equipment for these overnight oats. That’s part of the beauty.
- Mason jars or small containers (4 to 8-ounce size) – Wide-mouth jars are easiest for eating straight from the jar. I’ve used old pasta sauce jars too—just wash them well and they work fine.
- Measuring cups and spoons – For accuracy. Eyeballing it can lead to a watery mess or a dry brick.
- A small bowl or liquid measuring cup – For mixing the wet ingredients before pouring them over the oats. This prevents clumps.
- A spoon or whisk – For stirring everything together. A fork works in a pinch.
- A refrigerator – Obvious, but worth mentioning. These need at least 4 hours to set, but overnight is best.
If you don’t have mason jars, any airtight container works. I’ve used plastic meal prep containers and even a cereal bowl covered with plastic wrap. The key is a tight seal so the oats don’t dry out or absorb fridge odors. For budget-friendly options, dollar store containers are totally fine—just make sure they’re food-safe.
One tip I learned the hard way: don’t use metal containers. The oats can develop a metallic taste after sitting overnight. Stick with glass or BPA-free plastic.
Preparation Method
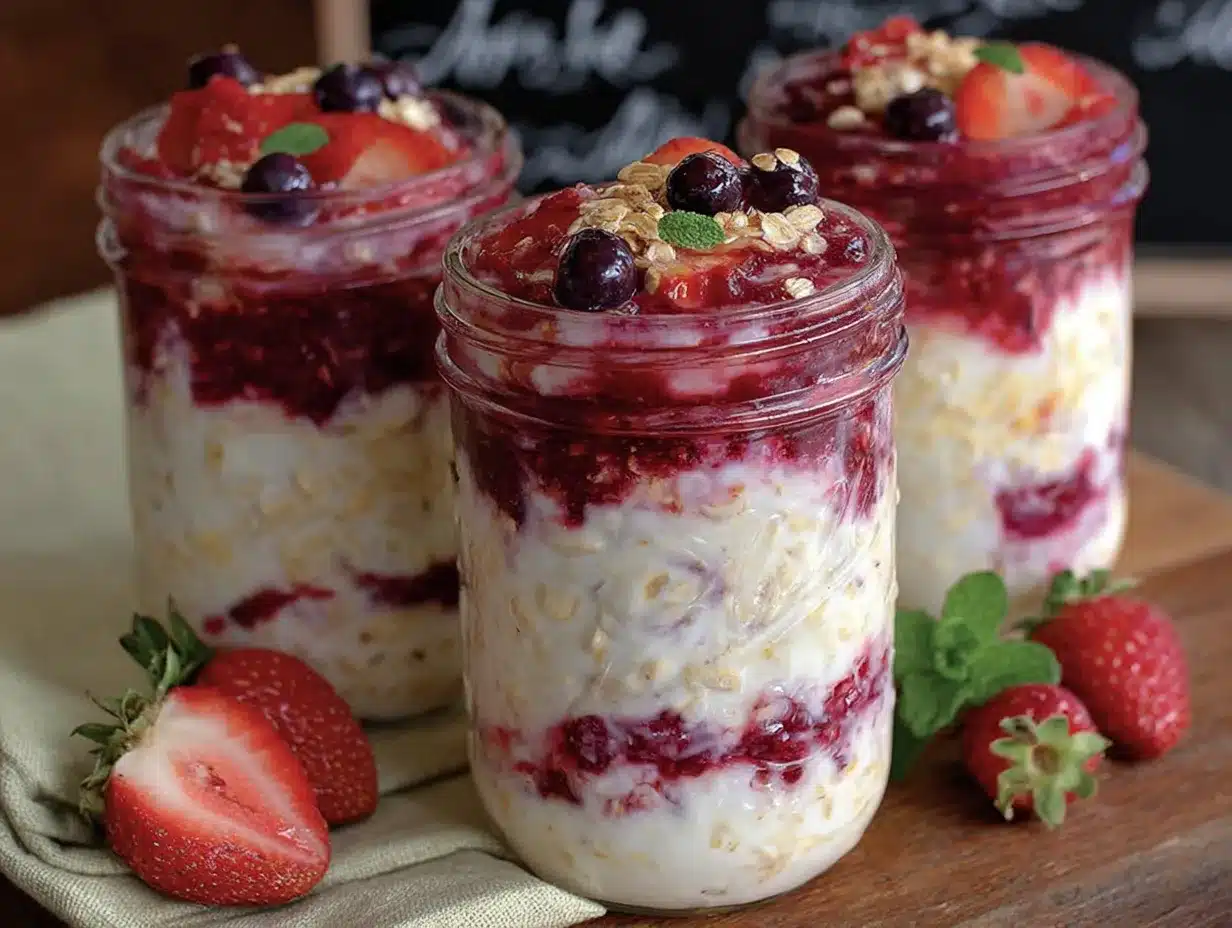
Making these overnight oats is almost embarrassingly simple. But there are a few tricks that make the difference between good oats and “can I have the recipe?” oats.
- Mix the wet ingredients first. In a small bowl or liquid measuring cup, whisk together 1 cup of milk, 1/2 cup of Greek yogurt, 2 tablespoons of maple syrup, 1 teaspoon of vanilla extract, and a pinch of salt. Whisk until the yogurt is fully incorporated and the mixture looks smooth. This takes about 30 seconds. (I learned this step after making lumpy oats for a week—mixing the wet stuff first prevents yogurt clumps.)
- Combine the dry ingredients. In each jar or container, add 1 cup of rolled oats and 1 tablespoon of chia seeds. Give them a quick stir so the chia seeds are evenly distributed. If you skip this, the chia seeds can clump together and form weird gelatinous blobs.
- Pour the wet mixture over the dry. Divide the milk-yogurt mixture evenly between your jars. For standard 8-ounce jars, this fills them about halfway. Don’t fill to the top—you need room for toppings and expansion as the oats absorb liquid.
- Stir everything together. Use a spoon to mix the oats, chia seeds, and liquid until everything is evenly combined. The mixture should look soupy at this point—that’s normal. The oats will absorb the liquid overnight.
- Add the berries. Gently fold in 1/2 cup of mixed berries per jar. If using frozen berries, don’t thaw them first—they’ll release their juices as they sit, creating a natural berry swirl. Fresh berries can be added whole or sliced.
- Seal and refrigerate. Put the lids on your jars and place them in the refrigerator. Let them sit for at least 4 hours, but overnight is best. The longer they sit, the creamier they get.
- Serve cold or at room temperature. In the morning, grab a jar from the fridge. Give it a good stir—the chia seeds settle at the bottom, so mixing redistributes everything. Add your favorite toppings like sliced almonds or a drizzle of almond butter. Eat straight from the jar or pour into a bowl.
One thing to watch for: if your oats look too thick in the morning, stir in a splash of milk to loosen them up. If they look too thin, they probably need more time—pop them back in the fridge for another hour. The texture should be creamy, like a thick pudding, not runny.
Total prep time is about 10 minutes. Active cooking time is zero. That’s the magic of overnight oats.
Cooking Tips & Techniques
After making these oats at least twenty times, I’ve picked up a few tricks that make the process smoother and the results better.
Don’t skip the chia seeds. I know they’re optional in some recipes, but here they’re essential. They absorb excess liquid and create that creamy, pudding-like texture. Without them, your oats can end up watery. I once forgot to add them and ended up with a jar of sad, soggy oats—never again.
Use room temperature yogurt. Cold yogurt straight from the fridge can make the mixture clumpy. Let it sit on the counter for 10 minutes before mixing. If you’re in a rush, whisk it vigorously to break up any lumps.
Layer your toppings strategically. If you’re adding crunchy toppings like nuts or granola, wait until just before serving to add them. Otherwise, they’ll get soft and lose their crunch. Berries can go in overnight—they’ll soften and release their juices, which is actually delicious.
Make a big batch on Sunday. These oats keep in the fridge for up to 5 days. I make 5 jars every Sunday night and grab one each morning. It saves me from the morning scramble and ensures I actually eat breakfast.
Watch the sweetness level. Different brands of yogurt and milk vary in sweetness. If you’re using vanilla yogurt or sweetened milk, cut back on the maple syrup to 1 tablespoon. Taste the mixture before refrigerating—it should be slightly sweeter than you want because the oats will mellow the sweetness overnight.
One mistake I made early on: I used steel-cut oats thinking they’d be healthier. They stayed hard and crunchy even after 12 hours. Stick with rolled oats—they’re the sweet spot between texture and nutrition.
Variations & Adaptations
This recipe is endlessly adaptable. Here are a few variations I’ve tried and loved.
Peanut Butter & Jelly Version: Swirl in 2 tablespoons of peanut butter and swap the berries for 1/4 cup of strawberry jam. The peanut butter adds protein and makes it extra filling. My kid calls these “lunchbox oats” and requests them weekly.
Vegan Option: Use unsweetened almond milk and dairy-free coconut yogurt. Substitute maple syrup with agave or date syrup. The texture is slightly less creamy but still delicious. I tested this with oat milk and it worked beautifully.
High-Protein Version: Add a scoop of vanilla protein powder when mixing the wet ingredients. Increase the milk by 2 tablespoons to compensate for the extra powder. This version keeps me full through a 3-hour morning meeting.
Seasonal Twist: In fall, swap the berries for diced apple and a sprinkle of cinnamon. In winter, use frozen cherries and a dash of almond extract. In spring, fresh strawberries and a dollop of lemon curd are incredible.
Low-Sugar Option: Skip the maple syrup and use mashed banana as the sweetener. The banana adds natural sweetness and a creamy texture. Just make sure the banana is very ripe—brown spots are your friend here.
Chocolate Version: Add 1 tablespoon of cocoa powder to the dry ingredients and use chocolate almond milk. Top with dark chocolate shavings. This one feels like dessert for breakfast, and teachers absolutely love it.
For allergen substitutions, sunflower seed butter works instead of peanut butter, and certified gluten-free oats are available for gluten sensitivity. Always check labels if you’re cooking for someone with severe allergies.
Serving & Storage Suggestions
These overnight oats are best served cold, straight from the fridge. The chilled texture is part of what makes them so refreshing, especially on warm spring mornings during Teacher Appreciation Week.
For presentation, I layer the oats in clear mason jars so you can see the creamy oats with the berry swirl at the bottom. Top with a sprinkle of sliced almonds and a few fresh berries right before serving. It looks pretty enough for a brunch table but simple enough for a weekday grab-and-go.
For a teacher appreciation event, I arrange the jars in a basket with a handwritten tag that says “Thanks for helping me grow!” tied to each one with twine. It’s a small touch that makes a big impression.
Storage instructions: Keep the jars sealed in the refrigerator for up to 5 days. Do not freeze—the texture becomes watery and unpleasant after thawing. If you want to prep further ahead, mix the dry ingredients (oats, chia seeds, salt) in a bag and store at room temperature. Add the wet ingredients and berries the night before you plan to serve them.
Reheating tips: These are meant to be eaten cold, but if you prefer warm oats, microwave the jar for 45-60 seconds (remove the metal lid first!). Stir well and add a splash of milk to restore creaminess. The berries will become jammy and delicious when heated.
One thing I’ve noticed: the flavors get better after the second day. The berries break down more, the oats absorb all the vanilla goodness, and the texture becomes perfectly creamy. So if you’re making these for a Friday event, Thursday is actually the ideal prep day.
Nutritional Information & Benefits
Here’s the estimated nutrition for one serving (based on the base recipe with whole milk and no toppings):
- Calories: 285
- Protein: 12g
- Carbohydrates: 42g
- Fiber: 8g
- Sugar: 16g (natural from berries and maple syrup)
- Fat: 7g
- Calcium: 15% of daily value
- Iron: 10% of daily value
The health benefits here are solid. Rolled oats are a great source of soluble fiber, which helps lower cholesterol and keeps you full. Chia seeds add omega-3 fatty acids and extra fiber. Greek yogurt provides protein and probiotics for gut health. Berries are packed with antioxidants that support immune function—something teachers definitely need during spring allergy season.
This recipe is naturally vegetarian and can be made gluten-free with certified oats. It’s also nut-free if you skip the almond toppings, making it safe for most classroom environments. The only potential allergen is dairy from the milk and yogurt, which can be substituted as noted above.
From a personal wellness perspective, I love that these oats give me steady energy without a sugar crash. They’re satisfying without being heavy, and I never feel sluggish after eating them. That’s a win in my book.
Conclusion
These overnight oats have become my go-to for showing appreciation without adding stress to my week. They’re simple enough for a busy Tuesday morning but thoughtful enough to make a teacher feel seen. The creamy texture, the burst of berries, the way the oats soak up all that vanilla goodness—it just works.
I encourage you to make this recipe your own. Swap in your favorite fruits, adjust the sweetness to your taste, or try the peanut butter version that my kid can’t get enough of. The beauty of overnight oats is that they’re forgiving. Mess up the ratio? Add a splash of milk. Want more protein? Toss in some seeds. It’s hard to go wrong.
Honestly, I love this recipe because it reminds me that showing gratitude doesn’t have to be complicated. Sometimes the smallest gestures—a jar of oats, a handwritten note, a few minutes of prep—mean the most. If you make these for your kid’s teacher, I’d love to hear how they turned out. Drop a comment below or tag me in your photos. Happy Teacher Appreciation Week!
Frequently Asked Questions
Can I use quick oats instead of rolled oats?
You can, but the texture will be much softer and almost mushy. Rolled oats hold their shape better and give you that satisfying chewy texture. If you only have quick oats, reduce the milk by 2 tablespoons and only let them sit for 4 hours instead of overnight.
How long do overnight oats last in the fridge?
They’ll stay fresh for up to 5 days in an airtight container. The texture gets creamier over time, but after day 5 the oats can start to break down and become too soft. I recommend making a batch on Sunday and eating them through Thursday.
Can I make these without yogurt?
Yes, but the texture will be thinner and less creamy. Replace the yogurt with an equal amount of milk or a mashed banana for natural creaminess. The banana version is actually my second-favorite variation—it adds sweetness and a silky texture.
Are these oats safe for nut-free classrooms?
Yes, as long as you skip the almond toppings and use a nut-free milk like oat or soy milk. The base recipe with berries is naturally nut-free. Just double-check your chia seed and oat labels for cross-contamination warnings if allergies are severe.
Can I double this recipe for a big group?
Absolutely. The recipe scales perfectly—just multiply all ingredients by the number of servings you need. For a class of 25, use 25 cups of oats, 25 cups of milk, and so on. Mix everything in a large bowl before dividing into individual jars for even distribution.
Pin This Recipe!
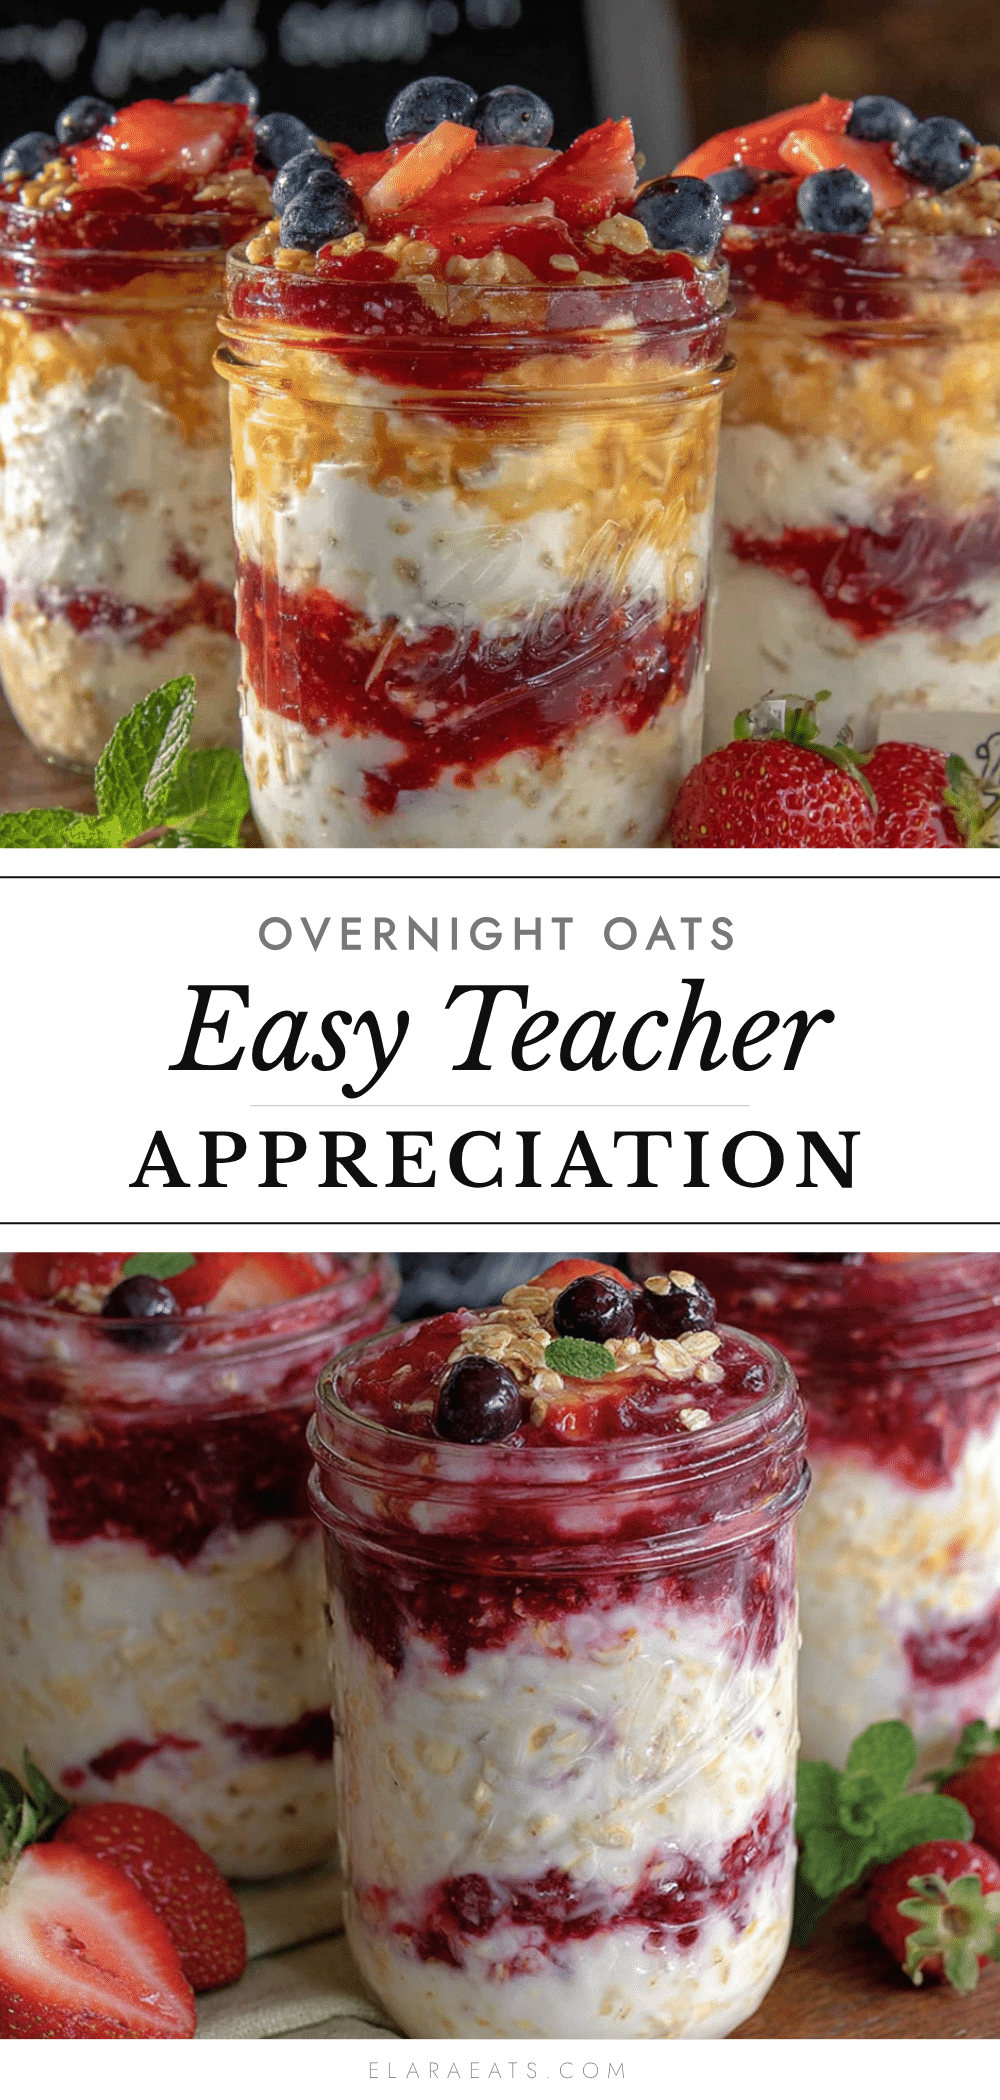
The Best Overnight Oats for Teacher Appreciation Week

Creamy, naturally sweet overnight oats that are perfect for showing appreciation without adding stress to your week. Made with simple ingredients and ready in under 10 minutes, these portable jars are a crowd-pleaser for teachers and busy mornings alike.
- Prep Time: 10 minutes
- Cook Time: 0 minutes
- Total Time: 10 minutes (plus 4 hours to overnight chilling)
- Yield: 4 servings 1x
- Category: Breakfast
- Cuisine: American
Ingredients
- 1 cup (90g) rolled oats
- 1 cup (240ml) milk (whole, 2%, or oat milk)
- 1/2 cup (120g) Greek yogurt (plain)
- 2 tablespoons (30ml) pure maple syrup
- 1 tablespoon (12g) chia seeds
- 1 teaspoon (5ml) vanilla extract
- 1/2 cup (75g) mixed berries (fresh or frozen)
- 1/8 teaspoon salt
- Optional toppings: sliced almonds, shredded coconut, or almond butter
Instructions
- In a small bowl or liquid measuring cup, whisk together milk, Greek yogurt, maple syrup, vanilla extract, and salt until smooth.
- In each jar or container, add rolled oats and chia seeds. Stir to distribute chia seeds evenly.
- Pour the wet mixture over the dry ingredients, dividing evenly among jars. Stir until well combined.
- Gently fold in mixed berries. If using frozen berries, do not thaw first.
- Seal jars and refrigerate for at least 4 hours, preferably overnight.
- In the morning, stir well. Add a splash of milk if too thick. Top with optional toppings and serve cold or at room temperature.
Notes
For best texture, use rolled oats (not quick or steel-cut). Chia seeds are essential for creamy texture. Oats keep in fridge for up to 5 days. Do not freeze. For warm oats, microwave for 45-60 seconds (remove metal lid). Flavors improve after day 2.
Nutrition
- Serving Size: 1 jar (about 1 cup)
- Calories: 285
- Sugar: 16
- Sodium: 150
- Fat: 7
- Saturated Fat: 2
- Carbohydrates: 42
- Fiber: 8
- Protein: 12
Keywords: overnight oats, teacher appreciation, easy breakfast, healthy breakfast, make-ahead breakfast, berry oats, no-cook breakfast


