Love this? Save it for later!
Share the inspiration with your friends
My roommate swore she hated the whole idea of those Uncrustables sandwiches. For years, she’d roll her eyes every time I pulled one out of the freezer, muttering about “processed mystery sandwiches.” Then one lazy Sunday afternoon, I whipped up a batch of Easy Homemade Uncrustables Peanut Butter Jelly Sandwiches just for myself while she was busy with her phone. Later, I caught her sneaking into the kitchen — not for coffee or chips, but for one of those sealed, crustless beauties. Honestly, that moment felt like a quiet victory.
Let me tell you, making these at home changed everything. The way the peanut butter and jelly meld just right between soft, crustless bread — it’s comfort food with a little extra thought and care. Maybe you’ve been there, standing in the grocery aisle debating between the prepackaged sandwiches and making your own. This recipe is my gentle nudge toward the homemade side, no pressure, just delicious results.
What makes these sandwiches stick with me (and my skeptical roommate) is how simple, quick, and satisfying they are. No weird preservatives, no questionable ingredients — just classic peanut butter and jelly, sealed tight for snack-time magic. And yes, I’ve made a mess or two trying to get the edges perfect, but that’s all part of the charm. These Easy Homemade Uncrustables Peanut Butter Jelly Sandwiches now show up regularly in our fridge, ready to save the day whenever hunger strikes.
Why You’ll Love This Recipe
This Easy Homemade Uncrustables Peanut Butter Jelly Sandwiches recipe ticks all the boxes if you’re looking for fuss-free, tasty snacks that feel both nostalgic and fresh. I’ve tested this recipe countless times, tweaking the seal technique and ingredient ratios until it just clicks.
- Quick & Easy: Ready in under 15 minutes, perfect when you need a last-minute snack or lunchbox filler.
- Simple Ingredients: You probably already have everything in your pantry — no surprise runs to specialty shops.
- Perfect for On-the-Go: These sandwiches freeze well, making them ideal for busy mornings, picnics, or road trips.
- Crowd-Pleaser: Kids, adults, and even the pickiest eaters tend to gobble these up — trust me, I’ve seen it happen.
- Unbelievably Delicious: The sealed edges keep the peanut butter and jelly perfectly contained, so every bite is just right.
This isn’t your average sandwich slapped together. I found that using slightly thicker peanut butter and spreading the jelly thin prevents sogginess and keeps the bread soft but not mushy. Plus, sealing the edges with a simple sandwich cutter or a fork creates that classic “no mess” experience. Honestly, these sandwiches bring back that childhood lunchbox magic, but with the freshness and trust of homemade.
What Ingredients You Will Need
For this recipe, I stick to straightforward, pantry-friendly ingredients that are easy to swap based on what you have. Each ingredient plays a simple but key role in making these sandwiches taste just right.
- White Bread – Soft, square sandwich bread works best; avoid super dense or whole grain varieties for that authentic Uncrustables texture.
- Peanut Butter – Creamy or chunky, depending on your preference. I usually go for a natural brand like Smucker’s Natural for that pure peanut flavor.
- Grape Jelly – Classic grape jelly is the nostalgic choice, but you can swap for strawberry or raspberry for a twist. Look for jelly with a smooth texture for better sealing.
- Butter or Margarine (Optional) – A thin layer on the bread before spreading peanut butter helps prevent sogginess, especially if you plan to freeze the sandwiches.
Feel free to customize: if you need a gluten-free option, use your favorite gluten-free sandwich bread. For dairy-free, skip the butter or use a plant-based spread. In summer, switching out jelly for fresh berry preserves adds a bright, seasonal touch — just be mindful of moisture content for sealing.
Equipment Needed
Making Easy Homemade Uncrustables Peanut Butter Jelly Sandwiches doesn’t require fancy tools, but a few kitchen helpers make the process smoother and tidier.
- Round Sandwich Cutter or Cookie Cutter – About 3-inch diameter works perfectly to cut and seal the sandwiches. If you don’t have one, a sharp knife and a fork to press edges will do just fine.
- Spoon or Small Spreader – For evenly spreading peanut butter and jelly without tearing the bread.
- Spatula or Butter Knife – Helpful if you’re using butter to prevent sogginess.
- Wax Paper or Parchment Paper – To lay out sandwiches before freezing or packing.
Personally, I’ve tried using a heavy-duty biscuit cutter and a plastic sandwich sealer, but the cookie cutter works best for consistent edges and easy cleanup. For budget-conscious cooks, a clean drinking glass rim and a fork can substitute nicely.
Preparation Method
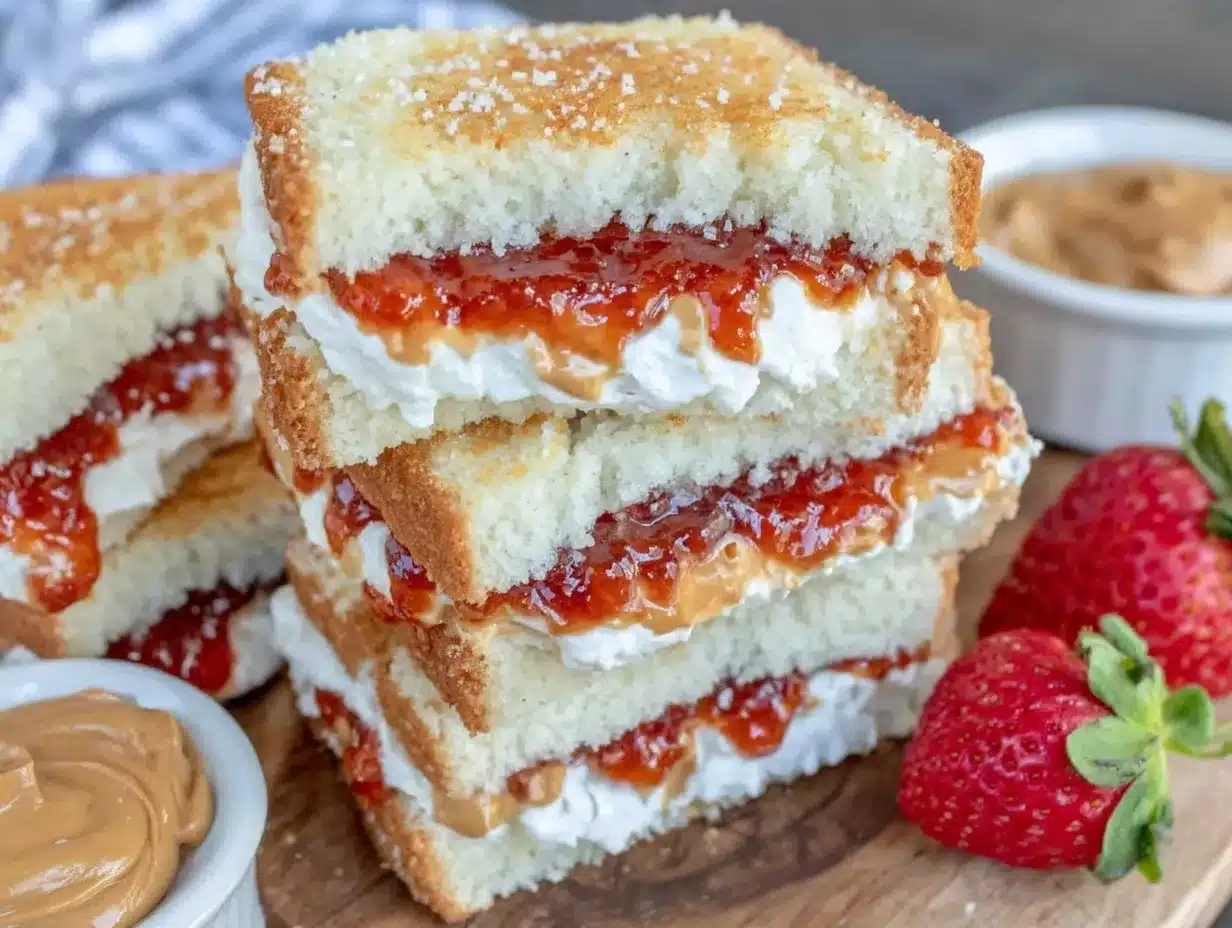
- Prepare your workspace. Lay out slices of white bread on a clean surface. I usually trim the crusts first to get that perfect edge, but if you like them on, that’s fine too. (I forgot crust trimming once and ended up with a less tidy seal — lesson learned!)
- Optional butter layer. Lightly spread softened butter or margarine on one side of each bread slice. This acts as a moisture barrier, especially useful if you plan to freeze your sandwiches.
- Spread peanut butter. Use about 1 to 1.5 tablespoons (15-22g) of peanut butter on half the slices. Spread evenly but avoid going too close to the edges to make sealing easier.
- Spread jelly. On the remaining slices, spread about 1 tablespoon (15g) of jelly. A thin layer works best to prevent leaks and sogginess.
- Assemble sandwiches. Carefully place the jelly-topped slice on top of the peanut butter one, butter side down if you used butter.
- Cut and seal. Using your round sandwich cutter, press down firmly to cut through both slices and seal the edges. If you don’t have a cutter, use a knife to cut a circle and press the edges together with a fork to seal. The seal should be tight enough to hold fillings but not so tight that the bread tears.
- Freeze or serve. Place sandwiches on wax or parchment paper. For freezing, arrange in a single layer and freeze for about 2 hours, then transfer to a freezer-safe bag. These keep well for up to 3 months.
- Thaw and enjoy. When ready, thaw at room temperature for 30 minutes or microwave for 15-20 seconds for that fresh, soft texture.
Pro tip: If your jelly is too runny, refrigerate it before spreading, or reduce the amount slightly. Also, don’t overfill the peanut butter or jelly — it’ll make sealing tricky and can cause leaks.
Cooking Tips & Techniques
Here are some seasoned tips I’ve picked up to make your Easy Homemade Uncrustables Peanut Butter Jelly Sandwiches truly shine:
- Use slightly stale bread. Fresh bread can be too soft and tear during sealing. A day-old loaf works better for cleaner edges.
- Chill your peanut butter. If it’s too warm, spreading it evenly is tricky and can cause bread to crumble.
- Practice your seal. Press firmly but gently with your cutter or fork. If edges aren’t sealed well, fillings will leak when frozen or packed.
- Don’t overload fillings. Less is more here — too much jelly or peanut butter means mess and soggy bread.
- Freeze flat and single-layered. Stacking before freezing can cause sandwiches to stick together.
- Thaw properly. Thaw at room temperature rather than microwaving if you want that soft, fresh bread feel.
I once microwaved a frozen sandwich for too long and ended up with peanut butter lava — lesson learned the hard way! Patience is key.
Variations & Adaptations
Easy Homemade Uncrustables are wonderfully adaptable. Here are some ways I’ve mixed things up over time:
- Nut-Free Version: Swap peanut butter for sunflower seed butter or soy nut butter — great for school lunches with allergy concerns.
- Flavor Variations: Try almond butter with honey or mix in a bit of cream cheese for a richer filling.
- Seasonal Twist: Replace jelly with fresh berry preserves or mashed bananas for a fresh, summery snack.
- Gluten-Free: Use gluten-free sandwich bread. I recommend brands like Udi’s for best texture.
- Different Shapes: Use fun cookie cutters to make stars or hearts, especially for kids’ parties or themed snacks.
Personally, I love swapping grape jelly for tart cherry preserves during winter holidays — it adds a lovely depth that feels festive without extra fuss.
Serving & Storage Suggestions
These sandwiches are perfect chilled or at room temperature. I like to pack them straight from the freezer into lunchboxes — they thaw nicely by lunchtime and hold up well without getting soggy.
Serving suggestions include pairing with fresh fruit, crunchy veggie sticks, or a little glass of milk for a classic combo. For a picnic, these sandwiches hold up better than your average PB&J!
For storage, keep homemade Uncrustables in an airtight container in the fridge for up to 3 days or freeze for longer shelf life (up to 3 months). When reheating, a quick 15-second microwave zap softens the bread without melting the filling.
Flavors actually deepen after a day in the fridge, so making them ahead for the next day works great. Just don’t leave them out too long or the bread will dry out.
Nutritional Information & Benefits
A typical homemade Uncrustables sandwich packs about 250-300 calories, depending on bread and peanut butter choices. They offer a balanced combo of protein, healthy fats, and carbohydrates — perfect for fueling active kids or busy adults.
Peanut butter provides heart-healthy monounsaturated fats and protein, while jelly adds natural sweetness (choose low-sugar or no-sugar options to cut down on added sugars). Using white bread keeps the texture soft and familiar, but swapping for whole wheat can boost fiber.
For those with allergies, sunflower seed or soy nut butters provide alternatives that still deliver protein and flavor. Overall, these sandwiches fit nicely into balanced snack or lunch plans.
Conclusion
Easy Homemade Uncrustables Peanut Butter Jelly Sandwiches are a simple, nostalgic treat that’s surprisingly satisfying and versatile. Whether you want to whip up a quick snack, pack a lunchbox, or prepare freezer-friendly goodies, this recipe has you covered with minimal fuss.
Make it your own by trying different nut butters, jellies, or bread types. I keep coming back to this recipe because it’s quick, mess-free, and always hits the spot—plus, it’s the only way I’ve gotten my roommate to admit she actually loves Uncrustables.
Give this recipe a try, tweak it to your taste, and share your favorite variations in the comments. Your perfect homemade snack might just be a few steps away — happy sandwich making!
FAQs
Can I use whole wheat bread for homemade Uncrustables?
Yes! Whole wheat bread works well, though it may be firmer and less soft than white bread. Just handle gently when sealing.
How long do homemade Uncrustables last in the freezer?
They keep well for up to 3 months in the freezer when stored in an airtight container or freezer bag.
What’s the best way to thaw frozen Uncrustables?
Thaw at room temperature for about 30 minutes or microwave for 15-20 seconds for a soft, fresh texture.
Can I make Uncrustables with other nut butters?
Absolutely! Almond butter, sunflower seed butter, or soy nut butter all make great alternatives.
How do I prevent the jelly from making the bread soggy?
Try spreading a thin layer of butter on the bread before adding jelly, and use a thin layer of jelly to avoid sogginess.
Pin This Recipe!
Easy Homemade Uncrustables Peanut Butter Jelly Sandwiches Recipe for Perfect Snacks
A simple, quick, and satisfying recipe for homemade crustless peanut butter and jelly sandwiches that are perfect for snacks, lunchboxes, and freezing.
- Prep Time: 10 minutes
- Cook Time: 0 minutes
- Total Time: 10 minutes
- Yield: 4 sandwiches
- Category: Snack
- Cuisine: American
Ingredients
- White bread (soft, square sandwich bread)
- Peanut butter (creamy or chunky, about 1 to 1.5 tablespoons per sandwich)
- Grape jelly (or strawberry/raspberry jelly, about 1 tablespoon per sandwich)
- Butter or margarine (optional, thin layer to prevent sogginess)
Instructions
- Prepare your workspace and lay out slices of white bread on a clean surface. Trim crusts if desired.
- Optionally, lightly spread softened butter or margarine on one side of each bread slice to act as a moisture barrier.
- Spread about 1 to 1.5 tablespoons of peanut butter evenly on half the slices, avoiding edges.
- Spread about 1 tablespoon of jelly thinly on the remaining slices.
- Carefully place the jelly-topped slice on top of the peanut butter slice, butter side down if used.
- Using a round sandwich cutter (about 3-inch diameter), press down firmly to cut and seal the edges. Alternatively, use a knife to cut a circle and press edges with a fork to seal.
- Place sandwiches on wax or parchment paper. For freezing, arrange in a single layer and freeze for about 2 hours, then transfer to a freezer-safe bag.
- To serve, thaw at room temperature for 30 minutes or microwave for 15-20 seconds.
Notes
Use slightly stale bread for cleaner edges. Chill peanut butter if too warm. Avoid overfilling to prevent leaks. Freeze sandwiches flat and single-layered. Thaw at room temperature for best texture. Refrigerate jelly if too runny before spreading.
Nutrition
- Serving Size: 1 sandwich
- Calories: 275
- Sugar: 12
- Sodium: 250
- Fat: 14
- Saturated Fat: 3
- Carbohydrates: 30
- Fiber: 2
- Protein: 8
Keywords: Uncrustables, peanut butter jelly sandwich, homemade snacks, lunchbox ideas, freezer-friendly, easy recipe


