Love this? Save it for later!
Share the inspiration with your friends
“You won’t believe how simple it is,” my friend Mark said, waving a pint of ice cream like it was a secret weapon. We were at his place on a lazy Saturday afternoon, the kind where the sun pours in and the hum of the city feels miles away. Mark wasn’t exactly a chef—he’s more of a “grab and go” kind of guy—but that day, he showed me how to transform ordinary store-bought ice cream and cookies into something that felt downright gourmet. Honestly, I thought it was going to be another basic snack hack, but the moment I bit into one of his easy gourmet store-bought ice cream sandwiches, I was hooked.
What’s funny is, the idea came from pure laziness—Mark had a craving for something cold and sweet but didn’t want to fuss with baking or elaborate recipes. So, armed with just a couple of pints from our local grocery and a box of cookies, he whipped up these little frozen delights that tasted like they came from a fancy ice cream shop. I mean, you know that feeling when you want a treat but don’t want to spend hours in the kitchen? This recipe is exactly that—quick, fuss-free, and yet surprisingly impressive.
Maybe you’ve been there too, staring at the freezer wondering how to make summer evenings feel special without turning on the oven. Well, this recipe stayed with me because it’s perfect for those moments—easy enough to make on a whim, but with a wow factor that makes everyone think you went the extra mile. Trust me, after trying this, you’ll find yourself reaching for those pints and cookie packs more often than you’d expect.
Why You’ll Love This Recipe
I’ve tested plenty of ice cream sandwich ideas, but this one stands out because it strikes the perfect balance between simplicity and gourmet taste. Let me tell you why this easy gourmet store-bought ice cream sandwiches recipe is a keeper:
- Quick & Easy: You can put these together in under 15 minutes—no baking, no complicated steps, just pure fun.
- Simple Ingredients: No need for specialty stores. Just grab your favorite ice cream and cookies from the supermarket.
- Perfect for Summer Parties: Whether it’s a backyard BBQ, a kids’ birthday, or a casual hangout, these sandwiches steal the show.
- Crowd-Pleaser: Adults and kids alike love them. I’ve never met anyone who said no to a homemade ice cream sandwich.
- Unbelievably Delicious: The creamy ice cream against the cookie’s crunch creates a texture combo that’s pure magic.
What makes this recipe different? Well, it’s all about the little touches. You can customize the cookie and ice cream pairing to suit your mood or season. Plus, I recommend letting the ice cream soften just enough before assembling—that makes the sandwich melt in your mouth rather than freeze your teeth. Honestly, it’s comfort food reimagined: the ease of store-bought ingredients combined with the charm of a handcrafted treat. It’s the kind of recipe that makes you close your eyes after the first bite and say, “Yep, this is summer.”
What Ingredients You Will Need
This recipe uses simple, wholesome ingredients to deliver bold flavor and satisfying texture without the fuss. Most of these are pantry staples or easy to find at your local grocery store, making it convenient and adaptable.
- Ice Cream: About 1 pint (475 ml) of your favorite flavor. Classic vanilla, chocolate chip, or even salted caramel work great. I often go for Ben & Jerry’s for their creamy texture.
- Cookies: 12 large cookies (about 3 inches/7.5 cm diameter). Choose sturdy cookies like chocolate chip, snickerdoodle, or oatmeal raisin. Soft cookies can work, but crispier ones hold up better.
- Optional Mix-ins: Chocolate chips, crushed nuts, or sprinkles to roll the edges in for extra flair and texture.
- Wax Paper or Parchment Paper: For wrapping each sandwich to keep them neat in the freezer.
Substitution tips: For gluten-free options, look for gluten-free cookies and pair them with dairy-free ice cream like coconut milk-based varieties. Use almond or oat milk ice cream if you need a dairy-free alternative.
Seasonal twist? In warmer months, try swapping in fruity ice creams like strawberry or mango and pair with shortbread cookies for a refreshing change.
Equipment Needed
- Mixing bowl: For softening the ice cream and mixing optional add-ins if you want a bit of customization.
- Spatula or ice cream scoop: To spread and shape the ice cream evenly on the cookie base.
- Baking sheet or tray: To place your sandwiches on before freezing.
- Wax or parchment paper: For wrapping sandwiches individually. This keeps them tidy and makes storage easy.
- Freezer-safe container or zip-top bag: For storing assembled sandwiches.
If you don’t have a spatula, a butter knife works fine for spreading. And honestly, I sometimes skip the bowl and just soften the ice cream straight in the pint container to save dishes. The key is having a flat surface to assemble on and a cold spot to freeze.
Preparation Method
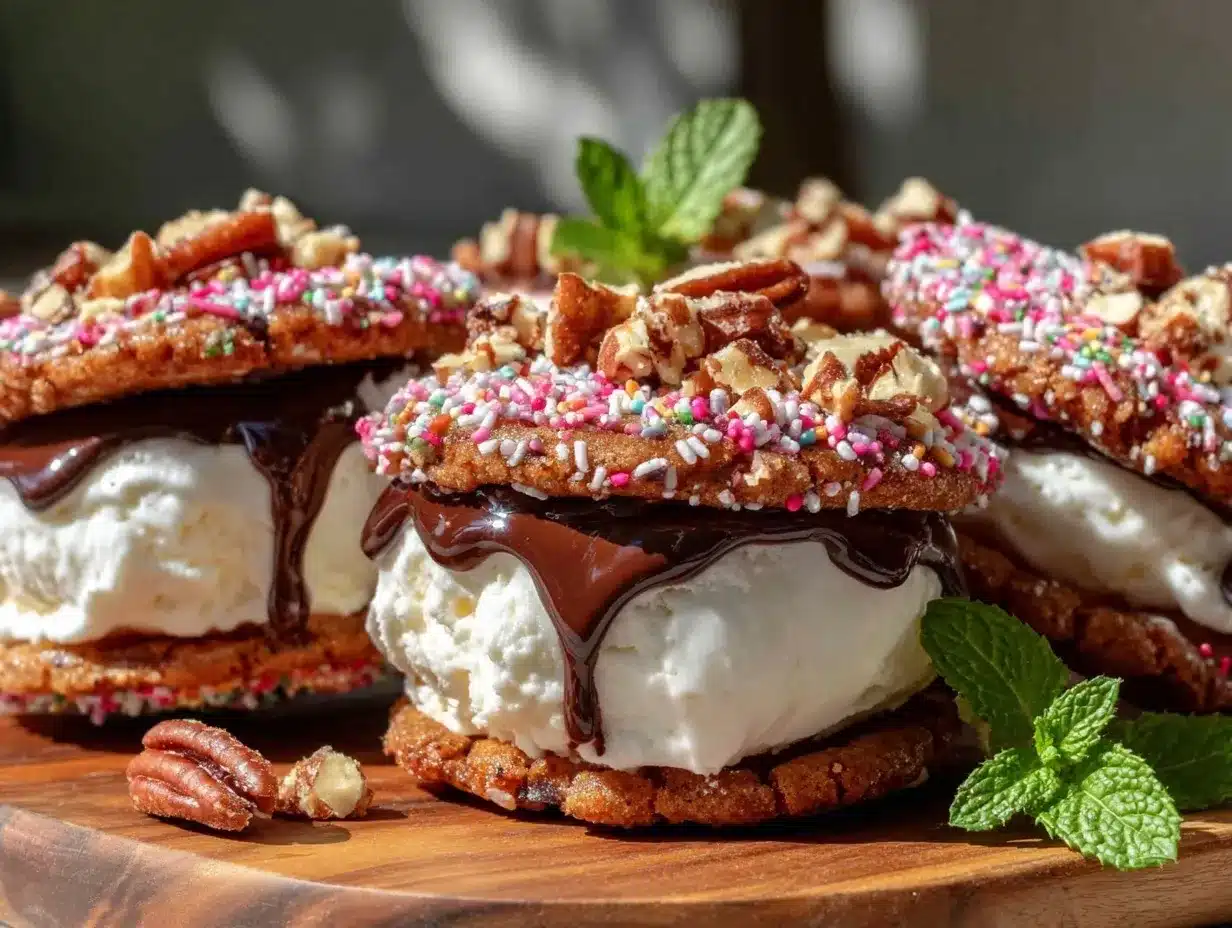
- Soften the ice cream: Take the pint out of the freezer about 5-10 minutes before starting. It should be soft enough to spread but not melted. This usually means a creamy texture that’s easy to handle.
- Prepare your workspace: Line a baking sheet with parchment paper. This will be your assembly station and freezing base.
- Place the cookie bases: Lay out 6 cookies flat side up on the parchment paper. These will be the bottom of each sandwich.
- Spread ice cream: Using a spatula or spoon, scoop about 2-3 tablespoons (30-45 ml) of softened ice cream onto each cookie. Spread evenly but leave a small border around the edges to prevent overflow.
- Top with cookies: Gently place the remaining 6 cookies on top of the ice cream, flat side down, pressing lightly to sandwich the ice cream evenly. Avoid pressing too hard or the ice cream will ooze out.
- Optional edge rolling: If desired, roll the edges of each sandwich in your choice of mix-ins like chocolate chips or crushed nuts for texture and flair.
- Wrap each sandwich: Use wax or parchment paper to wrap each sandwich individually. This helps keep them from sticking together and makes serving easier.
- Freeze: Place the wrapped sandwiches on the baking sheet and freeze for at least 2 hours, or until firm.
- Serve: Remove from the freezer 5 minutes before serving to soften slightly for best texture.
Pro tip: If your ice cream is too hard to spread, let it sit out for a minute longer. Too soft? Pop the sandwiches back in the freezer for a few minutes before wrapping.
Cooking Tips & Techniques
Here’s what I’ve learned making these easy gourmet store-bought ice cream sandwiches over and over:
- Soft but not melted ice cream: Timing the softening step is crucial. Too hard and it’s tough to spread; too soft and it melts, making a mess.
- Cookie choice matters: Thinner cookies can break or get soggy quickly, so pick sturdier ones. I like using cookies that hold their shape and have a bit of crunch.
- Work quickly: Ice cream melts fast once out of the freezer, so have all your ingredients and tools ready before you start assembling.
- Freezing time is key: Don’t rush the final freeze — the sandwiches need at least two hours to set properly or they’ll fall apart when you bite in.
- Mix-ins add personality: Rolling edges in sprinkles or nuts isn’t just pretty—it adds a nice texture contrast that makes these sandwiches feel special.
Don’t worry if your first few aren’t perfect. I’ve made a mess more times than I care to admit (think ice cream dripping everywhere), but once you get the hang of the texture and pressure, it becomes second nature. Multitasking by softening ice cream while prepping cookies saves time and keeps the process smooth.
Variations & Adaptations
This recipe is incredibly flexible. Here are some ideas to make it your own:
- Dietary twist: For a dairy-free option, use coconut or almond milk-based ice cream with gluten-free cookies.
- Flavor combos: Try mint chocolate chip ice cream with double chocolate cookies for an indulgent treat.
- Seasonal spin: In fall, swap cookies for ginger snaps and ice cream for pumpkin spice or cinnamon swirl.
- Cooking method: For a softer sandwich, briefly microwave the cookie halves before assembling to warm them slightly—just 5 seconds to avoid melting ice cream.
- Personal favorite: I once rolled the edges in crushed toasted coconut flakes—it added a tropical vibe that was a huge hit at a summer picnic.
Serving & Storage Suggestions
Serve these easy gourmet store-bought ice cream sandwiches straight from the freezer after letting them sit for about 5 minutes. This slight thaw softens the ice cream for the perfect bite without losing shape.
Pair them with a cold glass of milk or a refreshing iced tea to balance the sweetness. They’re also fantastic alongside fresh berries or a drizzle of chocolate sauce for a more decadent dessert plate.
Store leftovers wrapped individually in the freezer inside a sealed container to prevent freezer burn. They keep well for up to 2 weeks. When reheating, avoid thawing completely in the fridge; instead, let them sit at room temperature for a few minutes before eating.
Over time, the cookie edges may soften slightly, which some people prefer—the sandwich becomes chewy and even more comforting. Just watch out for condensation if you unwrap and rewrap multiple times.
Nutritional Information & Benefits
Each sandwich is approximately 250-300 calories, depending on the ice cream and cookie types you choose. Using store-bought ingredients means you can check nutrition labels to align with your dietary needs.
Choosing ice creams with natural ingredients or lower sugar content makes this treat a bit lighter, and pairing with whole-grain or nut-based cookies adds some fiber.
This recipe can easily fit into many diets by swapping ingredients: gluten-free, dairy-free, or even lower sugar options are simple to find these days.
From a wellness perspective, enjoying a homemade treat like this feels satisfying and guilt-free because you control the quality and portion size. It’s a fun way to indulge without overdoing it.
Conclusion
If you’re looking for a sweet treat that’s both effortless and feels special, these easy gourmet store-bought ice cream sandwiches are a perfect choice. They bring together the best of both worlds: the convenience of ready-made ingredients with the charm of a handcrafted dessert.
Feel free to make this recipe your own—try different cookie and ice cream pairings, add your favorite mix-ins, or even double up for ice cream sandwich towers. Honestly, once you make these, you’ll find yourself coming back to them as a go-to summer indulgence.
I love this recipe because it’s a reminder that sometimes the simplest ideas can be the most delicious. Now, I’d love to hear your twists and tricks—drop a comment below if you try it out or have your own favorite combos. Treat yourself—you deserve it!
FAQs About Easy Gourmet Store-Bought Ice Cream Sandwiches
Can I use soft cookies for this recipe?
Soft cookies can work but may get soggy faster. For best results, choose sturdier cookies that hold up well to the ice cream.
How long can I store the ice cream sandwiches in the freezer?
Wrapped properly, they can last up to 2 weeks without significant loss of quality.
What’s the best way to soften ice cream for assembling sandwiches?
Let the ice cream sit at room temperature for about 5-10 minutes until it’s soft enough to spread but not melted.
Can I make these ahead for a party?
Absolutely! Assemble and freeze them a day or two before your event. Just thaw for a few minutes before serving.
Are there any good dairy-free ice cream options for this recipe?
Yes, coconut milk, almond milk, and oat milk-based ice creams are excellent dairy-free alternatives and work great in this recipe.
Pin This Recipe!

Easy Gourmet Store-Bought Ice Cream Sandwiches Recipe for Perfect Summer Treats

A quick and fuss-free recipe to transform store-bought ice cream and cookies into delicious gourmet ice cream sandwiches, perfect for summer treats and parties.
- Prep Time: 10 minutes
- Cook Time: 2 hours
- Total Time: 2 hours 10 minutes
- Yield: 6 sandwiches 1x
- Category: Dessert
- Cuisine: American
Ingredients
- 1 pint (475 ml) of your favorite ice cream (e.g., vanilla, chocolate chip, salted caramel)
- 12 large cookies (about 3 inches/7.5 cm diameter), sturdy types like chocolate chip, snickerdoodle, or oatmeal raisin
- Optional mix-ins: chocolate chips, crushed nuts, or sprinkles for rolling the edges
- Wax paper or parchment paper for wrapping sandwiches
Instructions
- Soften the ice cream by taking the pint out of the freezer about 5-10 minutes before starting until it is soft enough to spread but not melted.
- Line a baking sheet with parchment paper to use as your assembly station and freezing base.
- Lay out 6 cookies flat side up on the parchment paper as the bottom of each sandwich.
- Using a spatula or spoon, scoop about 2-3 tablespoons (30-45 ml) of softened ice cream onto each cookie and spread evenly, leaving a small border around the edges.
- Place the remaining 6 cookies on top of the ice cream, flat side down, pressing lightly to sandwich the ice cream evenly without squeezing out the ice cream.
- If desired, roll the edges of each sandwich in your choice of mix-ins like chocolate chips or crushed nuts.
- Wrap each sandwich individually with wax or parchment paper to keep them neat and prevent sticking.
- Place the wrapped sandwiches on the baking sheet and freeze for at least 2 hours or until firm.
- Remove from the freezer 5 minutes before serving to soften slightly for the best texture.
Notes
Let the ice cream soften just enough before assembling to avoid melting or difficulty spreading. Use sturdier cookies to prevent sogginess. Wrap sandwiches individually to prevent sticking and store in a sealed container to avoid freezer burn. For dairy-free or gluten-free options, use appropriate ice cream and cookies. Optional to microwave cookies briefly for a softer sandwich.
Nutrition
- Serving Size: 1 ice cream sandwich
- Calories: 250300
- Sugar: 1822
- Sodium: 120180
- Fat: 1215
- Saturated Fat: 79
- Carbohydrates: 3035
- Fiber: 13
- Protein: 35
Keywords: ice cream sandwiches, easy dessert, summer treat, store-bought ice cream, no bake, quick dessert, gourmet ice cream sandwich


