Love this? Save it for later!
Share the inspiration with your friends
My dad claimed to hate sweet and savory combinations for forty-three years. Forty-three years. He’d push his plate away at Thanksgiving if a cranberry touched his turkey, and don’t even get me started on what he thought about pineapple on pizza (let’s just say it involved a lot of dramatic sighing). Then last October, I was testing this recipe on a random Tuesday, the air smelling like fallen leaves and the windows fogged up from the griddle. I made a sandwich “just for myself” — a messy, buttery thing with sharp cheddar and thin slices of Honeycrisp apple. I set it on the cutting board to rest and walked away for exactly one minute. When I came back, my dad was standing at the counter, mid-bite, with this look on his face like he’d just been caught sneaking cookies before dinner.
“That’s different,” he mumbled, crumbs falling from his chin. “It’s not bad.” Coming from him, that was practically a standing ovation. Honestly, I think the crunch of the apple against the melty cheese got him. Or maybe it was the way the salty butter on the sourdough balanced the sweet-tart fruit. Whatever it was, he finished the whole thing and asked if there was more. That’s the moment I knew this Fall Honeycrisp Apple Cheddar Grilled Cheese was something special — a sandwich that could change a mind that had been set for four decades. Maybe you’ve got a skeptic in your life too, someone who raises an eyebrow at fruit in a savory dish. This one’s for them. And for you.
Why You’ll Love This Recipe
I’ve tested this sandwich about fifteen times over the last two falls, tweaking the apple thickness, the cheese ratio, the bread choice. What I landed on is the version I keep coming back to, and here’s why it works:
- Quick & Easy: From fridge to plate in under 15 minutes. That’s faster than deciding what to order for takeout.
- Simple Ingredients: You need bread, butter, cheddar, an apple, and maybe some Dijon if you’re feeling fancy. No obscure grocery store missions.
- Perfect for Fall: This is the taste of apple picking season, hayrides, and crisp afternoons. It belongs on your table from September through November.
- Crowd-Pleaser: I’ve served these at a casual lunch with friends and at a kid’s birthday party (yes, really). Adults and children alike go quiet while eating.
- Unbelievably Delicious: The sharp cheddar melts into every crevice of the bread while the apple stays just slightly crunchy. It’s the kind of sandwich that makes you close your eyes on the first bite.
What sets this apart from other apple grilled cheese recipes is the layering technique. I don’t just pile everything on at once. I let the cheese melt first, then add the apples, then add another layer of cheese. This creates a sealed pocket that keeps the apples warm and juicy without making the bread soggy. It’s a small tweak that makes a big difference — the difference between a good sandwich and one you’ll text your friends about.
This isn’t just another grilled cheese. It’s comfort food that feels a little sophisticated, a little seasonal, and a whole lot satisfying. Perfect for a quick lunch when you want something cozy, or for impressing someone who thinks they’ve had every grilled cheese variation out there.
What Ingredients You Will Need
This recipe relies on a handful of quality ingredients to deliver that perfect balance of savory, sharp, sweet, and crunchy. Here’s what you’ll need and why each one matters:
- 8 slices sourdough bread (or rustic country bread) — Sourdough holds up to the heat without getting flimsy, and its tangy flavor plays beautifully with the sweet apples. I prefer a bakery-style loaf with a sturdy crust.
- 4 tablespoons unsalted butter, softened — Butter is non-negotiable here. It gives you that golden, crispy exterior. Salted butter works too, just watch the salt level in the final sandwich.
- 8 ounces sharp white cheddar cheese, thinly sliced or shredded — Sharp cheddar stands up to the apple’s sweetness without disappearing. I like to use a block and slice it myself — pre-shredded cheese has anti-caking agents that prevent smooth melting.
- 1 large Honeycrisp apple — This is the star. Honeycrisp apples hold their shape when heated, they don’t turn into mush, and their sweet-tart flavor is exactly what this sandwich needs. Fuji or Gala work in a pinch, but Honeycrisp is worth seeking out.
- 1 tablespoon Dijon mustard (optional but recommended) — A thin smear adds a subtle heat and tang that cuts through the richness. Don’t skip it if you have it on hand.
- Pinch of flaky sea salt — A tiny sprinkle right before serving makes the flavors pop. Maldon salt is my go-to.
- Fresh thyme leaves (optional) — A few scattered leaves inside the sandwich add an earthy, almost woodsy note that screams fall. I add this when I’m feeling extra.
For the apple, I recommend buying them a day or two before and keeping them in the fridge. Room temperature apples are fine, but a slightly chilled apple gives you a better crunch contrast against the hot cheese. If you’re making multiple sandwiches, prep all the apple slices at once and toss them with a squeeze of lemon juice to prevent browning.
For substitutions: use a good gluten-free bread if needed (just be careful not to over-toast it, as GF bread burns faster). For a dairy-free version, use a plant-based butter and a sharp vegan cheddar — just know the melt won’t be quite as luxurious. And if you can’t find Honeycrisp apples, look for Pink Lady or Braeburn, which have a similar sweet-tart balance.
Equipment Needed
You don’t need much for this recipe, which is part of its charm. Here’s what I use:
- A cast iron skillet or non-stick griddle — Cast iron gives you the most even heat and that perfect golden crust. A non-stick pan works fine too, just keep the heat at medium to avoid hot spots.
- A sharp knife and cutting board — You’ll need to slice the apple thinly (about 1/8 inch thick). A mandoline works if you have one, but a good chef’s knife does the job.
- A spatula — A thin, flexible metal spatula is best for flipping without losing your filling. I’ve used a plastic one in a pinch and ended up with apples all over the pan.
- A butter knife — For spreading the softened butter on the bread. Don’t melt the butter — softened butter spreads more evenly and gives a better crust.
- A plate or cutting board for resting — Let the sandwich rest for a minute after cooking. This lets the cheese set slightly so it doesn’t all ooze out when you cut it.
If you don’t have a cast iron skillet, you can use any heavy-bottomed pan. I’ve even made these on an electric griddle at a friend’s cabin — they turned out great. Just keep the heat at medium and don’t rush it.
Preparation Method

- Prep the apple — Wash your Honeycrisp apple, then cut it in half through the stem. Remove the core and seeds, then slice the apple into thin rounds, about 1/8 inch thick. You want them thin enough to heat through but thick enough to keep some crunch. Aim for about 12-16 slices total. Set them aside.
- Prep the cheese — If you bought a block of cheddar, slice it into thin pieces, about 1/8 inch thick. You’ll need about 2 ounces per sandwich. Shredding works too, but sliced cheese melts more evenly in my experience.
- Butter the bread — Lay out your 8 slices of sourdough. Using a butter knife, spread about 1/2 tablespoon of softened butter on one side of each slice. Don’t skimp — that butter is what gives you the golden crust. Make sure you get all the way to the edges.
- Assemble the first layer — Heat your skillet over medium heat. Place 4 slices of bread, buttered side down, in the skillet. Working quickly, layer half of your cheddar cheese on each slice of bread. Let this cook for about 2 minutes, until the bottom is golden brown and the cheese starts to melt.
- Add the apples — Place 4-5 apple slices on top of the melting cheese on each sandwich. Spread them out evenly so every bite gets some apple. If you’re using Dijon mustard, spread a thin layer on the inside of the remaining 4 bread slices now.
- Top with remaining cheese — Add the rest of the cheddar on top of the apples. This second layer of cheese acts like glue, holding everything together when you flip. Place the remaining bread slices on top, buttered side up.
- Flip carefully — Using your spatula, gently flip each sandwich. Press down lightly with the spatula to ensure even contact with the pan. Cook for another 3-4 minutes, until the bottom is golden brown and the cheese is fully melted.
- Check for doneness — The bread should be deep golden brown on both sides, and you should see cheese starting to peek out at the edges. If the bread is browning too fast but the cheese isn’t melted, lower the heat slightly and cover the pan with a lid for a minute.
- Rest and serve — Transfer the sandwiches to a cutting board. Sprinkle with a tiny pinch of flaky sea salt and fresh thyme leaves if using. Let them rest for 1-2 minutes before cutting. This step is crucial — it lets the cheese set so it doesn’t all slide out when you cut. Slice diagonally and serve warm.
A note on timing: The first side usually takes about 2-3 minutes, and the second side takes 3-4 minutes. If your pan is too hot, you’ll get burnt bread and cold cheese. If it’s too cool, you’ll get soggy bread. Medium heat is your friend here. Trust the sound — you want a gentle sizzle, not a frantic spatter.
Cooking Tips & Techniques
I’ve burned more grilled cheeses than I care to admit, so let me save you some trouble. Here are the things I wish someone had told me:
Don’t rush the butter. I used to melt the butter in the pan and then throw the bread in. That gives you uneven browning and a greasy texture. Spreading softened butter directly on the bread ensures every millimeter gets coated, and the butter soaks into the bread slightly as it cooks, creating that shatteringly crisp crust.
Low and slow wins. I know you’re hungry. I know the smell of melting butter is making your stomach growl. But medium heat is the sweet spot. If you go too high, the bread browns before the cheese melts, and you end up with a sandwich that’s burnt on the outside and cold in the middle. If you’re using a thick sourdough, you might even need to go a notch below medium.
Weight it down. After you flip the sandwich, place a smaller pan or a heavy lid on top of it. This presses the bread into the pan, giving you more even browning and helping the cheese melt faster. I use a small cast iron skillet, but a pot filled with water works too.
The lid trick. If your cheese is being stubborn and not melting, cover the pan with a lid for 30 seconds. The trapped steam gently melts the cheese without overcooking the bread. Just don’t leave it too long or the bread will get soft.
One mistake I still make. Sometimes I get distracted and let the sandwich sit in the pan too long after it’s done. The residual heat continues cooking the bread, and by the time I get back, it’s darker than I wanted. Pull the sandwich out as soon as it’s golden, even if you’re not ready to eat yet. It’ll stay warm on the cutting board.
Variations & Adaptations
This sandwich is a great base for experimentation. Here are a few variations I’ve tried and loved:
- Add bacon — Because of course. Cook 2-3 slices of bacon until crispy, crumble them, and add them with the apples. The smoky saltiness is incredible with the sweet apple and sharp cheddar.
- Swap the cheese — Gruyère melts like a dream and has a nutty flavor that pairs beautifully with apples. Gouda works too, especially the smoked kind. For a milder version, use havarti or monterey jack.
- Make it spicy — Spread a thin layer of fig jam or hot honey on the inside of the bread before assembling. The sweetness of the fig or the heat of the honey plays off the sharp cheddar in a way that’s honestly addictive.
- Add greens — A handful of arugula or baby spinach added right before serving gives the sandwich a fresh, peppery bite. I add it after cooking so it stays crisp.
- Try different apples — While Honeycrisp is my favorite, Granny Smith apples give a tarter, more pronounced contrast. Fuji apples are sweeter and softer. Experiment with what’s in season near you.
- Make it a meal — Serve with a cup of tomato soup or a simple side salad dressed with apple cider vinaigrette. It turns a quick lunch into a full fall experience.
My personal favorite variation? I add a thin layer of caramelized onions and a sprinkle of fresh rosemary. The sweetness of the onions with the apple is next-level. I made this version for a friend who claimed she “didn’t like cooked fruit” — she ate two.
Serving & Storage Suggestions
Serve this sandwich hot, right off the griddle. The cheese should be stretchy and the bread should crackle when you bite into it. I like to cut it diagonally (it just tastes better that way, doesn’t it?) and serve it on a wooden board with a small bowl of tomato soup or a handful of kettle chips on the side.
For drinks, a hard apple cider is a natural pairing — the effervescence cuts through the richness. A crisp white wine like Sauvignon Blanc works too, or just a hot cup of apple cider if you’re keeping it cozy.
Storage: These sandwiches are best eaten fresh. If you have leftovers (unlikely, but possible), let them cool completely, then wrap them tightly in foil and store in the fridge for up to 2 days. The bread will soften, but the flavor will still be good.
Reheating: Don’t use the microwave — it will turn the bread into a sad, soggy mess. Instead, reheat the sandwich in a skillet over medium-low heat for 2-3 minutes per side, or pop it in a 350°F oven for about 8 minutes. The oven method is actually my favorite for reheating because it crisps the bread back up without burning it.
One thing I’ve noticed: the flavors actually meld together a bit more after a day in the fridge. If you’re meal-prepping, you can assemble the sandwiches (without cooking them) and keep them in the fridge for up to 24 hours. Just cook them when you’re ready to eat.
Nutritional Information & Benefits
Here’s the estimated nutritional breakdown for one sandwich (using the recipe as written):
- Calories: Approximately 520
- Protein: 22g
- Fat: 32g
- Carbohydrates: 38g
- Fiber: 4g
- Sugar: 12g
- Sodium: 680mg
This sandwich isn’t exactly diet food, but it does have some redeeming qualities. Honeycrisp apples are a good source of fiber and vitamin C, and they contain antioxidants that support immune health — perfect for the cold and flu season that fall brings. Cheddar cheese provides calcium and protein, which help keep you full and support bone health. And sourdough bread, thanks to its fermentation process, is often easier to digest than other breads and has a lower impact on blood sugar.
If you’re watching your sodium, use unsalted butter and go easy on the added salt. For a lighter version, use a lighter cheese like part-skim mozzarella and reduce the butter to 1 tablespoon per sandwich. It won’t be as decadent, but it’ll still hit the spot.
Conclusion
This Fall Honeycrisp Apple Cheddar Grilled Cheese is the kind of recipe that makes you look forward to the season. It’s simple enough for a weekday lunch but special enough to serve to company. It’s the sandwich that converted my dad after forty-three years of resistance, and it’s the sandwich I keep coming back to every autumn when the apples start appearing at the farmers’ market.
I hope you make this your own. Maybe you’ll add bacon, or swap the cheese, or serve it with a side of soup. Maybe you’ll make it for a skeptic in your life and watch their face change with that first bite. Whatever you do, don’t rush it. Let the cheese melt slowly, let the bread get perfectly golden, and take a moment to enjoy the smell of butter and apples filling your kitchen.
If you try this recipe, I’d love to hear about it. Leave a comment below and tell me how it turned out — did you add anything? Change anything? Burn anything? (We’ve all been there.) And if you’re looking for more fall recipes, check out my cozy butternut squash soup or these maple roasted brussels sprouts — they’re perfect for the season too.
Happy cooking, and here’s to the season of warm kitchens and good food.
Frequently Asked Questions
Can I make this sandwich gluten-free?
Absolutely. Use a sturdy gluten-free bread — I like the ones from Canyon Bakehouse or Schär. Just watch the cooking time, as GF bread tends to brown faster. You might need to lower the heat slightly and cook for a shorter time.
What if I don’t have a cast iron skillet?
No problem at all. Any heavy-bottomed pan works — stainless steel, non-stick, even an electric griddle. The key is even heat distribution. If you’re using a thin pan, keep the heat at medium-low to avoid hot spots.
Can I prep these sandwiches ahead of time?
Yes, you can assemble the sandwiches (without cooking them) and store them in the fridge for up to 24 hours. Wrap them tightly in plastic wrap or place them in an airtight container. When you’re ready to eat, just cook them as directed. You might need to add an extra minute to the cooking time since the bread will be cold.
What’s the best apple for this recipe?
Honeycrisp is my top choice because it holds its shape when heated and has a perfect sweet-tart balance. Fuji, Pink Lady, or Braeburn are great alternatives. Avoid Red Delicious — they get mealy and bland when cooked.
Can I use pre-shredded cheese?
You can, but I don’t recommend it. Pre-shredded cheese is coated with anti-caking agents (like cellulose or potato starch) that prevent it from melting smoothly. You’ll end up with a grainy texture instead of that beautiful, stretchy melt. Take the extra minute to shred or slice your own cheese — it makes a real difference.
Pin This Recipe!
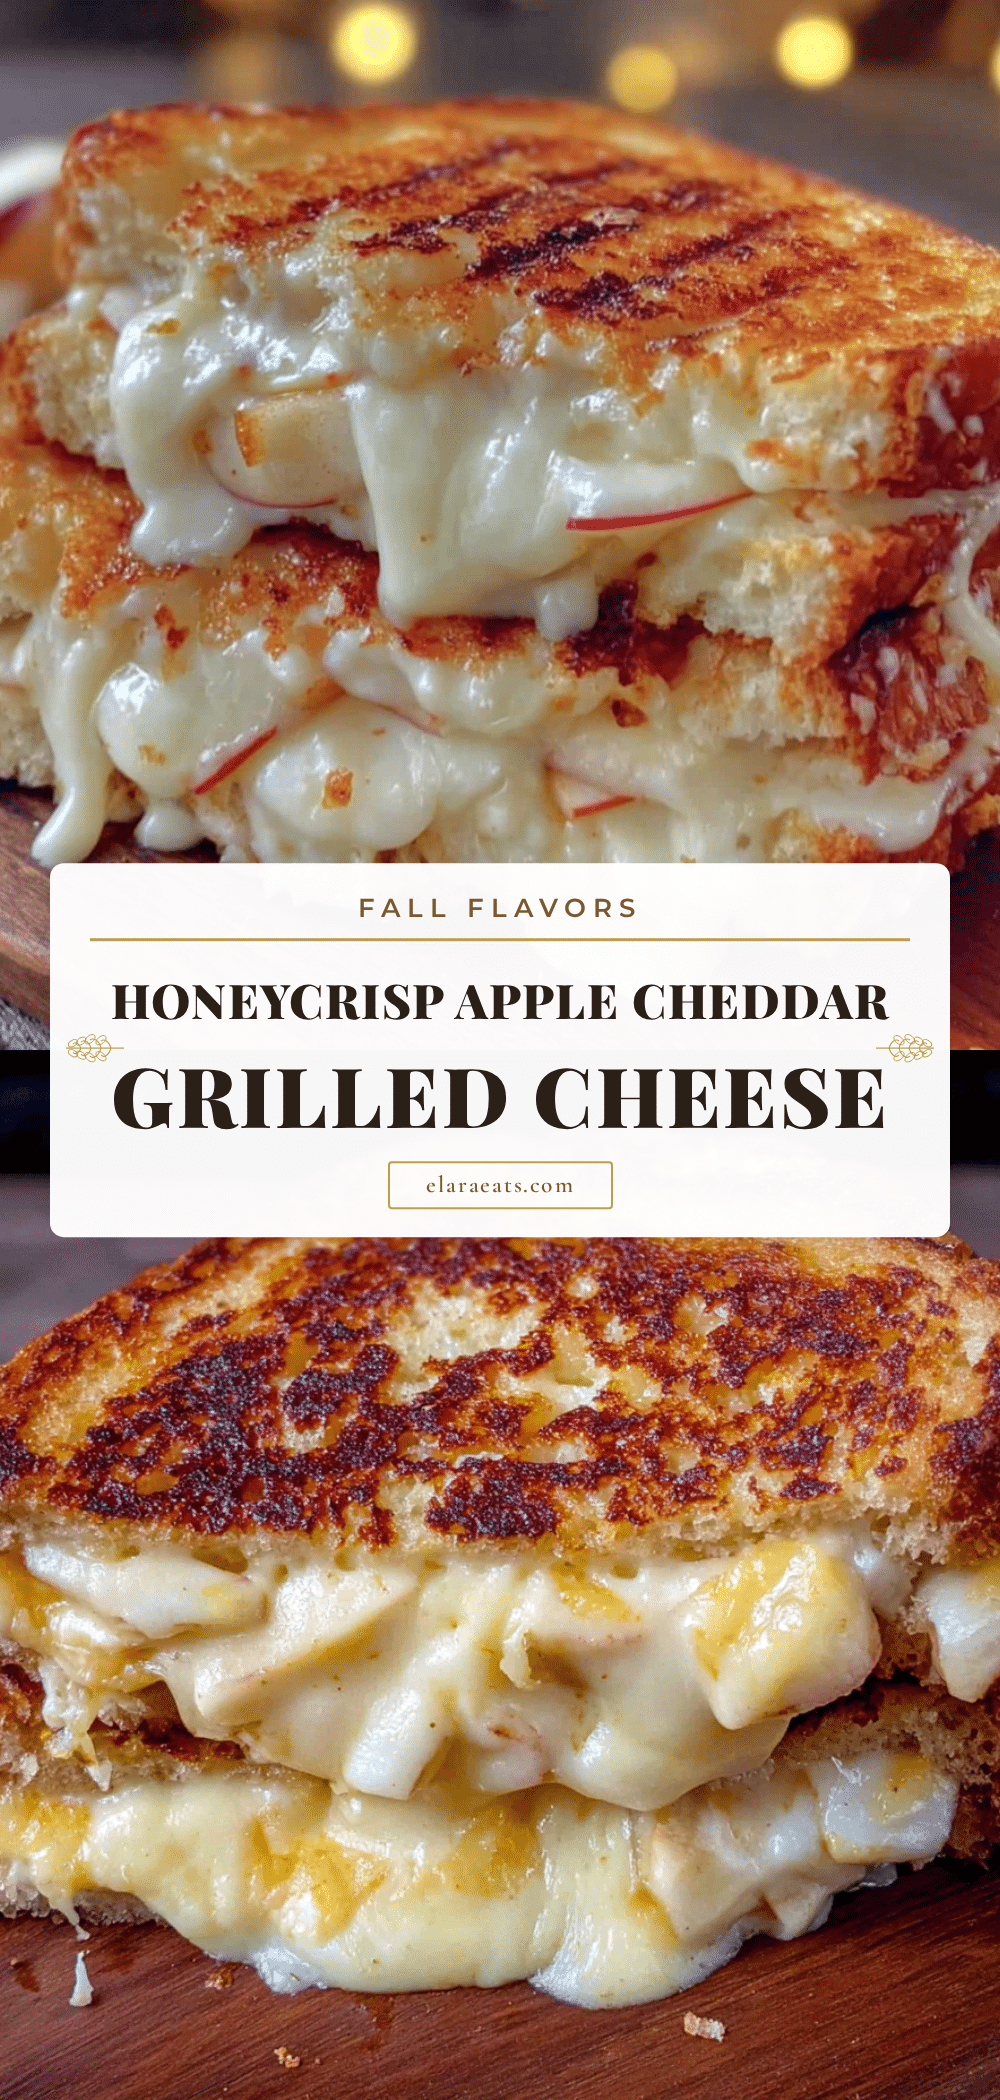
Perfect Fall Honeycrisp Apple Cheddar Grilled Cheese

A quick and easy grilled cheese sandwich featuring sharp cheddar, sweet-tart Honeycrisp apples, and buttery sourdough bread. This fall-inspired comfort food is perfect for a cozy lunch and is sure to convert even the biggest sweet-and-savory skeptics.
- Prep Time: 10 minutes
- Cook Time: 8 minutes
- Total Time: 18 minutes
- Yield: 4 servings 1x
- Category: Main Course
- Cuisine: American
Ingredients
- 8 slices sourdough bread (or rustic country bread)
- 4 tablespoons unsalted butter, softened
- 8 ounces sharp white cheddar cheese, thinly sliced or shredded
- 1 large Honeycrisp apple
- 1 tablespoon Dijon mustard (optional but recommended)
- Pinch of flaky sea salt
- Fresh thyme leaves (optional)
Instructions
- Prep the apple: Wash the Honeycrisp apple, cut it in half through the stem, remove the core and seeds, then slice into thin rounds about 1/8 inch thick. Aim for 12-16 slices total. Set aside.
- Prep the cheese: If using a block of cheddar, slice it into thin pieces about 1/8 inch thick (about 2 ounces per sandwich). Shredding works too, but sliced cheese melts more evenly.
- Butter the bread: Lay out 8 slices of sourdough. Spread about 1/2 tablespoon of softened butter on one side of each slice, making sure to get all the way to the edges.
- Assemble the first layer: Heat a cast iron skillet or non-stick griddle over medium heat. Place 4 slices of bread, buttered side down, in the skillet. Layer half of the cheddar cheese on each slice. Cook for about 2 minutes until the bottom is golden brown and the cheese starts to melt.
- Add the apples: Place 4-5 apple slices on top of the melting cheese on each sandwich. If using Dijon mustard, spread a thin layer on the inside of the remaining 4 bread slices now.
- Top with remaining cheese: Add the rest of the cheddar on top of the apples. Place the remaining bread slices on top, buttered side up.
- Flip carefully: Using a spatula, gently flip each sandwich. Press down lightly with the spatula to ensure even contact with the pan. Cook for another 3-4 minutes until the bottom is golden brown and the cheese is fully melted.
- Check for doneness: The bread should be deep golden brown on both sides, with cheese starting to peek out at the edges. If the bread is browning too fast but the cheese isn’t melted, lower the heat slightly and cover the pan with a lid for a minute.
- Rest and serve: Transfer the sandwiches to a cutting board. Sprinkle with a tiny pinch of flaky sea salt and fresh thyme leaves if using. Let rest for 1-2 minutes before cutting. Slice diagonally and serve warm.
Notes
For best results, use a bakery-style sourdough with a sturdy crust. Don’t rush the butter—spread softened butter directly on the bread for even browning. Keep the heat at medium to avoid burning the bread before the cheese melts. Let the sandwich rest for 1-2 minutes after cooking to allow the cheese to set. For variations, try adding bacon, swapping the cheese for Gruyère or Gouda, or adding a thin layer of fig jam or hot honey.
Nutrition
- Serving Size: 1 sandwich
- Calories: 520
- Sugar: 12
- Sodium: 680
- Fat: 32
- Saturated Fat: 18
- Carbohydrates: 38
- Fiber: 4
- Protein: 22
Keywords: grilled cheese, apple cheddar, fall recipe, honeycrisp apple, quick lunch, comfort food, sourdough, sharp cheddar


