Love this? Save it for later!
Share the inspiration with your friends
My brother, the one who swore up and down that “apples belong in pies, not on plates with cheese,” had been a stubborn holdout for years. A decade, maybe more. He’d make a face at any cheese board I set out, claiming the whole sweet-and-savory thing was a “texture nightmare.” Then, last October, I put together this particular board for a family football Sunday, mostly because I had a bag of Honeycrisps I needed to use. I walked back into the living room to find him standing over the coffee table, a slice of sharp cheddar and a thin apple wedge halfway to his mouth. He froze, caught. “I’m just… checking for bruises,” he mumbled, cheeks full. Sure, buddy. I didn’t say a word—just smiled and handed him a napkin. Honestly, that moment is why this board has become my fall signature. It’s the kind of thing that changes minds without even trying.
There’s something about the first crisp bite of a Honeycrisp apple in late September that just feels right. That snap, followed by that burst of sweet-tart juice—it’s basically fall in fruit form. And when you pair it with the right cheese? Forget about it. This isn’t a fussy, complicated board that takes hours to assemble. It’s a casual, gorgeous spread that looks like you tried way harder than you actually did. I mean, we’re talking ten minutes of arranging, tops. Maybe you’ve been there—staring at a beautiful pile of ingredients, wondering how to make them look intentional instead of like a grocery bag exploded on a cutting board. I’ve got you.
This Fresh Fall Charcuterie Board with Honeycrisp Apples and Cheese has become my go-to for everything from lazy Sunday afternoons to holiday gatherings. It’s forgiving, it’s flexible, and it somehow makes everyone feel like they’re getting something special. Let me walk you through exactly how I build it, including the one trick I learned after that one time I forgot to soak the apple slices (spoiler: they turned brown before anyone even saw them).
Why You’ll Love This Recipe
Let me tell you why this board keeps showing up at my table—and why it’ll become your fall secret weapon too.
- Ready in 15 Minutes: No cooking, no baking, no stress. Just slice, arrange, and serve. Perfect for those “everyone’s coming over in an hour” moments.
- Simple Ingredients, Big Impact: You can find everything at your regular grocery store. No specialty cheese shops or fancy import sections required. I’ve built this board with ingredients from my local Aldi and it still got rave reviews.
- Perfect for Fall Gatherings: Whether it’s a football party, a Friendsgiving appetizer, or just a cozy night in with a glass of wine, this board fits the occasion without trying too hard.
- Crowd-Pleaser Guaranteed: I’ve served this to my cheese-snob uncle, my picky-eating niece, and my vegan cousin (with a few swaps), and everyone walked away happy. It’s got something for every palate.
- Unbelievably Satisfying: The combination of creamy brie, sharp cheddar, crunchy apples, and salty prosciutto hits every single note your taste buds could want. It’s balanced, it’s beautiful, and it’s downright addictive.
What makes this board different from the thousands of other charcuterie boards out there? It’s the apples, honestly. Most boards treat fruit as an afterthought—a few sad grapes thrown on as an afterthought. Here, the Honeycrisp apples are the star. I cut them thick enough to hold their own against the cheese, and I toss them in a little lemon juice to keep them from browning. It’s a small thing, but it makes a huge difference. Plus, I’ve tested about a dozen apple varieties for this, and Honeycrisp wins every single time for texture and sweetness balance.
This board isn’t just good—it’s the kind of spread that makes people close their eyes after that first bite of apple and brie together. It’s comfort food reimagined: fresh, seasonal, and deeply satisfying without being heavy. Perfect for impressing guests without breaking a sweat.
What Ingredients You Will Need
Here’s the thing about a good charcuterie board—the ingredients are simple, but each one plays a specific role. I’ve broken this down so you know exactly what to grab and why.
The Apples (The Star)
- 2 large Honeycrisp apples (look for firm ones with no soft spots—they should feel heavy for their size)
- 1 tablespoon fresh lemon juice (to prevent browning—trust me on this one)
The Cheeses (The Soul)
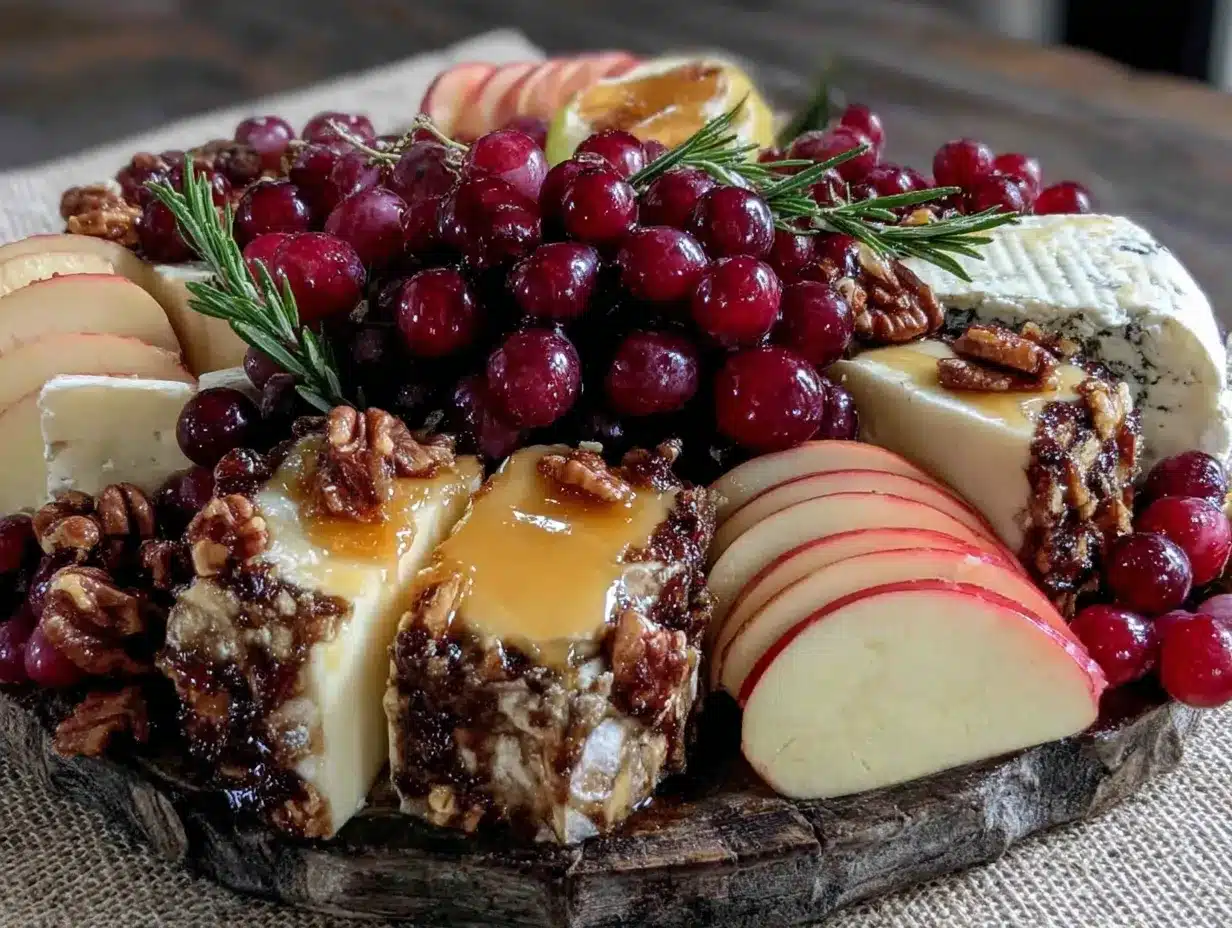
- 6 ounces aged sharp cheddar (I prefer Cabot Seriously Sharp—it stands up to the sweet apples beautifully)
- 6 ounces brie (a soft-ripened triple cream is ideal, but any brie works; I’ve used Kirkland brand and it’s great)
- 4 ounces goat cheese log (the tanginess cuts through the richness; I like Vermont Creamery)
The Meats (The Savory Balance)
- 4 ounces prosciutto (look for thinly sliced, not shaved—it holds up better on the board)
- 4 ounces soppressata or salami (I like it sliced medium-thick so you can bite through it easily)
The Accompaniments (The Texture Play)
- 1/3 cup honey (local honey if you can find it—it adds a floral note that pairs perfectly with the apples)
- 1/2 cup toasted walnuts (toast them yourself in a dry pan for 3-4 minutes—it makes a huge difference)
- 1/3 cup dried figs or dates (optional but highly recommended; the chewy texture is lovely)
- Fresh rosemary sprigs (for garnish and a subtle aromatic note)
- Flaky sea salt (Maldon is my go-to; a tiny pinch on the brie transforms it)
The Vessels (The Delivery System)
- 1 small baguette (sliced on a bias into thin rounds)
- 1 box good-quality crackers (I like Raincoast crisps or a simple water cracker—nothing too flavored that competes with the cheese)
A quick note on substitutions: if you can’t find Honeycrisp apples, Fuji or Pink Lady work well too. Just avoid Red Delicious—they’re too mealy and sweet without enough acidity to balance the cheese. For a gluten-free option, swap the baguette and crackers for gluten-free crackers and sliced cucumber rounds. And if you’re dairy-free, you can use a plant-based brie or aged vegan cheddar—just know the texture will be different.
Equipment Needed
You don’t need much for this board, and I’ve learned the hard way that fancy equipment isn’t necessary. Here’s what I actually use:
- Large wooden cutting board or slate board (mine is a 12×18-inch acacia board from Target—cost about $20 and it’s perfect)
- Small sharp knife (a paring knife works great for slicing apples; a serrated knife is better for the baguette)
- Cheese knives or spreaders (at least two—one for the brie, one for the cheddar; you don’t want to mix cheese flavors)
- Small bowls (for honey, walnuts, and any wet ingredients; I use little ceramic ramekins)
- Cutting board for prep (don’t use your serving board for slicing—you’ll scratch it up)
- Citrus juicer (or just squeeze the lemon by hand; no need for fancy tools)
If you don’t have a wooden board, a large baking sheet or even a clean pizza pan works in a pinch. I once used a marble pastry slab from a garage sale, and honestly, it looked even fancier than my regular board. Don’t overthink the equipment—the food is what matters.
Preparation Method
Alright, let’s build this board. I’m going to walk you through exactly how I do it, including the little tricks I’ve picked up from making this about fifty times.
Step 1: Prep the apples (5 minutes)
Core the apples and slice them into thin wedges—about 1/4-inch thick. I leave the skin on because it adds color and texture, plus it helps the slices hold their shape. Toss the slices in a bowl with the lemon juice and a pinch of salt. This is the step I forgot the first time I made this, and let me tell you, nothing kills a beautiful board faster than brown, sad-looking apple slices. The lemon juice keeps them bright for hours. Set them aside.
Step 2: Toast the walnuts (3 minutes)
If you’re using raw walnuts, toast them in a dry skillet over medium heat for 3-4 minutes, shaking the pan occasionally. You’ll know they’re done when they smell nutty and look slightly darker. Watch them carefully—walnuts go from toasted to burnt in about 30 seconds. I learned this the hard way and had to start over. Let them cool completely before adding to the board.
Step 3: Slice the cheeses (5 minutes)
For the cheddar: slice it into thin triangles or rectangles, about 1/4-inch thick. I like to leave some in a block and slice others for easier grabbing.
For the brie: leave it whole or cut it into wedges. I usually cut it into 6 wedges so everyone can get a piece with the rind on (the rind is edible and delicious—don’t skip it).
For the goat cheese: slice the log into rounds about 1/2-inch thick. If it crumbles a bit, that’s fine—it adds rustic charm.
Step 4: Slice the baguette (3 minutes)
Cut the baguette on a diagonal into thin slices, about 1/4-inch thick. The diagonal cut gives you more surface area for toppings. If the baguette is a day old, that’s actually better—it holds up better against soft cheese.
Step 5: Arrange the board (5 minutes)
This is where the magic happens. Start with the cheeses—place them in different spots around the board, not all clustered together. I put the brie at the top left, cheddar at the bottom right, and goat cheese in the middle. This creates visual balance and encourages people to walk around the board.
Next, add the meats. Fold the prosciutto into loose ribbons and tuck them near the brie. Fan out the soppressata slices near the cheddar.
Now add the apples. Arrange them in a slight fan pattern near the center, overlapping them slightly. This draws the eye and makes the board feel intentional.
Fill in the gaps with the accompaniments. Put the honey in a small bowl (or drizzle it directly on the board if you’re feeling bold—I do this when I’m serving immediately). Add the walnuts in little piles, scatter the dried figs, and tuck rosemary sprigs around the edges for color.
Finally, add the crackers and baguette slices around the perimeter, creating a frame for everything else. Don’t stack them too high—you want people to be able to grab them easily.
Step 6: Finish with salt and honey (1 minute)
Sprinkle a tiny bit of flaky sea salt over the brie and the apple slices. Drizzle a little honey over the goat cheese. This step takes ten seconds but makes the board look and taste like it came from a fancy restaurant.
Cooking Tips & Techniques
After making this board more times than I can count, here are the things I wish someone had told me:
Don’t overcrowd the board. I know it’s tempting to pile everything on, but a crowded board looks messy and makes it hard for people to grab what they want. Leave a little negative space—it looks more intentional and elegant. If you have too much food, use a second board or a plate on the side.
Let the cheese breathe. Take the cheeses out of the fridge 20-30 minutes before serving. Cold cheese doesn’t have the same flavor or texture. Room-temperature brie is creamy and luscious; cold brie is rubbery and bland. Trust me on this.
Balance flavors as you arrange. Don’t put all the sweet things together and all the savory things together. Mix it up. A sweet apple slice next to a sharp cheddar next to a salty piece of prosciutto—that’s the bite you want people to discover.
The one mistake I still make. I always underestimate how many crackers I need. People eat way more crackers than you think. I’ve learned to double my cracker estimate. The same goes for apples—they disappear fast.
Timing tip. You can prep everything except the apples a few hours ahead. Slice the apples and toss them with lemon juice just before serving for the best texture and color. If you’re making this for a party, I recommend doing all the prep work first, then assembling right before guests arrive.
Variations & Adaptations
This board is incredibly flexible, and I’ve tried several variations over the years. Here are my favorites:
Seasonal Swap: In the summer, swap the apples for sliced peaches or nectarines and use a fresh goat cheese with herbs. In the winter, try sliced pears (they’re softer, so handle them gently) with a blue cheese like gorgonzola. The honey drizzle works beautifully with any fruit.
Dietary Adaptations: For a vegan version, use vegan brie and cheddar (Miyoko’s makes excellent options), skip the meat and add marinated artichoke hearts and roasted red peppers. For a nut-free version, skip the walnuts and add pumpkin seeds or sunflower seeds instead. For a low-carb version, skip the baguette and crackers and use cucumber slices and bell pepper strips as vessels.
Flavor Twists: Add a small bowl of fig jam or apple butter for extra sweetness. Swap the prosciutto for speck (smoked prosciutto) for a deeper flavor. Add a few pickled things—cornichons or pickled red onions—for acidity that cuts through the richness. I tried pickled red onions once on a whim, and now I never make this board without them.
Personal Variation: My favorite version includes a small dish of hot honey drizzled over the goat cheese. The heat plus the sweetness plus the tangy cheese is absolutely ridiculous. I found this combination by accident when I grabbed the wrong bottle from the pantry, and it’s been a staple ever since.
Serving & Storage Suggestions
This board is best served at room temperature, so take it out of the fridge about 20 minutes before you’re ready to serve. I like to set it out on the counter with a few small plates, napkins, and a separate knife for each cheese. Don’t forget a small spoon for the honey!
For drinks, this board pairs beautifully with a crisp white wine like Sauvignon Blanc or a dry rosé. If you’re a beer person, try a hard cider or a pale ale—the apple notes in the cider complement the Honeycrisp apples perfectly. For non-alcoholic options, sparkling water with a splash of apple cider is lovely.
Storage: If you have leftovers (which honestly, rarely happens in my house), store the components separately. Wrap the cheeses in wax paper or cheese paper (not plastic wrap—it suffocates the cheese and makes it sweat). Store the apple slices in an airtight container with the lemon juice—they’ll keep for about 24 hours. Crackers and baguette slices should be stored in a sealed bag at room temperature. The prosciutto and soppressata can be wrapped in parchment and refrigerated.
Reheating: You don’t really reheat anything on a charcuterie board, but if you’re serving the baguette slices the next day, you can toast them in a 350°F oven for 5 minutes to crisp them up again.
One note on how flavors develop: the cheeses actually taste better the next day if you let them come to room temperature. Something about the aging process continues even after you’ve opened the package. I’ve been known to save a little brie specifically for the next day’s lunch.
Nutritional Information & Benefits
I’m not a nutritionist, but I’ve done my research on this board, and here’s the deal. A typical serving (about 1/4 of the board) contains roughly 400-500 calories, 25g fat, 30g carbs, and 20g protein. The exact numbers depend on how much cheese and meat you pile on your plate—be honest with yourself here.
The health benefits are actually pretty solid. Honeycrisp apples are packed with fiber and vitamin C, and they’ve got a decent amount of antioxidants in the skin. Cheese provides calcium and protein, and while it’s high in saturated fat, the probiotics in aged cheeses like cheddar are good for gut health. Walnuts are full of omega-3 fatty acids, which are great for brain health. And prosciutto, while high in sodium, is a good source of iron and B vitamins.
This board works for a lot of dietary preferences. It’s naturally gluten-free if you skip the bread and crackers. It’s low-carb friendly if you focus on the cheese, meat, and apples in moderation. It’s vegetarian-friendly if you skip the meat and add extra fruit and nuts. The only major allergen to note is tree nuts (walnuts) and dairy—both are clearly visible on the board, so guests can self-select.
My personal perspective? This board is a treat, not an everyday meal. But I love that it’s built around whole, recognizable ingredients. There’s nothing processed or mysterious here. You know exactly what you’re eating, and that feels good.
Conclusion
Look, I know there are about a million charcuterie board recipes out there. But this Fresh Fall Charcuterie Board with Honeycrisp Apples and Cheese is the one I keep coming back to, year after year. It’s the one I make for my brother, who still pretends he didn’t get caught sneaking bites. It’s the one I make for myself on a quiet Sunday afternoon with a good book. It’s simple, it’s beautiful, and it tastes like fall in the best possible way.
I hope you make this board your own. Add your favorite cheese, swap in whatever fruit looks good at the market, drizzle it with your favorite honey. The beauty of a board like this is that there are no rules—just good food arranged on a pretty surface. That’s it. That’s the whole secret.
If you make this board, I’d love to hear about it. Leave a comment below and tell me what variations you tried, or tag me in your photos. Did your picky eater finally come around? Did you discover a cheese-and-apple combination that blew your mind? Share it with me. And if you’re looking for more fall recipes, check out my Honeycrisp Apple Crisp or my Fall Salad with Maple Vinaigrette—they’re both perfect for this time of year.
Now go build yourself a beautiful board. You’ve got this.
Frequently Asked Questions
How far in advance can I make this charcuterie board?
You can prep everything except the apples up to 4 hours ahead. Slice the apples and toss them with lemon juice just before serving for the best color and texture. Assemble the board no more than 30 minutes before guests arrive so everything stays fresh.
Can I use a different type of apple?
Absolutely. Fuji, Pink Lady, or Gala apples work well. Avoid Red Delicious (too mealy) or Granny Smith (too tart for this particular board—save those for baking). The key is to use a crisp apple that holds its shape when sliced.
How do I keep the apple slices from turning brown?
Toss them in fresh lemon juice immediately after slicing. The citric acid prevents oxidation. I use about 1 tablespoon of juice per 2 apples. If you don’t have lemon juice, a splash of white vinegar or even Sprite works in a pinch—though lemon juice tastes the best.
What if I don’t have a wooden board?
No problem. Use a large baking sheet, a marble pastry slab, a clean pizza pan, or even a large dinner plate. You can also arrange everything on individual plates and let people build their own. The board is just a vessel—the food is what matters.
How much should I make per person?
For a main course, plan on about 4-6 ounces of total food per person. For an appetizer before a meal, 2-3 ounces per person is plenty. When in doubt, err on the side of more—leftover charcuterie ingredients make excellent lunches the next day.
Pin This Recipe!
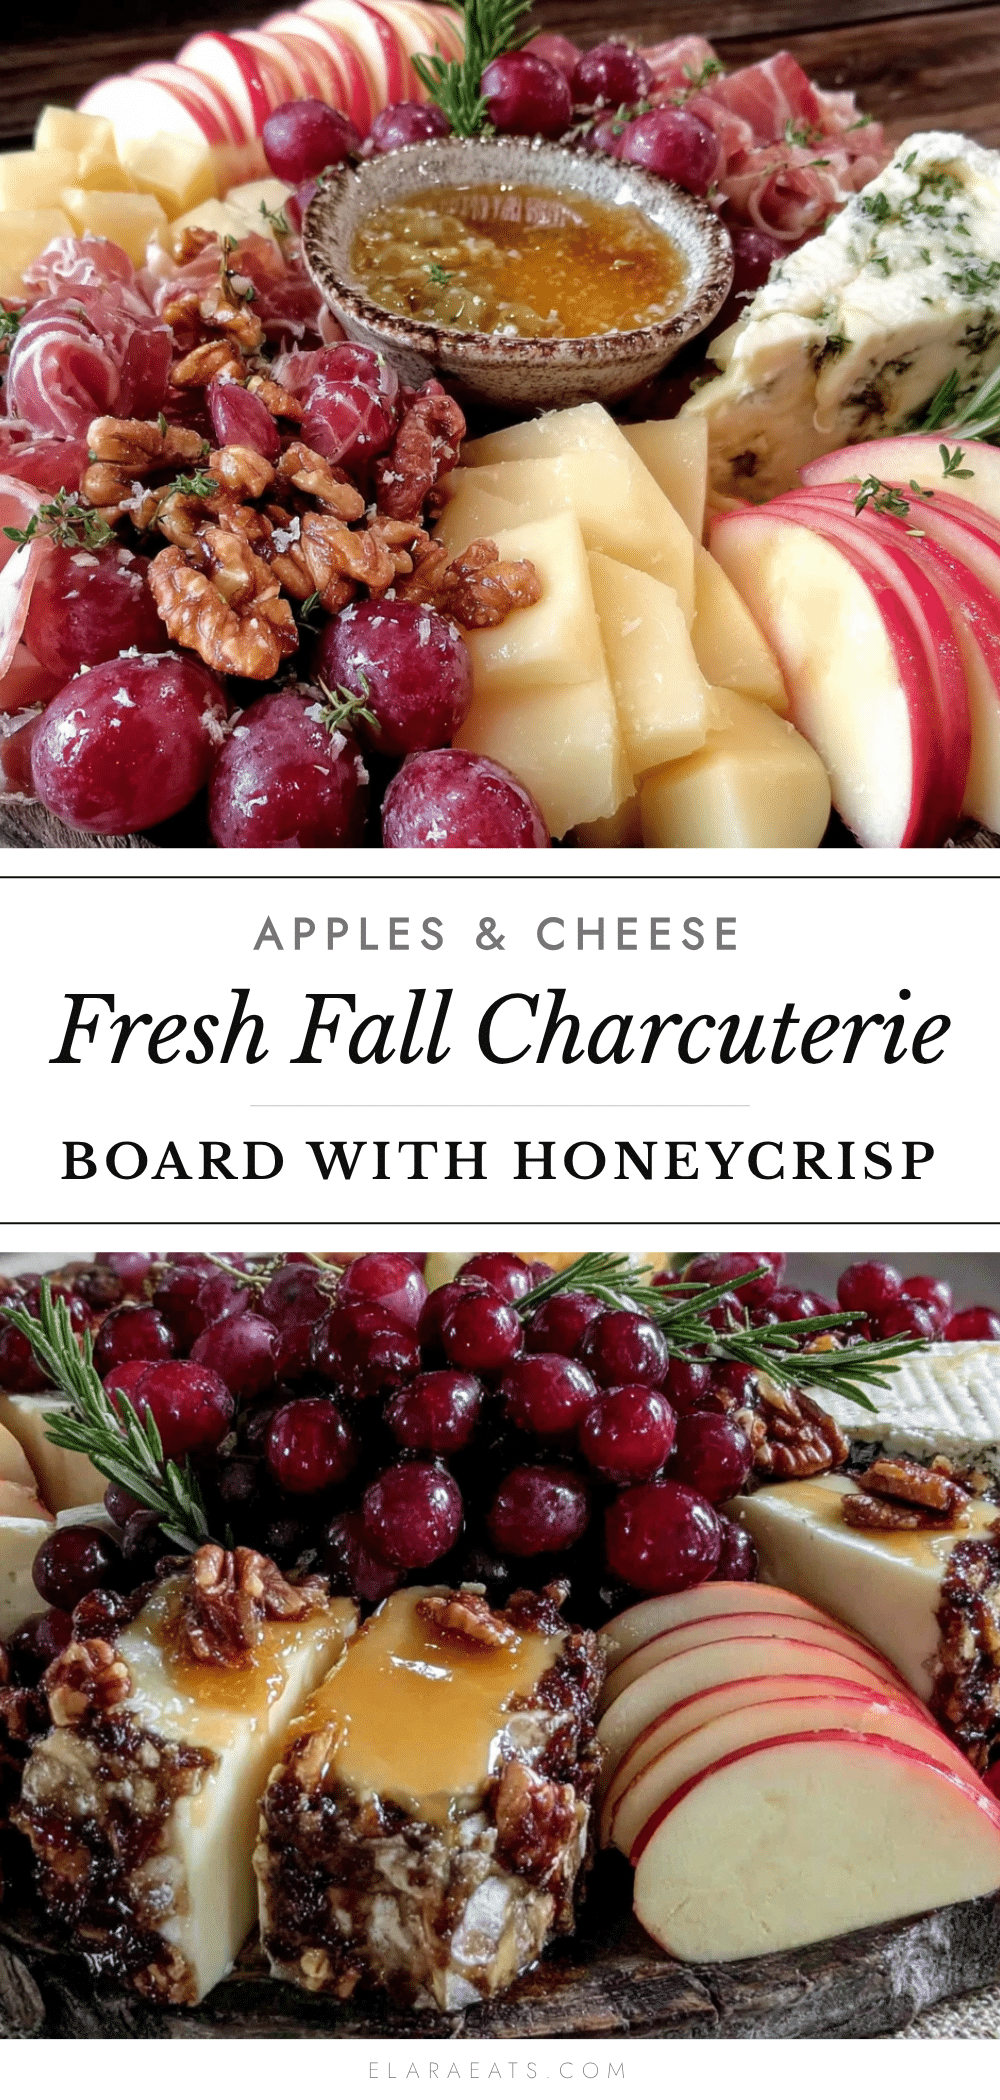
Fresh Fall Charcuterie Board with Apples and Cheese

A casual, gorgeous charcuterie board featuring Honeycrisp apples, a trio of cheeses, and savory meats, perfect for fall gatherings. Ready in 15 minutes, this crowd-pleaser is forgiving, flexible, and changes minds without even trying.
- Prep Time: 15 minutes
- Cook Time: 0 minutes
- Total Time: 15 minutes
- Yield: 8 servings 1x
- Category: Appetizer
- Cuisine: American
Ingredients
- 2 large Honeycrisp apples
- 1 tablespoon fresh lemon juice
- 6 ounces aged sharp cheddar (e.g., Cabot Seriously Sharp)
- 6 ounces brie (soft-ripened triple cream preferred)
- 4 ounces goat cheese log (e.g., Vermont Creamery)
- 4 ounces prosciutto (thinly sliced, not shaved)
- 4 ounces soppressata or salami (medium-thick slices)
- 1/3 cup honey
- 1/2 cup toasted walnuts
- 1/3 cup dried figs or dates (optional)
- Fresh rosemary sprigs (for garnish)
- Flaky sea salt (e.g., Maldon)
- 1 small baguette (sliced on bias into thin rounds)
- 1 box good-quality crackers (e.g., Raincoast crisps or water crackers)
Instructions
- Core the apples and slice into thin wedges about 1/4-inch thick. Toss with lemon juice and a pinch of salt. Set aside.
- Toast raw walnuts in a dry skillet over medium heat for 3-4 minutes, shaking occasionally, until fragrant and slightly darker. Let cool completely.
- Slice cheddar into thin triangles or rectangles (about 1/4-inch thick). Cut brie into 6 wedges (rind on). Slice goat cheese log into rounds about 1/2-inch thick.
- Slice baguette on a diagonal into thin rounds about 1/4-inch thick.
- Arrange cheeses in different spots on a large wooden board (e.g., brie top left, cheddar bottom right, goat cheese middle). Fold prosciutto into loose ribbons near brie; fan soppressata near cheddar. Arrange apple slices in a slight fan pattern near center. Fill gaps with honey (in a small bowl or drizzled), walnuts, dried figs, and rosemary sprigs. Place crackers and baguette slices around the perimeter.
- Sprinkle flaky sea salt over brie and apple slices. Drizzle honey over goat cheese.
Notes
Let cheeses come to room temperature 20-30 minutes before serving for best flavor. Prep everything except apples up to 4 hours ahead; slice apples and toss with lemon juice just before serving. Don’t overcrowd the board—leave negative space. Double the cracker estimate as they disappear fast. For a vegan version, use vegan cheeses and skip meat; add marinated artichoke hearts and roasted red peppers. For nut-free, substitute pumpkin seeds or sunflower seeds for walnuts.
Nutrition
- Serving Size: 1/4 of board
- Calories: 450
- Sugar: 18
- Sodium: 800
- Fat: 25
- Saturated Fat: 12
- Carbohydrates: 30
- Fiber: 4
- Protein: 20
Keywords: charcuterie board, fall charcuterie, apple cheese board, Honeycrisp apple, easy appetizer, fall entertaining, cheese board


