Love this? Save it for later!
Share the inspiration with your friends
It was 9:47 PM on a random Tuesday in October, and I had a desperate need for something warm, spiced, and sweet. The kind of craving that makes you open every cabinet door twice, hoping something magical appears. I didn’t have the energy for a layer cake or even homemade cookies—let’s face it, I was wearing pajamas and my motivation had clocked out hours ago. But I had a can of pumpkin puree, a box of spice cake mix that was probably meant for a different week’s plan, and a vague memory of something called a “dump cake” that a friend had mentioned once. Honestly, I figured it would either be a disaster or a revelation. So I grabbed a baking dish, dumped everything in (as the name suggests), and crossed my fingers. The smell that filled my kitchen twenty minutes later was pure autumn magic—cinnamon, nutmeg, and something deeply comforting. That first bite, warm and gooey with that perfect crunchy topping, made me wonder why I’d ever bothered with complicated desserts. Maybe you’ve had one of those nights where you just need something good without the fuss. This recipe became my answer, and it’s been my fall secret weapon ever since.
Why You’ll Love This Recipe
This Easy Pumpkin Dump Cake isn’t just another fall dessert—it’s the one that makes you look like a hero with almost zero effort. After testing this recipe at three different potlucks and two family dinners (including one where I forgot to set a timer and it still turned out perfect), I can confidently say it’s foolproof.
- Only 4 Ingredients: You probably already have most of them in your pantry. No fancy grocery runs required.
- Ready in Under an Hour: From craving to eating in about 50 minutes, with only 5 minutes of actual prep work.
- Perfect for Fall Gatherings: Thanksgiving, Halloween parties, or just a cozy Tuesday night—it fits every occasion.
- Crowd-Pleaser Guaranteed: I’ve watched people go back for thirds. Kids love it, adults devour it, and nobody believes it came from a box mix.
- Unbelievably Delicious Texture: The magic is in that contrast—silky pumpkin custard on the bottom, buttery crumb topping that gets slightly crispy, and a soft cake layer in between.
What makes this different from every other pumpkin dump cake out there? It’s the spice cake mix. Most recipes use yellow cake mix, but the spice mix brings that warm cinnamon-clove-nutmeg flavor that perfectly complements the pumpkin. I learned this the hard way after making it with plain cake mix once and having to add a ton of extra spices. Never again. This version tastes like you spent hours layering flavors, when really, the box did all the work.
This is the kind of dessert that makes you close your eyes after the first bite. It’s comfort food at its finest—warm, spiced, and deeply satisfying without any stress. Perfect for impressing guests who think you slaved away, or for treating yourself on a quiet fall evening.
What Ingredients You Will Need
This recipe uses simple, pantry-friendly ingredients to deliver that cozy autumn flavor without any complicated shopping lists. Here’s what you’ll need and why each one matters:
- 1 can (15 oz) pumpkin puree (not pumpkin pie filling—make sure it’s 100% pure pumpkin. I prefer Libby’s for consistent texture, but store brands work fine too)
- 1 can (12 oz) evaporated milk (this adds richness without making it too heavy. You can substitute with half-and-half if you’re in a pinch)
- 1 box (15.25 oz) spice cake mix (Duncan Hines and Betty Crocker both work great. The spice blend in the mix is what gives this dessert its warm, aromatic flavor)
- 1 cup (2 sticks) salted butter, melted (unsalted works too—just add a pinch of salt to the topping. I use Challenge or Kerrygold for extra richness)
- Optional: 1 teaspoon vanilla extract (adds depth to the pumpkin layer, but honestly, it’s great without it too)
- Optional: 1/2 cup chopped pecans or walnuts (for extra crunch on top—I love adding these when I’m feeling fancy)
- Optional: whipped cream or vanilla ice cream for serving (highly recommended, but not required)
Ingredient Selection Tips: When choosing your pumpkin puree, look for cans that feel firm with no dents. The pumpkin should be a deep orange color and smell slightly sweet. For the spice cake mix, check the expiration date—old cake mix can result in a denser texture. I once used an expired box and the topping never got that beautiful golden color I was hoping for.
Substitution Guidance: If you can’t find spice cake mix, use yellow cake mix and add 1 teaspoon cinnamon, 1/2 teaspoon nutmeg, and 1/4 teaspoon cloves to the dry mix. For a dairy-free version, use coconut cream instead of evaporated milk and a plant-based butter alternative. The texture will be slightly different but still delicious.
Equipment Needed
You don’t need a fancy kitchen for this recipe—that’s the beauty of it. Here’s what you’ll need:
- 9×13-inch baking dish (glass or ceramic works best for even heating. I use a Pyrex dish that’s seen better days but still delivers perfect results every time)
- Large mixing bowl (any medium-to-large bowl will do)
- Whisk or fork (for mixing the pumpkin base)
- Measuring cups and spoons (if you’re using the optional add-ins)
- Small saucepan or microwave-safe bowl (for melting butter)
- Rubber spatula (for scraping every last bit of pumpkin goodness)
- Cooling rack (optional but helps the cake set properly)
If you don’t have a 9×13 dish, you can use two 8×8 pans—just reduce the baking time by about 10 minutes and check for doneness earlier. I’ve even made this in a disposable aluminum pan for camping trips, and it worked like a charm. No special equipment needed, just basic kitchen tools you probably already own.
Preparation Method
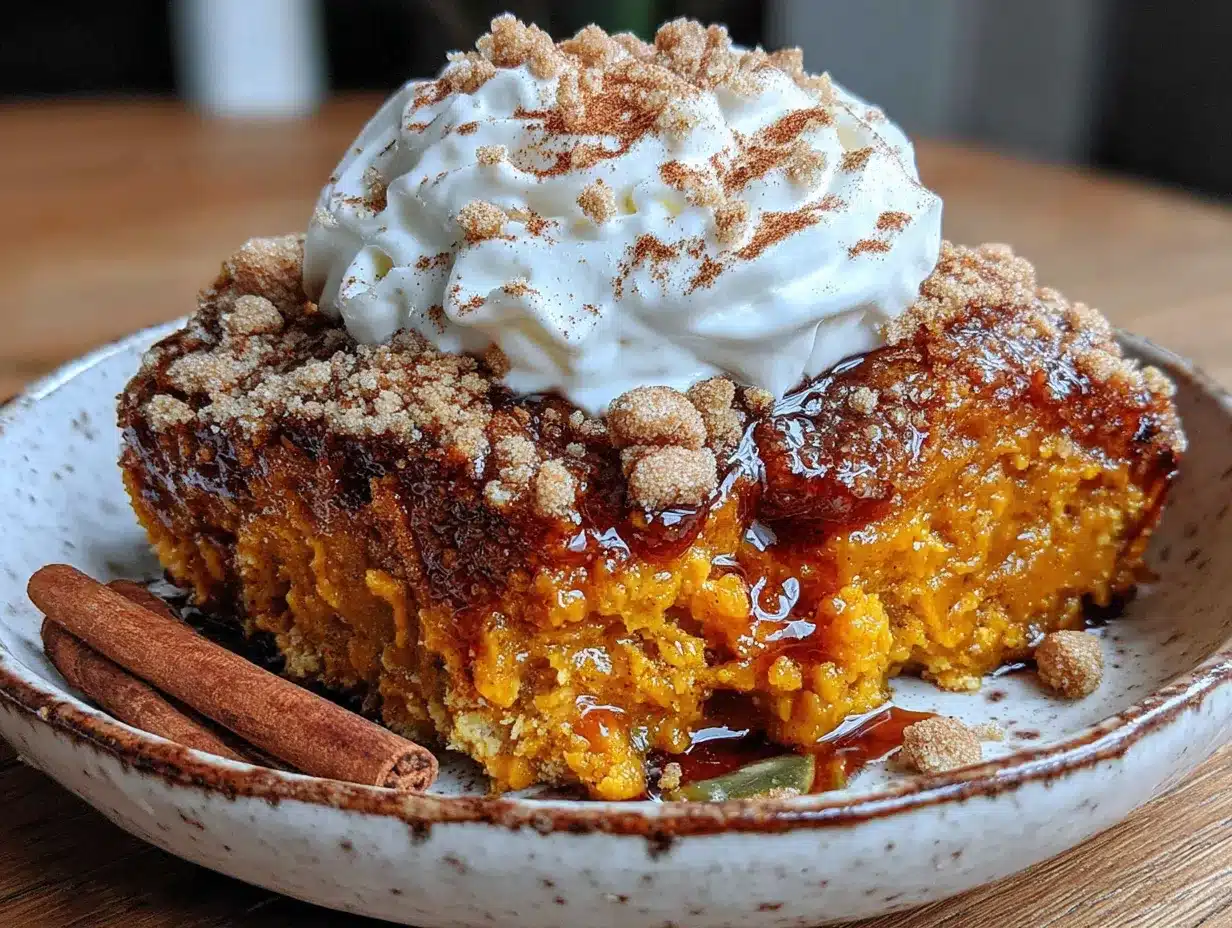
This is the easiest dessert you’ll ever make. Seriously, if you can open cans and pour things, you can make this. Here’s how it comes together:
- Preheat your oven to 350°F (175°C). While it’s heating, lightly grease your 9×13 baking dish with butter or non-stick spray. I use a paper towel to spread it evenly—just enough to prevent sticking.
- Make the pumpkin base. In your large mixing bowl, combine the entire can of pumpkin puree and the can of evaporated milk. Whisk them together until smooth and fully combined. The mixture should be a uniform orange color with no streaks. If you’re adding vanilla extract, stir it in now. This takes about 30 seconds—don’t overthink it.
- Pour the pumpkin mixture into your prepared baking dish. Use your rubber spatula to spread it evenly across the bottom. It should be about 1/4 inch deep. Don’t worry if it looks thin—the cake mix will absorb some of the liquid as it bakes.
- Sprinkle the spice cake mix evenly over the pumpkin layer. Here’s the key: don’t stir it in. Just dump the dry cake mix directly on top of the pumpkin mixture and spread it into an even layer with your spatula or the back of a spoon. Make sure every inch is covered—any bare spots will result in uneven texture. I learned this the hard way when I got lazy and left a corner uncovered. That corner turned into a sad, soggy mess.
- Pour the melted butter over the cake mix. Melt your butter in the microwave (about 45 seconds on high) or on the stovetop. Drizzle it as evenly as possible over the entire surface of the cake mix. Don’t stir! The butter will seep down through the dry mix and create that magical crumb topping. If you’re adding nuts, sprinkle them on top now.
- Bake for 45-55 minutes. Place the dish on the middle rack of your oven. The dump cake is done when the top is golden brown and the edges are bubbling. You’ll see the pumpkin mixture bubbling up around the sides—that’s normal. The center should be set but still slightly jiggly. I usually start checking at 45 minutes, then add 5 minutes at a time until it looks perfect.
- Let it cool for at least 15-20 minutes. This is the hardest part, I know. But letting it rest allows the layers to set properly. If you dig in too soon, you’ll get a soupy mess. Trust me, I’ve made that mistake at least three times. The wait is worth it.
- Serve warm or at room temperature. Scoop it into bowls, add a dollop of whipped cream or a scoop of vanilla ice cream, and enjoy. The contrast between the warm pumpkin layer and cold ice cream is absolutely divine.
Cooking Tips & Techniques
After making this dump cake at least twenty times (I’m not exaggerating), I’ve picked up a few tricks that make the difference between good and unforgettable:
The Butter Distribution Trick: Pouring melted butter evenly is harder than it sounds. I now use a spoon to drizzle it in a grid pattern—row by row, column by column. This ensures every bit of cake mix gets some butter love. If you just dump it all in one spot, you’ll end up with dry patches.
The Doneness Test: The top should be deep golden brown, and the edges should be actively bubbling when you pull it out. If the center still looks wet and the top is pale, give it another 5-7 minutes. I once underbaked this by 10 minutes and ended up with a goopy middle that nobody wanted to eat. Learn from my mistakes.
The Nut Topping Hack: If you’re adding nuts, toast them first in a dry skillet for 2-3 minutes until fragrant. This brings out their oils and adds a deeper flavor. Sprinkle them on top of the butter layer, not before—otherwise they’ll sink into the pumpkin and lose their crunch.
Timing and Multitasking: This recipe comes together so fast that you can prep it while your oven preheats. I start by melting the butter, then whisk the pumpkin mixture while it cools slightly. By the time the oven beeps, everything is ready to go in. Total active time is about 5 minutes—the rest is just waiting.
Consistency Secrets: If your dump cake turns out too soupy, you might have used pumpkin pie filling instead of pure pumpkin. That stuff has extra liquid and sugar that throws off the ratio. Always double-check the label. If it’s too dry, you might have overbaked it or used a smaller can of evaporated milk. Stick with the 12-ounce can for best results.
Variations & Adaptations
This recipe is incredibly forgiving and adaptable. Here are some variations I’ve tried and loved:
1. Chocolate Pumpkin Dump Cake: Use a chocolate cake mix instead of spice cake. The chocolate-pumpkin combo is surprisingly amazing—like a healthier version of a brownie. I made this for a Halloween party and it disappeared faster than the candy bowl.
2. Gluten-Free Version: Substitute the spice cake mix with a gluten-free yellow cake mix and add 1 teaspoon cinnamon, 1/2 teaspoon nutmeg, and 1/4 teaspoon ginger. King Arthur makes a great gluten-free mix that holds up well. My gluten-sensitive friend couldn’t tell the difference, which is the highest compliment.
3. Vegan Adaptation: Use full-fat coconut milk instead of evaporated milk, and a vegan butter stick (like Earth Balance) instead of regular butter. The texture is slightly less firm but still incredibly delicious. I tested this version for a vegan potluck and got requests for the recipe.
4. Extra Spiced Version: Add 1 teaspoon pumpkin pie spice and 1/2 teaspoon cinnamon to the pumpkin mixture before pouring it into the dish. This doubles down on the fall flavors and makes your kitchen smell like a candle shop. Perfect for when you want that extra warmth.
5. Caramel Pecan Dump Cake: Drizzle 1/4 cup caramel sauce over the top before baking, and add 1/2 cup chopped pecans. The caramel gets all bubbly and sticky—it’s like a pecan pie and pumpkin pie had a beautiful baby. Dangerous in the best way possible.
Serving & Storage Suggestions
This dump cake is best served warm, straight from the oven, with a generous scoop of vanilla ice cream melting on top. The contrast between the warm, spiced pumpkin and cold, creamy ice cream is absolutely heavenly. If you’re feeling extra indulgent, add a drizzle of caramel sauce and a sprinkle of cinnamon.
For presentation, I like to scoop it into shallow bowls so you can see all the layers—the golden crumb topping, the soft cake layer, and the silky pumpkin base. It’s rustic and inviting, not fancy or fussy. Perfect for fall gatherings where you want people to feel comfortable going back for seconds.
Storage Instructions: Cover the baking dish tightly with foil or plastic wrap and store in the refrigerator for up to 5 days. The flavors actually meld together overnight, making it even better the next day. I’ve been known to eat cold leftovers straight from the fridge for breakfast—no judgment here.
Freezing Instructions: This dump cake freezes beautifully. Let it cool completely, then wrap the entire dish in plastic wrap, followed by a layer of foil. Freeze for up to 3 months. To reheat, thaw in the refrigerator overnight, then warm individual portions in the microwave for 30-45 seconds or in a 350°F oven for 10-15 minutes.
Reheating Tips: The microwave is your friend here. Individual servings take about 30 seconds on high. If you’re reheating the whole dish, cover it with foil and warm in a 350°F oven for 15-20 minutes. The topping will crisp back up nicely. Don’t microwave the entire dish—the topping gets soggy and sad.
Flavor Development: Like many desserts, this one gets better with time. The spices meld into the pumpkin, and the textures settle into perfect harmony. Day-old dump cake is honestly my favorite version. Something about that overnight rest makes everything taste more cohesive.
Nutritional Information & Benefits
Here’s the estimated nutritional breakdown per serving (based on 12 servings):
| Nutrient | Amount per Serving |
|---|---|
| Calories | 320 |
| Total Fat | 18g |
| Saturated Fat | 10g |
| Cholesterol | 45mg |
| Sodium | 380mg |
| Total Carbohydrates | 38g |
| Dietary Fiber | 2g |
| Sugars | 22g |
| Protein | 4g |
| Vitamin A | 80% DV |
| Calcium | 10% DV |
Pumpkin is packed with vitamin A, which supports eye health and immune function. It’s also a good source of fiber and potassium. While this is definitely a treat (it’s cake, after all), using pumpkin adds some nutritional value you won’t find in regular cakes. Plus, the evaporated milk provides calcium and protein.
Dietary Considerations: This recipe contains dairy (butter, evaporated milk) and gluten (cake mix). It can be made gluten-free and vegan with the substitutions mentioned above. It’s naturally nut-free if you skip the optional pecan topping. Always check your cake mix label for potential allergens—some brands process nuts in the same facility.
Frequently Asked Questions
Can I use pumpkin pie filling instead of pumpkin puree?
No, I wouldn’t recommend it. Pumpkin pie filling already has sugar and spices added, which will throw off the sweetness and texture of the dump cake. Stick with 100% pure pumpkin puree for the best results. The difference is noticeable—pie filling makes it overly sweet and the texture gets gummy.
Why is my dump cake soupy in the middle?
This usually happens for one of two reasons: either you didn’t bake it long enough, or you used the wrong type of pumpkin. Make sure you’re using pure pumpkin puree, not pumpkin pie filling. Also, check that your oven is actually at 350°F—I’ve had ovens run cool and needed an extra 10-15 minutes of baking time. Let it cool for at least 20 minutes before serving, as it continues to set as it rests.
Can I make this in advance?
Absolutely! This dump cake is actually better the next day. You can make it a day ahead, let it cool completely, cover it, and store it in the refrigerator. Reheat individual portions in the microwave for 30 seconds or warm the whole dish in a 350°F oven for 15 minutes. It’s perfect for holiday entertaining when you want to get ahead of the cooking chaos.
What can I use instead of evaporated milk?
If you don’t have evaporated milk, you can substitute with half-and-half or whole milk mixed with a tablespoon of melted butter. For a dairy-free option, use full-fat coconut milk or oat milk. The texture will be slightly different—evaporated milk gives the richest, creamiest result—but any of these will work in a pinch.
Can I double this recipe?
Yes, but you’ll need a larger pan. Use a half-sheet pan (about 12×17 inches) and double all the ingredients. The baking time will be similar, but start checking at 50 minutes. If you don’t have a larger pan, make two separate 9×13 dishes and bake them on separate racks, rotating halfway through. Just don’t try to cram double the ingredients into one 9×13—it will overflow and make a sticky mess in your oven.
Conclusion
This Easy Pumpkin Dump Cake is everything I want in a fall dessert—warm, spiced, comforting, and ridiculously simple to make. It’s the kind of recipe that proves you don’t need fancy techniques or complicated ingredient lists to create something truly memorable. Whether you’re bringing it to a Thanksgiving dinner, feeding a crowd at a Halloween party, or just treating yourself on a cozy autumn evening, this dump cake delivers every single time.
What I love most about this recipe is how it invites you to make it your own. Add nuts, swap the cake mix, drizzle caramel on top—there’s no wrong way to enjoy it. It’s forgiving, adaptable, and always delicious. That late-night experiment in my pajamas turned into one of my most-requested recipes, and I have a feeling it’ll become one of yours too.
So go ahead—open that can of pumpkin, grab a box of spice cake mix, and give this a try. I’d love to hear how it turns out! Drop a comment below and let me know if you added any fun variations, or tag me in your photos if you share them online. Happy fall baking, friends!
Pin This Recipe!
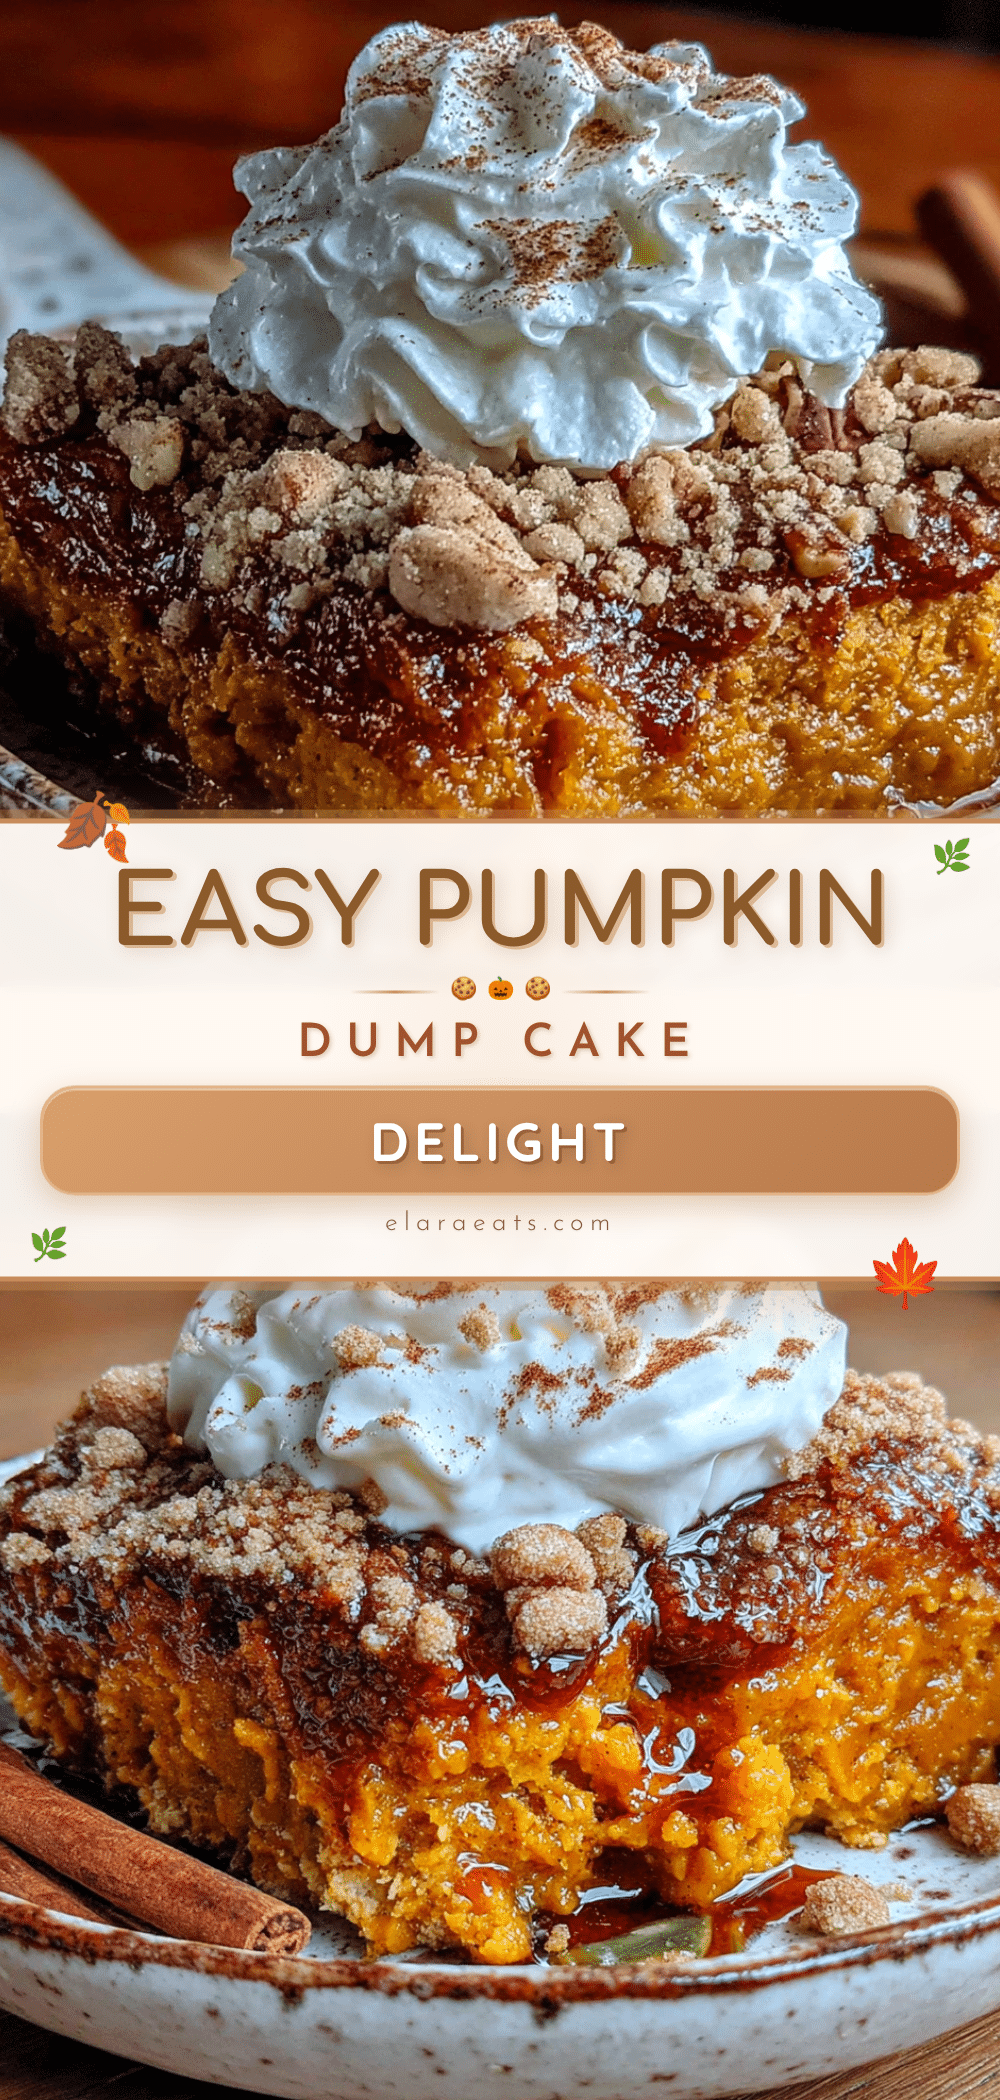
Easy Pumpkin Dump Cake: Best 4-Ingredient Fall Dessert
This Easy Pumpkin Dump Cake is a warm, spiced, and comforting fall dessert made with just 4 ingredients. It’s ready in under an hour with only 5 minutes of prep, making it perfect for Thanksgiving, Halloween parties, or a cozy night in.
- Prep Time: 5 minutes
- Cook Time: 50 minutes
- Total Time: 55 minutes
- Yield: 12 servings 1x
- Category: Dessert
- Cuisine: American
Ingredients
- 1 can (15 oz) pumpkin puree (not pumpkin pie filling)
- 1 can (12 oz) evaporated milk
- 1 box (15.25 oz) spice cake mix
- 1 cup (2 sticks) salted butter, melted
- 1 teaspoon vanilla extract (optional)
- 1/2 cup chopped pecans or walnuts (optional)
- Whipped cream or vanilla ice cream for serving (optional)
Instructions
- Preheat your oven to 350°F (175°C). Lightly grease a 9×13-inch baking dish with butter or non-stick spray.
- In a large mixing bowl, combine the pumpkin puree and evaporated milk. Whisk until smooth and fully combined. If using vanilla extract, stir it in now.
- Pour the pumpkin mixture into the prepared baking dish and spread it evenly across the bottom.
- Sprinkle the spice cake mix evenly over the pumpkin layer. Do not stir.
- Pour the melted butter evenly over the cake mix. Do not stir. If adding nuts, sprinkle them on top now.
- Bake for 45-55 minutes, until the top is golden brown and the edges are bubbling. The center should be set but slightly jiggly.
- Let the dump cake cool for at least 15-20 minutes before serving.
- Serve warm or at room temperature, optionally topped with whipped cream or vanilla ice cream.
Notes
For best results, use 100% pure pumpkin puree, not pumpkin pie filling. The spice cake mix is key—if using yellow cake mix, add 1 tsp cinnamon, 1/2 tsp nutmeg, and 1/4 tsp cloves. Let the cake cool for at least 15-20 minutes to set properly. Store leftovers covered in the refrigerator for up to 5 days. Freeze for up to 3 months.
Nutrition
- Serving Size: 1 serving
- Calories: 320
- Sugar: 22
- Sodium: 380
- Fat: 18
- Saturated Fat: 10
- Carbohydrates: 38
- Fiber: 2
- Protein: 4
Keywords: pumpkin dump cake, easy fall dessert, 4-ingredient dessert, pumpkin dessert, spice cake mix, dump cake


