Love this? Save it for later!
Share the inspiration with your friends
I wasn’t planning on making a Fourth of July dessert at all. I was actually at my local hardware store, of all places, buying a new garden hose, when the cashier—a woman named Dottie who looked like she’d rather be anywhere else—started talking about this icebox cake. She said it was the only thing she made for summer barbecues because you didn’t have to turn on the oven, and her grandkids went crazy for the stripes. I mean, who gets a dessert recipe from a hardware store cashier? But Dottie was so matter-of-fact about it, scribbling the ingredients on the back of a receipt, that I had to try it. I honestly forgot about the hose for a second.
So, I went home, bought a bunch of berries, and made this Easy No-Bake Red White and Blue Berry Icebox Cake. And you know that feeling when something turns out way better than you expected? That was this. It’s not just a dessert; it’s a showstopper. The layers of cream, graham crackers, and fresh berries look like they took hours, but the whole thing comes together in about twenty minutes. The hardest part is waiting for it to chill in the fridge. Maybe you’ve been there—staring at the fridge door, willing the cake to be ready. I know I have. This is the recipe that made me a believer in no-bake desserts, and I keep making it because it’s the perfect, stress-free way to celebrate summer.
Why You’ll Love This Recipe
Let me tell you why this particular icebox cake has earned a permanent spot in my summer rotation. I’ve tested a lot of versions over the years, and this one hits all the right notes without any of the fuss.
- Quick & Easy : It comes together in under 20 minutes of active prep time. No baking, no complicated techniques, just layering. Perfect for those hot days when you don’t want to even look at your oven.
- Simple Ingredients : You only need a handful of things—graham crackers, heavy cream, cream cheese, powdered sugar, vanilla, and fresh berries. You might already have most of them in your kitchen.
- Perfect for Celebrations : This cake is a natural for Memorial Day, the Fourth of July, or any summer potluck. The red, white, and blue stripes make it a patriotic centerpiece without any artificial food coloring.
- Crowd-Pleaser : I’ve brought this to three different barbecues this summer, and it gets devoured every single time. Kids love the creamy layers, and adults appreciate that it’s not too sweet.
- Unbelievably Delicious : The magic happens overnight. The graham crackers soften into a cake-like texture, and the cream absorbs all the berry juices. It’s like a giant, creamy berry shortcake that you eat with a fork.
What makes this recipe different from the rest? It’s the balance. I use a cream cheese and whipped cream mixture instead of just plain whipped cream, which gives it a slight tang and a much more stable structure. It doesn’t get soggy or slide apart when you cut it. This isn’t just another version of a no-bake cake—it’s the version that actually works, every single time. It’s comfort food reimagined: cool, creamy, and bursting with fresh fruit, perfect for making any summer day feel special.
What Ingredients You Will Need
This recipe relies on simple, fresh ingredients to create something truly spectacular. The berries do the heavy lifting for flavor, while the cream layer provides that luscious, cool texture. Here is everything you will need, with a few notes from my own kitchen.
- Graham Crackers : You will need one standard box (about 14-16 whole sheets). I prefer the classic honey-flavored ones, but cinnamon graham crackers also work and add a nice warmth. Do not use the low-fat version; they can get too mushy. You will break them to fit your dish, so don’t worry about keeping them perfect.
- Heavy Whipping Cream : 2 cups (480 ml). Make sure it is very cold. This is what gives the filling its light, airy texture. I have tried using half-and-half, and honestly, it is not the same—the cake will be much thinner and less stable.
- Cream Cheese : 8 ounces (226 grams), softened to room temperature. This is the secret ingredient that gives the filling structure and a slight tang, balancing the sweetness of the berries and graham crackers. I always use full-fat cream cheese for the best texture.
- Powdered Sugar : 1 cup (120 grams). It dissolves instantly into the cream, giving you a smooth, lump-free filling. Do not substitute granulated sugar, as it will leave a gritty texture.
- Vanilla Extract : 1 teaspoon. It enhances the sweetness and adds depth. Use pure vanilla extract if you have it, but imitation will work in a pinch.
- Fresh Strawberries : 1 pound (450 grams), hulled and sliced. Look for bright red, fragrant berries. If they are out of season, you can use frozen sliced strawberries, but thaw and drain them very well first, or they will make the cake watery.
- Fresh Blueberries : 6 ounces (170 grams). I love using wild blueberries when I can find them—they are smaller and sweeter. Regular blueberries work perfectly, too. Just make sure they are dry and firm.
- Fresh Raspberries (optional) : 6 ounces (170 grams). I like to add a few for extra red color and a pop of tartness. They are optional but highly recommended for the “red” layer.
Ingredient Tip : For the best flavor, use berries that are in season. In the middle of summer, local strawberries are unbeatable. If you are making this in winter, look for organic berries from the grocery store; they tend to have more flavor than conventionally grown ones.
Equipment Needed
You don’t need any fancy gadgets for this recipe, which is part of its beauty. Here is what you will need to pull it off.
- 9×13-inch Baking Dish : This is the perfect size for creating three distinct layers of graham crackers and filling. A glass dish lets you see the beautiful stripes, which is always fun. If you don’t have a 9×13, you can use an 8×8 dish for a taller cake, but you will need to adjust the layering.
- Electric Mixer : A stand mixer or a hand mixer works great for whipping the cream and cream cheese together. You can do it by hand with a whisk, but your arm will get a serious workout. I have done it both ways, and the mixer is just easier.
- Large Mixing Bowls : You will need one for the cream cheese mixture and one for whipping the cream. I recommend using a metal or glass bowl for the cream; it stays colder than plastic.
- Spatula : A rubber spatula is essential for folding the whipped cream into the cream cheese mixture without deflating it. It is also great for spreading the filling evenly over the graham crackers.
- Sharp Knife and Cutting Board : For hulling and slicing the strawberries. A good, sharp knife makes this job much faster and safer.
Budget-Friendly Tip : If you don’t have a 9×13 dish, you can use a deep 9-inch square dish or even a large loaf pan. Just adjust the number of layers. You can also use a trifle bowl to make a layered parfait-style dessert, which looks gorgeous.
Preparation Method
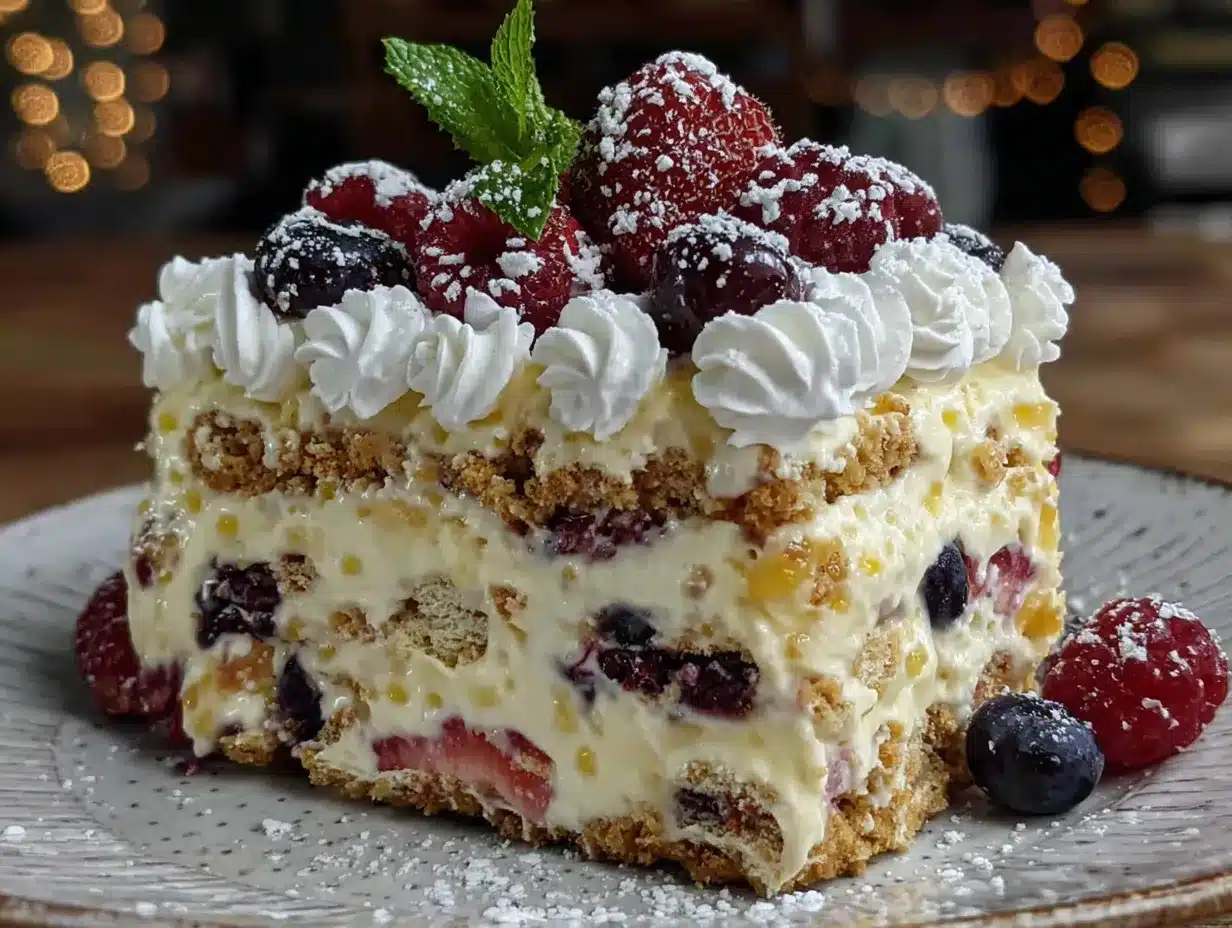
Alright, let’s get to the fun part. This is a hands-off recipe, but a little care in the layering makes all the difference. Follow these steps, and you will have a beautiful, delicious cake.
-
Prepare Your Pan and Berries. Lightly spray your 9×13-inch baking dish with non-stick cooking spray. This helps the bottom layer of graham crackers not stick. Then, wash and dry your berries. Hull and slice the strawberries into even, thin slices (about 1/4-inch thick). Set the strawberries and blueberries aside. If you are using raspberries, leave them whole.
-
Make the Cream Cheese Base. In a large mixing bowl, beat the softened cream cheese with an electric mixer on medium speed until it is completely smooth and fluffy. This takes about 2 minutes. Scrape down the sides of the bowl with a spatula. Add the powdered sugar and vanilla extract, and beat again until well combined and smooth. The mixture should look like a thick, sweet frosting.
-
Whip the Cream. In a separate, clean mixing bowl, pour the cold heavy whipping cream. Using the electric mixer (with clean beaters), whip the cream on medium-high speed until stiff peaks form. This means when you lift the beaters, the cream stands up in a peak that doesn’t flop over. Be careful not to over-whip, or you will end up with butter. It takes about 3-5 minutes with a hand mixer.
-
Fold It All Together. Take about one-third of the whipped cream and stir it into the cream cheese mixture. This lightens the cream cheese, making it easier to fold in the rest. Then, gently fold the remaining whipped cream into the cream cheese mixture using your spatula. Use a gentle, cutting motion—fold from the bottom up and over. Do not stir; you want to keep as much air in the mixture as possible. The final filling should be light, fluffy, and smooth.
-
First Layer: Graham Crackers. Arrange a single layer of graham crackers on the bottom of your prepared dish. You will likely need to break some to fit. I like to cover the entire bottom, leaving no gaps. It is okay if they overlap just a little bit.
-
Second Layer: Filling and Berries. Spread about one-third of the cream filling evenly over the graham crackers. Use your spatula to smooth it out. Then, scatter about one-third of your sliced strawberries and blueberries over the filling. Press them in gently so they are partially embedded in the cream.
-
Repeat the Layers. Place another layer of graham crackers on top of the berries. Repeat the process: spread another third of the filling, then scatter another third of the berries. Add a third layer of graham crackers, followed by the remaining filling. Spread the filling all the way to the edges of the dish.
-
Top with Berries. Now for the fun part—decorating the top. Arrange the remaining strawberries, blueberries, and raspberries in a pretty pattern. I like to create stripes of red and blue for a patriotic look. You can also make a star shape in the center. Get creative!
-
Chill, Chill, Chill. This is the most important step. Cover the dish tightly with plastic wrap and refrigerate for at least 6 hours, but overnight is best (8-12 hours). The graham crackers need time to absorb the moisture from the cream and soften into a cake-like texture. If you try to cut it too early, the crackers will be crunchy, and the cake will fall apart.
Pro Tip : If you are in a hurry, you can place the cake in the freezer for 2-3 hours. It will firm up faster, but let it sit at room temperature for 15 minutes before slicing for the best texture.
Cooking Tips & Techniques
I have made this cake about a dozen times now, and I have learned a few things the hard way. Here are my best tips to make sure yours turns out perfectly.
- Don’t Skip the Cream Cheese. I tried making this once with just whipped cream, and it was a disaster. The cake was a soggy, sliding mess. The cream cheese gives the filling structure, so it holds its shape when you cut it. It also adds a fantastic tang that cuts through the sweetness.
- Room Temperature Ingredients are Key. Your cream cheese must be softened to room temperature. If it is too cold, it will be lumpy and won’t mix smoothly. Take it out of the fridge about 30 minutes before you start. The heavy cream, however, needs to be ice-cold to whip properly. Keep it in the fridge until the very last minute.
- Pat Your Berries Dry. After washing the berries, make sure to dry them thoroughly with a clean kitchen towel or paper towels. Excess moisture will make the cream watery and the graham crackers soggy in a bad way. This is a small step that makes a huge difference.
- Use a Sharp Knife to Slice. When you are ready to serve, use a long, sharp knife. Run it under hot water, wipe it dry, and then make your cut. Clean the knife between each slice for picture-perfect pieces. A dull knife will just squish the cake.
- Patience is a Virtue. I know it is hard to wait, but do not rush the chilling time. The cake needs a full 6-8 hours to set properly. I once tried to serve it after only 4 hours, and it was a beautiful, delicious mess that fell apart on the plate. Trust the process.
Variations & Adaptations
One of the best things about this icebox cake is how easy it is to change it up. Here are a few of my favorite variations.
- Berry Swap : You are not limited to strawberries and blueberries. Try using sliced peaches and raspberries for a different summer flavor. Or, use blackberries and sliced nectarines. Any combination of soft, juicy fruit will work beautifully.
- Chocolate Lover’s Version : Swap the graham crackers for chocolate wafer cookies or even chocolate graham crackers. The chocolate and berry combination is incredible. You can also add a layer of chocolate shavings between the cream layers.
- Lemon Berry Twist : Add the zest of one lemon to the cream cheese mixture before whipping. The bright, citrusy flavor pairs perfectly with the berries. You can also add a thin layer of lemon curd on top of the first layer of graham crackers for an extra punch of flavor.
- Dairy-Free Option : You can make this dairy-free by using a block of vegan cream cheese and a can of full-fat coconut cream (chilled overnight, then whipped). The texture will be slightly different, but it is still delicious. Use vegan graham crackers as well.
- Individual Servings : Instead of a large dish, make these in individual mason jars or small glasses. Layer the graham crackers (broken into pieces), filling, and berries. They are perfect for picnics or portion control. Plus, they look adorable.
Serving & Storage Suggestions
This cake is best served cold, straight from the refrigerator. The texture is just perfect when it is well-chilled. Here is how to serve and store it.
Serving : Take the cake out of the fridge about 10-15 minutes before you plan to serve it. This takes the edge off the chill and allows the flavors to come through. Cut it into squares and serve on a plate. It is rich enough on its own, but a dollop of extra whipped cream or a drizzle of strawberry sauce is never a bad idea. I love serving it with a tall glass of iced tea or lemonade.
Storage : Cover the dish tightly with plastic wrap or transfer the leftovers to an airtight container. The cake will keep in the refrigerator for up to 3 days. The texture will continue to soften over time, so it will be even more cake-like on day two. Honestly, I think it tastes even better the next day.
Freezing : You can freeze this cake! Once it has set in the fridge, cover it tightly with a layer of plastic wrap and then a layer of aluminum foil. It will keep in the freezer for up to 1 month. To serve, thaw it in the refrigerator overnight. The texture will be slightly softer, but it is still wonderful.
Nutritional Information & Benefits
While this is definitely a treat, it does have some redeeming qualities thanks to the fresh fruit. Here is a rough estimate of the nutritional information per serving (assuming 12 servings).
| Nutrient | Amount Per Serving |
|---|---|
| Calories | ~380 |
| Fat | 24g |
| Saturated Fat | 15g |
| Carbohydrates | 38g |
| Sugar | 24g |
| Protein | 4g |
| Fiber | 2g |
Health Benefits : The fresh berries are packed with antioxidants, vitamin C, and fiber. Blueberries are particularly known for their brain-boosting properties, while strawberries are great for heart health. Of course, the cream and sugar make this a dessert, but using fresh fruit is a much better choice than processed candy or artificial colors. It is a dessert that makes you feel a little bit better about indulging.
Dietary Considerations : This recipe contains gluten (graham crackers), dairy (cream and cream cheese), and eggs (in the graham crackers). It is not suitable for vegans or those with celiac disease without modifications. See the variations section for dairy-free and gluten-free options.
Conclusion
So there you have it—my go-to Easy No-Bake Red White and Blue Berry Icebox Cake. It came from a hardware store cashier, of all people, but it has become a staple in my summer dessert rotation. It is simple, stunning, and absolutely delicious. I love that it takes almost no effort but looks like you spent hours in the kitchen. It is the perfect way to celebrate a sunny day, a holiday, or just a Tuesday.
I encourage you to make this recipe your own. Swap the berries, add some lemon zest, or make it in individual jars. The beauty of a no-bake cake is that it is forgiving and fun. I promise you, the first time you pull this out at a barbecue and hear the “oohs” and “ahhs,” you will feel like a rockstar.
Have you tried this recipe? I would love to hear about your variations! Drop a comment below and tell me how it turned out. And if you loved it, please share it with a friend who needs a stress-free dessert in their life. Happy no-baking!
Frequently Asked Questions
Can I use frozen berries instead of fresh?
Yes, you can, but you need to thaw and drain them very well first. Frozen berries release a lot of liquid as they thaw, which can make the cake watery. Pat them dry with paper towels before layering. For the best texture and flavor, fresh berries are always my first choice.
Why did my graham crackers stay crunchy?
This usually happens if the cake hasn’t chilled long enough. The graham crackers need at least 6 hours (overnight is best) to fully absorb the moisture from the cream and soften. If you are short on time, try the freezer method for 2-3 hours, but let it sit at room temperature for 15 minutes before serving.
Can I make this cake a day ahead of time?
Absolutely! In fact, I recommend it. Making this cake a day ahead gives it plenty of time to set and allows the flavors to meld together beautifully. It is the perfect make-ahead dessert for a party. Just keep it covered in the fridge until you are ready to serve.
How do I cut clean slices without it falling apart?
Use a long, sharp knife. Run it under hot water, wipe it dry, and then make your cut. Clean the knife between each slice. This prevents the cream from sticking and gives you clean, beautiful pieces. A dull knife will just squish the cake.
Can I use a different type of cracker or cookie?
Yes! You can swap graham crackers for vanilla wafers, shortbread cookies, or even chocolate wafer cookies. Keep in mind that different cookies have different textures and sweetness levels, so the final result will vary slightly. I love using chocolate wafers for a chocolate-berry version.
Pin This Recipe!
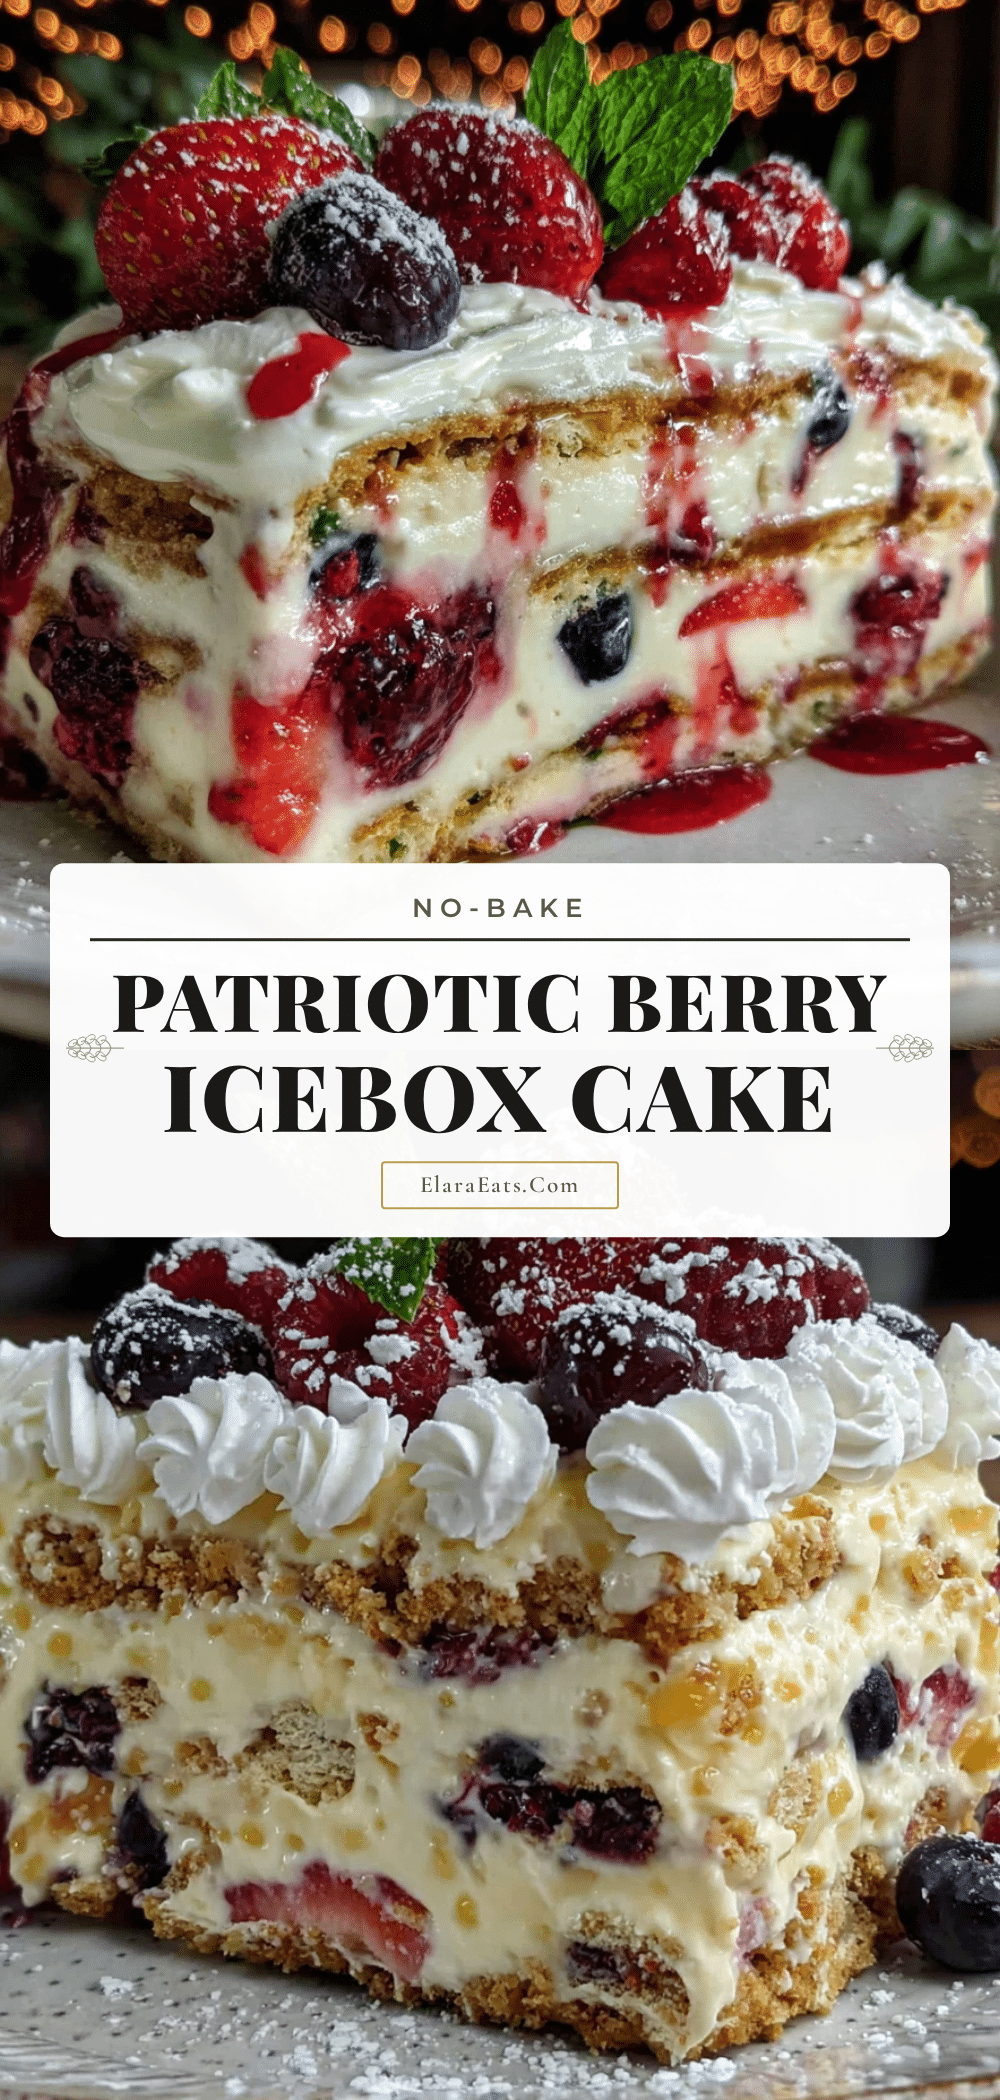
Easy No-Bake Red White and Blue Berry Icebox Cake

A stunning no-bake dessert featuring layers of graham crackers, a creamy cream cheese filling, and fresh strawberries and blueberries. Perfect for summer celebrations like the Fourth of July, this cake comes together in under 20 minutes of active prep and requires no oven time.
- Prep Time: 20 minutes
- Cook Time: 0 minutes
- Total Time: 6 hours 20 minutes (includes chilling)
- Yield: 12 servings 1x
- Category: Dessert
- Cuisine: American
Ingredients
- 1 box (14-16 whole sheets) graham crackers
- 2 cups (480 ml) heavy whipping cream, cold
- 8 ounces (226 g) cream cheese, softened to room temperature
- 1 cup (120 g) powdered sugar
- 1 teaspoon vanilla extract
- 1 pound (450 g) fresh strawberries, hulled and sliced
- 6 ounces (170 g) fresh blueberries
- 6 ounces (170 g) fresh raspberries (optional)
Instructions
- Lightly spray a 9×13-inch baking dish with non-stick cooking spray. Wash and dry the berries. Hull and slice the strawberries into even, thin slices (about 1/4-inch thick). Set the strawberries and blueberries aside. If using raspberries, leave them whole.
- In a large mixing bowl, beat the softened cream cheese with an electric mixer on medium speed until completely smooth and fluffy, about 2 minutes. Scrape down the sides of the bowl with a spatula. Add the powdered sugar and vanilla extract, and beat again until well combined and smooth.
- In a separate, clean mixing bowl, pour the cold heavy whipping cream. Using the electric mixer (with clean beaters), whip the cream on medium-high speed until stiff peaks form, about 3-5 minutes.
- Take about one-third of the whipped cream and stir it into the cream cheese mixture to lighten it. Then, gently fold the remaining whipped cream into the cream cheese mixture using a rubber spatula, using a gentle cutting motion from the bottom up and over. Do not stir.
- Arrange a single layer of graham crackers on the bottom of the prepared dish, breaking some to fit as needed. Cover the entire bottom, leaving no gaps.
- Spread about one-third of the cream filling evenly over the graham crackers. Scatter about one-third of the sliced strawberries and blueberries over the filling, pressing them in gently.
- Place another layer of graham crackers on top of the berries. Repeat the process: spread another third of the filling, then scatter another third of the berries. Add a third layer of graham crackers, followed by the remaining filling. Spread the filling all the way to the edges of the dish.
- Arrange the remaining strawberries, blueberries, and raspberries in a pretty pattern on top (e.g., stripes of red and blue for a patriotic look).
- Cover the dish tightly with plastic wrap and refrigerate for at least 6 hours, but overnight (8-12 hours) is best. The graham crackers need time to absorb the moisture from the cream and soften into a cake-like texture.
Notes
For best results, use full-fat cream cheese and cold heavy cream. Pat berries dry after washing to prevent excess moisture. The cake needs at least 6 hours to set; overnight is ideal. For a quicker set, freeze for 2-3 hours, then let sit at room temperature for 15 minutes before slicing. Use a sharp knife run under hot water and wiped dry for clean slices.
Nutrition
- Serving Size: 1 square (1/12 of ca
- Calories: 380
- Sugar: 24
- Fat: 24
- Saturated Fat: 15
- Carbohydrates: 38
- Fiber: 2
- Protein: 4
Keywords: no-bake dessert, icebox cake, Fourth of July, patriotic dessert, berry dessert, summer dessert, easy dessert