Love this? Save it for later!
Share the inspiration with your friends
There used to be a little bakery on the corner of Elm and 5th called The Whimsy Jar that made this incredible chocolate pudding cup for Halloween. They called it the “Graveyard Special,” and it was this perfect little pot of creamy pudding topped with crushed chocolate cookies and a single gummy worm poking out. When they closed their doors two autumns ago—right before Halloween, I still get a little sad thinking about it—I was honestly crushed. After maybe six tries—some were too watery, one was so thick it wouldn’t even set—I finally cracked the code.
Let me tell you, recreating that memory in my own kitchen became a bit of an obsession. I wanted that same silky texture, that perfect crunch from the “dirt,” and the playful surprise of the gummy worms. And honestly, I think my version is even better for a crowd. You know that feeling when you want to impress your friends and family at a gathering but don’t want to spend all day in the kitchen? These Halloween dirt cups are your answer. They look like a showstopper on the dessert table, but they come together with a few simple tricks I learned the hard way.
This recipe is a direct result of those late-night experiments. I remember one attempt where I forgot to chill the pudding long enough, and the “dirt” just sank into a muddy mess. My neighbor, Sarah, still teases me about it. But that failure taught me the exact timing you need. So, whether you are hosting a big Halloween bash or just want to surprise the kids with something spooky and fun, this is the recipe that will make you the hero of the party. It’s the one that stays with you because it brings pure joy to the table.
Why You’ll Love This Recipe
These crowd-pleasing Halloween dirt cups are more than just a dessert—they are an experience. I have tested this recipe for everything from kid’s birthday parties to adult Halloween potlucks, and it never fails to get that happy, surprised reaction. Here is why this version is the one you will keep coming back to:
- Quick & Easy: This dessert comes together in under 20 minutes of active prep time. The hardest part is waiting for the pudding to chill! It is perfect for busy weeknights or last-minute party planning.
- Simple Ingredients: You likely have most of these ingredients in your pantry right now. No fancy grocery trips or hard-to-find items. Just good, honest ingredients that work.
- Perfect for Halloween Parties: These are the star of any Halloween dessert table. They are great for school parties, family gatherings, or a spooky movie night. Everyone from toddlers to grandparents loves them.
- Crowd-Pleaser: This recipe makes about 8-10 individual cups, but you can easily double it. They always get devoured, and people ask for the recipe every single time.
- Unbelievably Delicious: The texture is what sets this apart. The pudding is rich and creamy, not too sweet, and the crushed cookie “dirt” adds that perfect crunch. The gummy worms are the playful, nostalgic touch that makes everyone smile.
What makes this recipe different from the rest? It is not just about throwing pudding and cookies in a cup. The secret is in the perfectly balanced pudding—not too thick, not too runny—and a clever layering technique that keeps the “dirt” crunchy until the very last bite. I have also included a pro tip for making the “dirt” look extra realistic. This is the kind of dessert that makes you close your eyes after the first bite because it tastes like the best childhood memory you ever had. It is comfort food with a spooky twist, perfect for impressing your guests without any stress.
What Ingredients You Will Need
This recipe uses simple, wholesome ingredients to deliver a rich, creamy texture and that signature “dirt” crunch. Most of these are pantry staples, making this a super convenient dessert to whip up for any gathering. Here is everything you need:
- For the Chocolate Pudding:
- 1 cup (200g) granulated sugar
- 1/2 cup (60g) unsweetened cocoa powder (I prefer Ghirardelli for its rich flavor)
- 1/4 cup (30g) cornstarch
- 1/2 teaspoon salt
- 4 cups (960ml) whole milk (do not use skim; the fat is key for creaminess)
- 2 large egg yolks
- 2 teaspoons vanilla extract
- 2 tablespoons unsalted butter (optional, but it adds a beautiful shine and richness)
- For the “Dirt”:
- 1 (14.3 oz / 405g) package chocolate sandwich cookies (like Oreos), crushed into fine crumbs (about 2 cups of crumbs)
- 2 tablespoons melted unsalted butter (helps the crumbs stick together slightly)
- For the Topping & Decoration:
- 1 (8 oz / 227g) container frozen whipped topping (like Cool Whip), thawed, or 1 1/2 cups homemade whipped cream
- 1 package (about 20-25) gummy worms (get the sour kind for an extra kick!)
- Optional: small plastic spiders or gummy bugs for extra decoration
Ingredient Selection Tips: For the best texture, use whole milk. It makes the pudding incredibly velvety. If you want a dairy-free version, you can substitute the whole milk with full-fat oat milk or canned coconut milk. Just note that the flavor will be slightly different. For the cookies, I recommend the classic Oreo because the cream filling adds a touch of sweetness and helps the “dirt” clump just enough to look realistic. If you are using a store-brand sandwich cookie, you might need to add a little more melted butter to get the right texture. Also, look for gummy worms that are bright and colorful—they pop beautifully against the dark “dirt.”
Equipment Needed
You do not need any fancy equipment to make these Halloween dirt cups. Here is what you will need:
- Medium Saucepan: For cooking the pudding. A heavy-bottomed saucepan works best to prevent scorching.
- Whisk: A good whisk is essential for a smooth, lump-free pudding.
- Mixing Bowls: One large bowl for the pudding and another for the “dirt.”
- Measuring Cups and Spoons: For accurate measurements.
- Food Processor or Ziploc Bag: To crush the cookies into fine crumbs. A rolling pin works great if you do not have a food processor.
- 8-10 Small Cups or Glasses: Clear plastic cups or small glass jars are perfect so you can see the layers. I love using 8-ounce mason jars—they look adorable and are easy to transport.
- Spatula: For scraping every last bit of pudding.
- Piping Bag or Ziploc Bag: For neat layering of the pudding and whipped topping (optional, but makes it look professional).
If you do not have a food processor, just place the cookies in a Ziploc bag and crush them with a rolling pin. It is a great way to get the kids involved, and it gives the crumbs a more rustic, “dirt-like” texture. I actually prefer this method sometimes because you get a few slightly larger chunks that look like little pebbles!
Preparation Method
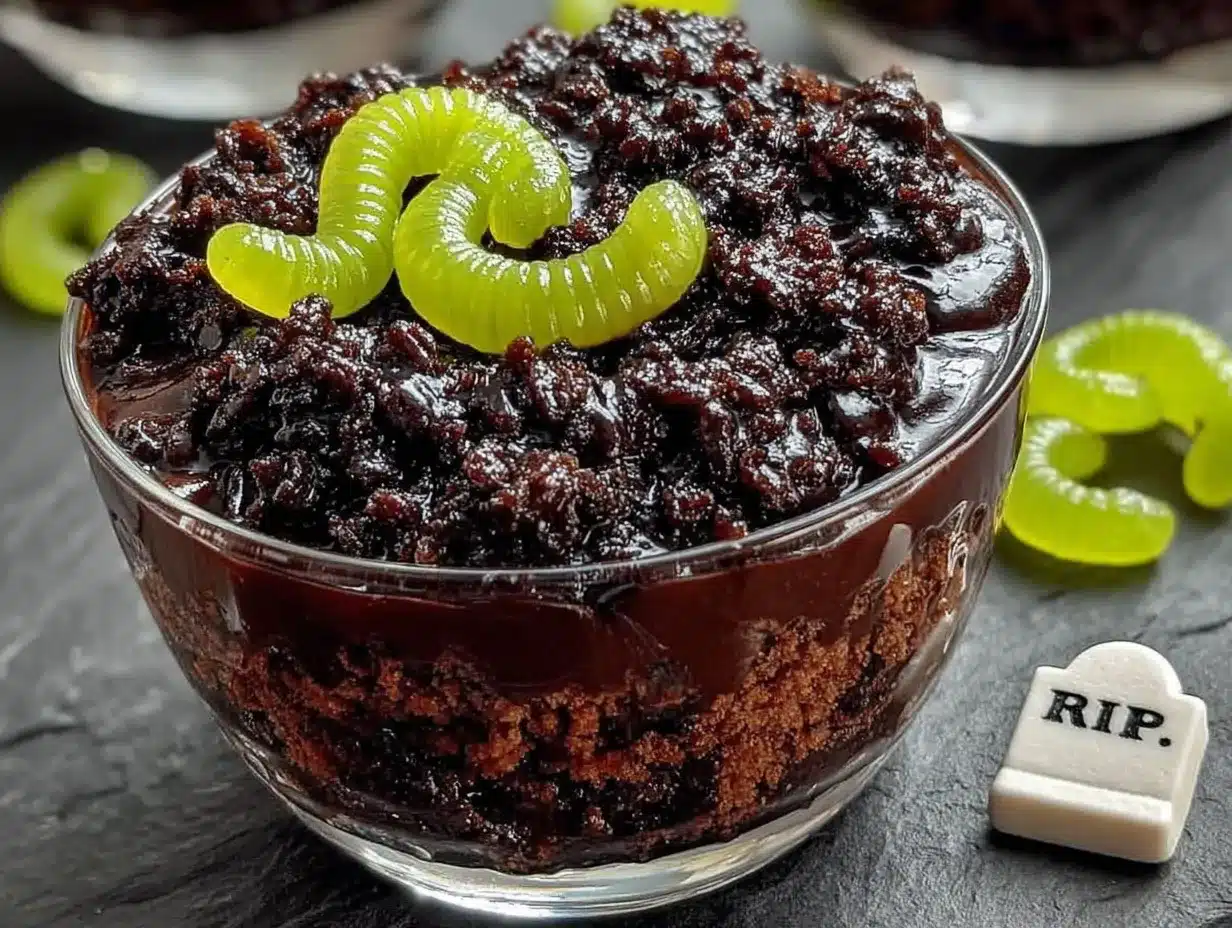
Follow these steps carefully, and you will have the most incredible Halloween dirt cups. The key is patience with the chilling process—do not rush it!
- Make the Pudding Base: In your medium saucepan, whisk together the sugar, cocoa powder, cornstarch, and salt. Make sure there are no lumps of cocoa powder. This is a crucial step—whisk it really well!
- Add the Milk: Gradually whisk in the whole milk, starting with a small amount to make a smooth paste, then adding the rest. This prevents lumps from forming. Whisk until the mixture is completely smooth.
- Temper the Egg Yolks: In a small bowl, lightly beat the two egg yolks. Slowly drizzle about 1/2 cup of the warm milk mixture into the yolks while whisking constantly. This is called tempering, and it stops the eggs from scrambling when you add them to the hot pot.
- Cook the Pudding: Pour the tempered egg mixture back into the saucepan. Place the pan over medium heat and cook, whisking constantly, for about 5-7 minutes. You will feel it start to thicken. It is ready when it is thick enough to coat the back of a spoon and leaves a clear trail when you run your finger through it. Do not walk away—it can burn quickly!
- Finish the Pudding: Remove the pan from the heat. Stir in the vanilla extract and the butter (if using) until the butter is completely melted and the pudding is shiny. The butter gives it a beautiful, professional finish.
- Chill the Pudding: Pour the hot pudding into a large bowl. Press a piece of plastic wrap directly onto the surface of the pudding to prevent a skin from forming. Refrigerate for at least 2 hours, or until completely cold and firm. I usually make this the night before.
- Make the “Dirt”: While the pudding chills, prepare the dirt. Place the chocolate sandwich cookies in a food processor and pulse until they are fine crumbs. Alternatively, crush them in a Ziploc bag. Transfer the crumbs to a bowl and stir in the melted butter. Mix until the crumbs look like damp soil. Set aside.
- Assemble the Cups: Once the pudding is cold, give it a good stir to loosen it up. If you want perfect layers, transfer the pudding to a piping bag or a Ziploc bag with the corner snipped off.
- Layer It Up: Start with a layer of crushed cookies at the bottom of each cup (about 2 tablespoons). This gives a nice “foundation.” Then, pipe or spoon a layer of chocolate pudding on top, filling the cup about halfway. Add another thin layer of cookie crumbs, then another layer of pudding, leaving about 1/2 inch of space at the top.
- Add the “Grass” and Worms: Top each cup with a generous dollop of whipped topping. Spread it out gently. Finally, sprinkle a thick layer of the remaining cookie “dirt” over the whipped cream. Poke 2-3 gummy worms into each cup so they look like they are crawling out of the dirt. You can also place a few worms on top.
- Final Chill: Refrigerate the assembled cups for at least 30 minutes before serving. This helps the layers set and the flavors meld together. They are best served cold.
Sensory Cue: When the pudding is ready, it should look like a thick, dark chocolate sauce that coats your whisk heavily. It will smell deeply of chocolate. The “dirt” should feel like slightly damp sand when you press it between your fingers.
Cooking Tips & Techniques
I have made these Halloween dirt cups more times than I can count, and I have learned a few things the hard way. Here are my best tips to make sure yours turn out perfect:
- Don’t Skip the Temper: I know it seems like an extra step, but tempering the egg yolks is what gives the pudding that silky, luxurious texture. If you add the eggs directly to the hot milk, you will end up with scrambled eggs in your pudding. Trust me, I have done it, and it is not a good look.
- Whisk Constantly: When cooking the pudding, you cannot stop whisking for even a second. The bottom will scorch very easily. Use a flat-bottomed whisk if you have one—it gets into the corners of the pan.
- Crush the Cookies Finely: For the most realistic “dirt,” you want the cookie crumbs to be very fine. If you have large chunks, they look like rocks. A food processor works best, but a rolling pin and a strong arm will do the trick. The melted butter is key—it gives the “dirt” that slightly clumpy, earthy texture that makes it look so real.
- Chill is Non-Negotiable: The pudding must be completely cold before you assemble the cups. If it is even slightly warm, the “dirt” will get soggy and turn into a paste. I always chill the pudding overnight. It makes the whole process so much smoother.
- Layer Strategically: The bottom layer of cookie crumbs is important because it creates a barrier that stops the pudding from soaking through completely. It also gives a nice surprise at the bottom of the cup. Do not skip it!
- Make Ahead: These are the perfect make-ahead dessert. You can prepare the pudding and the “dirt” up to 3 days in advance and store them separately in the fridge. Assemble the cups on the day of your party. They actually taste better after the flavors have had a chance to meld.
Variations & Adaptations
One of the best things about this recipe is how easy it is to customize. Here are a few ways I have adapted it for different tastes and occasions:
- Peanut Butter Cup Dirt Cups: For an extra layer of flavor, add a layer of peanut butter. Simply mix 1/2 cup of creamy peanut butter with 2 tablespoons of powdered sugar until smooth. Drop spoonfuls of this mixture between the pudding layers. It is incredible.
- Spooky Spiderweb Design: Instead of just piling on the whipped cream, use a piping bag to create a spiderweb pattern on top. Pipe a few concentric circles of whipped cream, then drag a toothpick from the center outwards to create the web effect. Place a plastic spider in the center for a dramatic look.
- Gluten-Free Version: This is super easy. Just use gluten-free chocolate sandwich cookies for the “dirt.” The rest of the ingredients are naturally gluten-free. Make sure to check the labels on your chocolate and vanilla extract.
- Dairy-Free & Vegan Version: For a dairy-free option, use full-fat canned coconut milk or oat milk in place of whole milk. Use a high-quality dairy-free butter substitute. The pudding might be slightly less thick, but it will still be delicious. Use a dairy-free whipped topping like CocoWhip. The cookie crumbs can be made with vegan chocolate sandwich cookies.
- Pumpkin Spice Dirt Cups: For a fall twist, add 1 teaspoon of pumpkin pie spice and 1/2 cup of pumpkin puree to the pudding while it is cooking. Reduce the milk by 1/4 cup to compensate for the extra liquid. Top with a sprinkle of cinnamon instead of just cookie crumbs. This is my personal favorite for Thanksgiving.
Serving & Storage Suggestions
These Halloween dirt cups are best served cold, straight from the fridge. The contrast between the cold, creamy pudding and the crunchy “dirt” is what makes them so special.
Serving Presentation: For a party, arrange the cups on a large platter or a wooden board. You can scatter extra gummy worms and plastic spiders around the base of the cups for a spooky, dramatic effect. If you are using clear cups, the layers will be visible, which always gets a “wow” from guests. I like to serve them with a little spoon and a napkin tied around each cup with some orange and black ribbon. It makes them feel like a special party favor.
What to Serve Alongside: These dirt cups are rich and decadent, so they pair well with something light. A bowl of fresh fruit, like apple slices or grapes, is a nice contrast. For a full Halloween spread, serve them alongside other finger foods like mini pumpkin pies, caramel apples, or a cheese board with spooky-shaped crackers.
Storage Instructions: Once assembled, these cups will last in the refrigerator for up to 3 days. However, the “dirt” will start to soften after the first day. For the best texture, I recommend assembling them no more than 24 hours before you plan to serve them. If you have leftovers, cover each cup with plastic wrap or a lid. Do not freeze them—the pudding will become watery and the texture will be ruined.
Reheating: You do not need to reheat these. They are meant to be eaten cold. If you have stored them for a day or two, just let them sit at room temperature for 5 minutes to take the chill off, then enjoy.
Nutritional Information & Benefits
While these Halloween dirt cups are a treat, they do offer a few surprising benefits. Here is a general estimate for one serving (based on 8 servings):
- Calories: ~380-420 kcal
- Fat: 18g
- Carbohydrates: 52g
- Protein: 7g
- Fiber: 3g
- Sugar: 38g
Health Benefits of Key Ingredients: The cocoa powder is rich in antioxidants called flavonoids, which are good for heart health. The milk provides calcium and vitamin D for strong bones. The eggs add high-quality protein. Of course, this is still a dessert, so enjoy it in moderation! The beauty of this recipe is that you can control the quality of the ingredients. By making it from scratch, you avoid the preservatives and artificial flavors found in store-bought pudding cups.
Dietary Considerations: As mentioned, this recipe can be adapted to be gluten-free, dairy-free, and even vegan. It is also nut-free (as long as you avoid cross-contamination with your ingredients), making it a safe option for many school parties. Just be sure to check all your labels if you have allergies.
Conclusion
So there you have it—my perfected version of those magical dirt cups from The Whimsy Jar. This recipe is more than just a dessert; it is a little piece of nostalgia that brings people together. Whether you are recreating a memory of your own or starting a new tradition, these Halloween dirt cups are guaranteed to be a hit. They are easy enough for a weeknight, impressive enough for a party, and endlessly customizable to fit your taste.
I truly believe that the best recipes are the ones we share, and I would love to see your creations. Did you add a spooky spiderweb on top? Swap in peanut butter? I want to hear all about it! Please leave a comment below and tell me how your dirt cups turned out. And if you really loved them, share this post with a friend who loves Halloween as much as you do. Let’s make this the most delicious, spooky season yet!
Frequently Asked Questions
Can I use instant pudding mix instead of making it from scratch?
Yes, you can use a 3.9-ounce box of instant chocolate pudding mix as a shortcut. Prepare it according to the package directions using whole milk. It will not be as rich or creamy as the homemade version, but it will still taste great and save you about 15 minutes of active cooking time.
How far in advance can I make these Halloween dirt cups?
You can make the pudding and the “dirt” up to 3 days in advance and store them separately in the refrigerator. For the best texture, assemble the cups no more than 24 hours before serving. The “dirt” will start to soften after that, but they will still be delicious.
Can I use a different type of cookie for the “dirt”?
Absolutely! You can use any chocolate cookie you like. Gluten-free chocolate cookies, chocolate wafer cookies, or even chocolate graham crackers all work well. If you use a plain chocolate cookie (without the cream filling), you may want to add an extra tablespoon of melted butter to help it clump together.
How do I get the layers to look so neat and defined?
The secret is to use a piping bag or a Ziploc bag with the corner snipped off to add the pudding. This gives you much more control than spooning it in. Also, make sure your pudding is completely cold and firm before you start layering. A cold pudding will hold its shape much better.
Can I make these in a large dish instead of individual cups?
Yes, you can! Use a 9×13-inch baking dish or a large trifle bowl. Layer the ingredients in the same order—cookies, pudding, cookies, pudding, whipped cream, and “dirt.” You will need to adjust the quantities slightly. This is a great option for a potluck where you do not want to transport individual cups. Just be sure to bring a big spoon for serving!
Pin This Recipe!
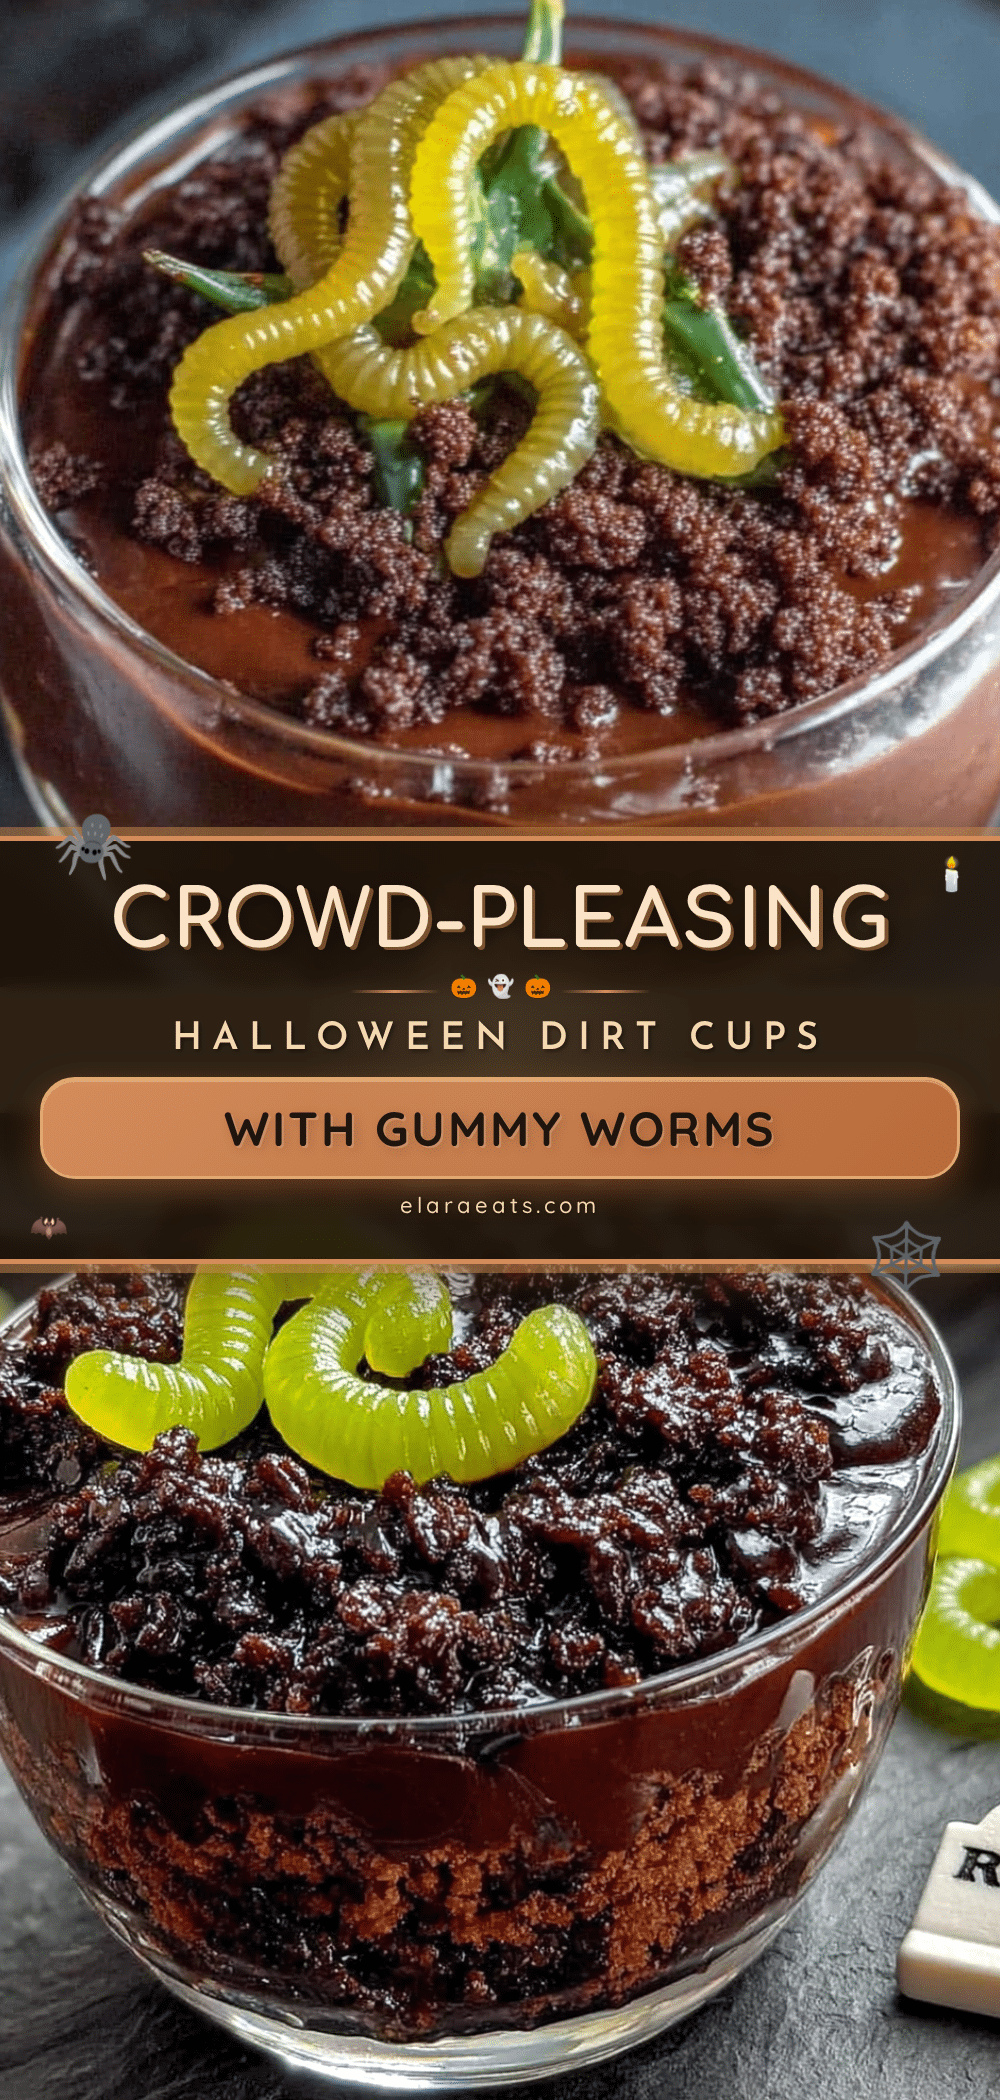
Easy Halloween Dirt Cups with Gummy Worms
These crowd-pleasing Halloween dirt cups are a fun and easy dessert featuring creamy homemade chocolate pudding, crunchy cookie ‘dirt,’ and playful gummy worms. Perfect for parties, they come together quickly and are sure to be a hit with kids and adults alike.
- Prep Time: 20 minutes
- Cook Time: 10 minutes
- Total Time: 2 hours 30 minutes (includes chilling)
- Yield: 8-10 servings 1x
- Category: Dessert
- Cuisine: American
Ingredients
- 1 cup (200g) granulated sugar
- 1/2 cup (60g) unsweetened cocoa powder
- 1/4 cup (30g) cornstarch
- 1/2 teaspoon salt
- 4 cups (960ml) whole milk
- 2 large egg yolks
- 2 teaspoons vanilla extract
- 2 tablespoons unsalted butter (optional)
- 1 (14.3 oz / 405g) package chocolate sandwich cookies (like Oreos), crushed into fine crumbs (about 2 cups)
- 2 tablespoons melted unsalted butter
- 1 (8 oz / 227g) container frozen whipped topping (like Cool Whip), thawed, or 1 1/2 cups homemade whipped cream
- 1 package (about 20–25) gummy worms
- Optional: small plastic spiders or gummy bugs for decoration
Instructions
- Make the Pudding Base: In a medium saucepan, whisk together the sugar, cocoa powder, cornstarch, and salt until no lumps remain.
- Add the Milk: Gradually whisk in the whole milk, starting with a small amount to make a smooth paste, then adding the rest. Whisk until completely smooth.
- Temper the Egg Yolks: In a small bowl, lightly beat the egg yolks. Slowly drizzle about 1/2 cup of the warm milk mixture into the yolks while whisking constantly.
- Cook the Pudding: Pour the tempered egg mixture back into the saucepan. Cook over medium heat, whisking constantly, for 5-7 minutes until thickened and coats the back of a spoon.
- Finish the Pudding: Remove from heat. Stir in vanilla extract and butter (if using) until melted and shiny.
- Chill the Pudding: Pour into a large bowl, press plastic wrap directly onto the surface, and refrigerate for at least 2 hours or until completely cold.
- Make the ‘Dirt’: While pudding chills, crush chocolate sandwich cookies into fine crumbs using a food processor or Ziploc bag. Stir in melted butter until mixture looks like damp soil.
- Assemble the Cups: Once pudding is cold, stir to loosen. Transfer to a piping bag or Ziploc bag with corner snipped off for neat layers.
- Layer It Up: Place about 2 tablespoons of cookie crumbs at the bottom of each cup. Pipe or spoon a layer of pudding on top, filling halfway. Add another thin layer of crumbs, then more pudding, leaving 1/2 inch space at the top.
- Add the ‘Grass’ and Worms: Top each cup with a generous dollop of whipped topping. Sprinkle a thick layer of remaining cookie ‘dirt’ over the whipped cream. Poke 2-3 gummy worms into each cup so they look like they are crawling out.
- Final Chill: Refrigerate assembled cups for at least 30 minutes before serving. Serve cold.
Notes
For best texture, use whole milk. Do not skip tempering the egg yolks to avoid scrambled eggs. Whisk constantly while cooking pudding to prevent scorching. Chill pudding completely before assembling to keep ‘dirt’ crunchy. Can be made ahead: prepare pudding and ‘dirt’ up to 3 days in advance; assemble no more than 24 hours before serving for best texture.
Nutrition
- Serving Size: 1 cup
- Calories: 400
- Sugar: 38
- Sodium: 320
- Fat: 18
- Saturated Fat: 10
- Carbohydrates: 52
- Fiber: 3
- Protein: 7
Keywords: Halloween dirt cups, gummy worms, chocolate pudding, easy Halloween dessert, dirt dessert, spooky treats, kid-friendly Halloween


