Love this? Save it for later!
Share the inspiration with your friends
The holiday party was in six hours and I’d completely forgotten about the gift exchange. Everyone else would be bringing homemade jam, fancy infused olive oils, and those beautifully wrapped cookie tins that look like they belong on a magazine cover. I had a bunch of root vegetables wilting in my crisper drawer, a half-used jar of honey, and a sudden, panicked memory of my grandmother’s vinegar-soaked concoctions. Honestly, I felt a little sick just thinking about the chaos of the event. So, I did the only logical thing—I grabbed a knife, a mason jar, and started chopping. I figured if I was going to show up empty-handed, at least I could show up with something that might keep us all from getting the dreaded post-party sniffles.
By the time I poured the raw apple cider vinegar over the mountain of ginger, horseradish, and garlic, my kitchen smelled like a battlefield. It was sharp, pungent, and made my eyes water. I shoved the jar in the pantry, muttered a prayer to the fermentation gods, and left it to do its thing. I honestly forgot about it for two weeks. When I finally remembered, I strained it, added a generous glug of raw honey, and tasted it. My eyes shot open. It was like a lightning bolt to the senses—spicy, sweet, sour, and strangely addictive. I bottled it up in little dropper bottles, tied a ribbon around each one, and brought them to the party feeling a bit foolish.
Let me tell you, those little bottles of fire cider immune boost shots were the hit of the night. People were doing shots out of teacups, sneaking extra bottles into their coat pockets, and asking for the recipe. I stood there in my slightly stained apron, completely surprised. Maybe you’ve been there—when the thing you threw together in a panic turns out to be the thing everyone loves. That’s how this recipe for fire cider immune boost shots became my go-to. It’s not fancy, it’s not fussy, but it’s got a kick that makes you feel like you can take on the world (or at least cold season).
Why You’ll Love This Recipe
I’ve been making this fire cider immune boost shot recipe for years now, and I’ve tweaked it through countless cold seasons and kitchen experiments. It’s one of those rare recipes that feels both ancient and totally new every time you make it. Here’s why I think you’ll fall for it too:
- Quick & Easy: The active prep time is maybe 15 minutes. The rest is just letting time and vinegar do the work for you. Perfect for when you want to be proactive about your health but don’t have hours to spend.
- Simple Ingredients: You don’t need to hunt down exotic superfoods. Garlic, ginger, horseradish, onions, and apple cider vinegar—these are the heavy hitters, and they’re probably already in your kitchen or at the corner store.
- Perfect for Cold Season: This isn’t just a trendy wellness drink. This is the stuff you reach for when you feel that first tickle in your throat or when everyone around you is coughing. It’s your immune system’s best friend.
- Crowd-Pleaser: I know it sounds weird to call a spicy vinegar shot a crowd-pleaser, but trust me. People love the ritual of taking a shot, and the flavor is surprisingly complex. It’s a conversation starter.
- Unbelievably Delicious: Okay, “delicious” might be a stretch for some folks. But the balance of spicy, sour, and sweet honey is genuinely addictive. It wakes up your taste buds in a way coffee never could.
What makes this fire cider recipe different from the rest? It’s the ratio. I’ve tested this more times than I care to admit, and I’ve found the perfect balance where the garlic and horseradish don’t overpower the ginger, and the honey rounds out the sharp edges of the vinegar. It’s not just another version—it’s the version I’ve staked my reputation on. Every winter, my family asks for their annual bottle, and I’ve even had friends text me from vacation saying they forgot their stash and felt lost without it. This recipe is comfort for your immune system, reimagined as a spicy little ritual.
What Ingredients You Will Need
This fire cider immune boost shot recipe uses simple, whole ingredients that pack a serious punch. The magic is in the combination—each ingredient brings something unique to the table, from antimicrobial properties to warming circulation. You’ll find most of these are pantry staples, especially if you cook with a lot of flavor.
- Raw Apple Cider Vinegar (with the mother): This is non-negotiable. I recommend Bragg’s or a local unfiltered brand. The “mother” is the cloudy stuff floating around—it’s full of beneficial bacteria and enzymes that make this recipe work.
- Fresh Ginger Root: About a 4-inch piece, unpeeled. You want the skin on for extra nutrients and a stronger flavor. Give it a good scrub.
- Fresh Horseradish Root: This is the fire in the fire cider. A 3-inch piece, peeled and chopped. It’s potent, so don’t be shy. If you can’t find fresh, you can use prepared horseradish, but fresh is a game-changer.
- Garlic Cloves: A whole head, peeled and smashed. Garlic is the immune-boosting superstar here. Use fresh, not pre-minced.
- Medium Onion: One, chopped roughly. Yellow or white works best. It adds a savory depth that balances the heat.
- Fresh Turmeric Root: Optional, but highly recommended. A 2-inch piece, peeled and chopped. It adds an earthy, peppery note and that beautiful golden color. Wear gloves—it stains everything.
- Fresh Jalapeño or Habanero: One, sliced. This is for extra heat and a dose of capsaicin, which is great for circulation. Remove the seeds if you want less fire.
- Raw Honey: About ¼ cup, or more to taste. This is added after steeping. It tempers the acidity and adds a layer of soothing sweetness. Local honey is best for seasonal allergies.
- Whole Black Peppercorns: A teaspoon. They help with the absorption of turmeric and add a subtle warmth.
- Fresh Rosemary or Thyme Sprigs: A couple of sprigs. Herbs add complexity and their own immune-supporting properties. Rosemary is my personal favorite.
Substitution note: If you’re sensitive to heat, cut back on the horseradish and skip the jalapeño. You’ll still get plenty of immune support from the garlic and ginger. For a milder version, use half the amount of ginger.
Equipment Needed
You don’t need a fancy kitchen to make this fire cider immune boost shot recipe. I’ve made it in cramped apartments and well-stocked kitchens, and the tools are basically the same. Here’s what you’ll need:
- A Sharp Chef’s Knife: You’ll be chopping tough roots like ginger and horseradish. A dull knife is a recipe for frustration (and potential injury). Keep it sharp.
- A Cutting Board: Preferably one that can handle staining from turmeric. I have a dedicated “turmeric board” that’s permanently yellow.
- A Glass Mason Jar (Quart Size): A 32-ounce wide-mouth jar is perfect. Avoid plastic, as the vinegar can leach chemicals over time. I use old pickle jars sometimes—just make sure they’re thoroughly cleaned.
- A Fine-Mesh Strainer or Cheesecloth: For straining the solids out after steeping. A nut milk bag works great too.
- A Funnel: Makes bottling the finished cider so much less messy. Trust me on this one.
- Small Glass Bottles or Dropper Bottles: For storing and gifting the finished shots. I love using 2-ounce amber glass bottles with dropper tops. They look professional and keep the cider fresh.
- Measuring Spoons and Cups: For the honey and peppercorns.
Budget-friendly tip: You don’t need to buy special bottles. You can use small mason jars or even repurpose small hot sauce bottles. Just make sure they’re glass and have a tight-fitting lid.
Preparation Method

Making fire cider immune boost shots is more about patience than skill. The actual hands-on time is minimal, but the waiting is where the magic happens. Here’s how I do it, step by step.
- Prep the roots (5 minutes): Start by giving your ginger and turmeric a good scrub under running water. You don’t need to peel them unless the skin looks particularly gnarly. Chop them into rough ½-inch chunks. Peel the horseradish root and chop it into similar-sized pieces. Smash and peel the garlic cloves. Chop the onion roughly. Slice the jalapeño if using. I usually do this while listening to a podcast—it’s meditative.
- Layer the jar (2 minutes): Grab your clean quart-sized mason jar. Start layering the ingredients: ginger, turmeric, horseradish, garlic, onion, jalapeño, peppercorns, and herb sprigs. Don’t pack them down too tightly—you want the vinegar to be able to flow around everything. The jar should be about three-quarters full of solids.
- Add the vinegar (1 minute): Pour the raw apple cider vinegar over the solids until they are completely submerged. Leave about an inch of headspace at the top. The vinegar will expand slightly as it steeps. Screw the lid on tightly. Give the jar a good shake to release any air bubbles.
- The waiting game (2-4 weeks): This is the hardest part. Place the jar in a cool, dark place—like a pantry or a cupboard. Shake it once a day for the first week to keep everything mixed. I set a daily reminder on my phone. After the first week, you can shake it every few days. Taste it after two weeks. If you want it stronger, let it go for another week or two. I usually let mine steep for a full month because I like it potent.
- Strain and sweeten (10 minutes): Once it’s reached your desired strength, place your fine-mesh strainer or cheesecloth over a large bowl or measuring cup. Pour the contents of the jar through the strainer. Press down on the solids with the back of a spoon to extract every last drop of liquid. Don’t rush this step—you want all that goodness. Discard the solids (or compost them).
- Add the honey (2 minutes): While the strained liquid is still at room temperature, whisk in the raw honey until it’s completely dissolved. Start with ¼ cup and taste. I usually end up adding about ⅓ cup because I like a touch of sweetness to balance the fire. The honey won’t dissolve well if the liquid is cold, so do this step before refrigerating.
- Bottle it up (5 minutes): Using your funnel, pour the finished fire cider into your small glass bottles. Leave a little headspace. Seal them tightly. I like to label mine with the date and a little warning: “This is spicy!”
A note from my own kitchen: The first time I made this, I forgot to shake the jar for a whole week. I thought I’d ruined it, but it actually turned out fine—just a little less integrated. So don’t stress if you miss a day. Also, be careful when straining. I once squeezed the cheesecloth too enthusiastically and ended up with a face full of vinegar spray. Lesson learned.
Cooking Tips & Techniques
Over the years, I’ve made plenty of mistakes with this fire cider immune boost shot recipe. Here’s what I’ve learned so you don’t have to repeat my errors.
Use the right vinegar. I cannot stress this enough. Regular distilled white vinegar will not work here. You need raw, unfiltered apple cider vinegar with the mother. That cloudy stuff is where the probiotics and enzymes live. It’s what makes this a functional health tonic rather than just a spicy pickle juice.
Don’t be afraid of the heat. The first time I made this, I was timid with the horseradish and ginger. The result was a bland, watery vinegar that didn’t do much for me. Be bold. The whole point of fire cider is the kick. If it makes your eyes water a little when you strain it, you’re on the right track.
Temperature matters. Store your steeping jar in a cool, dark place, not the refrigerator. The cold slows down the extraction process. Room temperature is ideal. But also keep it out of direct sunlight, which can degrade the quality of the vinegar over time.
Multitask with your prep. While you’re chopping the ginger and garlic for this recipe, why not double the batch? The prep time is the same, and you’ll have a jar ready to go for gifts or for your own stash. I always make two jars at once now.
Trust your senses. The recipe is a guideline, not a rule. Taste your fire cider at the two-week mark. If you want it more pungent, let it steep longer. If you want it sweeter, add more honey. Your palate is the ultimate judge. I’ve had batches that I let steep for six weeks because I got busy, and they turned out incredibly complex and delicious.
Variations & Adaptations
One of the best things about this fire cider immune boost shot recipe is how adaptable it is. I’ve tried several variations over the years, and each one brings something new to the table.
Variation 1: The Citrus Zing. Add the zest and juice of one lemon and one orange to the jar before steeping. The citrus brightens up the flavor and adds a hefty dose of vitamin C. I do this version in the dead of winter when I feel like I need extra immune support. It’s a little less harsh and more refreshing.
Variation 2: The Herbal Garden. Swap the rosemary for fresh oregano, thyme, and a sprig of sage. This herbal version is incredibly aromatic and has strong antimicrobial properties. I made this last fall when I had an abundance of herbs from my garden, and it was a hit with my friends who love earthy flavors.
Variation 3: The Mellow Mango. For those who find the traditional version too intense, add ½ cup of chopped fresh or frozen mango to the jar after straining. Let it sit in the strained cider for 24 hours, then strain again. The mango adds natural sweetness and a tropical note that tames the fire. This is my go-to for introducing skeptical friends to the world of fire cider.
Dietary Adaptation: This recipe is naturally gluten-free, dairy-free, and vegan (if you use maple syrup instead of honey). For a low-sugar version, omit the honey entirely or use a few drops of stevia. The flavor will be much sharper, but the immune benefits remain the same.
Personal favorite: My absolute favorite variation is the “Golden Fire” version, where I double the turmeric and add a teaspoon of freshly ground black pepper. The pepper helps your body absorb the curcumin in the turmeric, and the color is absolutely stunning. It feels like drinking liquid sunshine.
Serving & Storage Suggestions
Fire cider immune boost shots are best served as a daily wellness ritual rather than a casual drink. Here’s how I like to take mine.
Serving temperature: I prefer my fire cider at room temperature. It’s less shocking to the system than a cold shot straight from the fridge. If you store it in the refrigerator (which you should after opening), let it sit out for a few minutes or swirl it in a small glass to take the chill off.
How to take it: A standard dose is about 1 tablespoon (15 ml) per day. You can take it as a shot, or dilute it in a small glass of warm water with a squeeze of lemon for a soothing tea. I do the shot method when I feel a cold coming on—it’s more direct and wakes me up instantly.
What to pair it with: This isn’t a sipping drink, but it pairs wonderfully with savory breakfasts. I love taking a shot before a hearty bowl of oatmeal or eggs. It also works as a palate cleanser between rich courses, though that’s a bit unconventional.
Storage instructions: Store your unopened bottles of fire cider in a cool, dark pantry. They will keep for up to a year. Once opened, store them in the refrigerator. The vinegar acts as a natural preservative, so it won’t spoil easily, but the flavors will slowly mellow over time. I try to use an opened bottle within three months for the best flavor.
How flavors develop: The fire cider will taste its most potent right after you add the honey. Over the next week or two in the fridge, the flavors will marry and mellow slightly. The heat from the horseradish and ginger will soften, and the honey will become more integrated. I actually prefer it after it’s been sitting for a month. It’s still fiery, but it has a roundness that’s very satisfying.
Nutritional Information & Benefits
This fire cider immune boost shot recipe isn’t just about flavor—it’s a powerhouse of immune-supporting nutrients. Here’s a quick breakdown of what you’re getting in each tablespoon serving.
| Nutrient | Approximate Amount per 1 tbsp (15 ml) |
|---|---|
| Calories | 15-20 |
| Carbohydrates | 4-5 g |
| Sugars (from honey) | 3-4 g |
| Vitamin C | Trace amounts |
| Antioxidants | High (from ginger, turmeric, garlic) |
Health benefits of key ingredients: Garlic is a well-known immune booster with antimicrobial properties. Ginger is anti-inflammatory and great for digestion. Horseradish contains glucosinolates that support the body’s natural detoxification pathways. Raw apple cider vinegar helps balance gut bacteria. Together, they create a synergistic tonic that supports your body’s defenses.
Dietary considerations: This recipe is naturally gluten-free and dairy-free. If you use maple syrup instead of honey, it’s also vegan. It is low in calories and contains no artificial ingredients. However, it is high in acidity, so if you have sensitive teeth or a history of acid reflux, you may want to dilute it in water or take it with food.
Potential allergens: The main allergens to note are honey (for those with bee allergies) and the potential for cross-reactivity with other plants in the Allium family (garlic, onion). If you have known allergies, consult with your healthcare provider before incorporating this into your routine.
From a personal wellness perspective, I’ve found that taking a daily shot of this fire cider during the fall and winter months has noticeably reduced the number of colds I catch. It’s not a cure-all, but it’s a delicious and empowering way to take charge of your health.
Conclusion
If you’ve never made fire cider before, I hope this recipe gives you the nudge you need. It’s one of those kitchen projects that feels deeply satisfying—like you’re bottling up a little bit of protective magic. The ingredients are simple, the process is forgiving, and the result is something that genuinely makes you feel good. I love that I can make a batch in the fall and have it ready for the whole winter season. It’s like a pantry staple that also happens to be a health ritual.
I encourage you to make this recipe your own. Adjust the heat, play with the herbs, or add a splash of citrus. The best version of fire cider is the one that you look forward to taking every day. And honestly, when you feel that first tickle in your throat and you reach for your little bottle, you’ll be so glad you took the time to make it.
Have you tried making fire cider before? I’d love to hear about your favorite variations or how you incorporate it into your daily routine. Drop a comment below and share your experience—your idea might just become someone else’s new favorite version.
Stay warm, stay spicy, and here’s to a healthy season ahead!
Frequently Asked Questions
How long does homemade fire cider last?
When stored properly in a cool, dark place, unopened fire cider can last up to a year. Once opened and refrigerated, it’s best used within three months for optimal flavor, though it will remain safe to consume for much longer due to the vinegar’s preservative nature.
Can I use dried herbs instead of fresh?
Yes, you can use dried herbs, but the flavor will be different. Use about one-third of the amount of dried herbs compared to fresh. Fresh herbs provide a brighter, more vibrant flavor, while dried herbs offer a more concentrated, earthy taste.
Is it safe to take fire cider every day?
For most people, taking 1 tablespoon of fire cider daily is safe and beneficial. However, because it is highly acidic, it’s a good idea to dilute it in water or take it with food to protect your tooth enamel and stomach lining. If you have any underlying health conditions, consult your doctor first.
Can I make fire cider without horseradish?
Absolutely. If you can’t find fresh horseradish or prefer a milder tonic, simply omit it. You can increase the amount of ginger and add a bit more jalapeño to compensate for the lost heat. The immune benefits will still be significant from the garlic and ginger.
Why did my fire cider turn cloudy?
Cloudiness is completely normal and actually a good sign. It often indicates the presence of the “mother” from the raw apple cider vinegar, as well as tiny particles from the herbs and roots. If you prefer a clearer liquid, you can strain it through a coffee filter, but you’ll lose some of the beneficial sediment.
Pin This Recipe!
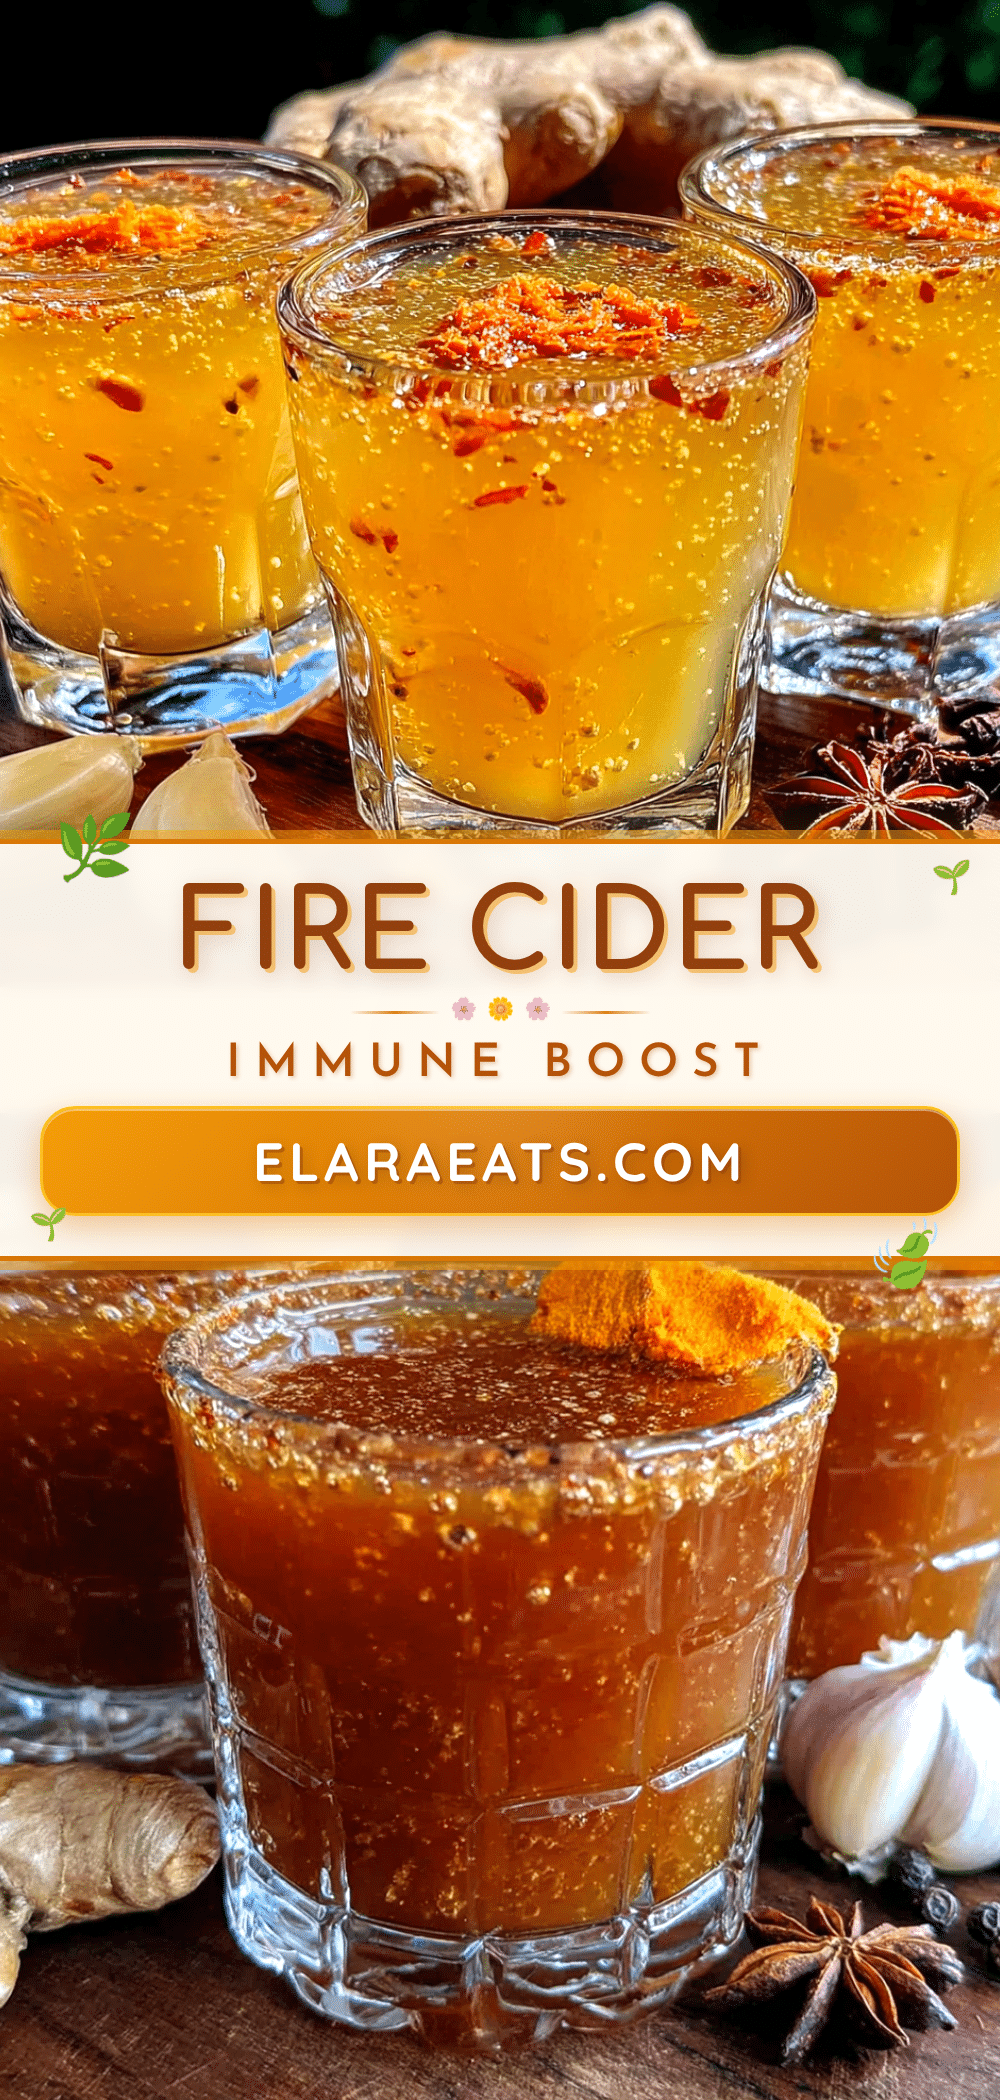
Easy Fire Cider Immune Boost Shot Recipe

A spicy, tangy, and sweet immune-boosting tonic made with raw apple cider vinegar, ginger, horseradish, garlic, and honey. Perfect for cold season, this quick and easy recipe yields a potent wellness shot that’s a crowd-pleaser.
- Prep Time: 15 minutes
- Cook Time: 0 minutes
- Total Time: 2-4 weeks (steeping time) + 15 minutes active prep
- Yield: Approximately 2 cups (32 servings of 1 tablespoon each) 1x
- Category: Wellness Tonic
- Cuisine: American
Ingredients
- 2 cups raw apple cider vinegar (with the mother)
- 4-inch piece fresh ginger root, unpeeled and chopped
- 3-inch piece fresh horseradish root, peeled and chopped
- 1 head garlic, cloves peeled and smashed
- 1 medium onion, roughly chopped
- 2-inch piece fresh turmeric root, peeled and chopped (optional)
- 1 fresh jalapeño or habanero, sliced (seeds removed for less heat)
- 1/4 cup raw honey (or more to taste)
- 1 teaspoon whole black peppercorns
- 2 sprigs fresh rosemary or thyme
Instructions
- Prep the roots: Scrub ginger and turmeric (do not peel unless skin is gnarly). Chop into rough 1/2-inch chunks. Peel and chop horseradish. Smash and peel garlic. Chop onion roughly. Slice jalapeño if using.
- Layer the jar: In a clean quart-sized glass mason jar, layer ginger, turmeric, horseradish, garlic, onion, jalapeño, peppercorns, and herb sprigs. Do not pack too tightly; jar should be about three-quarters full of solids.
- Add the vinegar: Pour raw apple cider vinegar over the solids until completely submerged, leaving about 1 inch of headspace. Screw lid on tightly and shake to release air bubbles.
- Steep: Place jar in a cool, dark place (like a pantry) for 2-4 weeks. Shake once daily for the first week, then every few days. Taste after 2 weeks; steep longer for stronger flavor.
- Strain: After steeping, place a fine-mesh strainer or cheesecloth over a large bowl. Pour contents through strainer, pressing on solids to extract all liquid. Discard solids.
- Sweeten: While liquid is at room temperature, whisk in raw honey until dissolved. Start with 1/4 cup and add more to taste (up to 1/3 cup).
- Bottle: Using a funnel, pour finished fire cider into small glass bottles or dropper bottles. Leave a little headspace. Seal tightly and label with date.
Notes
Use raw, unfiltered apple cider vinegar with the mother for best results. Be bold with horseradish and ginger for a potent kick. Store steeping jar at room temperature, not in the fridge. Taste after 2 weeks and adjust steeping time to preference. For a milder version, reduce horseradish and skip jalapeño. Double the batch for gifts. If using dried herbs, use one-third the amount of fresh.
Nutrition
- Serving Size: 1 tablespoon (15 ml)
- Calories: 1520
- Sugar: 34
- Carbohydrates: 45
Keywords: fire cider, immune boost, wellness shot, apple cider vinegar, ginger, horseradish, garlic, honey, cold season, homemade tonic


