Love this? Save it for later!
Share the inspiration with your friends
The neighborhood block party was in four hours and I’d completely blanked on the dessert sign-up. Everyone else would be bringing homemade pies, elaborate sheet cakes, and those fancy layered trifles that take all weekend. Me? I had a box of Jell-O, a can of evaporated milk, and a vague memory of my grandma making something striped and wobbly. Honestly, I almost just grabbed a bag of store-bought cookies on the way out. But then I remembered the candy corn Jell-O cups she used to make for Halloween, and I figured — why not? It’s just Jell-O. How hard could it be?
Let me tell you, I was not prepared for what happened. I showed up with a tray of these little orange, yellow, and white striped cups, feeling a bit silly next to the gourmet desserts. I put them on the table and went to grab a drink. By the time I came back, the tray was almost empty. People were actually asking me for the recipe. One neighbor, Karen, who usually brings those bakery-level tarts, came up to me and said, “Okay, these are genius. You have to tell me how you did it.” And I just stood there, holding my plastic cup of lemonade, thinking, I made these in twenty minutes while my coffee was brewing.
That’s the thing about these Easy Candy Corn Layered Jello Cups. They look like you fussed. They look like you spent hours creating perfect little stripes. But it’s really just a bit of patience and a trick with chilling. The first time I made them, I messed up the layers — the orange bled into the yellow and it looked like a muddy mess. But I learned from that, and now I’ve got the timing down. And honestly? That tiny bit of imperfection made them even more fun. It’s a dessert that doesn’t take itself too seriously, and that’s exactly why I keep coming back to it.
Maybe you’ve been there — needing a last-minute dessert that doesn’t look last-minute. Or maybe you just want something fun and nostalgic to make with the kids. Either way, these little cups are your answer. They’re silly, they’re sweet, and they’re surprisingly satisfying to watch come together. Let me show you how it’s done.
Why You’ll Love This Recipe
I’ve tested this recipe about six times now, and I can tell you with confidence — it’s practically foolproof. The first batch I made was for a family movie night, and my kids thought I was some kind of kitchen wizard. The truth is, it’s just three ingredients and a little patience. Here’s why this one is a keeper:
- Quick & Easy: The active prep time is about 15 minutes. The rest is just waiting for the Jell-O to set, so you can totally do other things. I usually clean up the kitchen or start a load of laundry between layers.
- Simple Ingredients: You only need four things — orange Jell-O, lemon Jell-O, sweetened condensed milk, and unflavored gelatin. That’s it. No fancy equipment, no obscure spices.
- Perfect for Halloween or Fall Parties: The candy corn colors are spot-on for October gatherings, but honestly, I’ve made them for Easter with pastel colors too. They’re versatile like that.
- Crowd-Pleaser: Kids go absolutely nuts for these. Adults too, actually. There’s something about the wobbly texture and the sweet, creamy middle layer that just works.
- Unbelievably Delicious: The combination of tart lemon, sweet orange, and that rich, creamy white layer is surprisingly addictive. It’s not just a pretty face — it tastes great too.
What makes this recipe different from all the other layered Jell-O recipes out there? It’s the timing. Most recipes tell you to wait until each layer is completely firm, which takes forever. I figured out the sweet spot — you only need the layer to be tacky on top, not fully set. This cuts the total time in half. Plus, using sweetened condensed milk instead of evaporated milk gives the white layer a richer, almost pudding-like texture that balances the tart Jell-O perfectly.
This isn’t just another Jell-O dessert. It’s the one that makes you look like a pro with almost zero effort. It’s comfort food that’s fun, colorful, and just a little bit nostalgic. Perfect for when you want to impress without the stress.
What Ingredients You Will Need
This recipe uses simple, pantry-friendly ingredients to create those iconic candy corn stripes. The magic is in how you layer them, not in complicated components. Here’s what you’ll need:
For the Orange Layer (Bottom):
- 1 box (3 oz) orange Jell-O (I prefer Jell-O brand, but store brands work fine too)
- 1 cup boiling water
- 1/2 cup cold water
For the Yellow Layer (Middle):
- 1 box (3 oz) lemon Jell-O
- 1 cup boiling water
- 1/2 cup cold water
For the White Cream Layer:
- 1 can (14 oz) sweetened condensed milk (I use Eagle Brand — it’s the most consistent)
- 1 packet (1/4 oz) unflavored gelatin (like Knox)
- 1/4 cup cold water (to bloom the gelatin)
Ingredient Tips & Substitutions:
- Jell-O Flavors: If you can’t find orange, you can use peach or even mango for the bottom layer. For the middle, any yellow or light-colored Jell-O works — try pineapple or even white grape. Just avoid red or purple flavors, as they’ll muddy the candy corn look.
- Sweetened Condensed Milk: This is non-negotiable for the creamy texture. Do not substitute with evaporated milk or regular milk — the layer won’t set properly and will taste thin. For a dairy-free version, use canned coconut cream mixed with a few tablespoons of sugar, though the texture will be slightly softer.
- Unflavored Gelatin: This helps the creamy layer set firmly enough to hold its shape against the Jell-O layers. I’ve tried skipping it, and the white layer just stays runny. You can use agar-agar if you need a vegetarian option, but follow the package directions for blooming.
- Boiling Water: Use freshly boiled water for dissolving the Jell-O. If your water isn’t hot enough, the gelatin won’t dissolve fully and you’ll get grainy layers.
That’s literally it. Four ingredients, no weird stuff. You probably already have the water and maybe even the Jell-O in your pantry. The sweetened condensed milk is the one thing you might need to pick up, but it’s worth it for that silky white layer.
Equipment Needed
You don’t need a fancy kitchen for this one. Here’s what I use:
- Small mixing bowls (3): One for each layer. I use my set of Pyrex glass bowls — they’re microwave-safe and easy to clean.
- Measuring cups: A 1-cup measure for the boiling water and a 1/2-cup measure for the cold water.
- Whisk or fork: For stirring the Jell-O until it’s fully dissolved. A fork works in a pinch if you’re lazy like me sometimes.
- Clear plastic cups (9 oz): These are perfect for showing off the layers. I get the ones from the party supply store — they’re cheap and disposable. You can also use small glass jars or wine glasses for a fancier look.
- Measuring spoon: For scooping the Jell-O mixture evenly into each cup.
- Refrigerator space: You’ll need a flat spot in your fridge where the cups can sit undisturbed for about 20 minutes between layers.
If you don’t have clear cups, you can use any small dish, but you won’t see the pretty stripes. That’s half the fun, honestly. A tip from my own experience: make sure your cups are completely dry before pouring the first layer. Any moisture can cause the Jell-O to stick unevenly.
Preparation Method
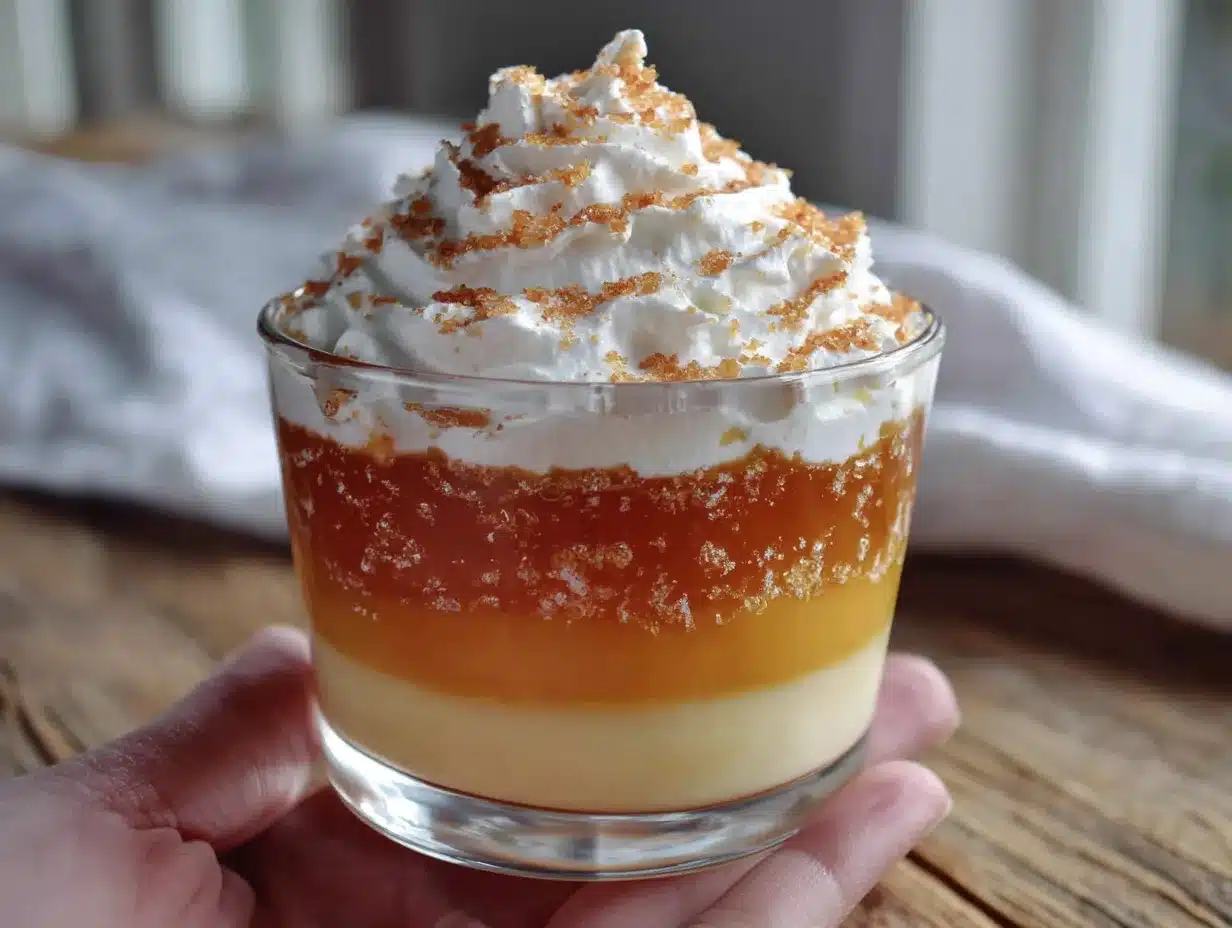
Okay, let’s get to the fun part. I’m going to walk you through this step by step, with all the little tricks I learned from my messy first attempt.
- Prepare the orange layer (bottom stripe): In a small bowl, empty the orange Jell-O powder. Pour in 1 cup of boiling water and whisk for about 2 minutes until the powder is completely dissolved. You shouldn’t see any granules. Then stir in 1/2 cup cold water. This cools it down a bit so it doesn’t melt the layer underneath — well, there’s no layer underneath yet, but it’s good practice.
- Fill the cups: Divide the orange Jell-O evenly among your clear cups. I use a 1/4 cup measuring scoop and give each cup about 3 tablespoons. You want the layer to be about 1/2 inch thick. Place the cups on a tray (trust me, this makes moving them easier) and put them in the fridge. Set a timer for 20 minutes.
- The waiting game: Here’s the key — you don’t need the layer to be fully firm. You just need it to be set enough that when you tilt the cup, the Jell-O doesn’t slosh. It should feel tacky on top, like a firm jelly. This usually takes about 20 minutes. If you wait until it’s rock hard, the next layer won’t stick as well and you’ll get gaps.
- Prepare the white cream layer: While the orange is setting, make the white layer. In a small bowl, sprinkle the unflavored gelatin over 1/4 cup cold water. Let it sit for 5 minutes — this is called blooming. It’ll look like a weird, spongy mass. Don’t panic, that’s normal. Then, in a separate bowl, pour the entire can of sweetened condensed milk. Microwave the bloomed gelatin for about 10 seconds until it’s liquid again, then whisk it into the condensed milk until smooth. Set this aside at room temperature. Don’t refrigerate it yet, or it’ll start setting before you’re ready.
- Add the white layer: After 20 minutes, take the cups out of the fridge. Gently spoon the white cream mixture over the orange layer. Use about 2 tablespoons per cup. Be careful not to pour too fast, or it can break through the orange layer. I use a spoon to guide it down the side of the cup. Return the cups to the fridge for another 20 minutes.
- Prepare the yellow layer (top stripe): While the white layer is setting, make the lemon Jell-O the same way — 1 cup boiling water, stir for 2 minutes, then 1/2 cup cold water. Let it cool at room temperature for about 10 minutes. You don’t want it hot when you pour it over the white layer, or it might melt the cream.
- Finish the cups: After 20 minutes, take the cups out. The white layer should feel firm but still a bit tacky. Gently pour the lemon Jell-O over the top, using about 3 tablespoons per cup. Again, pour slowly down the side of the cup to avoid disturbing the white layer.
- Final set: Place the cups back in the fridge for at least 2 hours, or until the top layer is fully firm. I usually let them sit overnight for best results. The layers become more distinct and the texture is perfect.
Pro tip from my kitchen: If you’re in a hurry, you can speed up the setting by placing the cups in the freezer for 10 minutes between layers. Just don’t forget about them, or you’ll have Jell-O popsicles!
Cooking Tips & Techniques
I’ve made these cups about a dozen times now, and I’ve made every mistake in the book. Here’s what I’ve learned so you don’t have to:
The biggest mistake: rushing the layers. I know it’s tempting to just pour everything at once, but you’ll end up with a muddy, monochrome mess. Each layer needs that 20-minute chill to form a skin on top. If you pour the next layer too soon, they’ll blend together. If you wait too long, they won’t stick. The tacky stage is your friend.
Temperature matters. Make sure your Jell-O mixture isn’t hot when you pour it over the previous layer. Hot liquid will melt the set layer and create a blurry line. I let my Jell-O sit at room temperature for about 10 minutes after adding the cold water. It should feel warm to the touch, not hot.
Pouring technique: Always pour the next layer against the side of the cup, not directly onto the surface below. Use a spoon or a small ladle to guide the liquid. This minimizes disturbance and keeps your stripes clean. I learned this the hard way when my white layer looked like a Jackson Pollock painting.
Multitasking is key. While one layer is setting, prepare the next. I make the white cream mixture while the orange is chilling, and I make the yellow Jell-O while the white is setting. This cuts the total active time to about 15 minutes. You just need to be organized.
Consistency tip: If your white layer seems too runny after adding the gelatin, you might not have bloomed it long enough. Give it the full 5 minutes. If it’s too thick, you can microwave it for 5 seconds to loosen it up. The texture should be like heavy cream.
Variations & Adaptations
Once you’ve mastered the basic candy corn look, you can have some fun with it. Here are a few variations I’ve tried:
- Halloween Colors: Use lime Jell-O for the bottom (green), orange for the middle, and a plain gelatin white layer for the top. It looks like a witch’s hat stripe. My kids loved this one for our Halloween party last year.
- Christmas Version: Swap the orange for cherry (red), keep the white layer, and use lime for the top (green). It’s festive and surprisingly tart-sweet. I brought these to a cookie exchange and they were gone in minutes.
- Dairy-Free Adaptation: Replace the sweetened condensed milk with full-fat coconut cream mixed with 3 tablespoons of sugar. Use agar-agar instead of gelatin. The texture is slightly softer, but the flavor is still rich and creamy. My friend who’s lactose-intolerant loved this version.
- Adult Version: Add a splash of vodka or coconut rum to the Jell-O layers before pouring. About 2 tablespoons per layer. Just note that alcohol can prevent the gelatin from setting fully, so you might need to add an extra 1/2 packet of unflavored gelatin to the mix. I tried this for a grown-up game night, and it was a hit.
- Berry Twist: Use berry-flavored Jell-O (like raspberry or strawberry) for the bottom layer instead of orange. The red and yellow combo looks like a sunset. I did this on a whim one summer, and it was surprisingly good.
Don’t be afraid to experiment. The basic technique is the same — it’s just the colors and flavors that change. I once made a rainbow version with six layers, but that took forever. Stick with three for sanity’s sake.
Serving & Storage Suggestions
These cups are best served cold, straight from the fridge. The texture is perfect when they’re fully chilled — firm but wobbly, with a creamy middle that melts in your mouth.
Presentation ideas: I like to serve them on a tray with some Halloween-themed napkins. You can also top each cup with a dollop of whipped cream and a few candy corn pieces for extra flair. If you’re feeling fancy, add a sprig of mint for color contrast. For a party, arrange the cups on a tiered stand — it looks super impressive and the layers are visible from all angles.
Complementary dishes: These cups pair well with other light desserts. I often serve them alongside a plate of sugar cookies or a fruit platter. For drinks, lemonade or iced tea balances the sweetness nicely. If you’re serving them at a Halloween party, they go great with spooky punch or a hot apple cider bar.
Storage instructions: Cover the cups with plastic wrap or transfer them to an airtight container. They’ll keep in the fridge for up to 5 days. The layers will stay distinct for the first 2 days, but after that, they might start to blend slightly as the gelatin breaks down. They’re still safe to eat, just less pretty.
Freezing: I don’t recommend freezing these. The gelatin structure breaks down when thawed, and you’ll end up with a watery, separated mess. Trust me, I tried it once. Just keep them in the fridge.
Reheating: You don’t need to reheat these — they’re meant to be cold. But if you’ve stored them for a few days and they seem a bit watery, you can let them sit at room temperature for 10 minutes to firm up slightly. The flavors actually meld together more after a day or two, so they might taste even better on day two.
Nutritional Information & Benefits
Let’s be real — this is a dessert, not a health food. But here’s what you’re working with per serving (one cup, about 1/2 cup total):
- Calories: Approximately 220-250 calories
- Fat: 5-7 grams (mostly from the sweetened condensed milk)
- Carbohydrates: 40-45 grams (sugar, mostly)
- Protein: 5-6 grams (thanks to the gelatin and milk)
- Calcium: About 10% of your daily value (from the milk)
Health benefits: Okay, so there aren’t many, but the gelatin is good for your joints and hair. The sweetened condensed milk provides a bit of calcium. And honestly, sometimes you just need a fun, nostalgic treat. It’s not about being healthy — it’s about enjoying a moment of sweetness with people you love.
Dietary considerations: This recipe contains dairy and gelatin, so it’s not vegan or vegetarian. It’s also high in sugar, so it’s not suitable for low-carb or keto diets. However, you can make a sugar-free version using sugar-free Jell-O and a sugar-free sweetened condensed milk alternative (though the texture might be slightly different).
Allergen note: Contains milk. If you’re using the dairy-free adaptation, it’s free of common allergens except for the gelatin (if using). Always check your labels if serving to guests with allergies.
My personal take? I don’t make these every day. But for a special occasion, they’re worth the sugar. Life’s too short to skip dessert all the time.
Conclusion
These Easy Candy Corn Layered Jello Cups are proof that you don’t need a culinary degree to make something beautiful. With just four ingredients and a little patience, you can create a dessert that looks like it came from a bakery. They’re fun, they’re nostalgic, and they always get a reaction.
I love this recipe because it reminds me of my grandma, but also because it’s so forgiving. Even when I mess up the layers, they still taste great. And honestly, the imperfect ones have more character. So don’t stress about making them perfect — just have fun with it.
I’d love to hear how yours turn out! Leave a comment below and tell me what color combos you tried. Did you make them for a party? Did the kids help? Share your photos on social media and tag me — I love seeing your creations. And if you have a variation that’s even better, I’m all ears. Happy cooking, friends!
Frequently Asked Questions
Can I use sugar-free Jell-O for this recipe?
Yes, you can! Sugar-free Jell-O works the same way. Just follow the same measurements. The texture might be slightly softer, but it’ll still set. I’ve done it for a low-sugar party, and no one noticed the difference.
Why did my layers blend together?
This usually happens if the previous layer wasn’t set enough, or if you poured the next layer too quickly. Make sure each layer is tacky on top (about 20 minutes in the fridge) and pour slowly against the side of the cup. Also, ensure your Jell-O mixture isn’t too hot when you pour it.
Can I make these in a large dish instead of individual cups?
Absolutely! Use a 9×9 inch glass dish and triple the recipe. Just remember that larger layers take longer to set — about 30-40 minutes between each layer. You’ll need to slice it into squares to serve, and the stripes will be visible from the side.
How far in advance can I make these?
You can make them up to 2 days ahead. The layers stay distinct for about 48 hours. After that, they might start to blend slightly. I usually make them the night before a party and they’re perfect the next day.
Can I use flavored gelatin for the white layer instead of plain?
No, the white layer needs to stay neutral to create the candy corn look. If you use a flavored Jell-O, it’ll tint the layer and ruin the color contrast. Stick with the sweetened condensed milk and unflavored gelatin for that classic white stripe.
Pin This Recipe!
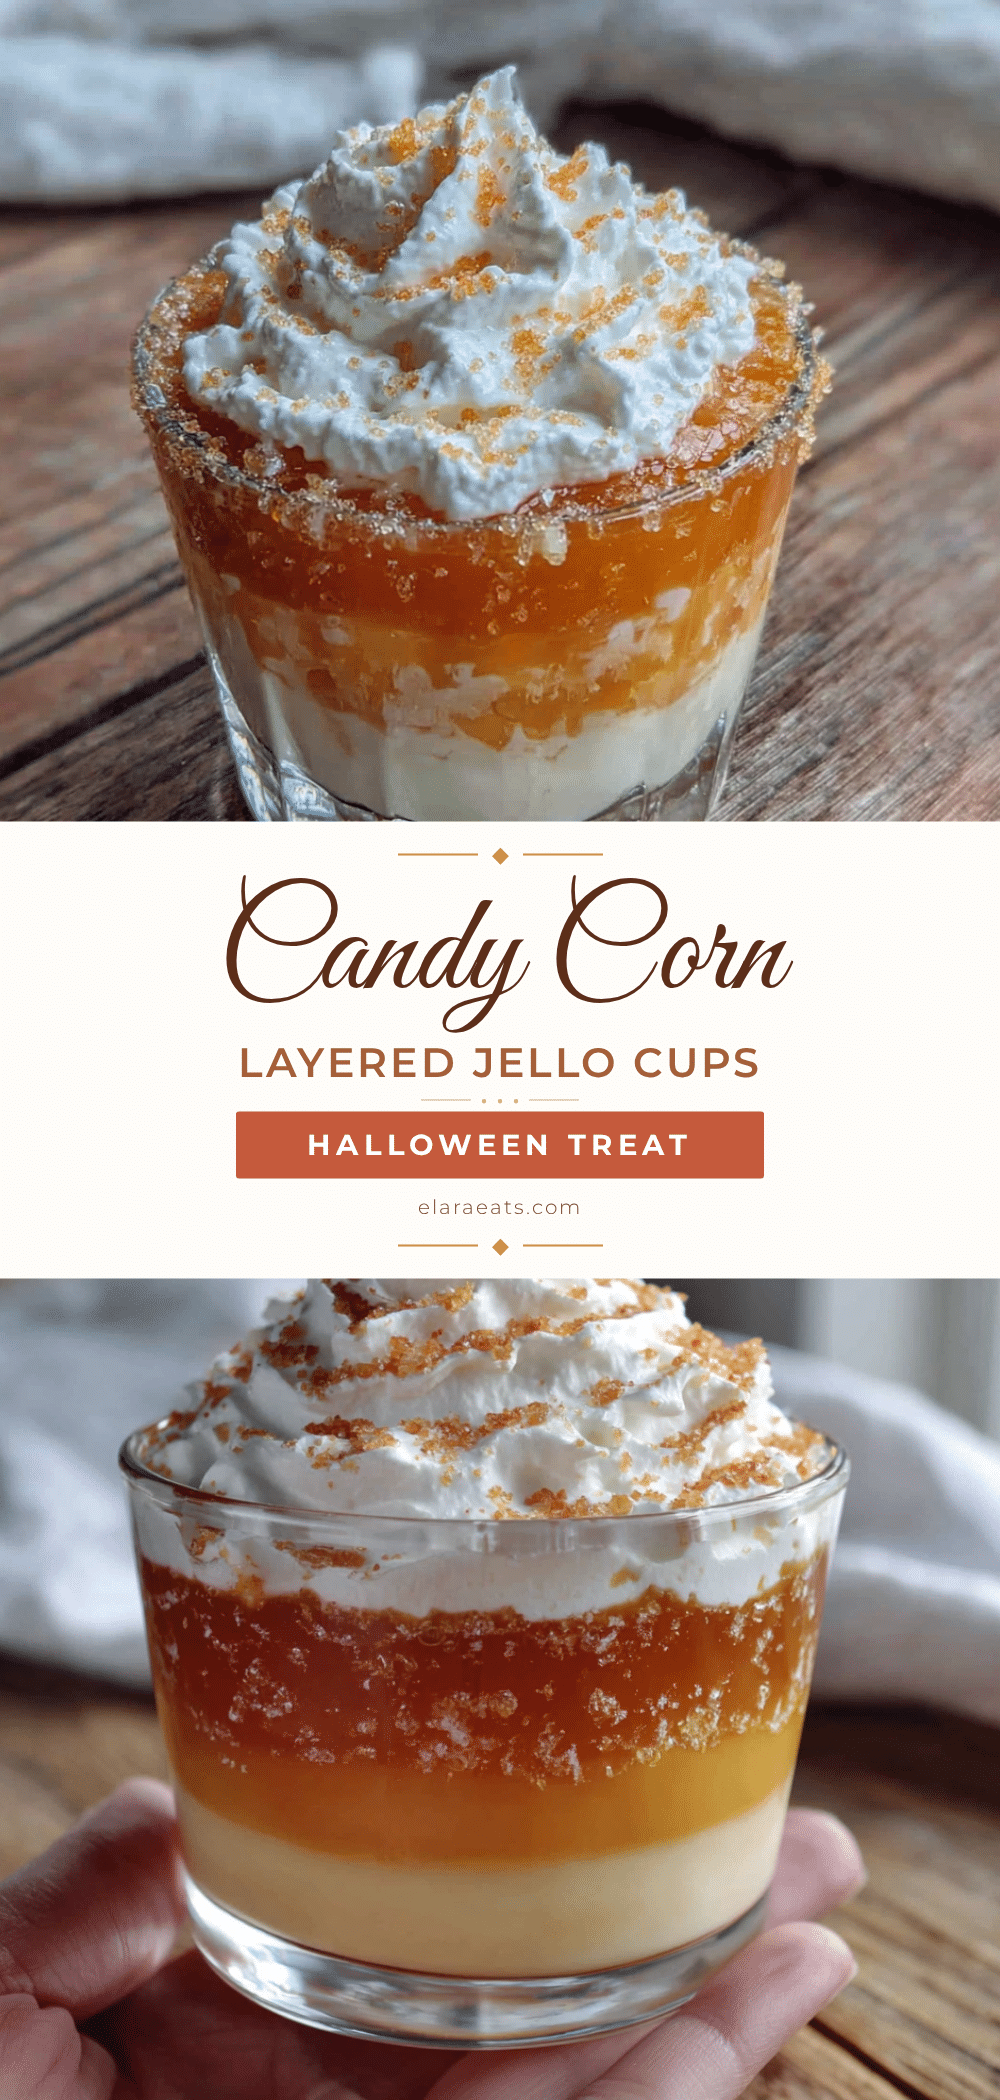
Easy Candy Corn Layered Jello Cups – 4-Ingredient Dessert
These Easy Candy Corn Layered Jello Cups are a quick, fun, and nostalgic dessert made with just four ingredients. Perfect for Halloween or fall parties, they look impressive but come together in about 20 minutes of active prep time.
- Prep Time: 15 minutes
- Cook Time: 0 minutes
- Total Time: 2 hours 35 minutes (includes setting time)
- Yield: 6 servings 1x
- Category: Dessert
- Cuisine: American
Ingredients
- 1 box (3 oz) orange Jell-O
- 1 cup boiling water
- 1/2 cup cold water
- 1 box (3 oz) lemon Jell-O
- 1 cup boiling water
- 1/2 cup cold water
- 1 can (14 oz) sweetened condensed milk
- 1 packet (1/4 oz) unflavored gelatin
- 1/4 cup cold water
Instructions
- Prepare the orange layer: In a small bowl, empty the orange Jell-O powder. Pour in 1 cup of boiling water and whisk for about 2 minutes until the powder is completely dissolved. Stir in 1/2 cup cold water.
- Fill the cups: Divide the orange Jell-O evenly among clear cups (about 3 tablespoons per cup). Place cups on a tray and refrigerate for 20 minutes, until the layer is tacky on top.
- Prepare the white cream layer: In a small bowl, sprinkle unflavored gelatin over 1/4 cup cold water. Let sit for 5 minutes to bloom. In a separate bowl, pour the entire can of sweetened condensed milk. Microwave the bloomed gelatin for about 10 seconds until liquid, then whisk into the condensed milk until smooth. Set aside at room temperature.
- Add the white layer: After 20 minutes, remove cups from fridge. Gently spoon about 2 tablespoons of white cream mixture over the orange layer, pouring slowly down the side of the cup. Return to fridge for another 20 minutes.
- Prepare the yellow layer: While the white layer sets, make the lemon Jell-O: 1 cup boiling water, stir for 2 minutes, then 1/2 cup cold water. Let cool at room temperature for 10 minutes.
- Finish the cups: After 20 minutes, remove cups from fridge. Gently pour about 3 tablespoons of lemon Jell-O over the white layer, pouring slowly down the side of the cup.
- Final set: Refrigerate cups for at least 2 hours, or until the top layer is fully firm. For best results, let set overnight.
Notes
The key is to let each layer set only until tacky (about 20 minutes), not fully firm. This cuts total time in half. For a dairy-free version, use full-fat coconut cream mixed with 3 tablespoons of sugar and agar-agar instead of gelatin. For an adult version, add 2 tablespoons of vodka or coconut rum to each Jell-O layer, but add extra unflavored gelatin to compensate.
Nutrition
- Serving Size: 1 cup (about 1/2 cup
- Calories: 235
- Sugar: 40
- Sodium: 120
- Fat: 6
- Saturated Fat: 4
- Carbohydrates: 43
- Protein: 5.5
Keywords: candy corn, jello cups, layered dessert, Halloween dessert, easy dessert, 4-ingredient dessert