Love this? Save it for later!
Share the inspiration with your friends
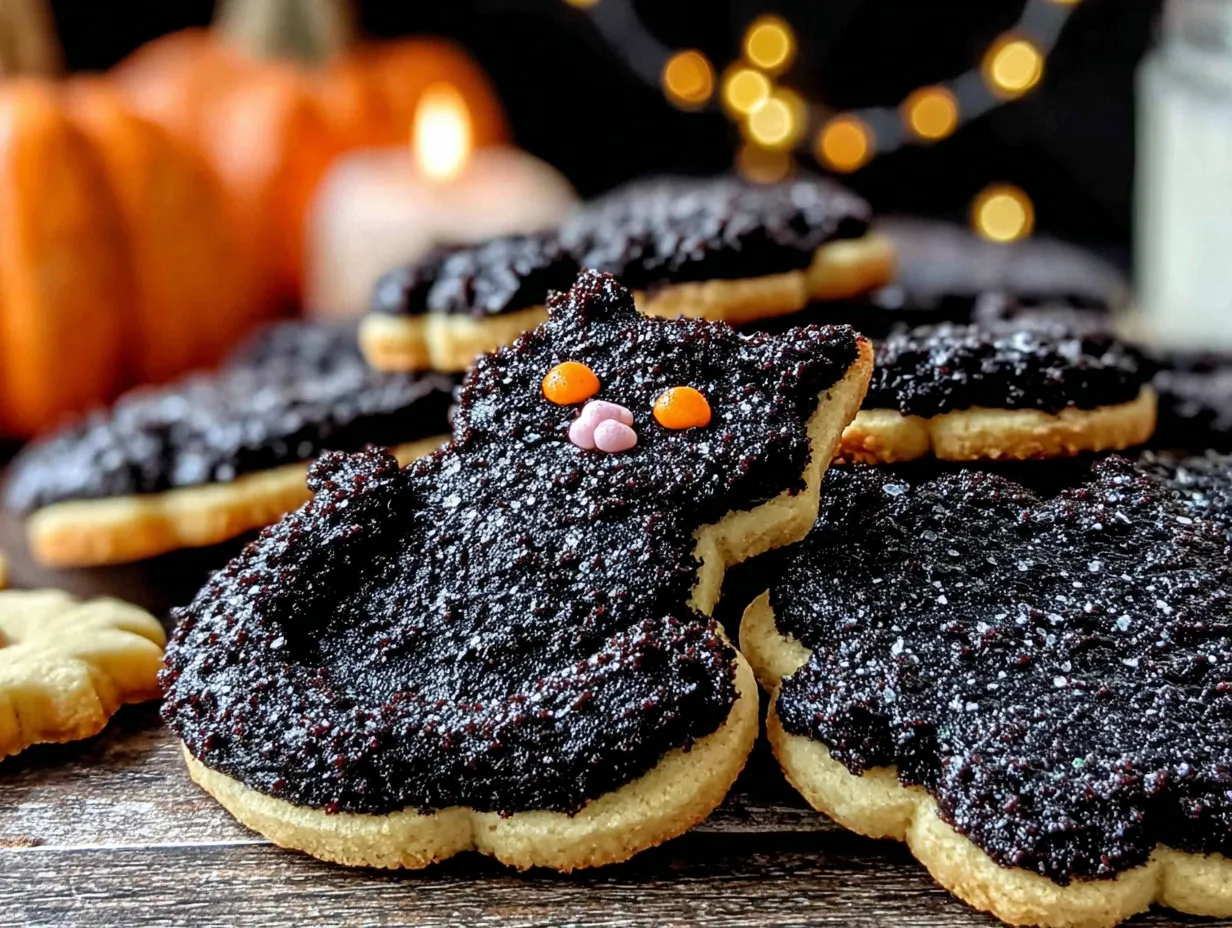
I was standing in the baking aisle of my local grocery store last October, staring at a bag of jet-black cocoa powder I’d never noticed before, when the strangest thing happened. A kid walked by holding one of those cheap, plastic Halloween buckets, and the faint smell of artificial orange flavoring hit me—and suddenly I was seven years old at my Aunt Jo’s kitchen table, her flour-dusted hands pressing a cat-shaped cookie cutter into a sheet of pale dough. She wasn’t the “bake from scratch” type—she used refrigerated dough and canned frosting, and honestly? We loved every second of it. But she always let me pick the shape, and I always picked the cat. I can still see the way she’d squint, trying to pipe on a crooked little face with a toothpick dipped in food coloring. She passed away a few years ago, and I haven’t thought about those afternoons in forever. But standing there in that bright, fluorescent aisle, I felt this sudden, almost desperate need to make something better. Something that actually looked like the black cats in my memory—sleek, mischievous, and a little bit magical. So I grabbed the cocoa, a bag of powdered sugar, and maybe a little too much confidence. Let me tell you, the first batch was a disaster. The icing was too runny, the cookies spread into blobs, and I had to explain to my neighbor, who’d knocked on my door mid-meltdown, why I was covered in powdered sugar and muttering about cat faces. But I kept at it. And now, after way too many test batches (and one very memorable royal icing flood), these adorable black cat Halloween sugar cookies are my absolute favorite thing to make when October rolls around. There’s something about that deep, dark color against a bright orange or purple sprinkle that just feels right. Maybe you’ve been there—chasing a taste or a smell from your past, trying to get it exactly right. This is that recipe for me.
Why You’ll Love This Recipe
I’m not going to pretend these cookies are complicated—they’re not. But they are the kind of project that feels like a real accomplishment, especially when you see those little cat faces staring back at you from the cooling rack. Here’s why I keep coming back to this recipe year after year:
- Simple Ingredients: You probably already have butter, sugar, flour, and eggs in your kitchen. The black cocoa powder is the only specialty item, and it’s easy to find online or at a well-stocked grocery store.
- Perfect for Halloween: Whether you’re hosting a spooky party, making treat bags for classmates, or just want something fun to do on a crisp October afternoon, these cookies fit the bill.
- Crowd-Pleaser: Kids go wild for the cat shape, and adults appreciate the rich, Oreo-like flavor from the black cocoa. I’ve never brought a batch to a gathering that didn’t disappear.
- Unbelievably Delicious: The black cocoa powder gives these cookies a deep, dark chocolate flavor that’s way more sophisticated than your average sugar cookie. It’s not just about the look—they actually taste incredible.
- Customizable: You can keep the royal icing simple with just eyes and a mouth, or go all out with different colored bows, collars, or even little witch hats. The base recipe is a blank canvas.
What makes this version different from all the other black cat cookies out there? It’s the balance. The cookie itself is sturdy enough to hold its shape during baking (no blobby cats here!), but still tender and buttery. And the royal icing—oh, the royal icing. I’ve tested ratios for weeks to get a consistency that’s stiff enough for detail work but fluid enough to flood smoothly. This isn’t just another Halloween cookie recipe; it’s the one that makes you close your eyes after that first bite. It’s comfort food reimagined—a little spooky, a little sweet, and completely satisfying.
What Ingredients You Will Need
This recipe uses a short list of simple ingredients to deliver big flavor and that perfect, deep black color. No weird additives or hard-to-find items—just good, honest baking staples with one special twist.
For the Sugar Cookies
- Unsalted butter, softened (1 cup / 226g) – Make sure it’s truly at room temperature. Cold butter won’t cream properly, and melted butter will make the cookies spread too much.
- Granulated sugar (1 cup / 200g) – Regular white sugar gives the cookies their classic sweetness and tender crumb.
- Large egg (1) – Room temperature, please. It incorporates more smoothly into the creamed butter and sugar.
- Vanilla extract (2 teaspoons) – Pure vanilla extract makes a difference here. The black cocoa is strong, and the vanilla helps round out the flavor.
- All-purpose flour (2 ½ cups / 312g) – Spoon and level your flour for the most accurate measurement. Scooping directly from the bag can pack in too much.
- Black cocoa powder (⅓ cup / 30g) – This is the star of the show. It’s different from regular Dutch-process cocoa—it’s darker, less acidic, and gives that Oreo cookie flavor. I recommend the brand Rodelle for the deepest color.
- Baking powder (½ teaspoon) – Just enough to give the cookies a slight lift without making them puffy.
- Salt (¼ teaspoon) – Balances the sweetness and enhances the chocolate flavor.
For the Royal Icing
- Powdered sugar (2 cups / 240g) – Sift it first to avoid lumps in your icing. Trust me on this one.
- Meringue powder (2 tablespoons) – This stabilizes the icing and gives it that smooth, professional finish. You can find it in the baking aisle or online.
- Water (3-4 tablespoons) – Start with 3 tablespoons and add more a teaspoon at a time until you reach the right consistency. You’re aiming for something that flows like thick honey.
- Vanilla extract (½ teaspoon) – For flavor. You can leave it out if you want pure white icing, but I like the hint of vanilla.
- Black gel food coloring (optional) – The black cocoa gives the cookies a dark color, but the royal icing will be off-white. If you want black icing (which I do for the base coat), you’ll need a good gel color. I use Americolor Super Black.
For Decorating
- Orange and purple sanding sugar or sprinkles – For adding a pop of color to the cats’ collars or bows.
- White royal icing (a small batch) – For piping the eyes and mouths. You can also use candy eyes if you’re short on time.
Substitution tip: If you can’t find black cocoa powder, you can use regular Dutch-process cocoa powder and add black gel food coloring to the cookie dough. The color won’t be as deep, but it will still be dark. For a gluten-free version, swap the all-purpose flour with a 1:1 gluten-free baking blend that contains xanthan gum.
Equipment Needed
You don’t need a professional bakery setup for these cookies, but a few key tools will make your life much easier.
- Electric mixer (stand or hand-held) – Creaming the butter and sugar by hand is possible, but your arm will thank you for using a mixer. I use my KitchenAid for the cookie dough and a simple hand mixer for the royal icing.
- Cat-shaped cookie cutter – This is non-negotiable. You can find them online in all sizes. I like a 3-inch cutter for a good balance of detail and ease of handling.
- Rolling pin – I prefer a wooden rolling pin with thickness guides, but a standard one works too. Just be consistent with your thickness.
- Baking sheets (2) – Light-colored, non-stick sheets are best. Dark sheets can cause the bottoms of the cookies to brown too quickly.
- Parchment paper or silicone baking mats – These prevent sticking and make cleanup a breeze. Silicone mats also help the cookies bake more evenly.
- Piping bags (disposable or reusable) – For the royal icing. You can also use a zip-top bag with a tiny corner snipped off in a pinch.
- Small round piping tips (Wilton #2 or #3) – For outlining and flooding the icing.
- Toothpicks or scribe tool – For popping air bubbles and spreading the icing into tight corners.
- Cooling rack – Essential for letting the cookies cool completely before icing. Warm cookies will melt your royal icing.
Budget-friendly tip: If you don’t have a cat-shaped cutter, you can use a round cutter and pipe the ears on with icing. It’s not the same, but it works in a pinch. I’ve done it, and honestly, the round cats have their own charm.
Preparation Method
Let’s get to the fun part. I’ve broken this down into clear steps with all the little details I wish someone had told me the first time I tried this.
Step 1: Make the Cookie Dough
In a large bowl, cream together the softened butter and granulated sugar using your electric mixer on medium speed. You want the mixture to be light and fluffy—about 2-3 minutes. Scrape down the sides of the bowl with a spatula halfway through. Add the egg and vanilla extract, then beat on low until just combined. Don’t overmix here; you don’t want to incorporate too much air.
In a separate bowl, whisk together the all-purpose flour, black cocoa powder, baking powder, and salt. This ensures the cocoa is evenly distributed—no white streaks in your black dough. Gradually add the dry ingredients to the wet ingredients, mixing on low speed until a soft dough forms. The dough will look very dark and slightly crumbly at first, but it will come together as you mix.
Step 2: Chill the Dough
Divide the dough into two discs, wrap each tightly in plastic wrap, and refrigerate for at least 1 hour. This step is crucial. Chilling the dough firms up the butter, which prevents the cookies from spreading too much in the oven. I’ve skipped this step before (I was in a hurry, and I regretted it). The cats came out looking like melted blobs. Don’t be like me. Chill the dough.
Step 3: Roll and Cut
Preheat your oven to 350°F (175°C). Line your baking sheets with parchment paper or silicone mats. Lightly flour your work surface and rolling pin. Roll one disc of dough to about ¼-inch thickness. If the dough feels sticky, dust it with a little more flour. Use your cat-shaped cookie cutter to cut out as many cookies as you can. Gather the scraps, re-roll them, and cut more. Repeat with the second disc.
Place the cookies about 1 inch apart on the prepared baking sheets. If you want to add a little detail, you can use a toothpick to gently score a line for the tail or ears—just don’t press all the way through.
Step 4: Bake
Bake for 8-10 minutes, rotating the baking sheet halfway through. The cookies are done when the edges look set and the tops are just slightly firm to the touch. They will not look browned—they’re black, after all. Let the cookies cool on the baking sheet for 5 minutes, then transfer them to a cooling rack to cool completely. Do not skip the cooling step. Warm cookies will ruin your royal icing.
Step 5: Make the Royal Icing
In a clean bowl, combine the powdered sugar and meringue powder. Add 3 tablespoons of water and the vanilla extract. Beat on low speed with your hand mixer until the ingredients are moistened, then increase to medium speed and beat for 3-4 minutes. The icing should be glossy and hold a stiff peak. If it’s too thick, add water a teaspoon at a time. If it’s too thin, add a little more powdered sugar.
Divide the icing into two bowls. Leave one bowl white (for the eyes and mouths) and color the other bowl black using the gel food coloring. You’ll need quite a bit of gel to get a true black—start with a small amount and add more until you’re happy with the color. Transfer each color to a piping bag fitted with a small round tip.
Step 6: Decorate the Cookies
This is where the magic happens. Using the black icing, outline each cat cookie, then flood the inside with more icing. Use a toothpick to spread the icing into the corners and pop any air bubbles. Let the black icing dry completely—this takes about 2-3 hours. I usually let them sit overnight to be safe.
Once the black icing is dry, use the white icing to pipe two small eyes and a little mouth on each cat. You can add a tiny dot of black icing in the center of each eye for a pupil if you want them to look really expressive. For the collars, pipe a thin line of black or white icing around the neck and press on some orange or purple sanding sugar before it dries.
Step 7: Let Everything Set
Allow the decorated cookies to set completely, preferably overnight. The royal icing needs time to harden fully, especially if you’re stacking them or putting them in treat bags.
Cooking Tips & Techniques
I’ve made more batches of these cookies than I care to count, and I’ve learned a few things along the way. Here are my best tips for getting perfect results every time.
- Weigh your flour: I know, I know—weighing ingredients feels fussy. But flour is notoriously inconsistent when measured by volume. A cup of flour can weigh anywhere from 120g to 150g depending on how you scoop it. For this recipe, you want exactly 312g. A kitchen scale is a game-changer, and they’re cheap.
- Don’t overbake: Because the cookies are black, it’s hard to tell when they’re done by looking at them. Trust the timer and the touch test. The edges should look set, and the center should spring back slightly when you press it. Overbaked cookies will be dry and crumbly.
- Chill the cut-out cookies: If your kitchen is warm, pop the baking sheet with the cut-out cookies into the fridge for 10-15 minutes before baking. This is my secret weapon for sharp edges. It gives the butter a chance to firm up again after being handled.
- Royal icing consistency is everything: For outlining, you want the icing to hold a stiff peak. For flooding, you want it to be slightly thinner—it should flow off a spoon in a smooth ribbon and settle within 10-15 seconds. If you’re not sure, test a small amount on a plate. It should spread slightly but not run everywhere.
- Use a scribe tool: A scribe tool (or a toothpick) is your best friend for flooding. Use it to guide the icing into tight spots and pop any air bubbles that form. Work quickly but carefully—the icing starts to set after a few minutes.
- Plan your decorating: I like to outline and flood all the cookies with black icing first, let them dry, and then do the white details. This prevents smudging and keeps the colors clean. It takes longer, but the results are worth it.
Variations & Adaptations
One of the best things about this recipe is how easily it adapts. Here are a few ways to switch things up.
- Dietary: Gluten-Free Version: Substitute the all-purpose flour with a 1:1 gluten-free baking blend. I’ve used Bob’s Red Mill with great results. The cookies will be slightly more tender, so handle them gently. You may need to add an extra tablespoon of flour if the dough feels too sticky.
- Seasonal: Pumpkin Spice Cats: Add 1 teaspoon of pumpkin pie spice to the dry ingredients for a fall twist. The warm spices pair beautifully with the black cocoa. You can also swap the vanilla extract in the royal icing for a teaspoon of maple extract.
- Flavor: Mint Chocolate Cats: Add ½ teaspoon of peppermint extract to the cookie dough along with the vanilla. For the royal icing, use a drop of peppermint oil instead of vanilla. These taste like a Thin Mint in cookie form—dangerously good.
- Decorating: Witch Cat: Pipe a tiny witch hat on one of the cat’s ears using black and purple icing. Or add a little orange pumpkin next to the cat. The possibilities are endless, and it’s a great way to use up leftover icing colors.
- Easy Shortcut: Candy Eyes: If piping tiny eyes feels too fiddly (and honestly, it can be), use edible candy eyes. You can find them at any craft store. Just press them into the wet black icing before it sets. It gives the cats a slightly goofy, cartoonish look that kids love.
My personal favorite variation is the mint chocolate version. I made a batch for a Halloween party last year, and they were gone before the punch bowl was empty. The combination of the dark, rich cookie and the cool, refreshing mint is just perfect.
Serving & Storage Suggestions
These cookies are best enjoyed at room temperature, which is convenient because that’s how you’ll store them anyway. The royal icing needs a few hours to set completely, so plan your decorating accordingly.
- Serving: Arrange the cookies on a platter or in a festive tin. They make a fantastic centerpiece for a Halloween dessert table. I like to pair them with a glass of cold milk or a warm mug of spiced apple cider. For an adult gathering, they’re wonderful with a dark stout or a bourbon-spiked hot chocolate.
- Storage: Store the decorated cookies in an airtight container at room temperature. Place a sheet of parchment paper between layers to prevent the icing from sticking. They will stay fresh for up to 1 week. Do not refrigerate them—the cold air can cause the royal icing to become sticky and attract moisture.
- Freezing: You can freeze the undecorated baked cookies for up to 3 months. Wrap them tightly in plastic wrap and place them in a freezer-safe bag. When you’re ready to decorate, thaw them at room temperature for about an hour. Do not freeze cookies that have already been iced—the condensation will ruin the design.
- Reheating: These cookies don’t need reheating, but if you want to refresh them, pop them in a 300°F (150°C) oven for 3-4 minutes. Let them cool completely before serving. I find the flavor actually improves after a day or two—the cocoa deepens, and the cookie becomes even more tender.
Nutritional Information & Benefits
Let’s be real: these are sugar cookies with royal icing. They’re a treat, not a health food. But that doesn’t mean they can’t have a place in a balanced diet. Here’s a rough estimate of what you’re looking at per cookie (based on a 3-inch cutter and a moderate amount of icing).
- Calories: Approximately 180-200 per cookie
- Fat: 8g
- Carbohydrates: 28g
- Protein: 2g
- Sugar: 18g
On the plus side, black cocoa powder is rich in antioxidants (even more than regular cocoa) and contains minerals like iron, magnesium, and zinc. The butter provides a small amount of vitamin A, and the egg adds a little protein. But honestly, the biggest benefit here is the joy they bring. Baking these cookies is a form of mindfulness—a way to slow down, focus on something creative, and share a little bit of happiness with the people you love. And that’s worth every gram of sugar.
Allergen note: This recipe contains wheat (gluten), dairy (butter), and eggs. If you have allergies, please see the variations section for substitution ideas.
Conclusion
These adorable black cat Halloween sugar cookies are more than just a pretty face. They’re a project—a little messy, a little time-consuming, but so, so rewarding. The deep, dark chocolate flavor from the black cocoa is completely unexpected in a sugar cookie, and the royal icing gives you the freedom to create something truly personal. Whether you’re making them for a party, a classroom treat, or just because you need a little spooky joy in your life, I promise they’re worth the effort.
I’d love to see how your cats turn out. Did you add a witch hat? A sparkly collar? Did you go with the mint chocolate version and blow everyone’s minds? Drop a comment below and let me know. And if you have a question about the recipe, don’t be shy—I’m here to help. Happy Halloween, and happy baking!
Frequently Asked Questions
Can I use regular cocoa powder instead of black cocoa?
You can, but the cookies won’t be as dark or have that distinct Oreo flavor. If you use regular cocoa, you’ll likely need to add black gel food coloring to the dough to get a deep black color. The texture might also be slightly different—black cocoa is less acidic, so it reacts differently with the baking powder.
My royal icing is too runny. How do I fix it?
If your royal icing is too thin, add more powdered sugar, one tablespoon at a time, until it thickens. Beat it on medium speed for a minute after each addition. If it’s too thick, add water a teaspoon at a time. The goal is a consistency that flows like thick honey—it should hold a soft peak but settle into a smooth surface within 10-15 seconds.
Can I freeze the cookie dough?
Absolutely. Wrap the dough discs tightly in plastic wrap and place them in a freezer-safe bag. They’ll keep for up to 3 months. When you’re ready to bake, thaw the dough in the refrigerator overnight, then roll and cut as usual. You might need to let it sit at room temperature for 10 minutes if it’s too firm to roll.
How do I get the icing to dry faster?
Patience is your best tool here. Royal icing needs time to dry—usually 2-3 hours for the base coat and overnight for full hardening. You can speed things up slightly by placing the cookies in a warm, dry area (like near a heater or in a low-temperature oven with the door open). But don’t rush it too much; the icing needs to set properly to avoid smudging.
Can I use a different cookie cutter shape?
Of course! The black cocoa dough works beautifully with any shape. Try pumpkins, ghosts, bats, or even simple circles. Just adjust the baking time slightly for smaller or larger cookies. The same royal icing technique applies—just adapt the design to fit your shape.
Pin This Recipe!

Easy Black Cat Halloween Sugar Cookies Recipe

These adorable black cat Halloween sugar cookies feature a deep, dark chocolate flavor from black cocoa powder, topped with smooth royal icing. Perfect for Halloween parties, treat bags, or a fun baking project that brings a little spooky joy to your kitchen.
- Prep Time: 20 minutes
- Cook Time: 10 minutes
- Total Time: 1 hour 30 minutes (includes chilling and decorating time)
- Yield: 24 servings 1x
- Category: Dessert
- Cuisine: American
Ingredients
- 1 cup (226g) unsalted butter, softened
- 1 cup (200g) granulated sugar
- 1 large egg, room temperature
- 2 teaspoons vanilla extract
- 2 ½ cups (312g) all-purpose flour
- ⅓ cup (30g) black cocoa powder
- ½ teaspoon baking powder
- ¼ teaspoon salt
- 2 cups (240g) powdered sugar, sifted
- 2 tablespoons meringue powder
- 3–4 tablespoons water
- ½ teaspoon vanilla extract
- Black gel food coloring (optional)
- Orange and purple sanding sugar or sprinkles
- White royal icing (small batch)
Instructions
- Make the cookie dough: In a large bowl, cream together softened butter and granulated sugar with an electric mixer on medium speed until light and fluffy, about 2-3 minutes. Scrape down the sides. Add egg and vanilla extract, beat on low until just combined.
- In a separate bowl, whisk together flour, black cocoa powder, baking powder, and salt. Gradually add dry ingredients to wet ingredients, mixing on low speed until a soft dough forms.
- Divide dough into two discs, wrap tightly in plastic wrap, and refrigerate for at least 1 hour.
- Preheat oven to 350°F (175°C). Line baking sheets with parchment paper or silicone mats.
- Lightly flour work surface and rolling pin. Roll one disc of dough to ¼-inch thickness. Cut out cookies using a cat-shaped cookie cutter. Place cookies 1 inch apart on prepared baking sheets.
- Bake for 8-10 minutes, rotating the baking sheet halfway through. Cookies are done when edges look set and tops are slightly firm. Cool on baking sheet for 5 minutes, then transfer to a cooling rack to cool completely.
- Make the royal icing: In a clean bowl, combine powdered sugar and meringue powder. Add 3 tablespoons water and vanilla extract. Beat on low speed until moistened, then increase to medium speed and beat for 3-4 minutes until glossy and stiff peaks form. Add more water if needed, a teaspoon at a time.
- Divide icing into two bowls. Leave one white, color the other black with gel food coloring. Transfer each to piping bags fitted with small round tips.
- Decorate cookies: Using black icing, outline each cat cookie, then flood the inside. Use a toothpick to spread icing into corners and pop air bubbles. Let dry completely, about 2-3 hours or overnight.
- Once black icing is dry, use white icing to pipe two small eyes and a mouth on each cat. For collars, pipe a thin line of icing around the neck and press on sanding sugar before it dries.
- Let decorated cookies set completely, preferably overnight, before serving or storing.
Notes
Chilling the dough is crucial to prevent spreading. For best results, weigh your flour for accuracy. Royal icing needs time to dry—plan accordingly. Cookies can be stored in an airtight container at room temperature for up to 1 week. Undecorated baked cookies can be frozen for up to 3 months.
Nutrition
- Serving Size: 1 cookie
- Calories: 190
- Sugar: 18
- Sodium: 75
- Fat: 8
- Saturated Fat: 5
- Carbohydrates: 28
- Fiber: 1
- Protein: 2
Keywords: Halloween cookies, black cat cookies, sugar cookies, black cocoa cookies, royal icing cookies, Halloween baking, spooky cookies, cat-shaped cookies


