Love this? Save it for later!
Share the inspiration with your friends
My friend Jenna had sworn off pumpkin desserts for three years. “Too heavy,” she’d say, waving a hand every time someone mentioned pumpkin bread at our book club. “It’s like eating a candle.” I tried not to take it personally—I’d been perfecting my pumpkin cheesecake bar recipe for about that long. Then last October, I brought a batch to her place under the guise of “just trying a new recipe” and found her hovering over the pan at 11 PM, fork in hand, muttering something about “just one more bite.”
I didn’t say a word. I just smiled and grabbed a fork for myself. Honestly, I’ve been there. These creamy pumpkin cheesecake bars with graham crust have a way of sneaking up on you. The first time I made them, I was testing a crust recipe that kept falling apart—I mean, I had crumbs all over my kitchen floor and somehow in my hair. But the filling? That part worked on the very first try. Rich, velvety, with just enough pumpkin spice to taste like autumn without overwhelming you.
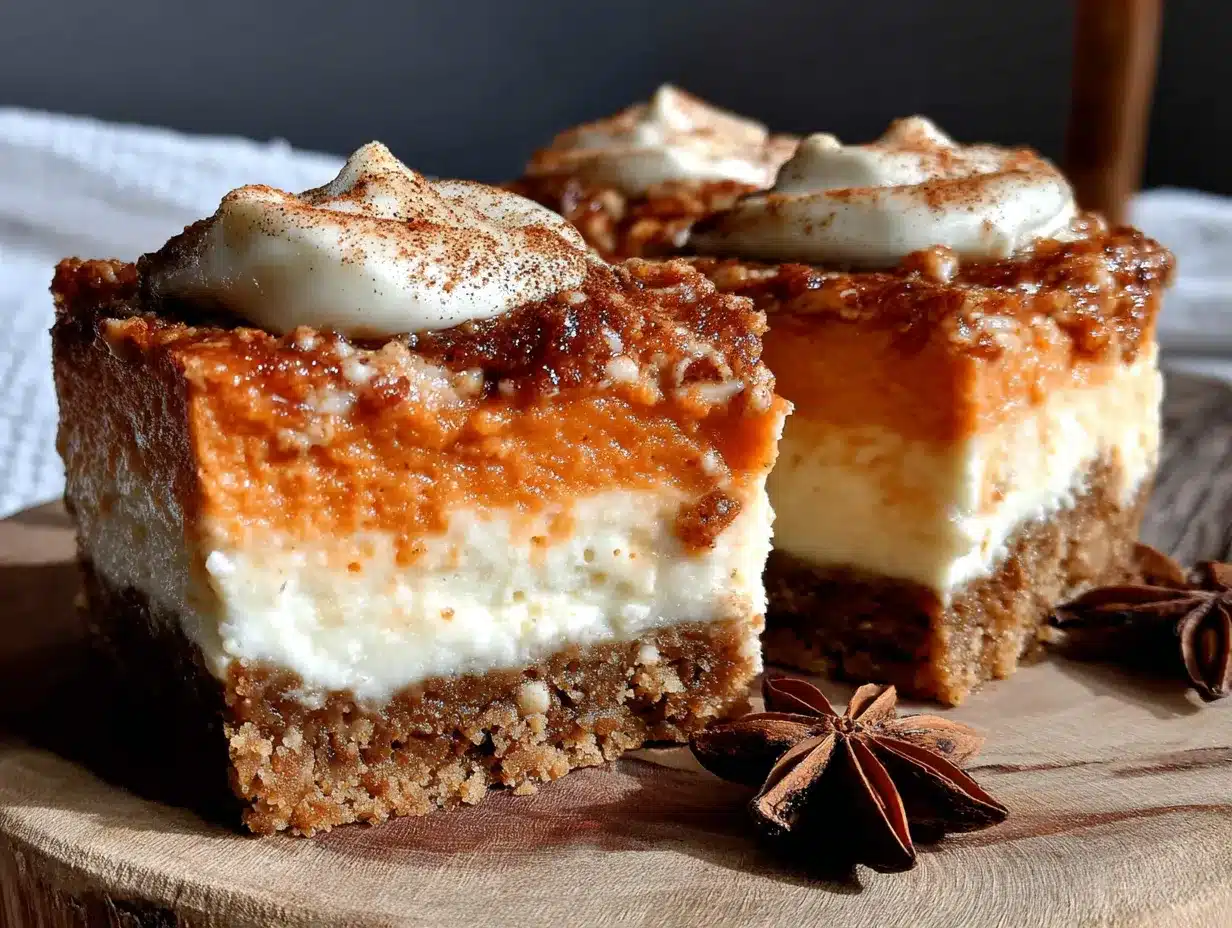
What gets me every time is the texture. The graham cracker crust stays buttery and crisp, while the pumpkin layer is almost mousse-like. Then there’s that cream cheese layer on top—tangy, smooth, and perfectly balanced against the sweetness. Maybe you’ve had pumpkin desserts that felt more like obligation than joy. These bars are the opposite. They’re the kind of treat you make for yourself on a Tuesday afternoon, not just for Thanksgiving. And honestly? That’s why I keep coming back to this recipe. It feels like fall in a way that’s warm and familiar, not fussy or complicated.
Why You’ll Love This Recipe
Let me tell you why these creamy pumpkin cheesecake bars with graham crust have earned a permanent spot in my fall baking rotation. After testing this recipe at least eight times (my neighbors have become very willing taste testers), I can confidently say this version nails everything you want in a fall dessert.
- Simple Ingredients – No weird specialty items here. You probably have most of what you need in your pantry right now. Cream cheese, pumpkin puree, graham crackers, butter, sugar, and eggs. That’s basically it.
- Quick & Easy – From start to fridge, you’re looking at about 30 minutes of active time. The oven does most of the work, and then the fridge handles the rest. Perfect for busy weeknights when you still want something homemade.
- Perfect for Fall Gatherings – These bars travel well, slice cleanly, and look gorgeous on a dessert table. I brought them to a Friendsgiving potluck last year and watched three people ask for the recipe before the plates were even cleared.
- Crowd-Pleaser – Even people who claim they don’t like pumpkin desserts (looking at you, Jenna) end up going back for seconds. The cream cheese layer mellows out the pumpkin flavor in a way that feels approachable.
- Unbelievably Delicious – The texture is what gets everyone. The graham crust stays crunchy, the pumpkin layer is silky, and the cream cheese topping is perfectly tangy. It’s comfort food that feels a little fancy.
What makes this recipe different from other pumpkin cheesecake bars is the layering technique. Instead of swirling everything together, I keep the pumpkin and cream cheese layers distinct. This gives you that beautiful marbled effect on top while each bite delivers a clear taste of both components. Plus, I’ve figured out the exact ratio of pumpkin to cream cheese so neither one overpowers the other. It’s the kind of balance that took me several batches to perfect—and now I’m sharing it with you.
This recipe is the kind that makes you close your eyes after the first bite. It’s fall baking at its finest—comforting, satisfying, and just a little bit indulgent. Perfect for impressing guests without any stress, or turning an ordinary weekend into something worth remembering.
What Ingredients You Will Need
This recipe uses simple, wholesome ingredients to deliver that rich, creamy texture and bold pumpkin flavor without any fuss. Most of these are pantry staples, especially if you do any fall baking.
For the Graham Crust
- 2 cups graham cracker crumbs – About 14-16 full sheets. I prefer Nabisco brand for consistent texture, but any brand works. Pulse them in a food processor or crush them in a zip-top bag with a rolling pin.
- 1/2 cup unsalted butter, melted – Salted butter works too, just reduce any added salt elsewhere. Let it cool slightly so it doesn’t cook the crumbs.
- 1/4 cup granulated sugar – Adds just enough sweetness to balance the buttery crumbs.
- 1/4 teaspoon salt – Enhances the buttery flavor. Skip this if using salted butter.
For the Pumpkin Layer
- 1 cup canned pumpkin puree – Not pumpkin pie filling! Look for 100% pure pumpkin. I like Libby’s for consistent results every time.
- 8 ounces cream cheese, softened – Full-fat gives the creamiest texture. Let it sit out for at least 30 minutes before mixing.
- 1/2 cup granulated sugar – Sweetens the pumpkin without making it cloying.
- 2 large eggs, room temperature – Cold eggs can cause the batter to seize. Place them in warm water for 5 minutes if you’re in a hurry.
- 1 teaspoon vanilla extract – Pure vanilla extract adds depth. Imitation works in a pinch.
- 1 teaspoon pumpkin pie spice – Or make your own: 1/2 teaspoon cinnamon, 1/4 teaspoon ginger, 1/4 teaspoon nutmeg, pinch of cloves.
- 1/2 teaspoon cinnamon – For extra warmth and that unmistakable fall aroma.
For the Cream Cheese Topping
- 8 ounces cream cheese, softened – Same as above—full-fat, room temperature.
- 1/4 cup granulated sugar – Less than the pumpkin layer to keep the tanginess intact.
- 1 large egg, room temperature – Helps create that smooth, silky texture.
- 1/2 teaspoon vanilla extract – Brings out the cream cheese flavor beautifully.
Substitution Notes
If you need a gluten-free option, use gluten-free graham crackers or crushed gluten-free cookies. For a dairy-free version, use dairy-free cream cheese and plant-based butter—just know the texture will be slightly less firm. I’ve tried Kite Hill cream cheese style spread with decent results. You can also swap pumpkin pie spice with equal parts cinnamon, ginger, nutmeg, and a pinch of allspice if that’s what you have on hand.
Equipment Needed
You don’t need a fancy kitchen to pull off these creamy pumpkin cheesecake bars with graham crust. Here’s what you’ll need:
- 9×9-inch baking pan – Glass or metal both work. I prefer glass because I can see the crust browning through the bottom. If using metal, line it well with parchment.
- Parchment paper – Non-negotiable for easy removal. Leave overhang on two sides like handles.
- Food processor or zip-top bag – For crushing graham crackers. A food processor gives finer crumbs, but a rolling pin and some elbow grease works just fine.
- Electric hand mixer or stand mixer – Cream cheese needs to be really smooth, and doing it by hand is a workout. I’ve done it with a whisk once—never again.
- Large mixing bowls – At least two: one for the crust mixture, one for the cheesecake batters.
- Measuring cups and spoons – Accurate measurements matter here, especially for the graham cracker crumbs.
- Spatula – For scraping every last bit of that creamy filling into the pan.
- Wire cooling rack – Helps the bars cool evenly before refrigeration.
If you don’t have a 9×9 pan, an 8×8 works but you’ll need to bake a few minutes longer. A 9×13 pan will give you thinner bars with less baking time. Just keep an eye on them. My first batch ever was in a too-small pan and I ended up with cheesecake overflowing everywhere—learn from my mistakes, friends.
Preparation Method
Let’s walk through this step by step. I’ve made these creamy pumpkin cheesecake bars with graham crust more times than I can count, so I’ll share all the little tricks I’ve picked up along the way.
Step 1: Prep Your Pan and Preheat
Preheat your oven to 350°F (175°C). Line your 9×9-inch baking pan with parchment paper, leaving about 2 inches of overhang on two opposite sides. This creates little handles that make lifting the bars out so much easier later. Spray the parchment lightly with non-stick spray for extra insurance.
Step 2: Make the Graham Crust
In a food processor, pulse 2 cups of graham cracker crumbs until they’re fine and uniform. No big chunks allowed here—they’ll create weak spots in the crust. Transfer to a medium bowl and add 1/4 cup granulated sugar and 1/4 teaspoon salt. Pour in 1/2 cup melted butter and stir with a fork until everything is moistened and looks like wet sand.
Press this mixture firmly into the bottom of your prepared pan. I use the bottom of a measuring cup to really pack it down—this is crucial for a crust that doesn’t crumble when you cut the bars. Bake for 10 minutes, then set aside to cool slightly while you make the fillings. The crust will smell amazing at this point, like butter and honey.
Step 3: Make the Pumpkin Layer
In a large mixing bowl, beat 8 ounces of softened cream cheese with 1/2 cup granulated sugar until smooth and fluffy—about 2 minutes with an electric mixer on medium speed. Scrape down the sides of the bowl. Add 1 cup pumpkin puree, 2 room-temperature eggs, 1 teaspoon vanilla extract, 1 teaspoon pumpkin pie spice, and 1/2 teaspoon cinnamon. Beat on low speed just until combined. Don’t overmix! Overmixing incorporates too much air, which can cause cracks as the bars bake.
The batter should be smooth and a gorgeous deep orange color. Taste it if you want—I always do. It should be sweet with a warm spice kick.
Step 4: Make the Cream Cheese Topping
In a separate bowl, beat the remaining 8 ounces of cream cheese with 1/4 cup granulated sugar until smooth. Add 1 large egg and 1/2 teaspoon vanilla extract, then beat on low just until combined. This layer should be thicker than the pumpkin layer and a pale ivory color. Set it aside.
Step 5: Layer the Bars
Pour the pumpkin mixture over the pre-baked crust and spread it into an even layer with a spatula. Now, gently dollop the cream cheese mixture on top in small spoonfuls—about 6 to 8 dollops spread across the surface. Use a butter knife or toothpick to gently swirl the two layers together. Don’t over-swirl! You want distinct ribbons of cream cheese running through the pumpkin, not one uniform color. A few figure-eight motions is all it takes.
Step 6: Bake to Perfection
Bake at 350°F (175°C) for 30-35 minutes. The edges should be set and slightly puffed, but the center should still jiggle slightly when you gently shake the pan. This jiggle is your friend—it means the bars will be creamy, not dry. If the top starts browning too quickly, tent loosely with foil for the last 10 minutes.
Let the bars cool completely on a wire rack—about 1 hour. Then refrigerate for at least 4 hours, but overnight is even better. This chilling step is non-negotiable. The bars need time to set properly so they slice cleanly. I learned this the hard way when I tried to cut them after only 2 hours and ended up with a delicious but messy situation.
Step 7: Slice and Serve
Once fully chilled, lift the bars out using the parchment handles. Use a sharp knife to slice into 16 squares. For clean cuts, wipe the knife clean between each slice. Serve cold or at room temperature—both are delicious.
Cooking Tips & Techniques
After making these creamy pumpkin cheesecake bars with graham crust more times than I care to admit, I’ve collected some hard-won wisdom. Let me save you from my mistakes.
Room temperature ingredients are not optional. I know, I know—you’re in a hurry. But cold cream cheese creates lumps that no amount of mixing can fix. Set everything out 30-45 minutes before you start. If you forget, cut the cream cheese into small cubes and microwave on 50% power in 10-second bursts until softened but not melted.
Don’t overmix the batters. This is probably the most common mistake I see. Overmixing incorporates too much air, which creates bubbles that rise to the surface and cause cracks. Mix just until each ingredient is incorporated, then stop. A few tiny lumps in the cream cheese layer are better than a cracked surface.
The water bath debate. I don’t use a water bath for these bars, and here’s why: the graham crust gets soggy. Instead, I bake at a moderate temperature and let the residual heat finish the cooking process as the bars cool. The slight jiggle in the center when you pull them out is exactly what you want.
Patience with chilling. I once tried to rush the chilling process by putting the pan in the freezer for an hour. The edges froze while the center stayed soft, and cutting was a disaster. Four hours minimum in the fridge. Overnight is ideal. The flavors actually meld and deepen overnight, so there’s a real payoff for waiting.
Sharp knife, clean cuts. Use a long, sharp knife and wipe it clean with a damp paper towel between each cut. This gives you those beautiful, bakery-style slices. Run the knife under hot water for even cleaner cuts—just dry it off first.
Variations & Adaptations
One of the best things about these creamy pumpkin cheesecake bars with graham crust is how adaptable they are. Here are some variations I’ve tried and loved:
Ginger Snap Crust – Swap the graham crackers for crushed ginger snaps. The spicy-sweet flavor pairs beautifully with the pumpkin. I tried this for a holiday party and it was gone in 20 minutes. Use the same proportions—2 cups crumbs to 1/2 cup melted butter.
Chocolate Drizzle – Melt 1/2 cup semi-sweet chocolate chips with 1 tablespoon coconut oil and drizzle over the chilled bars. The chocolate adds a rich contrast to the creamy pumpkin and tangy cream cheese. My kids go crazy for this version.
Vegan Adaptation – Use dairy-free cream cheese and butter, and substitute the eggs with 1/4 cup aquafaba (the liquid from a can of chickpeas) per egg. The texture is slightly less firm but still delicious. I’ve made this for a vegan friend and she said it was the best pumpkin dessert she’d had in years.
Gluten-Free Option – Use gluten-free graham crackers or crushed gluten-free vanilla cookies. The crust will be a bit more delicate, so press it firmly and chill before adding the filling. Pamela’s brand makes excellent gluten-free graham crackers.
Spice It Up – Add 1/4 teaspoon cardamom or 1/8 teaspoon cayenne pepper to the pumpkin layer for a warming kick. I tried cardamom on a whim and now it’s my secret ingredient for fall baking.
Serving & Storage Suggestions
These bars are versatile enough for any occasion. Here’s how to serve and store them:
Serving Temperature – I prefer them cold, straight from the fridge. The texture is firmer and the flavors are more pronounced. But they’re also lovely at room temperature—just let them sit out for 15-20 minutes before serving. Top with a dollop of whipped cream and a sprinkle of cinnamon for a prettier presentation.
What to Serve With – A cup of hot coffee or spiced chai is the perfect companion. For a dessert spread, pair with apple cider donuts or a warm apple crisp. They also work beautifully on a Thanksgiving dessert table alongside pecan pie and chocolate cake.
Storage Instructions – Keep the bars in an airtight container in the refrigerator for up to 5 days. Layer them between sheets of parchment paper so they don’t stick together. I’ve never had them last that long in my house, but theoretically they should hold up well.
Freezing Instructions – These bars freeze beautifully! Wrap individual slices tightly in plastic wrap, then place them in a freezer-safe container. They’ll keep for up to 3 months. Thaw in the refrigerator overnight before serving. I always keep a stash in my freezer for unexpected guests or late-night cravings.
Flavor Development – Here’s something interesting: the flavors actually get better after a day or two in the fridge. The spices meld with the cream cheese and pumpkin, creating a more complex, rounded taste. So don’t worry about making them a day ahead—it’s actually ideal.
Nutritional Information & Benefits
Let’s talk numbers. Each bar (based on 16 servings) contains approximately:
- Calories: 285
- Fat: 18g
- Carbohydrates: 27g
- Protein: 5g
- Sugar: 18g
- Fiber: 1g
Now, these are estimated values and will vary based on your specific ingredients and portion sizes. But here’s the good news: pumpkin is packed with vitamin A, fiber, and antioxidants. It’s great for eye health and immune function. Cream cheese provides calcium and protein, though it’s also higher in fat. This is a treat, not a health food, but it’s made with real ingredients you can feel good about.
If you’re watching your sugar intake, you can reduce the sugar in the cream cheese layer to 2 tablespoons without affecting the texture too much. For a lower-fat option, use Neufchâtel cream cheese instead of full-fat—it has about a third less fat and works almost as well.
This recipe contains dairy, gluten, and eggs, so it’s not suitable for those with allergies to those ingredients. But the variations section above has some great alternatives if you need them.
Conclusion
These creamy pumpkin cheesecake bars with graham crust are everything I want in a fall dessert. They’re rich without being heavy, sweet without being cloying, and impressive without requiring hours in the kitchen. The buttery graham crust, the silky pumpkin layer, the tangy cream cheese swirl—it’s a combination that just works.
What I love most about this recipe is how forgiving it is. You don’t need to be a pastry chef to nail it. The ingredients are simple, the steps are straightforward, and the results are consistently delicious. Whether you’re bringing them to a holiday gathering, surprising your family on a cozy weekend, or just treating yourself on a Tuesday afternoon, these bars deliver.
I’d love to hear how yours turn out! Did you try one of the variations? Come up with your own twist? Drop a comment below and let me know. And if you share a photo on Pinterest, tag me—I love seeing your creations. Happy baking, friends. Fall is calling, and these bars are the perfect answer.
Frequently Asked Questions
Can I use fresh pumpkin instead of canned?
Yes, but you’ll need to roast and puree it first, then drain off any excess liquid. Fresh pumpkin has more water content than canned, which can make the filling too loose. I recommend roasting the pumpkin at 400°F for 45 minutes, then letting it drain in a fine-mesh strainer for an hour before using.
Why did my cheesecake bars crack on top?
Cracks usually happen from overmixing the batter or overbaking. Mix just until combined and pull the bars out while the center still has a slight jiggle. Sudden temperature changes can also cause cracking—let them cool gradually on the counter before refrigerating.
Can I make these bars ahead of time?
Absolutely! In fact, they taste better after a day in the fridge. Make them up to 2 days ahead and store them covered in the refrigerator. You can also freeze them for up to 3 months—just wrap individual slices tightly in plastic wrap.
How do I get clean, neat slices?
Use a sharp knife and wipe it clean with a damp paper towel between each cut. For extra clean slices, run the knife under hot water and dry it off before cutting. Chilling the bars for at least 4 hours (or overnight) is essential for clean cuts.
Can I use a different crust?
Definitely! Ginger snaps, shortbread cookies, or vanilla wafers all work beautifully. Just use the same ratio: 2 cups crumbs to 1/2 cup melted butter. You might need to adjust the baking time slightly depending on the cookie’s density.
Pin This Recipe!
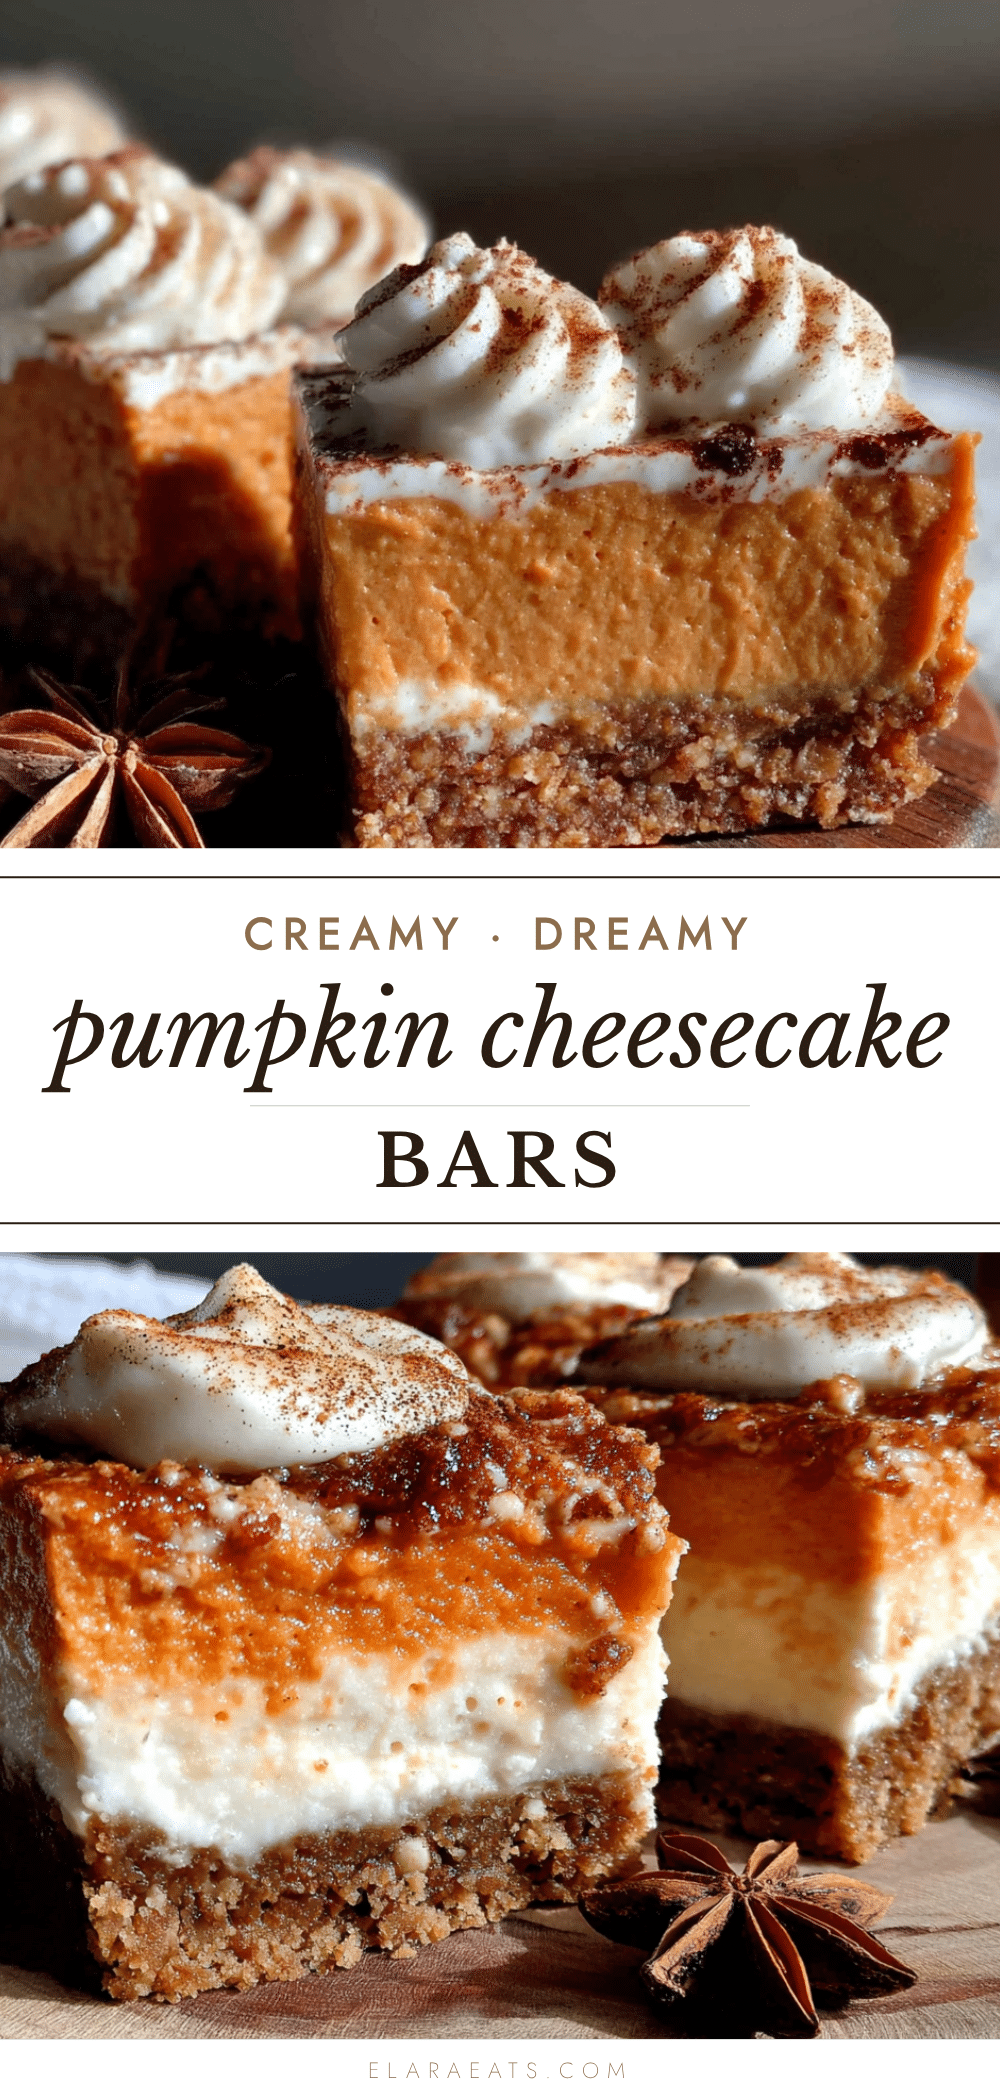
Creamy Pumpkin Cheesecake Bars with Graham Crust: Best Easy Fall Dessert
These creamy pumpkin cheesecake bars with graham crust are the perfect fall dessert—rich, velvety, and balanced with a tangy cream cheese layer. Easy to make and sure to impress at any gathering.
- Prep Time: 30 minutes
- Cook Time: 35 minutes
- Total Time: 5 hours 5 minutes (includes chilling)
- Yield: 16 servings 1x
- Category: Dessert
- Cuisine: American
Ingredients
- 2 cups graham cracker crumbs (about 14–16 full sheets)
- 1/2 cup unsalted butter, melted
- 1/4 cup granulated sugar (for crust)
- 1/4 teaspoon salt
- 1 cup canned pumpkin puree (100% pure, not pumpkin pie filling)
- 8 ounces cream cheese, softened (for pumpkin layer)
- 1/2 cup granulated sugar (for pumpkin layer)
- 2 large eggs, room temperature (for pumpkin layer)
- 1 teaspoon vanilla extract (for pumpkin layer)
- 1 teaspoon pumpkin pie spice
- 1/2 teaspoon cinnamon
- 8 ounces cream cheese, softened (for cream cheese topping)
- 1/4 cup granulated sugar (for cream cheese topping)
- 1 large egg, room temperature (for cream cheese topping)
- 1/2 teaspoon vanilla extract (for cream cheese topping)
Instructions
- Preheat oven to 350°F (175°C). Line a 9×9-inch baking pan with parchment paper, leaving overhang on two sides. Lightly spray with non-stick spray.
- Make the graham crust: In a food processor, pulse graham cracker crumbs until fine. Transfer to a bowl and mix with 1/4 cup sugar and 1/4 teaspoon salt. Pour in melted butter and stir until moistened like wet sand. Press firmly into the prepared pan using the bottom of a measuring cup. Bake for 10 minutes, then set aside to cool slightly.
- Make the pumpkin layer: In a large bowl, beat 8 ounces softened cream cheese with 1/2 cup sugar until smooth and fluffy (about 2 minutes). Add pumpkin puree, 2 eggs, 1 teaspoon vanilla, pumpkin pie spice, and cinnamon. Beat on low just until combined. Do not overmix.
- Make the cream cheese topping: In a separate bowl, beat remaining 8 ounces cream cheese with 1/4 cup sugar until smooth. Add 1 egg and 1/2 teaspoon vanilla, beat on low just until combined.
- Pour the pumpkin mixture over the pre-baked crust and spread evenly. Dollop the cream cheese mixture on top in 6-8 spoonfuls. Gently swirl with a butter knife or toothpick—just a few figure-eight motions to create ribbons.
- Bake for 30-35 minutes until edges are set and center jiggles slightly. If top browns too quickly, tent with foil for last 10 minutes. Cool completely on a wire rack (about 1 hour), then refrigerate for at least 4 hours or overnight.
- Lift bars out using parchment handles. Slice into 16 squares with a sharp knife, wiping clean between cuts. Serve cold or at room temperature.
Notes
Room temperature ingredients are essential for a smooth batter. Do not overmix to avoid cracks. Chill for at least 4 hours for clean slices. For gluten-free, use gluten-free graham crackers. For dairy-free, use dairy-free cream cheese and butter. Bars can be frozen for up to 3 months.
Nutrition
- Serving Size: 1 bar
- Calories: 285
- Sugar: 18
- Sodium: 220
- Fat: 18
- Saturated Fat: 10
- Carbohydrates: 27
- Fiber: 1
- Protein: 5
Keywords: pumpkin cheesecake bars, graham crust, fall dessert, easy pumpkin dessert, cream cheese bars