Love this? Save it for later!
Share the inspiration with your friends
I was at a little community garden harvest potluck last October when my neighbor, an older woman named Gloria, watched me eyeing a tray of wiggly, jewel-toned cups on the dessert table. She didn’t say anything at first. Then she nudged me, pointed at the cups, and whispered, “Three ingredients, honey. That’s it. I’ve been making them for forty years.” I honestly thought she was exaggerating. But she wasn’t. The cups were these gorgeous, creamy layers of orange, yellow, and white that looked just like candy corn. They were also the first thing to disappear from the table. I grabbed one, took a bite, and let me tell you—it was like being a kid again, but in a way that felt calm and cozy, not chaotic. The cool, silky texture. The subtle sweetness. It was pure comfort in a little plastic cup. Gloria and I ended up talking for twenty minutes about her garden, her grandkids, and how this simple dessert became her signature for every fall gathering. She never gave me a formal recipe card. She just told me how she did it, right there between bites of roasted squash and stories about her tomatoes. I went home and made my own version that very weekend, tweaking it just a little to get the layers just right. And honestly, I haven’t stopped making them since.
Maybe you’ve been there—staring at a Pinterest board full of complicated fall desserts and feeling a little overwhelmed. Or maybe you just want something that looks impressive but takes almost no effort. These Cozy Candy Corn Layered Jello Cups are that recipe. They’re the kind of dessert you can whip up while dinner is cooking, let set in the fridge, and then serve with a little flourish that makes everyone think you spent hours on them. I mean, who doesn’t love a treat that looks like a party but feels like a hug?
This recipe stayed with me because it’s more than just a pretty dessert. It’s a reminder that the best things are often the simplest. It’s a conversation starter. It’s a little bit of childhood nostalgia served in a cup. And every time I make them, I think of Gloria and her garden, and the way a tiny, unassuming dessert can bring people together. So grab your ingredients, clear some space in your fridge, and let’s make something cozy.
Why You’ll Love This Recipe
Let me tell you why these little cups of joy are about to become your new favorite fall dessert. I’ve tested this recipe more times than I can count—through different brands of gelatin, various types of creamy toppings, and even a few failed attempts where the layers bled into each other like a watercolor painting gone wrong. I’ve learned what works and what doesn’t, so you don’t have to.
- Quick & Easy: This dessert comes together in about 20 minutes of active time. The hardest part is waiting for the layers to set, which the fridge does for you. Perfect for those evenings when you want something special but don’t want to spend hours in the kitchen.
- Simple Ingredients: You probably already have everything you need. No fancy grocery trips, no obscure ingredients you’ll never use again. Just three main components that work together like a dream team.
- Perfect for Fall Gatherings: Whether it’s a Halloween party, a Thanksgiving potluck, or just a cozy night in with a movie, these cups fit right in. They’re festive without being over-the-top.
- Crowd-Pleaser: Kids love the vibrant colors and wiggly texture. Adults love the nostalgia. And everyone loves how easy they are to grab and eat. I’ve brought these to at least five different gatherings, and they always, always get compliments.
- Unbelievably Delicious: The combination of sweet, fruity gelatin and creamy topping is pure comfort. It’s light enough to have after a big meal but satisfying enough to feel like a real treat. The texture is what gets me every time—smooth, silky, and just the right amount of jiggle.
What makes this recipe different from all the other layered jello desserts out there? It’s the technique. I figured out the perfect way to keep the layers from bleeding into each other, so you get those crisp, distinct candy corn colors every single time. No muddy middle layers. No disappointing grayish orange. Just beautiful, photo-worthy stripes that look like they came from a bakery.
This recipe is the kind that makes you close your eyes after the first bite. It’s comfort food reimagined—simpler, faster, but with the same soul-soothing satisfaction. Perfect for impressing guests without any stress, or turning an ordinary Tuesday night into something a little more special.
What Ingredients You Will Need
This recipe uses just a handful of simple ingredients to create something that looks and tastes far more complex than it is. Each component plays a specific role, and understanding that will help you get perfect results every time. Here’s what you’ll need:
For the Orange Layer (Bottom)
- 1 box (3 oz) orange gelatin dessert mix – I recommend Jell-O brand for consistent results, but any store brand works fine too. The orange flavor gives that classic candy corn taste.
- 1 cup boiling water – This dissolves the gelatin completely. Make sure it’s truly boiling, not just hot.
- 1/2 cup cold water – Helps cool the mixture down so it sets properly.
For the Yellow Layer (Middle)
- 1 box (3 oz) lemon or pineapple gelatin dessert mix – Lemon gives a slightly brighter flavor that balances the sweetness. Pineapple works beautifully too if you prefer a milder taste.
- 1 cup boiling water
- 1/2 cup cold water
For the White Layer (Top)
- 1 can (12 oz) evaporated milk – This is the secret to the creamy white layer. It’s thicker than regular milk and gives a lovely richness. Do not use sweetened condensed milk—it’s too sweet and will change the texture completely.
- 1 packet (0.25 oz) unflavored gelatin – Knox brand is my go-to. This helps the creamy layer set firmly enough to hold its shape.
- 1/4 cup cold water – For blooming the unflavored gelatin.
- 1/4 cup granulated sugar – Just a little sweetness to balance the creamy layer.
- 1 teaspoon vanilla extract – Adds warmth and depth. Pure vanilla is best, but imitation works in a pinch.
Optional but recommended: A light spray of non-stick cooking oil for your measuring cups. Trust me on this one—it makes cleanup so much easier, especially when dealing with gelatin.
One thing I learned the hard way: always check the expiration date on your gelatin packets. Old gelatin won’t set properly, and you’ll end up with a soupy mess. I made that mistake once before a Halloween party and had to scramble for a backup dessert. Not fun.
For the unflavored gelatin, I’ve tried a few different brands, and Knox has never let me down. It blooms evenly and dissolves cleanly without any lumps. If you’re using a generic brand, just make sure it’s unflavored and not a vegetarian substitute, as those behave differently.
Equipment Needed
You don’t need any fancy equipment for this recipe, which is part of its charm. Here’s what you’ll need:
- Small clear cups or glasses (6-8 ounces each) – Clear is key here! You want to show off those beautiful layers. I use 7-ounce plastic cups from the party supply store, but small glass juice glasses or even mason jars work beautifully.
- 3 small mixing bowls – For preparing each layer separately. Glass or ceramic works best because they don’t retain odors.
- Measuring cups and spoons – Accuracy matters with gelatin, so use proper measuring tools.
- Whisk or fork – For dissolving gelatin and mixing the creamy layer.
- Kettle or saucepan – For boiling water.
- Liquid measuring cup – A 2-cup glass measuring cup is perfect for heating water in the microwave if you prefer that method.
- Small saucepan – For heating the evaporated milk mixture (if using the stovetop method for the white layer).
- Refrigerator space – You’ll need room to let the cups set undisturbed for at least 2 hours per layer.
If you don’t have clear cups, don’t worry! You can use any small serving dish. You just won’t see the beautiful layers as clearly. I’ve also made these in small ramekins for a fancier presentation.
One tool I absolutely recommend: a small offset spatula or butter knife for gently leveling the tops of the layers if they’re uneven. It just gives a cleaner look.
Preparation Method
Alright, let’s get to the fun part. I’m going to walk you through this step by step, with all the little tips I’ve picked up along the way. Take your time with the layers—patience is your friend here.
Step 1: Prepare the Orange Layer (Bottom)
In a small mixing bowl, empty the orange gelatin powder. Pour in 1 cup of boiling water and whisk until the powder is completely dissolved. You shouldn’t see any grains at the bottom. Add 1/2 cup cold water and stir. Let this cool for about 5 minutes at room temperature.
Evenly divide the orange mixture among your clear cups, filling them about one-third of the way. I use a liquid measuring cup with a spout for easy pouring. Place the cups in the refrigerator and let them set for at least 2 hours, or until firm to the touch. The gelatin should feel solid and not jiggle when you gently shake the cup.
Pro tip: Make sure your cups are on a level surface in the fridge. I once put them on a slightly tilted shelf, and my layers came out all lopsided. Not a disaster, but not as pretty.
Step 2: Prepare the Yellow Layer (Middle)
Once the orange layer is completely set, it’s time for the yellow. In a clean bowl, dissolve the lemon or pineapple gelatin in 1 cup of boiling water. Stir until fully dissolved. Add 1/2 cup cold water and stir again.
Here’s the crucial part: let the yellow gelatin cool to room temperature before pouring it over the orange layer. If it’s too warm, it will melt the orange layer and create a messy blend. I usually let it sit for about 10-15 minutes, stirring occasionally. It should feel lukewarm to the touch, not hot.
Gently pour the yellow mixture over the set orange layer, dividing it evenly among the cups. Return to the refrigerator and let set for another 2 hours.
Step 3: Prepare the White Creamy Layer (Top)
This layer is a little different because it uses unflavored gelatin and evaporated milk. Start by blooming the unflavored gelatin: sprinkle the packet over 1/4 cup cold water in a small bowl. Let it sit for 5 minutes without stirring. It will look like a stiff, spongy mass—that’s exactly what you want.
In a small saucepan, combine the evaporated milk and sugar. Heat over medium-low, stirring constantly, until the sugar dissolves and the mixture is warm but not boiling. You should see tiny bubbles around the edges but no rolling boil. Remove from heat.
Add the bloomed gelatin to the warm milk mixture and whisk until completely smooth. Stir in the vanilla extract. Let this cool to room temperature as well—again, about 10-15 minutes. You want it to be cool but still liquid.
Gently pour the creamy mixture over the set yellow layer. Return to the fridge and let set for at least 4 hours, or overnight for best results. The creamy layer will be softer than the gelatin layers, which is why it needs more time to set firmly.
Step 4: Serve and Enjoy
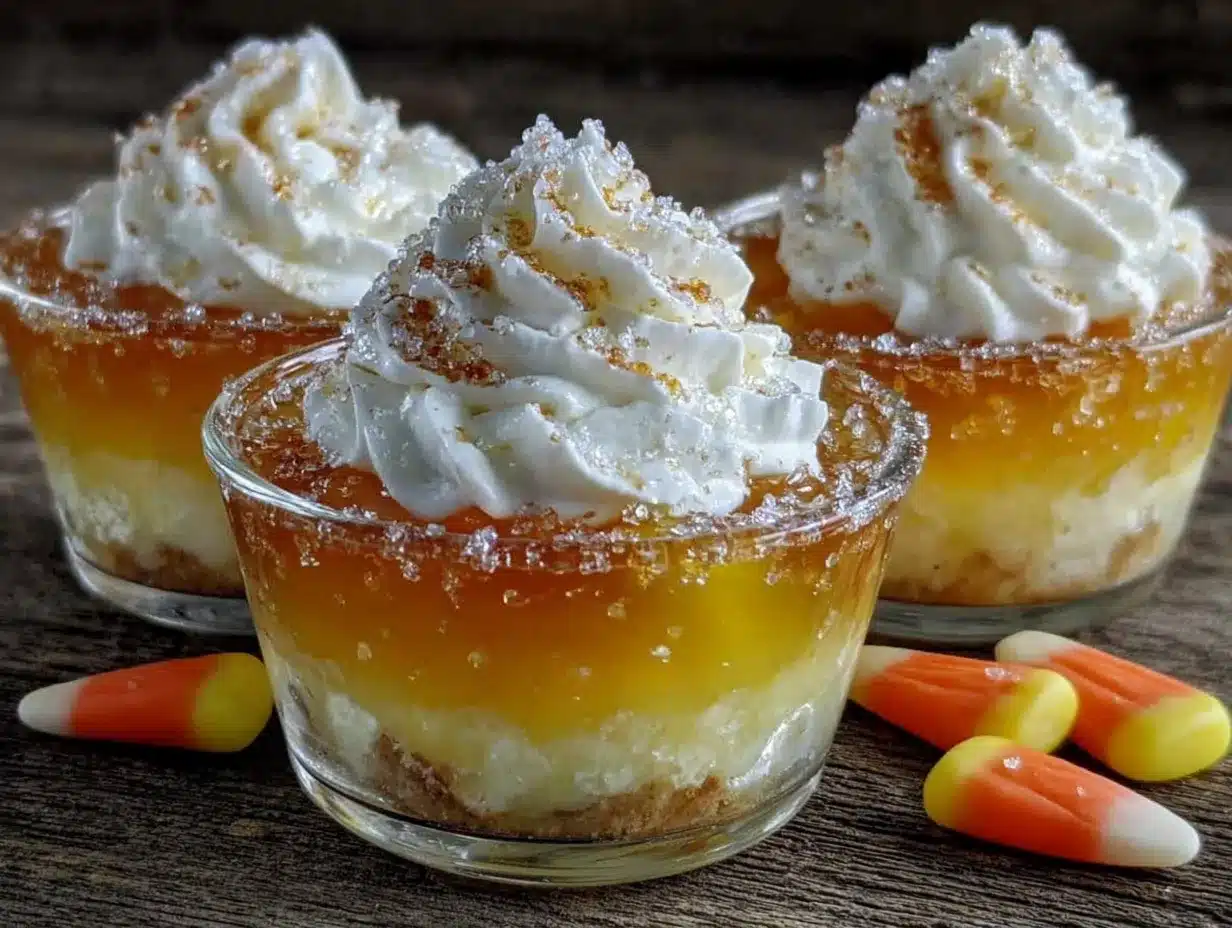
Once everything is fully set, your Cozy Candy Corn Layered Jello Cups are ready to serve. They’re best enjoyed chilled, straight from the fridge. If you want to get fancy, you can top each cup with a dollop of whipped cream and a sprinkle of orange or yellow sanding sugar.
Sensory cues: When you tap the side of the cup, the layers should feel firm and separate. The orange and yellow layers should be clear and bright, while the white layer should be opaque and creamy. The first spoonful should give you a clean cut through all three layers, with no bleeding between them.
Cooking Tips & Techniques
Let me share some things I learned the hard way so you don’t have to. My first attempt at these was a disaster—the layers bled into each other and turned into a murky orange-brown mess. But after a few more tries, I figured out the secrets.
The temperature trick: This is the most important tip I can give you. Each layer must be completely set before you add the next one. And the new layer must be cooled to room temperature before pouring. If it’s even slightly warm, it will melt the layer below. I’ve started setting a timer for each cooling step so I don’t rush it.
Patience is not optional: I know it’s tempting to speed things up, but don’t. Each layer needs a full 2 hours in the fridge. The creamy layer needs at least 4 hours. If you try to rush, you’ll end up with a muddy mess. Trust me, I’ve been there.
Level your cups: Before you pour any liquid, make sure your cups are on a perfectly level surface in the fridge. A slightly tilted shelf will give you slanted layers. I now use a small level tool to check my fridge shelf—it sounds obsessive, but it works.
Pour gently: When adding a new layer, pour the liquid slowly against the side of the cup, not directly onto the set gelatin. This minimizes disturbance. I use a small spoon to guide the liquid down the side.
Watch for bubbles: If you see bubbles in your gelatin mixture, let it sit for a few minutes before pouring. Bubbles can make the layers look cloudy. If bubbles form after pouring, you can pop them with a toothpick.
One mistake I still make: Sometimes I get distracted and let the gelatin mixture cool too long, and it starts to set in the bowl. If that happens, just gently reheat it in the microwave for 5-10 seconds until it’s liquid again. But be careful—don’t overheat it.
Variations & Adaptations
One of the best things about this recipe is how easy it is to customize. Here are some variations I’ve tried and loved:
Halloween Candy Corn Cups
For a more festive look, use orange, yellow, and white layers just like classic candy corn. You can add a few drops of orange or yellow food coloring to intensify the colors. I’ve also added a tiny drop of neon green to the orange layer for a slightly spooky glow.
Berrylicious Version
Swap the orange gelatin for strawberry or raspberry, and use lemon or lime for the middle layer. The creamy top stays the same. This gives a beautiful red, green, and white look that’s perfect for Christmas or Valentine’s Day.
Dairy-Free Adaptation
Replace the evaporated milk with full-fat coconut milk from a can. The texture will be slightly different—a bit softer—but still delicious. Use a dairy-free vanilla extract to keep it vegan. The coconut flavor actually pairs beautifully with the fruit gelatins.
Low-Sugar Option
Use sugar-free gelatin mixes for the orange and yellow layers. For the creamy layer, replace the sugar with a monk fruit sweetener or stevia blend. Just be aware that sugar-free gelatin can set a little softer, so you might need an extra hour of chilling time.
Adults-Only Version
Replace the cold water in the orange and yellow layers with an equal amount of white rum or vodka. The alcohol won’t prevent the gelatin from setting as long as you don’t use too much. Keep the creamy layer non-alcoholic for balance. These are always a hit at Halloween parties.
I personally love the berrylicious version for summer barbecues. The bright colors feel so cheerful, and the fruit flavors are refreshing on a hot day. Plus, kids go crazy for the rainbow effect.
Serving & Storage Suggestions
These cups are best served chilled, right out of the fridge. The cool, silky texture is part of what makes them so satisfying. I like to serve them on a small tray with a few napkins and maybe some Halloween-themed decorations around the base of the cups.
For a more elegant presentation, you can top each cup with a dollop of freshly whipped cream (sweetened lightly with a pinch of sugar and vanilla). A sprinkle of orange and yellow sanding sugar adds a nice crunch and sparkle. Fresh mint leaves make a pretty garnish, though they’re not necessary.
These pair beautifully with warm drinks. A cup of hot apple cider, a pumpkin spice latte, or even a simple mug of hot chocolate complements the cool, creamy dessert perfectly. The temperature contrast is lovely.
Storage instructions: Keep the cups covered in the refrigerator. They’ll stay good for up to 5 days, though the texture is best within the first 3 days. To cover them, I use plastic wrap pressed directly onto the surface of the creamy layer to prevent a skin from forming. Alternatively, you can use cups with lids if you have them.
Can you freeze them? I don’t recommend it. Freezing will ruin the texture of the gelatin, making it watery and grainy when thawed. These are strictly a refrigerator dessert.
One thing I love about these cups: the flavors actually meld together a bit after a day or two. The creamy layer absorbs some of the fruitiness from the gelatin, creating a more cohesive taste. They’re still delicious on day one, but day two is when they really shine.
Nutritional Information & Benefits
While these cups are definitely a treat, they’re not as indulgent as you might think. Here’s an approximate breakdown per serving (based on 8 servings):
- Calories: 120-140
- Total Fat: 3-4g
- Saturated Fat: 2g
- Carbohydrates: 22-25g
- Sugar: 20-22g
- Protein: 3-4g
- Calcium: 80-100mg (from the evaporated milk)
The evaporated milk in the creamy layer provides a decent amount of calcium, which is good for bone health. The gelatin itself contains collagen, which some people find beneficial for skin and joint health—though the amounts are small.
If you’re watching your sugar intake, the sugar-free version is a great alternative. And if you have dietary restrictions, the dairy-free adaptation works beautifully.
Potential allergens: This recipe contains dairy (evaporated milk). It’s gluten-free as written. Always check your gelatin packaging to be sure, as some brands may have cross-contamination risks.
From a wellness perspective, I see these cups as a perfect example of balance. They’re a small, portion-controlled treat that satisfies your sweet tooth without derailing your whole day. Plus, the act of making them—layering, waiting, watching them set—is almost meditative. There’s something soothing about the process.
Conclusion
These Cozy Candy Corn Layered Jello Cups are more than just a pretty dessert. They’re a little piece of nostalgia, a conversation starter, and a reminder that the best things in life are often the simplest. With just three main ingredients and a little patience, you can create something that looks like it came from a fancy bakery but tastes like pure childhood comfort.
I hope you’ll give them a try and make them your own. Maybe you’ll add a different flavor combination, or top them with something unexpected. Maybe you’ll make them for a Halloween party and watch them disappear. Or maybe you’ll make them on a quiet Tuesday night, just because you deserve something cozy.
I’d love to hear how yours turn out! Leave a comment below and tell me about your favorite variation, or share a photo of your cups on social media. Tag me so I can see your beautiful layers. And if you have any questions, just ask—I’m always happy to help.
Until next time, happy layering!
Frequently Asked Questions
Can I use sugar-free gelatin for this recipe?
Yes, you can absolutely use sugar-free gelatin. Just be aware that it tends to set a little softer than regular gelatin, so you may need to add an extra hour of chilling time for each layer. The taste is still great, and it’s a good option if you’re watching your sugar intake.
Why did my layers bleed into each other?
This usually happens when the bottom layer isn’t fully set before you add the next one, or when the new layer is too warm. Make sure each layer chills for at least 2 hours, and let the new mixture cool to room temperature before pouring. Pouring gently against the side of the cup also helps prevent bleeding.
Can I make these in advance for a party?
Absolutely! These are actually perfect for making ahead. You can prepare them up to 3 days in advance and keep them covered in the refrigerator. The flavors often meld together nicely after a day or two. Just make sure to keep them covered with plastic wrap or lids to prevent them from absorbing fridge odors.
What can I use instead of evaporated milk?
If you don’t have evaporated milk, you can use full-fat coconut milk for a dairy-free version, or even heavy cream mixed with a little water. The texture will vary slightly, but it will still work. Avoid using regular milk, as it’s too thin and won’t set properly.
Can I use different flavors of gelatin?
Definitely! The candy corn colors are traditional, but you can use any flavor combination you like. Strawberry and lime make a festive red and green for Christmas. Blue raspberry and lemon create a pretty summer look. Just keep the creamy white top layer the same for that beautiful contrast.
Pin This Recipe!
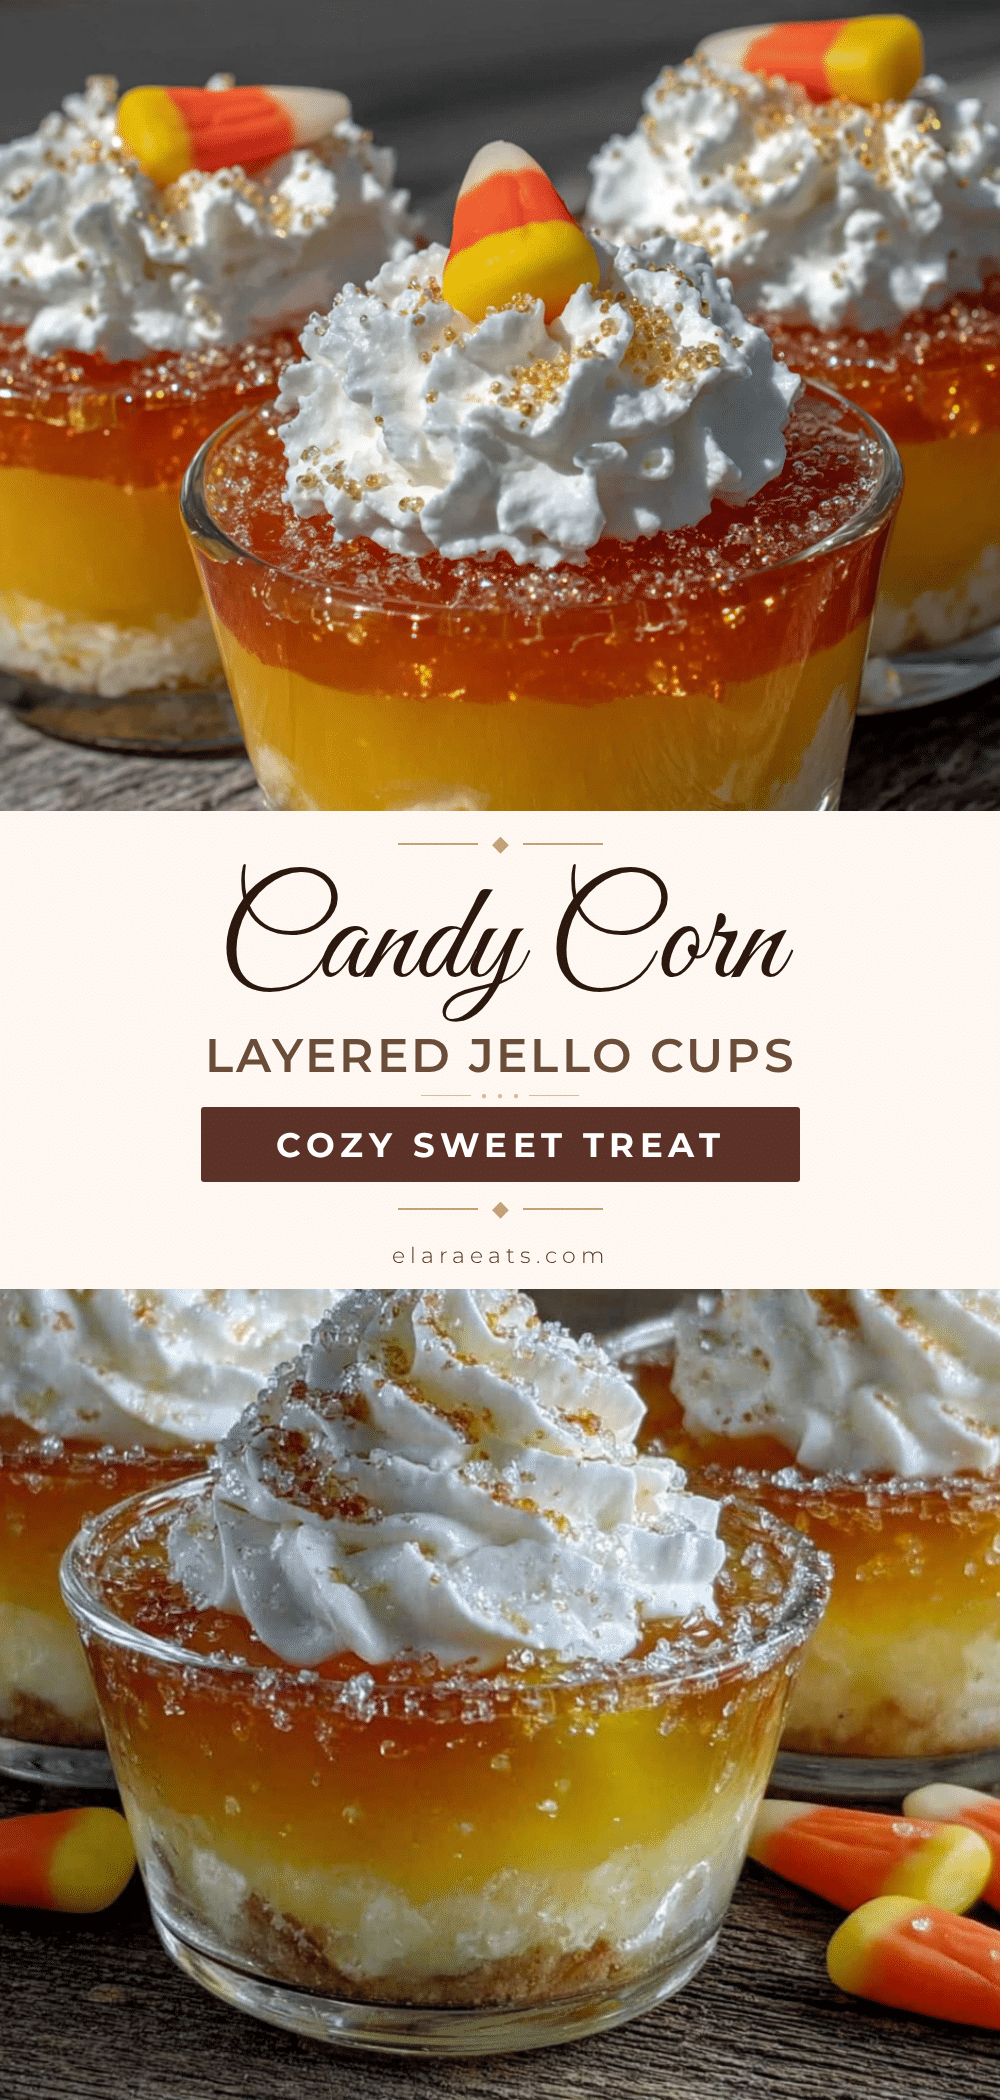
Cozy Candy Corn Layered Jello Cups: Easy 3-Ingredient Dessert
These Cozy Candy Corn Layered Jello Cups are a simple, nostalgic dessert made with just three main ingredients. With vibrant orange, yellow, and creamy white layers, they’re perfect for fall gatherings and are sure to be a crowd-pleaser.
- Prep Time: 20 minutes
- Cook Time: 0 minutes
- Total Time: 8 hours 20 minutes (includes chilling time)
- Yield: 8 servings 1x
- Category: Dessert
- Cuisine: American
Ingredients
- 1 box (3 oz) orange gelatin dessert mix
- 1 cup boiling water
- 1/2 cup cold water
- 1 box (3 oz) lemon or pineapple gelatin dessert mix
- 1 cup boiling water
- 1/2 cup cold water
- 1 can (12 oz) evaporated milk
- 1 packet (0.25 oz) unflavored gelatin
- 1/4 cup cold water
- 1/4 cup granulated sugar
- 1 teaspoon vanilla extract
Instructions
- Prepare the orange layer: In a small mixing bowl, empty the orange gelatin powder. Pour in 1 cup of boiling water and whisk until completely dissolved. Add 1/2 cup cold water and stir. Let cool for about 5 minutes at room temperature.
- Evenly divide the orange mixture among clear cups, filling them about one-third of the way. Place cups in the refrigerator and let set for at least 2 hours, or until firm.
- Prepare the yellow layer: In a clean bowl, dissolve the lemon or pineapple gelatin in 1 cup of boiling water. Stir until fully dissolved. Add 1/2 cup cold water and stir again. Let cool to room temperature (about 10-15 minutes).
- Gently pour the yellow mixture over the set orange layer, dividing evenly among cups. Return to the refrigerator and let set for another 2 hours.
- Prepare the white creamy layer: Bloom the unflavored gelatin by sprinkling the packet over 1/4 cup cold water in a small bowl. Let sit for 5 minutes without stirring.
- In a small saucepan, combine evaporated milk and sugar. Heat over medium-low, stirring constantly, until sugar dissolves and mixture is warm but not boiling. Remove from heat.
- Add bloomed gelatin to warm milk mixture and whisk until completely smooth. Stir in vanilla extract. Let cool to room temperature (about 10-15 minutes).
- Gently pour the creamy mixture over the set yellow layer. Return to the fridge and let set for at least 4 hours, or overnight for best results.
- Serve chilled, straight from the fridge. Optionally top with whipped cream and a sprinkle of orange or yellow sanding sugar.
Notes
Ensure each layer is fully set before adding the next. Let new layers cool to room temperature before pouring to prevent bleeding. For best results, chill the creamy layer overnight. Use clear cups to show off the layers.
Nutrition
- Serving Size: 1 cup
- Calories: 130
- Sugar: 21
- Sodium: 80
- Fat: 3.5
- Saturated Fat: 2
- Carbohydrates: 23
- Protein: 3.5
Keywords: candy corn jello, layered jello cups, easy dessert, fall dessert, Halloween dessert, 3-ingredient dessert, no-bake dessert


