Love this? Save it for later!
Share the inspiration with your friends
My nephew asked why I couldn’t just use a piping bag with a grass tip instead of painstakingly tinting shredded coconut green. I started to explain why that wouldn’t work—then stopped. Honestly, I had no good reason. I’d been making football field cakes for years using that messy coconut method because that’s how my mom did it, and her mom before her. But this kid, who was maybe ten at the time, looked at me with that patient expression kids get when they think adults are being willfully dense.
So I tried it. I mean, I grabbed a grass tip I’d bought on a whim years ago, filled a piping bag with buttercream, and went to town on a test cake. The result? Pure magic. The buttercream grass looked so real you could almost hear the wind rustling through it. I actually laughed out loud standing there in my kitchen, frosting smeared on my cheek, realizing I’d been doing it the hard way for no reason at all.
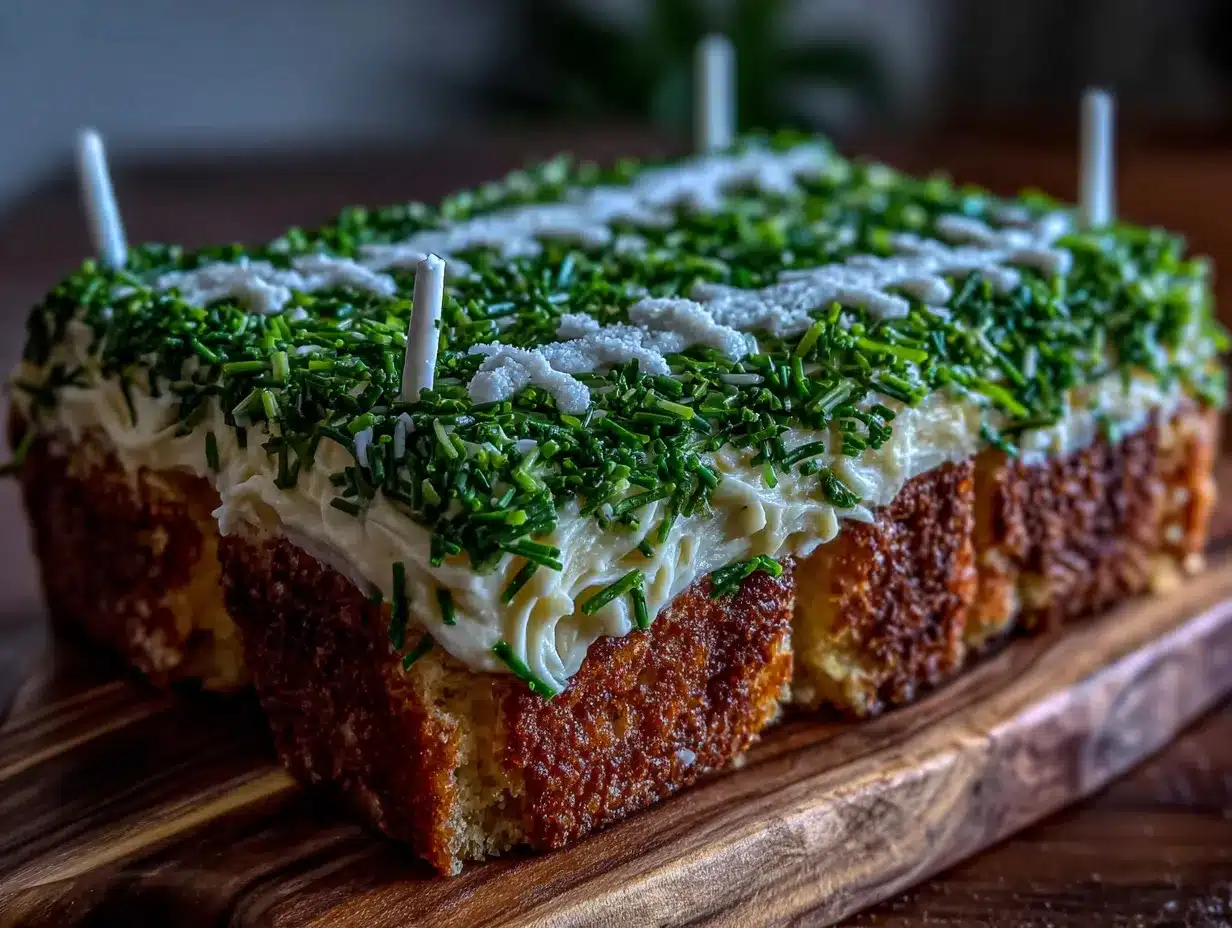
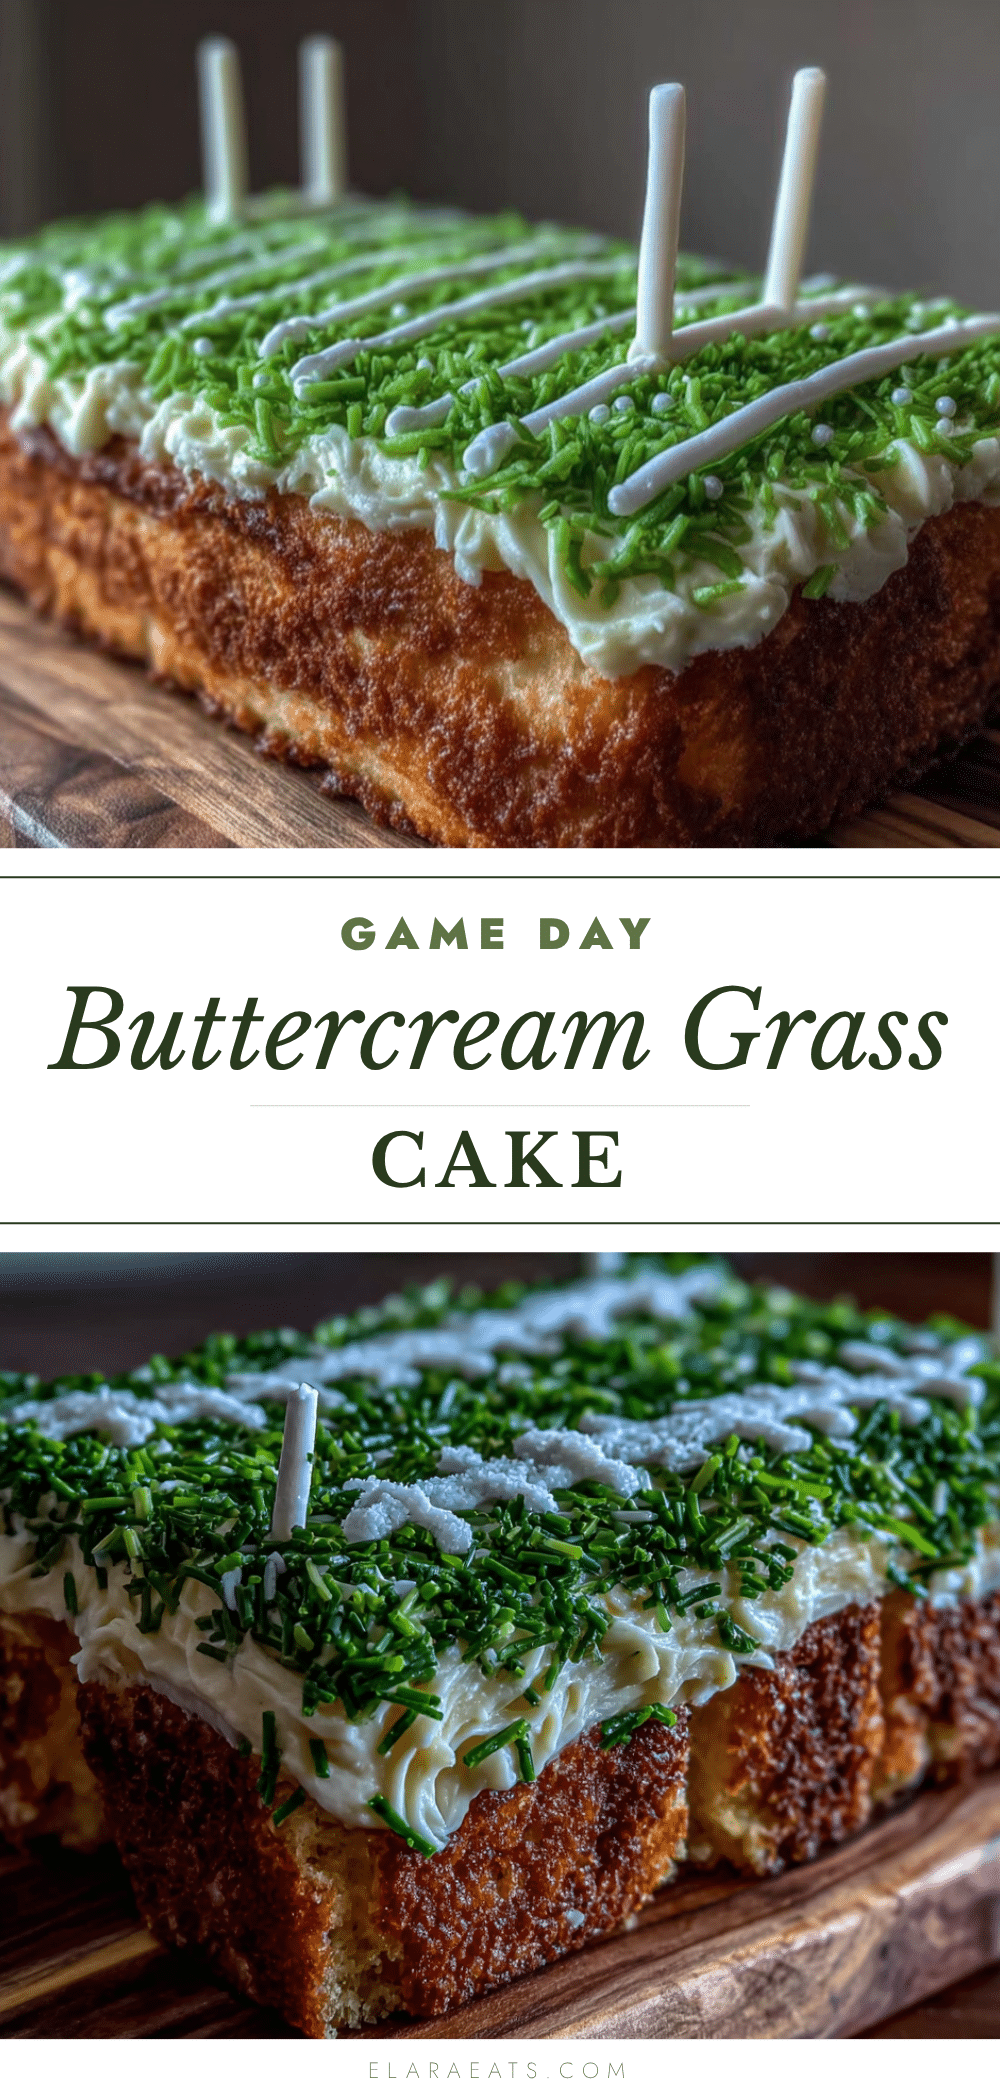
That’s the thing about this Best Football Field Sheet Cake with Buttercream Grass—it taught me that sometimes the simplest approach is the best one. The buttercream grass gives you that perfect, realistic texture that makes everyone at the party do a double-take. And let me tell you, watching people’s faces light up when they see that green frosting field with little yard lines? That never gets old.
Maybe you’ve been there, stubbornly sticking to a method because it’s what you know. Or maybe you’re looking for that one dessert that’ll steal the show at game day. Either way, this cake is it. It’s the kind of recipe that makes you look like a total pro without actually having to be one.
Why You’ll Love This Recipe
I’ve tested this cake more times than I care to admit—through three Super Bowls, two birthday parties, and one very memorable tailgate where it started raining mid-bite. Every single time, people asked for the recipe before they even finished their slice. Here’s why this one stands out from every other football-themed dessert out there.
- Game Day Ready in Under an Hour : From mixing bowl to finished cake in about 45 minutes of active time. The oven does most of the work while you focus on the fun part—decorating.
- Pantry-Friendly Ingredients : No weird specialty items here. Butter, sugar, flour, eggs—the usual suspects. The only thing you might need to grab is green food coloring, and that’s a quick trip to any grocery store.
- Perfect for Parties and Tailgates : This sheet cake feeds a crowd easily. I’ve taken it to potlucks, team parties, and family gatherings, and it disappears faster than a fumble recovery.
- Crowd-Pleasing Flavor : The cake is tender and moist with a classic vanilla base that pairs beautifully with the rich buttercream. Kids and adults both go back for seconds.
- Foolproof Buttercream Grass : That grass tip does all the hard work. Even if you’ve never piped frosting before, you can create a realistic football field that wows everyone.
What makes this recipe different from the dozens of other sheet cakes out there is the technique. Instead of struggling with shredded coconut or complicated fondant, you get that perfect grassy texture in minutes with a simple piping tip. It’s not just another version—it’s the best version I’ve found after years of trial and error.
This cake is comfort food reimagined for game day—familiar, satisfying, but with that wow factor that makes people stop mid-conversation to ask where you bought it. And when you smile and say “I made it,” that feeling is honestly better than any touchdown.
What Ingredients You Will Need
This recipe uses simple, wholesome ingredients that come together to create something truly special. Most of these are probably already in your kitchen, which makes this a last-minute lifesaver for those surprise game day invites.
For the Cake
- 2 ½ cups all-purpose flour (spooned and leveled for accuracy)
- 2 ½ teaspoons baking powder
- ½ teaspoon salt
- 1 cup unsalted butter, softened to room temperature (I prefer Land O’Lakes for consistent results)
- 2 cups granulated sugar
- 4 large eggs, room temperature (cold eggs can make the batter seize up)
- 1 tablespoon vanilla extract (use pure, not imitation, for the best flavor)
- 1 ¼ cups whole milk, room temperature (adds richness, but 2% works in a pinch)
For the Buttercream Frosting
- 1 ½ cups unsalted butter, softened (yes, real butter makes a difference here)
- 5 cups powdered sugar, sifted (sifting prevents lumps that can clog your piping tip)
- 3 tablespoons heavy cream (adjust for consistency)
- 2 teaspoons vanilla extract
- ¼ teaspoon salt (balances the sweetness)
- Green gel food coloring (I recommend Americolor or Wilton gel colors—liquid drops won’t give you that vibrant field green)
- Brown gel food coloring (for the yard lines)
- White gel food coloring (for the yard numbers, optional but impressive)
For the Decoration
- 1 cup white chocolate melting wafers or candy melts (for the goal posts)
- Pretzel sticks (for the goal post uprights)
- Miniature football candies (available at most craft stores or online)
- Green sprinkles or sanding sugar (for extra texture, optional)
When it comes to food coloring, gel is non-negotiable here. Liquid food coloring will thin out your buttercream and make it impossible to pipe those perfect grass blades. I learned that lesson the hard way during a particularly frustrating decorating session that ended with me scraping green-tinted soup off a cake.
For the goal posts, white chocolate melts give you a clean, professional look. But honestly, I’ve used regular white chocolate chips in a pinch—just add a teaspoon of coconut oil to help them melt smoothly.
Equipment Needed
You don’t need a professional bakery setup for this cake, but having the right tools makes the process infinitely smoother. Here’s what you’ll need:
- 13×9 inch sheet pan : The standard size works perfectly. I use a metal pan for more even baking, but glass works too—just reduce the oven temperature by 25°F.
- Electric stand mixer or hand mixer : Creaming butter and sugar by hand is possible but exhausting. Your arm will thank you for using a mixer.
- Piping bags : Disposable ones are fine and actually easier to clean up. I buy them in bulk from the craft store.
- Wilton grass piping tip (#233) : This is the star of the show. It’s cheap and available at any craft store or online. Don’t try to substitute with a star tip—the texture won’t be the same.
- Small offset spatula : For smoothing the base layer of frosting before adding the grass.
- Parchment paper : Line your pan for easy removal. Trust me on this one.
- Cooling rack : Essential for letting the cake cool completely before frosting.
- Small microwave-safe bowl : For melting the white chocolate for goal posts.
- Ruler : For measuring those yard lines. A clear plastic ruler works best.
I picked up my grass tip at a local craft store for about three dollars, and it’s paid for itself a hundred times over. If you’re on a budget, skip the fancy decorating tools and focus on that one tip—it does all the heavy lifting visually.
Preparation Method
Let’s walk through this step by step. I’ve included all the little details I wish someone had told me the first time I made this cake.
Step 1: Prep Your Pan and Preheat
Preheat your oven to 350°F (175°C). Grease your 13×9 inch pan thoroughly, then line it with parchment paper, leaving some overhang on the long sides. Grease the parchment too. This makes lifting the cake out a breeze—no wrestling with stuck corners.
Step 2: Mix the Dry Ingredients
In a medium bowl, whisk together the flour, baking powder, and salt. Set this aside. Whisking aerates the flour and ensures the baking powder is evenly distributed, which means a more even rise.
Step 3: Cream Butter and Sugar
In your stand mixer fitted with the paddle attachment, beat the softened butter and granulated sugar on medium speed until light and fluffy. This takes about 3-4 minutes. Don’t rush this step—proper creaming is what gives the cake its tender texture. Scrape down the sides and bottom of the bowl at least once.
Step 4: Add Eggs and Vanilla
Add the eggs one at a time, beating well after each addition. The batter might look slightly curdled after the second egg—that’s normal, don’t panic. Add the vanilla extract and beat until combined.
Step 5: Alternate Dry and Wet Ingredients
With the mixer on low speed, add the flour mixture in three additions, alternating with the milk in two additions. Start and end with the flour. Mix just until combined—overmixing develops gluten and makes the cake tough. You’ll see me scrape the bowl down between additions to make sure everything incorporates evenly.
Step 6: Bake the Cake
Pour the batter into your prepared pan and spread it evenly. Bake for 28-32 minutes, or until a toothpick inserted in the center comes out clean or with just a few moist crumbs. The edges should be golden and pulling away from the pan slightly. Let the cake cool in the pan for 10 minutes, then transfer to a wire rack to cool completely. And I mean completely—warm cake will melt your buttercream into a sad, green puddle.
Step 7: Make the Buttercream
While the cake cools, beat the softened butter on medium speed until smooth and creamy, about 2 minutes. Gradually add the sifted powdered sugar, one cup at a time, beating on low speed to avoid a sugar cloud. Add the heavy cream, vanilla, and salt, then increase to medium-high speed and beat for 3-4 minutes until light and fluffy. The frosting should hold a stiff peak when you lift the beater.
Step 8: Color the Frosting
Divide the frosting into two bowls—about ¾ of it for the green field and the remaining ¼ for the brown yard lines. Add green gel food coloring to the larger portion, starting with a tiny amount and adding more until you reach a vibrant grass green. I usually end up using more than I expect. For the brown portion, add a small amount of brown gel coloring and mix well.
Step 9: Crumb Coat and Base Layer
Spread a thin layer of the green buttercream over the cooled cake—this is your crumb coat. Pop the cake in the refrigerator for 15 minutes to set the crumb coat. Then apply a thicker, even layer of green buttercream over the entire cake. Smooth it out with your offset spatula as best you can.
Step 10: Pipe the Grass
Fit your piping bag with the grass tip (#233) and fill it with the remaining green buttercream. Hold the bag perpendicular to the cake, tip touching the surface. Squeeze firmly, then pull straight up quickly. That’s it—you’ve made a blade of grass. Work in rows, covering the entire surface. The texture should look like a freshly mowed lawn. Don’t overthink it—imperfect grass actually looks more realistic.
Step 11: Add the Field Lines
Using a ruler as a guide, pipe thin lines of brown buttercream across the width of the cake for the yard lines. Space them about 1 ½ inches apart. For the center line, pipe a slightly thicker line. If you’re feeling ambitious, pipe tiny white numbers every 10 yards using the white gel food coloring mixed with a bit of buttercream.
Step 12: Make and Place Goal Posts
Melt the white chocolate wafers according to package directions. Dip the ends of two pretzel sticks in the melted chocolate and stick them upright into the cake at each end zone. Use small dabs of melted chocolate to attach a horizontal pretzel stick across the top of each pair. Let the chocolate set for about 10 minutes before moving the cake.
Step 13: Final Touches
Place miniature football candies on the field, scatter a few green sprinkles for extra texture, and step back to admire your work. You just made a football field cake that looks like it came from a bakery.
Cooking Tips & Techniques
After making this cake more times than I can count, I’ve collected a few tricks that make the process smoother and the results more impressive. Here are the ones that matter most.
Room temperature ingredients are non-negotiable. Cold butter doesn’t cream properly, cold eggs can make your batter curdle, and cold milk won’t incorporate smoothly. Take everything out of the fridge an hour before you start baking. I set a timer on my phone because I always forget otherwise.
Don’t skip the crumb coat. I know it’s tempting to just pile on the frosting and call it done. But that thin first layer traps the crumbs so your final coat stays clean and beautiful. It takes fifteen minutes in the fridge and makes a world of difference.
Practice piping on a plate first. Before you go near the cake, pipe a few test blades of grass onto a plate. You’ll get a feel for the pressure and the pull-away motion. I’ve had a few disasters where I squeezed too hard and got a blob instead of a blade—better to make that mistake on a plate than on your cake.
Keep your piping bag twisted tight. When you fill the bag, twist the top tightly and hold it between your thumb and forefinger. This prevents frosting from squirting out the top and making a mess. I learned this after a particularly frustrating incident involving green buttercream on my ceiling.
Work from the edges inward. When piping the grass, start at the outer edges of the cake and work your way toward the center. This way, if you run out of frosting or need to refill, the edges are already done and look clean.
Use a toothpick for yard line guidance. Before piping the brown lines, lightly score the frosting with a toothpick using your ruler as a guide. This gives you a faint line to follow and keeps your yard lines straight.
Variations & Adaptations
One of the best things about this cake is how adaptable it is. I’ve experimented with several variations over the years, and each one brought something new to the table.
Chocolate Football Field : Swap out ½ cup of the all-purpose flour for ½ cup of unsweetened cocoa powder. The chocolate base looks amazing against the green grass and tastes incredible with the vanilla buttercream. My brother-in-law requests this version every year for his birthday.
Gluten-Free Option : Substitute the all-purpose flour with a good 1:1 gluten-free baking flour blend. I’ve used Bob’s Red Mill with great results. Add an extra tablespoon of milk since gluten-free flours tend to absorb more liquid.
Dairy-Free Adaptation : Use vegan butter sticks (not the spreadable kind) and substitute the milk with oat milk or almond milk. The texture will be slightly denser but still delicious. Coconut cream works beautifully in place of heavy cream for the buttercream.
Cupcake Version : Turn this into football field cupcakes by baking the batter in lined muffin tins for 18-20 minutes. Pipe the grass onto each cupcake individually and arrange them in a rectangle shape on a serving platter to form the field. This is perfect for parties where people want grab-and-go portions.
Stadium Cake : Bake the cake in a half-sheet pan instead and add a second layer of cake. Fill the center with chocolate pudding to represent the field, then pipe the grass on top. Build “bleachers” around the edges using graham crackers and frosting.
I tried the gluten-free version for a friend’s son who has celiac disease, and honestly, I couldn’t tell the difference. The key is not to overmix the batter and to let the cake cool completely before frosting. Gluten-free cakes can be more fragile when warm.
Serving & Storage Suggestions
This cake is best served at room temperature, which lets the buttercream soften slightly and the cake stay tender. If you’ve refrigerated it, take it out about 30 minutes before serving to let it come to temperature.
For game day parties, set the cake out on a large cutting board or serving platter. Arrange bowls of popcorn, chips, and veggie sticks around it for a full snack spread. The cake serves 15-20 people easily, depending on how generous you cut the slices.
Storage : Cover the cake loosely with plastic wrap or aluminum foil and store it in the refrigerator for up to 5 days. The buttercream grass will stay intact if you’re careful with the covering. Don’t press the wrap directly against the frosting or you’ll flatten all those beautiful grass blades.
Freezing : You can freeze the unfrosted cake layers for up to 3 months. Wrap them tightly in plastic wrap, then foil. When you’re ready to decorate, thaw them in the refrigerator overnight and bring to room temperature before frosting. I’ve also frozen fully decorated cakes with good results—just place the cake in the freezer uncovered for an hour to harden the frosting, then wrap carefully.
Reheating : If you prefer your cake slightly warm, microwave individual slices for 10-15 seconds. The buttercream will soften but won’t melt completely. For a truly indulgent treat, warm a slice and add a scoop of vanilla ice cream on the side.
One thing I’ve noticed is that the flavors actually develop overnight. The cake absorbs some of the moisture from the frosting, and everything melds together beautifully. If you can make this a day ahead, do it. The grass might lose a tiny bit of its sharp definition, but the taste more than makes up for it.
Nutritional Information & Benefits
Let’s be real—this is a celebration cake, not a health food. But knowing what’s in it helps you enjoy it mindfully. Here’s the approximate nutritional breakdown per serving (based on 20 servings):
- Calories : 410
- Total Fat : 22g
- Saturated Fat : 14g
- Cholesterol : 95mg
- Sodium : 210mg
- Total Carbohydrates : 52g
- Dietary Fiber : 1g
- Sugars : 38g
- Protein : 4g
The butter in this recipe provides a good source of vitamin A, and the eggs contribute high-quality protein and choline, which supports brain health. If you use grass-fed butter, you’ll also get a small amount of conjugated linoleic acid, which has been linked to various health benefits.
For those with dietary restrictions, this cake contains dairy, eggs, and gluten. I’ve included substitution options in the variations section above to accommodate common allergies.
From a wellness perspective, I believe in balance. This cake is meant for special occasions—game days, birthdays, celebrations. It’s the kind of dessert that brings people together and creates memories. One slice isn’t going to derail anyone’s healthy eating habits. Enjoy it, savor it, and get back to your regular routine tomorrow.
Frequently Asked Questions
Can I make this cake a day ahead of time?
Absolutely. In fact, I recommend it. The flavors meld together overnight and the cake becomes even more moist. Just wait to add the goal posts until right before serving so they stay crisp.
My grass tip keeps clogging. What am I doing wrong?
This usually happens when your frosting is too thick or has lumps. Make sure your powdered sugar is sifted and your butter is fully softened. If the frosting still seems stiff, add an extra tablespoon of heavy cream and beat again.
Can I use a different size pan?
Yes, but you’ll need to adjust the baking time. A 9×13 inch pan is standard, but you can use two 8-inch round pans for a different look. Bake rounds for 25-28 minutes. A half-sheet pan will give you a thinner cake that bakes in about 20 minutes.
How do I get my yard lines perfectly straight?
Use a ruler and a toothpick to lightly score guidelines into the frosting before piping. Then follow those lines with your piping bag. If you mess up, just pipe more grass over the mistake and try again.
What if I can’t find miniature football candies?
No problem. You can shape small footballs from fondant or marzipan, or simply skip them. The cake looks fantastic with just the grass and yard lines. Some people use chocolate chips arranged in a football shape as a cute alternative.
Conclusion
This Best Football Field Sheet Cake with Buttercream Grass is more than just a dessert—it’s a conversation starter, a crowd-pleaser, and honestly, one of the most fun cakes I’ve ever made. That moment when you set it on the table and everyone stops to take a picture? That never gets old.
What I love most about this recipe is how approachable it is. You don’t need to be a professional baker or have years of decorating experience. With that simple grass tip and a little patience, you can create something that looks like it took hours of work. And the best part? It tastes even better than it looks.
I’d love to hear how yours turns out. Did you add your team’s colors? Make it into cupcakes? Try the chocolate version? Drop a comment below and share your creation—I read every single one and love seeing how you make this recipe your own. And if you’re looking for more game day inspiration, check out our game day appetizers that pair perfectly with this cake.
So grab that grass tip, preheat your oven, and get ready to score big with your family and friends. Trust me—this is one touchdown you’ll want to celebrate again and again.
Pin This Recipe!
Best Football Field Sheet Cake with Buttercream Grass
A crowd-pleasing vanilla sheet cake decorated with realistic buttercream grass, yard lines, and goal posts. Perfect for game day parties, tailgates, and football-themed celebrations.
- Prep Time: 45 minutes
- Cook Time: 30 minutes
- Total Time: 1 hour 15 minutes
- Yield: 20 servings 1x
- Category: Dessert
- Cuisine: American
Ingredients
- 2 ½ cups all-purpose flour (spooned and leveled)
- 2 ½ teaspoons baking powder
- ½ teaspoon salt
- 1 cup unsalted butter, softened
- 2 cups granulated sugar
- 4 large eggs, room temperature
- 1 tablespoon vanilla extract (pure)
- 1 ¼ cups whole milk, room temperature
- 1 ½ cups unsalted butter, softened (for frosting)
- 5 cups powdered sugar, sifted
- 3 tablespoons heavy cream
- 2 teaspoons vanilla extract (for frosting)
- ¼ teaspoon salt (for frosting)
- Green gel food coloring
- Brown gel food coloring
- White gel food coloring (optional)
- 1 cup white chocolate melting wafers or candy melts
- Pretzel sticks
- Miniature football candies
- Green sprinkles or sanding sugar (optional)
Instructions
- Preheat oven to 350°F (175°C). Grease a 13×9 inch sheet pan, line with parchment paper with overhang, and grease the parchment.
- In a medium bowl, whisk together flour, baking powder, and salt. Set aside.
- In a stand mixer with paddle attachment, beat softened butter and granulated sugar on medium speed until light and fluffy (3-4 minutes). Scrape bowl.
- Add eggs one at a time, beating well after each. Add vanilla extract and beat until combined.
- With mixer on low, add flour mixture in three additions, alternating with milk in two additions (start and end with flour). Mix just until combined.
- Pour batter into prepared pan and spread evenly. Bake 28-32 minutes until a toothpick inserted in center comes out clean or with moist crumbs. Cool in pan 10 minutes, then transfer to wire rack to cool completely.
- For buttercream: Beat softened butter on medium speed until smooth (2 minutes). Gradually add sifted powdered sugar, one cup at a time, on low speed. Add heavy cream, vanilla, and salt. Beat on medium-high 3-4 minutes until light and fluffy.
- Divide frosting: ¾ for green field, ¼ for brown yard lines. Add green gel coloring to larger portion until vibrant grass green. Add brown gel coloring to smaller portion.
- Spread thin layer of green buttercream over cooled cake (crumb coat). Refrigerate 15 minutes. Apply thicker, even layer of green buttercream and smooth with offset spatula.
- Fit piping bag with grass tip (#233) and fill with remaining green buttercream. Hold bag perpendicular to cake, tip touching surface. Squeeze firmly, then pull straight up quickly. Work in rows to cover entire surface.
- Using a ruler as guide, pipe thin lines of brown buttercream across cake width for yard lines, spaced about 1 ½ inches apart. Pipe slightly thicker center line. Optionally pipe tiny white numbers every 10 yards.
- Melt white chocolate wafers. Dip ends of two pretzel sticks in melted chocolate and stick upright into cake at each end zone. Use small dabs of melted chocolate to attach horizontal pretzel stick across top of each pair. Let set 10 minutes.
- Place miniature football candies on field. Scatter green sprinkles if desired.
Notes
Room temperature ingredients are essential for best results. Don’t skip the crumb coat. Practice piping grass on a plate first. Keep piping bag twisted tight. Work from edges inward when piping grass. Use a toothpick to score yard lines before piping. Cake can be made a day ahead; add goal posts just before serving. For gluten-free, use 1:1 gluten-free flour blend and add extra tablespoon milk. For dairy-free, use vegan butter and oat or almond milk.
Nutrition
- Serving Size: 1 slice (1/20 of cak
- Calories: 410
- Sugar: 38
- Sodium: 210
- Fat: 22
- Saturated Fat: 14
- Carbohydrates: 52
- Fiber: 1
- Protein: 4
Keywords: football cake, sheet cake, buttercream grass, game day dessert, football field cake, vanilla cake, party cake