Love this? Save it for later!
Share the inspiration with your friends
My friend Jen asked why I couldn’t just use the cookie cutter I already had for the cat shape. I started to explain why that wouldn’t work — then stopped. She was holding up a black cat cookie cutter she’d found at a thrift store for fifty cents, and honestly, I had a drawer full of perfectly good Halloween cutters already. But the thing is, I’d been overcomplicating these black cat sugar cookies for years.
Last October, I spent three hours trying to pipe perfect cat faces onto round cookies. Let me tell you, the results were hilarious. One cat looked like it had been stung by a bee. Another had eyes that were, well, let’s just say not quite aligned. I mean, I’ve been baking since I was a kid, and somehow those cats kept looking more like confused potatoes. That’s when Jen walked in with her thrift store find and basically changed my entire Halloween baking game.
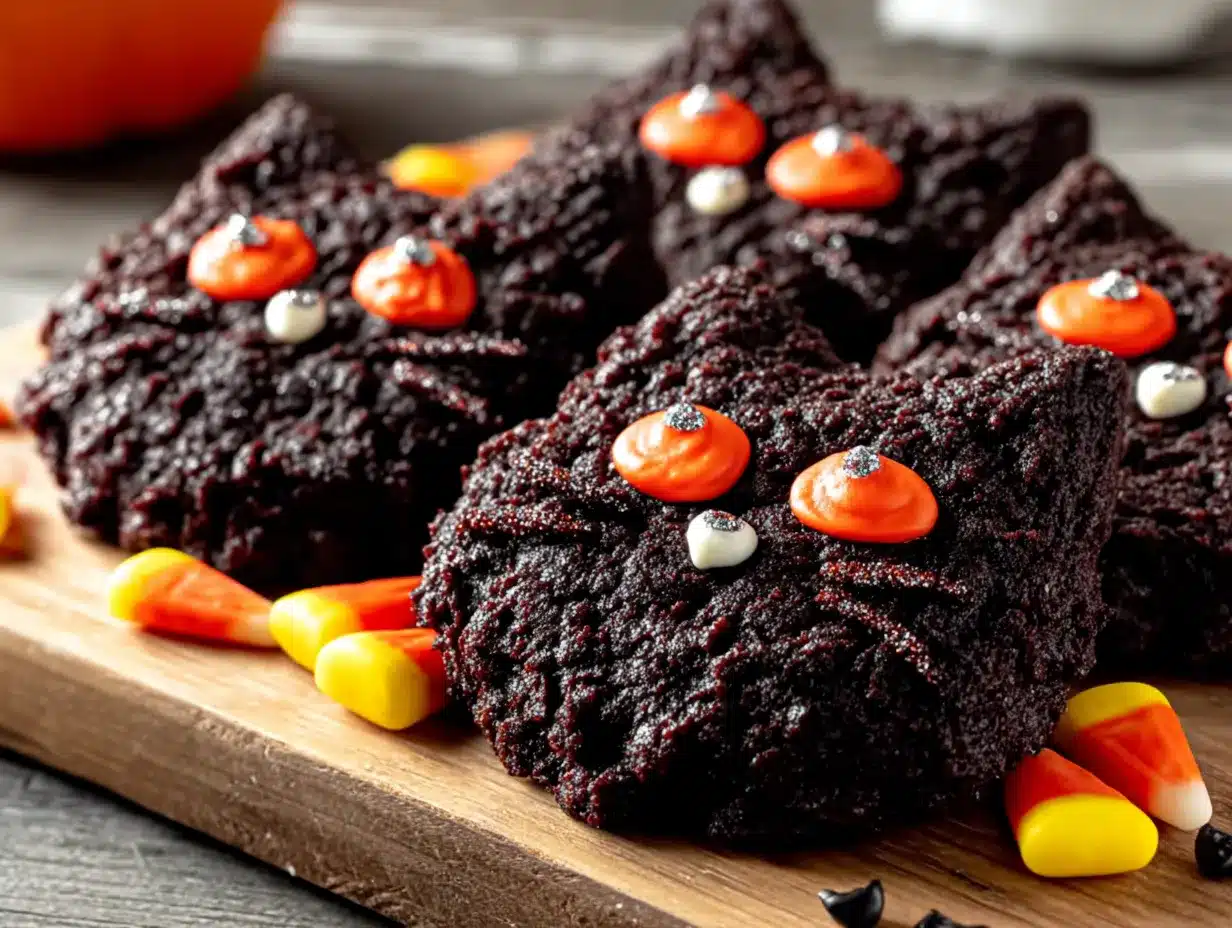
The cookies I’m sharing today aren’t just any black cat sugar cookies. They’re the ones that finally worked for me — the ones that actually look like cats, with cute little faces and all. You know that feeling when something just clicks? That’s what happened with this recipe. The dough holds its shape perfectly, the royal icing sets up shiny and smooth, and the decorating is actually fun instead of frustrating.
Maybe you’ve been there too, staring at a batch of cookies that were supposed to look adorable but ended up looking a little, um, abstract. These black cat sugar cookies are the answer. They’re the recipe that made me stop trying so hard and just enjoy the process. And honestly, that’s why I keep coming back to them every Halloween.
Why You’ll Love This Recipe
After years of testing and tweaking, I can confidently say these black cat sugar cookies are everything you want in a Halloween treat. They’re not just cute — they’re actually achievable, even if you’re not a professional baker.
- Simple Ingredients: You probably have most of these in your pantry already. No weird extracts or specialty flours needed.
- Holds Shape Perfectly: This dough doesn’t spread. Your cat shapes will stay crisp and defined, which is crucial for decorating.
- Perfect for Halloween Parties: These cookies are total crowd-pleasers. Kids love them, adults sneak them, and everyone asks for the recipe.
- Customizable Faces: Every cat can have its own personality. Grumpy cat, happy cat, surprised cat — you decide.
- Make-Ahead Friendly: The dough freezes beautifully, and baked cookies stay fresh for over a week.
What makes these different from every other sugar cookie recipe out there? It’s the texture. The combination of butter and shortening gives you that perfect balance — crisp edges with a soft, tender center. I tested this ratio for months, and this is the version that finally worked. Plus, the royal icing recipe is foolproof. No more runny icing disasters or crusty, cracked surfaces.
These black cat sugar cookies are the kind that make you close your eyes after the first bite. The vanilla flavor is warm and familiar, the texture is spot-on, and the decorating is genuinely satisfying. It’s comfort food with a spooky twist — perfect for getting into the Halloween spirit without the stress.
What Ingredients You Will Need
This recipe uses simple, wholesome ingredients to deliver bold flavor and satisfying texture without the fuss. Most of these are pantry staples, which means you can whip up a batch whenever the Halloween mood strikes.
For the Sugar Cookie Dough
- Unsalted butter, softened (1 cup / 226g) — I prefer Kerrygold for the rich flavor
- Shortening (½ cup / 100g) — Crisco works great; this helps the cookies hold their shape
- Granulated sugar (1½ cups / 300g)
- Large egg (1, room temperature)
- Vanilla extract (2 teaspoons) — use pure vanilla for the best flavor
- All-purpose flour (3 cups / 360g) — spoon and level for accuracy
- Baking powder (1 teaspoon)
- Salt (½ teaspoon)
- Black gel food coloring (about 1 teaspoon) — Americolor Super Black is my go-to
For the Royal Icing
- Powdered sugar (4 cups / 480g)
- Meringue powder (3 tablespoons) — Wilton brand is reliable
- Warm water (5-6 tablespoons)
- Vanilla extract (½ teaspoon)
- Black gel food coloring (for the base color)
- White gel food coloring (for the eyes and accents)
- Yellow food coloring (optional, for cat eyes)
For the black coloring, I’ve learned the hard way that liquid food coloring won’t cut it. You need gel or paste coloring to get that deep, true black without thinning out your dough or icing. Americolor and Wilton both make excellent options. If you’re using a different brand, start with less and add more gradually — you can always darken, but you can’t lighten.
For the shortening, don’t skip it. I know some recipes use all butter, but the combination is what keeps these cat shapes looking like cats. All-butter cookies spread more, and nobody wants a melted-looking black cat. Trust me on this one.
Equipment Needed
You don’t need a professional bakery setup for these black cat sugar cookies, but a few key tools will make your life much easier.
- Black cat cookie cutter (about 3-4 inches) — I found mine at a thrift store, but Amazon and baking supply shops have them
- Stand mixer or hand mixer — for creaming the butter and sugar properly
- Rolling pin with thickness guides — adjustable rings are a game-changer for even cookies
- Parchment paper or silicone baking mats
- Baking sheets — light-colored metal works best for even browning
- Wire cooling rack
- Piping bags (disposable or reusable)
- Small round piping tips (#2 or #3 for outlining, #1.5 for details)
- Toothpicks — for popping air bubbles and spreading icing into tight spots
- Small offset spatula — helpful for transferring cut dough
If you don’t have a cat-shaped cutter, you can use a round cutter and add piped ears. Honestly, I’ve done that in a pinch and it works fine. Just make the cookies slightly smaller than you want the final cat to be, then pipe the ears directly onto the baked cookie with royal icing.
For the piping bags, I prefer the disposable plastic ones for royal icing. They’re easier to clean up, and the icing doesn’t seep through like it can with parchment cones. A set of couplers is also worth having — they let you switch tips without changing bags.
Preparation Method
Let’s get into the nitty-gritty of making these adorable black cat sugar cookies. Take your time with each step — rushing is what leads to those wonky cat faces I mentioned earlier.
- Make the cookie dough. In a large bowl, cream together the softened butter, shortening, and granulated sugar until light and fluffy — about 3 minutes with a stand mixer on medium speed. You want the mixture to look pale and aerated. Scrape down the sides of the bowl halfway through.
- Add the wet ingredients. Beat in the egg and vanilla extract until fully combined. The mixture might look slightly curdled at this point, but that’s normal. Add the black gel food coloring and mix until the color is evenly distributed. Start with ½ teaspoon and add more if needed.
- Mix the dry ingredients. In a separate bowl, whisk together the flour, baking powder, and salt. Gradually add this to the wet mixture, mixing on low speed until just combined. Don’t overmix — you’ll end up with tough cookies. The dough should be soft but not sticky.
- Chill the dough. Divide the dough in half, flatten each half into a disk, wrap tightly in plastic wrap, and refrigerate for at least 2 hours. I know it’s tempting to skip this step, but don’t. Chilled dough is much easier to roll and cut, and it helps the cookies hold their shape.
- Preheat and prepare. When you’re ready to bake, preheat your oven to 350°F (175°C). Line your baking sheets with parchment paper or silicone mats.
- Roll and cut. On a lightly floured surface, roll one disk of dough to ¼-inch thickness. Use your cat cookie cutter to cut out shapes, pressing straight down and lifting straight up — don’t twist the cutter. Transfer the cutouts to your prepared baking sheets, spacing them about 2 inches apart.
- Bake. Bake for 8-10 minutes, rotating the pan halfway through. The cookies should look set but not browned around the edges. Remember, these are black cookies, so you can’t rely on color to tell doneness. Look for the edges to look slightly dry and the centers to be just set.
- Cool completely. Let the cookies cool on the baking sheet for 5 minutes, then transfer to a wire rack to cool completely. Don’t even think about icing them while they’re warm — the icing will slide right off.
- Make the royal icing. In a clean bowl, combine the powdered sugar and meringue powder. Add 5 tablespoons of warm water and the vanilla extract. Beat on low speed until combined, then increase to medium-high and beat for 5-7 minutes until the icing is thick, glossy, and forms stiff peaks.
- Color and thin the icing. Divide the icing into portions: one large portion for the black base, and smaller portions for white (eyes) and yellow (optional eye color). For the black icing, add gel coloring and mix well. Thin each portion with water, a few drops at a time, until it reaches a 15-20 second consistency — meaning when you lift the spoon, the icing ribbons back into the bowl and settles smooth in about 15-20 seconds.
- Decorate the cats. Fit your piping bags with tips. Outline each cat cookie with the black icing, then flood the inside with thinned icing. Use a toothpick to spread the icing into corners and pop any air bubbles. Let the base layer dry completely — about 2-4 hours.
- Add the faces. Once the base is dry, pipe on white eyes. Let those dry for about 30 minutes, then add smaller black pupils. Pipe on a tiny pink or white nose and whiskers. Add a cute little mouth — a tiny “w” shape is my favorite.
- Let everything dry. Allow the decorated cookies to dry completely, ideally overnight. This prevents smudging when you stack or package them.
Cooking Tips & Techniques
After making these black cat sugar cookies more times than I can count, I’ve collected a few tricks that make the process smoother. Let me share the ones that saved my sanity.
Don’t skip the chilling step. I learned this the hard way when I was in a rush and tried to roll warm dough. The cookies spread into blobby shapes that looked nothing like cats. Chill the dough for at least 2 hours, and if it gets too soft while you’re cutting, pop the cutouts back in the fridge for 15 minutes before baking.
Use a light touch with flour. Too much flour on your rolling surface can dry out the dough and leave white streaks in your black cookies. Use just enough to prevent sticking, and brush off excess flour from the cutouts with a dry pastry brush.
Watch the baking time carefully. Since the cookies are black, you can’t see when they’re getting golden. I set my timer for 7 minutes and check from there. The cookies are done when they look set and the edges are just barely starting to look dry. Overbaked cookies will be hard and crumbly.
Royal icing consistency is everything. Too thick, and it won’t spread smoothly. Too thin, and it will run off the edges. The 15-20 second consistency is your sweet spot. Test it by lifting your spoon — the icing should fall back into the bowl in a steady ribbon and settle smooth within 20 seconds.
Work in batches with the icing. Royal icing dries out fast, so keep your piping bags covered with a damp cloth when you’re not using them. If the icing gets too stiff, add a drop or two of water and mix well.
One of my biggest failures? I once tried to rush the drying process and stacked the cookies too soon. The faces smeared into a creepy mess. Now I always let the icing dry overnight before stacking or packaging. Patience really pays off here.
Variations & Adaptations
These black cat sugar cookies are wonderfully adaptable. Here are some variations I’ve tried and loved.
Gluten-Free Version: Substitute the all-purpose flour with a 1:1 gluten-free baking flour blend. I’ve had good results with King Arthur’s Measure for Measure. Add ¼ teaspoon of xanthan gum if your blend doesn’t already include it. The dough will be a bit more fragile, so handle it gently.
Vegan Adaptation: Use vegan butter sticks (not tub margarine) and replace the egg with a flax egg (1 tablespoon ground flaxseed + 3 tablespoons water, let sit for 5 minutes). For the royal icing, use aquafaba (chickpea water) instead of meringue powder. Whisk 3 tablespoons of aquafaba with the powdered sugar until stiff peaks form.
Different Cat Personalities: Give each cat its own expression. Some can have wide, surprised eyes. Others can have sleepy half-closed eyes. Add little eyebrows for different moods. I once made a whole batch of grumpy cats for my friend who loves that meme — they were hilarious.
Spooky Variations: Add a tiny spider web piped on one side of the cat. Or give some cats little witch hats. You can also make pumpkin-shaped cookies alongside the cats for a full Halloween spread.
Flavor Twists: Add ½ teaspoon of almond extract along with the vanilla for a different flavor profile. Or try adding a teaspoon of cocoa powder to the dough for a deeper black color and subtle chocolate flavor. Just reduce the flour by the same amount.
My personal favorite variation? I made a batch with orange icing details for a friend’s Halloween party. The orange eyes and little pumpkin-shaped noses were adorable. It’s a small change that makes the cookies feel extra festive.
Serving & Storage Suggestions
These black cat sugar cookies are best served at room temperature. The royal icing should be fully set and firm to the touch — no stickiness. Arrange them on a platter with other Halloween treats for a spooky dessert spread.
For serving: I love pairing these with a warm mug of hot chocolate or apple cider. The sweetness of the cookies balances perfectly with the rich, warm drinks. They also look fantastic on a Halloween dessert table alongside pumpkin cupcakes and ghost-shaped meringues.
Storage instructions: Store the decorated cookies in an airtight container at room temperature. Layer them between sheets of parchment paper or wax paper to prevent the icing from sticking. They’ll stay fresh for up to 2 weeks — though they rarely last that long in my house.
Freezer instructions: You can freeze the baked, undecorated cookies for up to 3 months. Wrap them tightly in plastic wrap and place in a freezer bag. When you’re ready to decorate, thaw them at room temperature, then ice as directed. The dough itself also freezes beautifully for up to 3 months. Just thaw it in the refrigerator overnight before rolling and cutting.
Reheating tips: These cookies don’t really need reheating, but if you want that fresh-baked taste, pop them in a 300°F oven for 3-4 minutes before decorating. Let them cool completely before icing.
The flavors actually develop over time. Day-old cookies taste even better than fresh ones — the vanilla flavor deepens and the texture becomes perfectly tender. So don’t feel like you have to serve them immediately. Make them a day or two ahead for the best flavor.
Nutritional Information & Benefits
Let’s be honest — these are treat cookies, not health food. But knowing what’s in them helps you enjoy them mindfully.
Per cookie (based on 24 cookies):
- Calories: 185
- Total Fat: 8g
- Saturated Fat: 4g
- Cholesterol: 25mg
- Sodium: 65mg
- Total Carbohydrates: 27g
- Sugars: 17g
- Protein: 2g
Dietary considerations: This recipe contains dairy (butter), eggs, and gluten (flour). For allergen-friendly versions, see the variations section above. The cookies are nut-free as written, making them suitable for school parties where nut allergies are a concern.
Health benefits of key ingredients: While these are definitely a treat, the butter provides vitamin A and healthy fats. The eggs add protein. And honestly, there’s a mental health benefit too — baking and decorating these cookies is a wonderful stress reliever. The focus and creativity involved can be genuinely calming.
I like to remind myself (and my readers) that balance is everything. Enjoy these cookies as part of a varied diet. One or two with a glass of milk is a perfectly reasonable Halloween treat. The joy they bring is worth every calorie.
Conclusion
These black cat sugar cookies have become a Halloween tradition in my kitchen, and I hope they become one in yours too. They’re the recipe that taught me to stop overthinking and just enjoy the process — even when things don’t turn out perfectly. Because honestly, the slightly wonky cats are often the most charming ones.
What I love most about this recipe is how it brings people together. I’ve made these with my niece, with friends, and even by myself on a quiet October evening. Every time, the act of creating something cute and delicious feels like a small celebration. The black cats with their little faces always make me smile, and I know they’ll do the same for you.
I’d love to hear how your black cat sugar cookies turn out. Did you give them different expressions? Try a flavor variation? Share your creations in the comments below — I read every single one. And if you know someone who loves Halloween baking, please share this recipe with them. Let’s spread the joy of spooky, adorable cookies together.
Happy Halloween baking, friends. May your cookies be crisp, your icing be smooth, and your cats be absolutely adorable.
Frequently Asked Questions
Can I make these cookies without a cat-shaped cutter?
Absolutely! You can use a round cutter and pipe the ears onto the baked cookies with royal icing. Just make the round cookies slightly smaller than you want the final cat to be. Pipe two triangles for ears, let them dry, then flood the rest of the face. It takes a little more time, but the results are just as cute.
Why did my black cat sugar cookies spread in the oven?
This usually happens when the dough wasn’t chilled enough. Make sure you refrigerate the dough for at least 2 hours before rolling and cutting. If your kitchen is warm, pop the cutout cookies back in the fridge for 15 minutes before baking. Also, check that you measured your flour correctly — too little flour can cause spreading.
How do I get the royal icing perfectly smooth?
The key is getting the right consistency. Your icing should be thick enough to hold its shape but thin enough to settle smooth within 15-20 seconds. Use a toothpick to spread the icing into corners and pop any air bubbles. Work quickly — royal icing starts to set within a few minutes. If you see any uneven spots, gently tap the cookie on the counter to help the icing settle.
Can I freeze these decorated cookies?
Yes, but with caution. Freeze the decorated cookies in a single layer on a baking sheet until the icing is fully frozen (about 2 hours), then transfer to an airtight container with parchment paper between layers. Thaw in the refrigerator overnight, then bring to room temperature before serving. The icing may lose some of its shine, but the cookies will still taste great.
How far in advance can I make these cookies?
You can make the dough up to 3 days ahead and keep it in the refrigerator. Baked, undecorated cookies can be stored in an airtight container for up to 2 weeks. Decorated cookies are best within 1 week for the freshest taste and best appearance. I usually bake the cookies on a Friday, decorate on Saturday, and serve them throughout the following week.
Pin This Recipe!
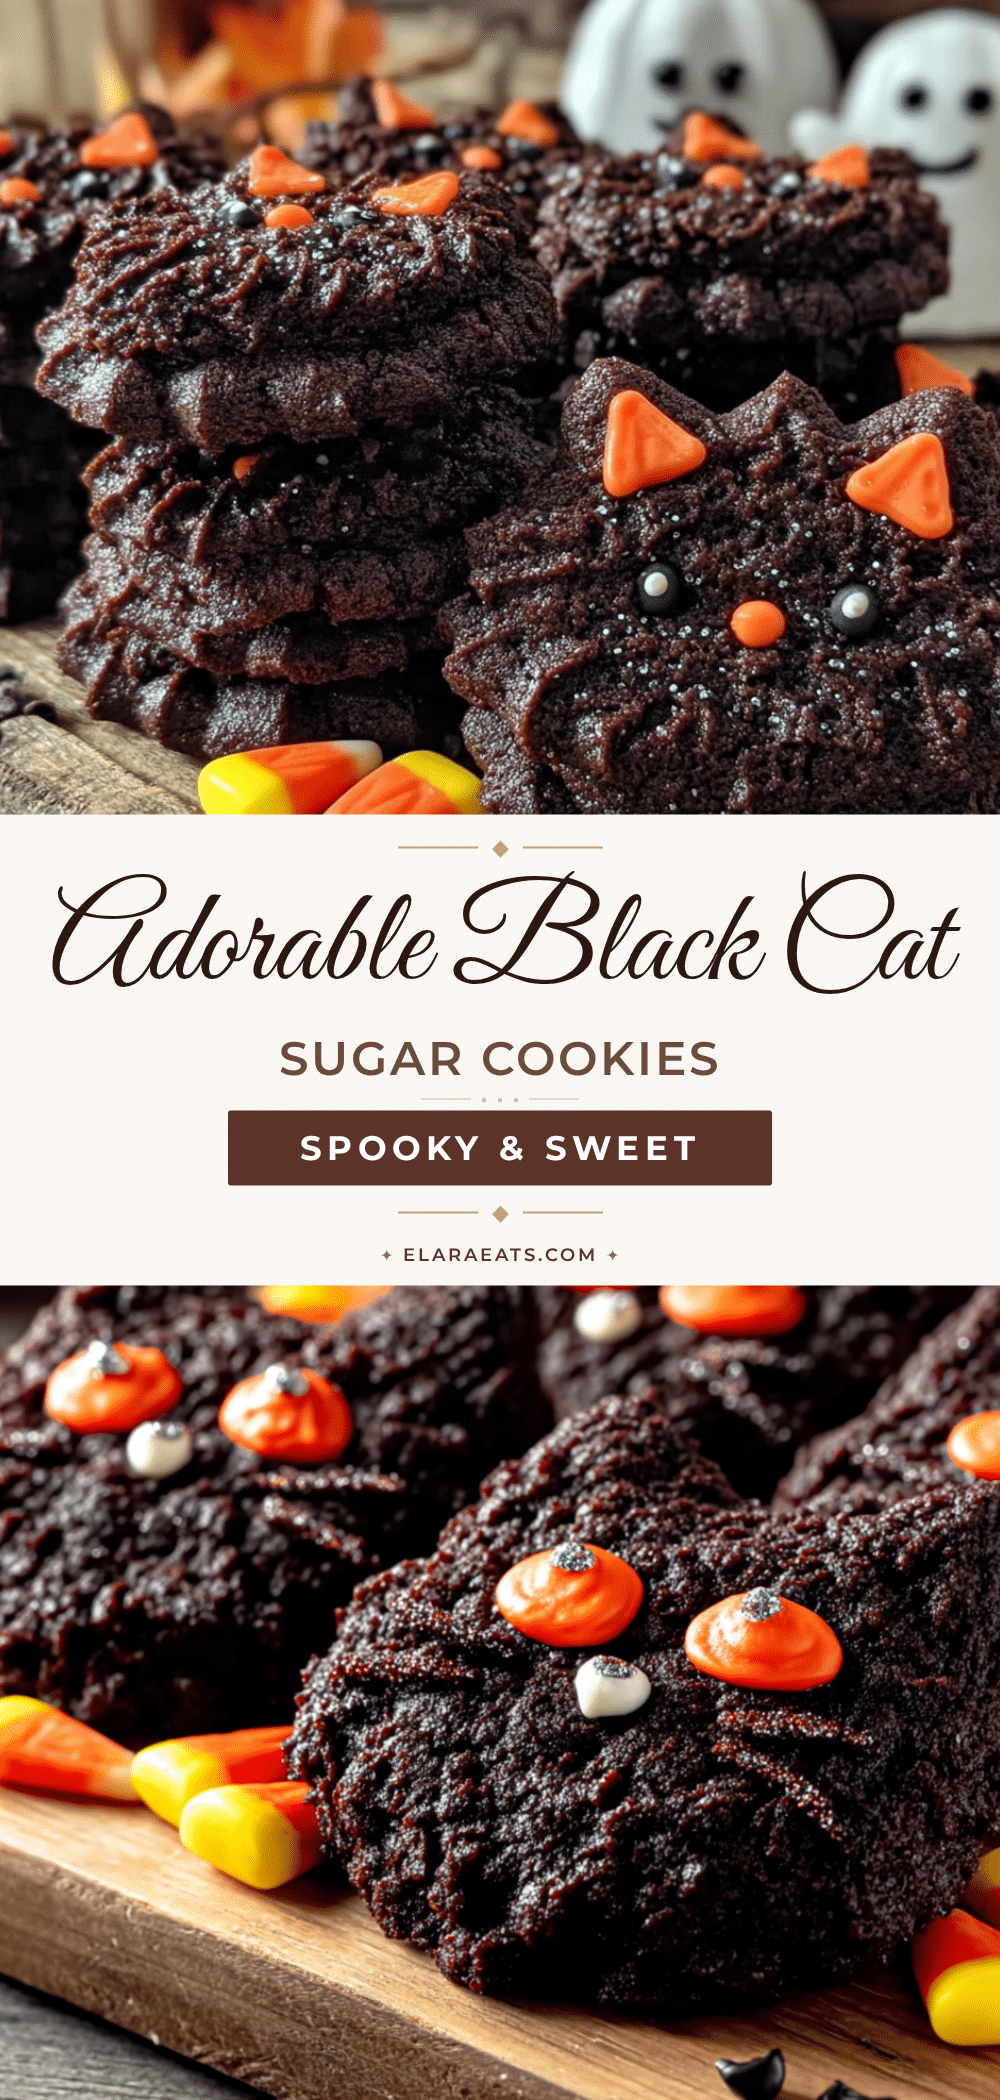
Best Easy Black Cat Sugar Cookies for Halloween Fun
These black cat sugar cookies are the perfect Halloween treat—cute, achievable, and delicious. With a foolproof dough that holds its shape and a simple royal icing technique, you can create adorable cat faces without the stress.
- Prep Time: 30 minutes
- Cook Time: 10 minutes
- Total Time: 2 hours 40 minutes (includes chilling and decorating time)
- Yield: 24 cookies 1x
- Category: Dessert
- Cuisine: American
Ingredients
- 1 cup (226g) unsalted butter, softened
- ½ cup (100g) shortening (e.g., Crisco)
- 1½ cups (300g) granulated sugar
- 1 large egg, room temperature
- 2 teaspoons pure vanilla extract
- 3 cups (360g) all-purpose flour, spooned and leveled
- 1 teaspoon baking powder
- ½ teaspoon salt
- 1 teaspoon black gel food coloring (e.g., Americolor Super Black)
- 4 cups (480g) powdered sugar
- 3 tablespoons meringue powder (e.g., Wilton)
- 5–6 tablespoons warm water
- ½ teaspoon vanilla extract
- Black gel food coloring (for icing)
- White gel food coloring (for eyes and accents)
- Yellow food coloring (optional, for cat eyes)
Instructions
- Make the cookie dough: In a large bowl, cream together the softened butter, shortening, and granulated sugar until light and fluffy—about 3 minutes with a stand mixer on medium speed. Scrape down the sides halfway through.
- Add the wet ingredients: Beat in the egg and vanilla extract until fully combined. Add the black gel food coloring and mix until evenly distributed. Start with ½ teaspoon and add more if needed.
- Mix the dry ingredients: In a separate bowl, whisk together the flour, baking powder, and salt. Gradually add to the wet mixture, mixing on low speed until just combined. Do not overmix.
- Chill the dough: Divide the dough in half, flatten each half into a disk, wrap tightly in plastic wrap, and refrigerate for at least 2 hours.
- Preheat and prepare: When ready to bake, preheat oven to 350°F (175°C). Line baking sheets with parchment paper or silicone mats.
- Roll and cut: On a lightly floured surface, roll one disk of dough to ¼-inch thickness. Use a cat cookie cutter to cut out shapes, pressing straight down and lifting straight up—do not twist. Transfer cutouts to prepared baking sheets, spacing about 2 inches apart.
- Bake: Bake for 8-10 minutes, rotating the pan halfway through. Cookies should look set but not browned around the edges. Cool on the baking sheet for 5 minutes, then transfer to a wire rack to cool completely.
- Make the royal icing: In a clean bowl, combine powdered sugar and meringue powder. Add 5 tablespoons of warm water and vanilla extract. Beat on low speed until combined, then increase to medium-high and beat for 5-7 minutes until thick, glossy, and forms stiff peaks.
- Color and thin the icing: Divide icing into portions: one large for black base, smaller for white (eyes) and yellow (optional). Add gel coloring to each. Thin each portion with water, a few drops at a time, until it reaches a 15-20 second consistency.
- Decorate the cats: Fit piping bags with tips. Outline each cat cookie with black icing, then flood the inside with thinned icing. Use a toothpick to spread icing into corners and pop air bubbles. Let base layer dry completely—about 2-4 hours.
- Add the faces: Once base is dry, pipe on white eyes. Let dry for about 30 minutes, then add smaller black pupils. Pipe on a tiny pink or white nose and whiskers. Add a tiny ‘w’ shape mouth.
- Let everything dry: Allow decorated cookies to dry completely, ideally overnight, to prevent smudging.
Notes
Chill the dough for at least 2 hours to prevent spreading. Use gel food coloring for deep black color. Royal icing should have a 15-20 second consistency for best flooding. Let decorated cookies dry overnight before stacking.
Nutrition
- Serving Size: 1 cookie
- Calories: 185
- Sugar: 17
- Sodium: 65
- Fat: 8
- Saturated Fat: 4
- Carbohydrates: 27
- Protein: 2
Keywords: black cat sugar cookies, Halloween cookies, sugar cookies, royal icing cookies, cat cookies, Halloween baking, easy sugar cookies


