Love this? Save it for later!
Share the inspiration with your friends
The neighborhood Halloween potluck was in twelve hours and I’d completely forgotten. Everyone else would be bringing those Pinterest-perfect graveyard dirt cakes, those elaborate witch hat cookies, and probably a few things that looked like they belonged on a professional baking show. I had a stick of butter, some sugar, and a black cat who was currently asleep on my flour canister. Honestly, I almost just grabbed a bag of chips from the pantry. But then I looked at that sleeping cat, and a slightly frantic, very silly idea hit me. I mean, how hard could a cat-shaped cookie be?
The answer, as it turns out, is not hard at all. That night, with flour absolutely everywhere and a little bit of panic-fueled determination, I whipped up a batch of the most ridiculously adorable black cat sugar cookies. I walked into that potluck feeling like a fraud, carrying a plate of cookies that took maybe an hour to throw together. And you know what? They vanished. People were taking pictures, asking for the recipe, and completely ignoring the elaborate three-tier cake that someone had clearly spent all week on. The underdog won, and it was covered in black icing.
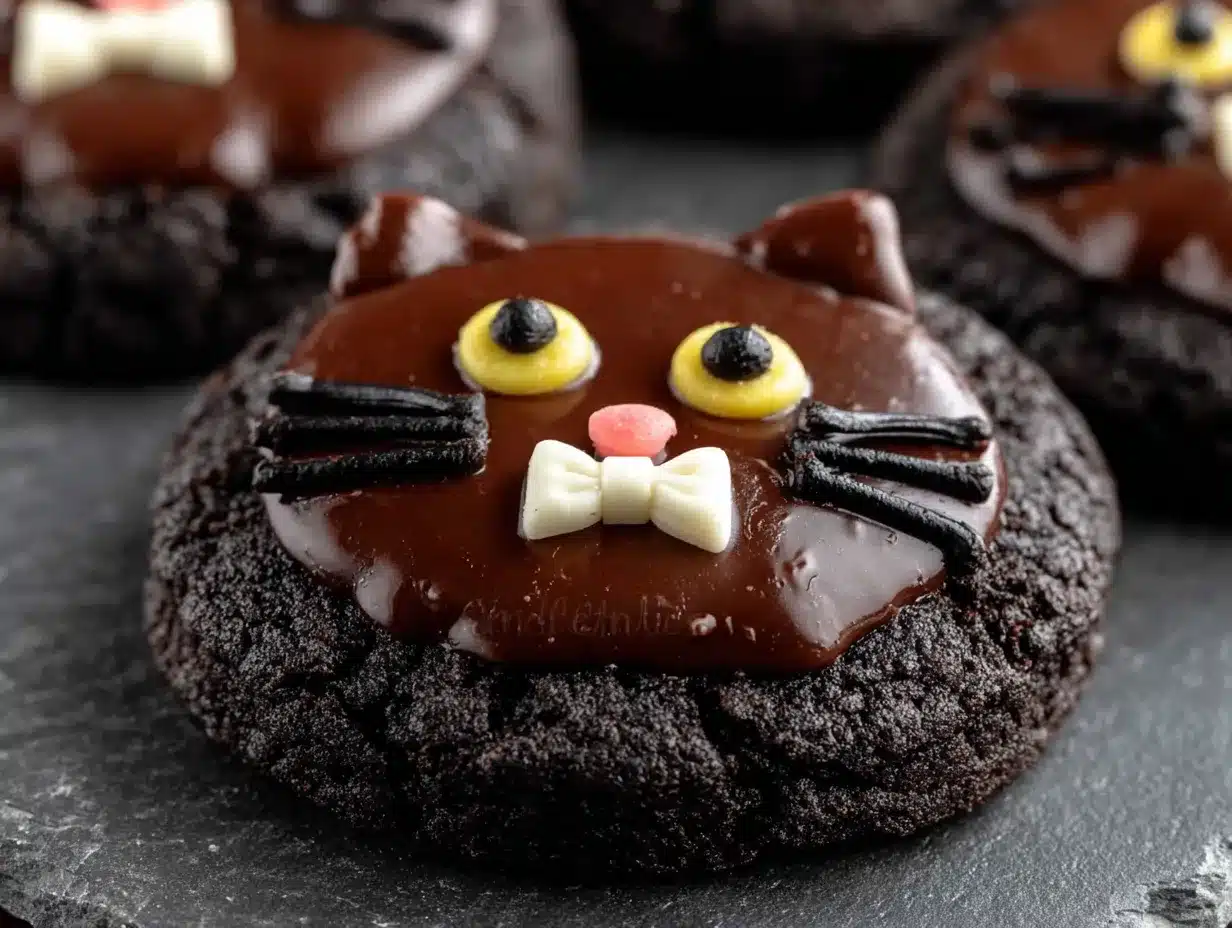
That is the thing about these cookies. They look like you spent hours, like you have some secret cat-shaped cookie wizardry. But it’s just a simple sugar cookie base, a little bit of creativity, and a whole lot of charm. They have that perfect, slightly crisp edge with a soft, buttery center. Let me tell you, biting into the ear of a black cat cookie just feels right during spooky season. Maybe you’ve been there, staring down a potluck sign-up sheet and realizing you have zero time and even less energy. This is your recipe. It’s the one that saves the day and makes you look like a hero.
Why You’ll Love This Recipe
I have tested a lot of sugar cookie recipes over the years, and I mean a lot. Some spread into shapeless blobs in the oven. Others were so hard you could use them as a hockey puck. This one? It holds its shape perfectly, which is non-negotiable when you are trying to create a recognizable cat face. I have had professional bakers ask me for this dough recipe, which always makes me feel a little smug.
- Perfect for Halloween Hosting: These are the life of the party. They are fun, festive, and way easier than a complicated dessert. You can make a huge batch without breaking a sweat.
- Simple Ingredients: You probably have everything in your pantry right now. No weird extracts or specialty flours. Just classic baking staples.
- Holds Its Shape: This dough is the star of the show. It doesn’t spread, so your cats will have distinct ears, tails, and faces every single time.
- Customizable: Once you have the base, you can go wild. Different icing colors, spooky faces, little bow ties—the possibilities are endless.
- Unbelievably Delicious: Forget those bland, dry sugar cookies from the store. These are buttery, tender, and have the perfect amount of sweetness. The texture is honestly next-level.
What makes these different from any other black cat cookie out there is the dough itself. I use a slightly higher ratio of butter to flour, and I chill the dough for just the right amount of time. This creates a cookie that is soft in the middle but has a beautiful, clean edge. It is not just another version of a sugar cookie—it is my best version, perfected after many, many batches of slightly deformed cats. This is the kind of cookie that makes you close your eyes after the first bite. It’s comfort food for the Halloween season—faster, easier, but with the same soul-soothing satisfaction. Perfect for impressing your guests without any pre-party stress.
What Ingredients You Will Need
This recipe uses simple, wholesome ingredients to deliver a cookie that is both structurally sound for decorating and incredibly delicious. These are all pantry staples, which makes this a perfect last-minute Halloween project.
For the Sugar Cookie Dough
- Unsalted butter, softened: 1 cup (2 sticks / 226g). I always use unsalted so I can control the salt level. Let it sit out for at least 30 minutes to get truly soft.
- Granulated sugar: 1 cup (200g). This gives the cookies their classic sweetness and helps with that slightly crisp edge.
- Large egg: 1, at room temperature. A cold egg can shock your butter mixture, so let it sit on the counter with the butter.
- Vanilla extract: 2 teaspoons. I prefer pure vanilla extract for the best flavor, but imitation will work in a pinch.
- All-purpose flour: 2 ½ cups (312g). Spoon and level it into your measuring cup for accuracy. Too much flour makes a dry cookie.
- Baking powder: 1 teaspoon. This gives the cookies just a little lift without making them puff up and lose their shape.
- Salt: ½ teaspoon. Don’t skip it! Salt balances the sweetness and enhances the buttery flavor.
For the Royal Icing & Decoration
- Powdered sugar: 3 cups (360g), sifted for a smooth, lump-free icing.
- Meringue powder: 2 tablespoons. This gives the icing the perfect consistency for flooding and piping. You can find it at most craft stores or online.
- Warm water: 4-6 tablespoons. Add it slowly until you reach the right “flood” consistency (it should drizzle off a spoon like thick honey).
- Black gel food coloring: A generous amount. Liquid coloring will thin your icing too much, so stick with gel or paste.
- Orange gel food coloring: For the pumpkin details, if you want to get fancy.
- White icing pens or a piping bag: For the eyes and whiskers. A simple store-bought white decorating pen is the easiest option.
- Edible glitter or sprinkles (optional): For a little magic. I love a spooky star sprinkle for the background.
Equipment Needed
You don’t need a professional bakery setup for these adorable black cat sugar cookies. A few basic tools will do the trick perfectly.
- Electric mixer: A stand mixer with a paddle attachment is ideal, but a hand mixer works just as well. You just need to cream the butter and sugar until light and fluffy.
- Mixing bowls: A large one for the dough and a medium one for the icing.
- Rolling pin: I prefer a french-style rolling pin without handles, but any rolling pin will work. If you have adjustable rings, they are a lifesaver for even thickness.
- Cat-shaped cookie cutter: This is the most important tool! Look for one that is about 3-4 inches tall. I got mine from a local baking supply shop, but there are tons of options online.
- Parchment paper or silicone baking mats: Essential for easy cleanup and preventing sticking.
- Baking sheets: Heavy-duty ones are best as they distribute heat more evenly and prevent the bottoms from burning.
- Piping bags or squeeze bottles: For the royal icing. Squeeze bottles are my secret weapon for flooding—they are so much easier to control than a bag.
- Small offset spatula: Great for spreading the icing if needed, though for these cookies, flooding is easier.
Preparation Method
Alright, let’s make some magic happen. This process is broken down into easy steps. Take your time with the chilling—it is the secret to perfect cat shapes.
- Make the Dough: In your large mixing bowl, beat the softened butter and granulated sugar together on medium speed for about 2-3 minutes, until it is light, fluffy, and pale in color. Scrape down the sides of the bowl. Add the egg and vanilla extract, and beat until just combined. Don’t overmix here.
- Mix the Dry Ingredients: In a separate bowl, whisk together the all-purpose flour, baking powder, and salt. With the mixer on low, gradually add the dry ingredients to the wet ingredients. Mix until a soft dough forms and no streaks of flour remain. It will look a little crumbly at first, then come together.
- Chill the Dough: Divide the dough into two equal discs, wrap each tightly in plastic wrap, and flatten them into a disc shape. This helps them chill faster and more evenly. Refrigerate for at least 2 hours, or up to 3 days. I have forgotten about mine overnight and they were even easier to roll out the next day.
- Preheat and Prep: When you are ready to bake, preheat your oven to 350°F (175°C). Line your baking sheets with parchment paper or silicone mats.
- Roll and Cut: On a lightly floured surface, roll out one disc of dough to about ¼-inch (6mm) thickness. I usually give it a few gentle taps with my rolling pin to start. Dip your cat cookie cutter in flour and cut out your shapes. Transfer them to the prepared baking sheets, leaving about 1 inch of space between each cookie.
- Bake: Bake for 8-10 minutes, or until the edges are just barely starting to turn a light golden brown. The centers will still look a little pale and soft. Do not overbake! They will continue to set on the sheet. Let them cool on the baking sheet for 5 minutes, then transfer them to a wire rack to cool completely. They must be 100% cool before you even think about icing them.
- Make the Royal Icing: In a medium bowl, whisk together the sifted powdered sugar and meringue powder. Add 4 tablespoons of warm water and whisk until smooth. The consistency should be thick but flowy. If it is too thick, add another tablespoon of water. You want it to drizzle off a spoon in a thick ribbon that melts back into the bowl in about 10 seconds.
- Color the Icing: Divide the icing into two bowls. Color one large portion black using your black gel food coloring. It will take more than you think to get a true, deep black. Color a small portion orange for the pumpkin details. Transfer each color into separate piping bags or squeeze bottles.
- Decorate the Cats: Outline each cooled cookie with the black icing, then immediately fill in the center (this is called “flooding”). Use a toothpick to guide the icing into the corners and pop any air bubbles. Let the black icing set for about 30 minutes, or until it is dry to the touch.
- Add the Faces: Once the black base is dry, use your white icing pen to pipe two eyes and a little nose. Add whiskers with a thin line. If you are making a pumpkin, pipe a small orange circle or oval on the cat’s belly or next to it. Let everything set for another hour before serving or storing.
Cooking Tips & Techniques
I have absolutely ruined my fair share of cookies, so let me save you the trouble. The biggest mistake people make with cut-out cookies is skipping the chill time. I once thought I could rush it, and my cats came out looking more like melted blobs. It was tragic. The dough needs to be cold so the butter doesn’t melt and spread before the structure sets.
Another tip? Don’t overwork the dough. When you re-roll the scraps, you are adding more gluten, which can make the cookies tough. I try to get as many cuts from the first roll as possible. When I do re-roll, I let the dough rest in the fridge for another 10 minutes first.
For the royal icing, the consistency is everything. If it is too thick, it will be hard to spread and will look lumpy. If it is too thin, it will run right off the cookie. The “10-second rule” is your best friend. Lift your spoon, and if the icing falls back into the bowl and the surface smooths out in about ten seconds, you are golden. I also learned the hard way that liquid food coloring is the enemy of royal icing. It messes up the consistency immediately. Stick with gel.
One last thing: bake one test cookie first. It sounds silly, but every oven is different. That first cookie will tell you if your oven is running hot or cold, and you can adjust your bake time accordingly. It saves you from ruining a whole batch.
Variations & Adaptations
These black cat sugar cookies are a fantastic base for all kinds of Halloween fun. Don’t be afraid to experiment and make them your own.
- Gluten-Free Option: I have successfully made these with a 1:1 gluten-free baking flour blend. The dough is a little more fragile, so extra chilling is a must. They taste just as buttery and delicious.
- Vegan Adaptation: Swap the butter for a high-quality vegan butter block (not the spreadable kind) and use a flax egg (1 tablespoon ground flaxseed mixed with 3 tablespoons water). The texture will be slightly different, but they still hold their shape beautifully.
- Spooky Season Flavors: Add 1 teaspoon of pumpkin pie spice or cinnamon to the dry ingredients for a fall twist. You can also add a pinch of black cocoa powder to the dough for an even darker, more intense “black cat” color.
- Different Decorations: Instead of royal icing, you can press candy eyes or sprinkles into the dough before baking. You can also drizzle melted white chocolate over the baked cookies for a simple, elegant look.
- Cat Breeds: Get creative with the icing! Make an orange tabby by using orange icing instead of black. A tuxedo cat is easy too—just leave a white chest and paws. You can even make a calico cat with little patches of orange and brown.
Serving & Storage Suggestions
These cookies are the star of any Halloween spread. I love to serve them on a large black platter or a wooden board to make the black icing pop. They are perfect for a Halloween party, a spooky movie night, or even as a fun classroom treat.
For the best texture, serve them at room temperature. The icing will be set and snappy, and the cookie underneath will be perfectly soft. They pair wonderfully with a glass of cold milk, a warm mug of apple cider, or even a pumpkin spice latte. If you are hosting a dinner party, put a small plate of these out with the coffee—they are always a hit.
To store your decorated cookies, place them in a single layer in an airtight container. If you need to stack them, put a piece of parchment paper between each layer. They will stay fresh for up to a week at room temperature. Do not refrigerate them, as the moisture can make the icing sticky and the cookies soggy.
These cookies also freeze beautifully. Freeze the undecorated, baked cookies in a freezer-safe bag for up to 3 months. When you are ready to decorate, just let them thaw at room temperature and ice them as usual. The flavors actually develop a bit more after a day or two, so these are a perfect make-ahead treat.
Nutritional Information & Benefits
Let’s be honest, these are a treat, so they are not a health food. But knowing what is in them helps you enjoy them mindfully. This information is an estimate and will vary based on the exact ingredients and decorations you use.
| Nutrient | Amount per Cookie (approx) |
|---|---|
| Calories | 180 |
| Total Fat | 8g |
| Saturated Fat | 5g |
| Cholesterol | 25mg |
| Sodium | 90mg |
| Total Carbohydrates | 26g |
| Sugars | 16g |
| Protein | 2g |
On the bright side, this recipe uses simple, recognizable ingredients. There are no preservatives or artificial flavors (except for the food coloring, which you can choose to use natural versions of). The butter provides a small amount of vitamin A, and you are getting a little bit of protein from the egg. From a wellness perspective, I believe in balance. Enjoying a couple of these adorable cookies as part of a festive celebration is good for the soul. They are a fun, creative outlet that brings people together, and that has its own kind of nutritional value.
Conclusion
These adorable black cat sugar cookies are more than just a Halloween dessert. They are a little story you get to tell. They are the last-minute save that turned into a tradition. They are the cookie that makes people smile before they even take a bite. I love that they look so intricate and special, but they are truly one of the easiest decorated cookies you can make. That contrast is my favorite thing about them.
I really hope you give these a try. Don’t be afraid to make them your own. Give your cat a little witch hat, or a silly expression, or a whole plate of pumpkins. The best part of baking is the creativity. I can’t wait to hear how your black cats turn out. Please leave a comment below and let me know if they stole the show at your Halloween party. And if you tweaked the recipe, share that too! Happy Halloween, and happy baking!
Frequently Asked Questions
Can I use a different cookie cutter?
Absolutely! While this recipe is designed for a cat shape, the dough works perfectly with any cookie cutter. You can use it for ghosts, pumpkins, bats, or any other Halloween shape you have.
My dough is too sticky. What do I do?
If your dough is sticky, it likely needs more chilling time. Pop it back in the fridge for 30 minutes. If it is still sticky after that, you can dust your work surface and rolling pin with a little more flour.
How do I get a really deep black color for the icing?
Getting a true black requires a lot of black gel food coloring. Start with a small amount, mix it in, and then add more until you reach the desired shade. Letting the colored icing sit for 30 minutes can also help the color deepen.
Can I make the dough ahead of time?
Yes, this dough is perfect for making ahead. You can keep it wrapped in the fridge for up to 3 days. You can also freeze the unbaked dough discs for up to 3 months. Just thaw them in the fridge overnight before rolling and cutting.
My cookies spread in the oven. What went wrong?
The most common reason for spreading is that the dough was not cold enough when it went into the oven. Make sure you chill it for the full 2 hours. Also, be sure your butter was not too soft when you started. If your kitchen is very warm, you can chill the cut-out cookies on the baking sheet for 10 minutes before baking.
Pin This Recipe!
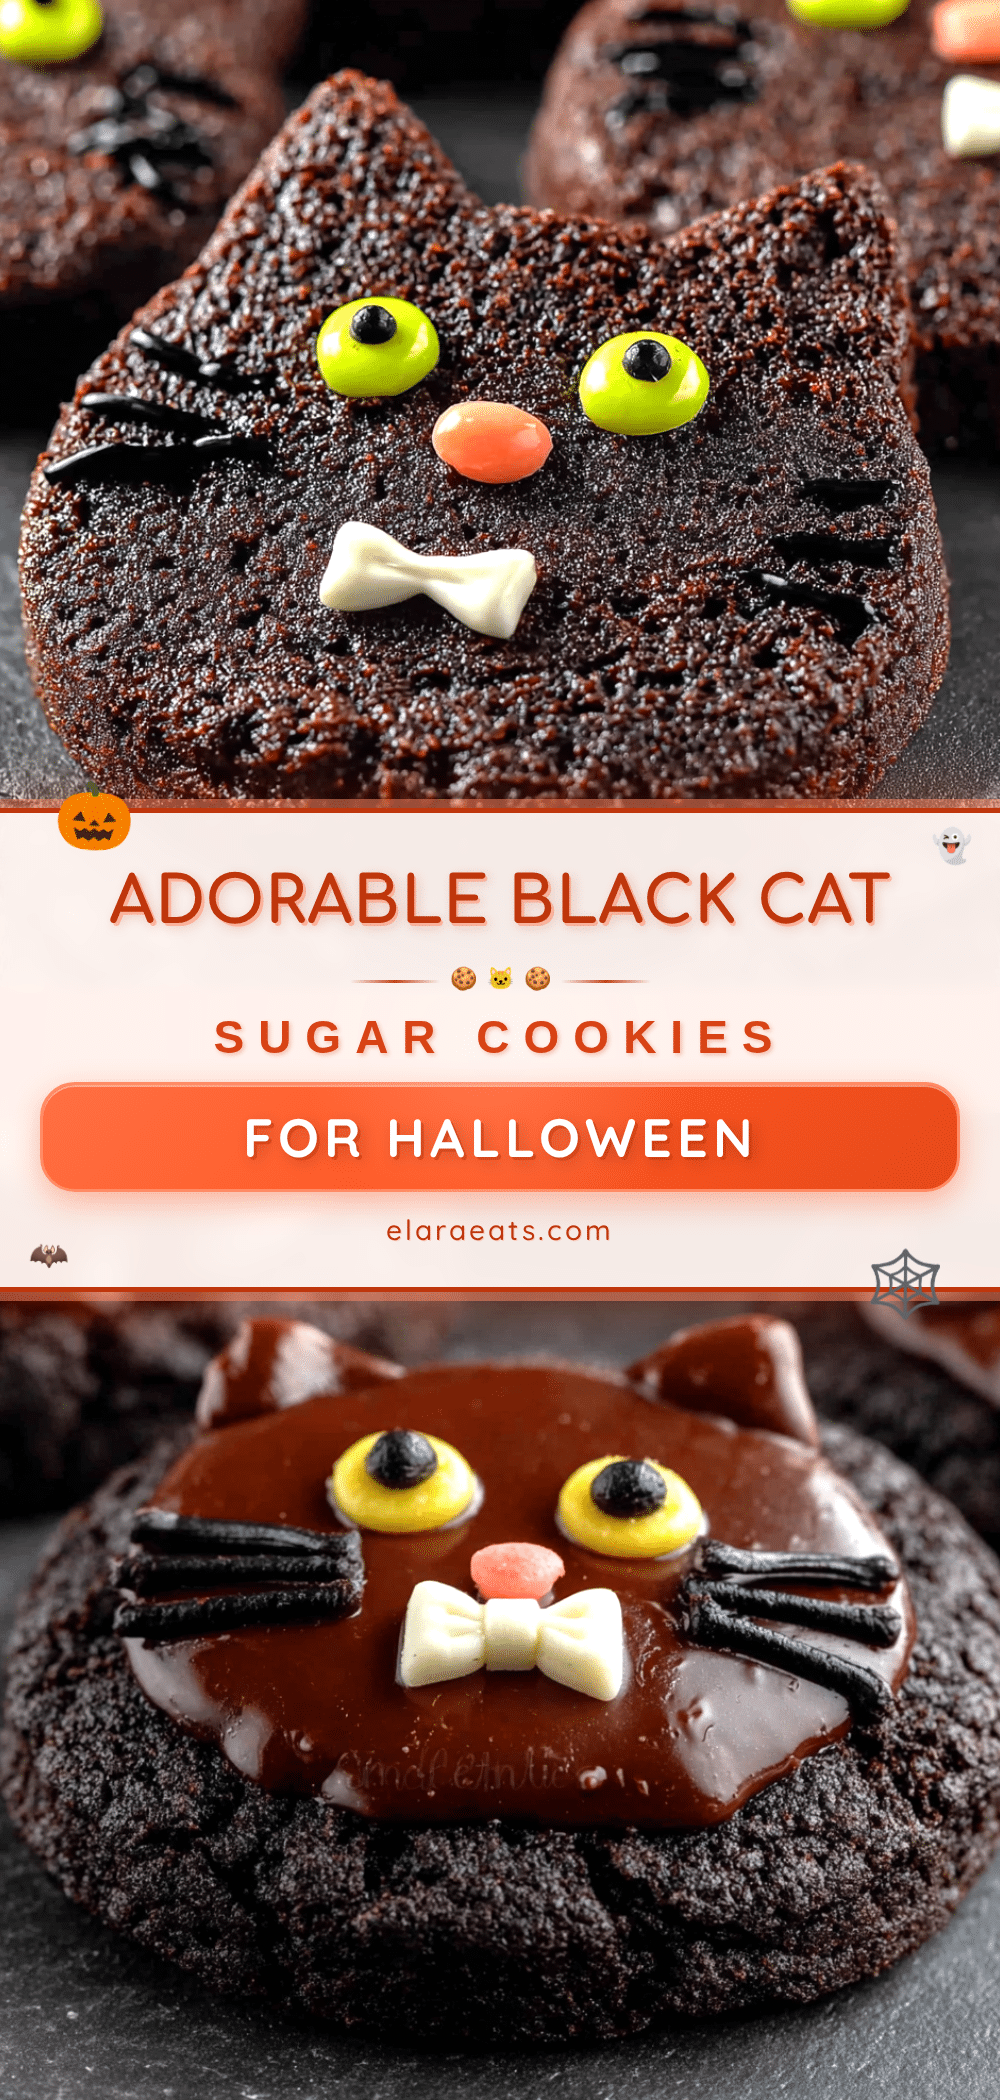
Best Easy Black Cat Sugar Cookies for Halloween Fun

These adorable black cat sugar cookies are the perfect last-minute Halloween treat. With a simple sugar cookie base that holds its shape perfectly and easy royal icing decoration, they look like you spent hours but come together in no time.
- Prep Time: 30 minutes
- Cook Time: 10 minutes
- Total Time: 3 hours (includes 2 hours chilling and 1.5 hours decorating/setting)
- Yield: 24 servings 1x
- Category: Dessert
- Cuisine: American
Ingredients
- 1 cup (2 sticks / 226g) unsalted butter, softened
- 1 cup (200g) granulated sugar
- 1 large egg, at room temperature
- 2 teaspoons vanilla extract
- 2 ½ cups (312g) all-purpose flour
- 1 teaspoon baking powder
- ½ teaspoon salt
- 3 cups (360g) powdered sugar, sifted
- 2 tablespoons meringue powder
- 4–6 tablespoons warm water
- Black gel food coloring
- Orange gel food coloring
- White icing pens or piping bag
- Edible glitter or sprinkles (optional)
Instructions
- Make the Dough: In a large mixing bowl, beat the softened butter and granulated sugar together on medium speed for about 2-3 minutes, until light, fluffy, and pale in color. Scrape down the sides of the bowl. Add the egg and vanilla extract, and beat until just combined. Don’t overmix.
- Mix the Dry Ingredients: In a separate bowl, whisk together the all-purpose flour, baking powder, and salt. With the mixer on low, gradually add the dry ingredients to the wet ingredients. Mix until a soft dough forms and no streaks of flour remain.
- Chill the Dough: Divide the dough into two equal discs, wrap each tightly in plastic wrap, and flatten into a disc shape. Refrigerate for at least 2 hours, or up to 3 days.
- Preheat and Prep: When ready to bake, preheat oven to 350°F (175°C). Line baking sheets with parchment paper or silicone mats.
- Roll and Cut: On a lightly floured surface, roll out one disc of dough to about ¼-inch (6mm) thickness. Dip a cat-shaped cookie cutter in flour and cut out shapes. Transfer to prepared baking sheets, leaving about 1 inch of space between each cookie.
- Bake: Bake for 8-10 minutes, or until edges are just barely starting to turn light golden brown. Centers will still look pale and soft. Do not overbake. Let cool on baking sheet for 5 minutes, then transfer to a wire rack to cool completely.
- Make the Royal Icing: In a medium bowl, whisk together sifted powdered sugar and meringue powder. Add 4 tablespoons warm water and whisk until smooth. Consistency should be thick but flowy—it should drizzle off a spoon in a thick ribbon that melts back into the bowl in about 10 seconds. Add more water if needed.
- Color the Icing: Divide icing into two bowls. Color one large portion black using black gel food coloring. Color a small portion orange for pumpkin details. Transfer each color into separate piping bags or squeeze bottles.
- Decorate the Cats: Outline each cooled cookie with black icing, then immediately fill in the center (flooding). Use a toothpick to guide icing into corners and pop air bubbles. Let black icing set for about 30 minutes, or until dry to the touch.
- Add the Faces: Once black base is dry, use white icing pen to pipe two eyes and a little nose. Add whiskers with a thin line. For pumpkins, pipe a small orange circle or oval on the cat’s belly or next to it. Let everything set for another hour before serving or storing.
Notes
Chilling the dough is essential to prevent spreading. For best results, bake one test cookie first to check oven temperature. Use gel food coloring for royal icing—liquid coloring will ruin the consistency. Cookies can be stored in an airtight container at room temperature for up to a week. Undecorated baked cookies freeze well for up to 3 months.
Nutrition
- Serving Size: 1 cookie
- Calories: 180
- Sugar: 16
- Sodium: 90
- Fat: 8
- Saturated Fat: 5
- Carbohydrates: 26
- Protein: 2
Keywords: black cat cookies, Halloween cookies, sugar cookies, royal icing cookies, cat-shaped cookies, easy Halloween dessert, cut-out cookies


