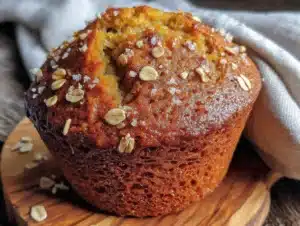
Love this? Save it for later!
Share the inspiration with your friends
I was digging through my pantry last Tuesday, looking for a bag of chocolate chips I swore I had bought, when my hand brushed against a dusty can of pumpkin puree. And suddenly I was seven years old, standing on a stepstool in my neighbor Mrs. Kowalski’s kitchen, watching her crack an egg with one hand like it was the most natural thing in the world. She wasn’t my grandmother, wasn’t even related to me — just the lady next door who let me hang around because I was always asking questions about what she was baking. The pumpkin smell hit me, that earthy, slightly sweet scent that means fall is actually here, and I could almost feel the worn linoleum floor under my bare feet again.
Mrs. Kowalski made these muffins every October, and she never used white sugar. Said it masked the real flavor of the pumpkin. I didn’t understand what she meant back then — I was too busy trying to sneak spoonfuls of the batter when she turned around. But now, standing in my own kitchen with that same can of pumpkin in my hand, I get it. She was onto something. These cozy pumpkin oat muffins are my attempt to capture that exact moment: the warmth of her tiny kitchen, the way the oats smelled as they toasted in the dry pan, and that first bite of a muffin that tasted like fall itself.
Honestly, I’ve made a lot of pumpkin muffins over the years. Some were too sweet, some were too dry, and some just felt like they were trying too hard. But this version? It’s the one that finally feels right. Maybe you’ve been there — chasing a memory through recipe after recipe, hoping one of them will finally click. These muffins are that click for me. No refined sugar, just the natural sweetness of pumpkin and a little maple syrup, with oats that give them this hearty, satisfying texture. They’re not trying to be fancy. They’re just trying to taste like a Tuesday afternoon in October, the way it used to be.
Why You’ll Love This Recipe
Let me tell you why these muffins have become my go-to fall bake, and why I think they’ll become yours too.
- No Refined Sugar: Sweetened with maple syrup and the natural sweetness of pumpkin, these muffins are perfect if you’re trying to cut back on processed sugar without sacrificing flavor. I mean, you won’t miss the white sugar at all — the pumpkin and maple do all the heavy lifting.
- Simple Ingredients: You probably have most of these in your kitchen right now. Oats, pumpkin puree, eggs, maple syrup, and a few spices. No fancy trips to specialty stores required.
- Perfect for Fall Mornings: These muffins were made for those crisp October mornings when you want something warm and comforting but don’t have time for a full breakfast. They’re grab-and-go cozy.
- Crowd-Pleaser: I brought these to a potluck last weekend, and three people asked for the recipe before I even left. Kids love them, adults love them, and nobody guesses they’re refined-sugar-free.
- Unbelievably Moist: The combination of pumpkin and oats creates this incredibly tender crumb that stays moist for days. No dry, crumbly muffins here — I promise.
What makes these different from every other pumpkin muffin recipe out there? It’s the texture, honestly. The oats aren’t just thrown in — they’re pulsed in the blender first, creating this rustic, hearty flour that gives the muffins structure without making them dense. Plus, the pumpkin-to-oat ratio is something I tested six times to get exactly right. Not too wet, not too dry, with just enough maple syrup to bring out the pumpkin’s natural sweetness.
This is the kind of muffin that makes you close your eyes after the first bite. It’s comfort food reimagined — healthier, faster, but with the same soul-soothing satisfaction that made Mrs. Kowalski’s kitchen feel like the safest place in the world.
What Ingredients You Will Need
This recipe uses simple, wholesome ingredients that come together to create something truly special. Most of these are pantry staples, especially if you bake regularly in the fall.
- Rolled oats, 1 ½ cups (150g) — Not quick oats! Rolled oats give the muffins that hearty texture and soak up the pumpkin moisture perfectly. I prefer Bob’s Red Mill for consistency.
- Pumpkin puree, 1 cup (245g) — Make sure you’re getting pure pumpkin, not pumpkin pie filling. Libby’s is my go-to, but any 100% pure pumpkin works. (Pro tip: if you open a can and only use half, freeze the rest in an ice cube tray for later.)
- Maple syrup, ⅓ cup (80ml) — Real maple syrup, not pancake syrup. The grade doesn’t matter much here, but I like Grade A Amber for its milder flavor. It adds sweetness without overpowering the pumpkin.
- Eggs, 2 large, room temperature — Room temperature eggs blend more smoothly into the batter. If you forgot to take them out, place them in a bowl of warm water for 5 minutes.
- Coconut oil, ¼ cup (60ml), melted — Or any neutral oil like avocado or grapeseed. Coconut oil adds a subtle richness that pairs beautifully with pumpkin. (Use refined coconut oil if you don’t want any coconut taste.)
- Milk, ¼ cup (60ml) — Any milk works here. I’ve used oat milk, almond milk, and regular whole milk — all turned out great. Use dairy-free if needed.
- Vanilla extract, 1 teaspoon — Pure vanilla extract is worth it here. It rounds out the pumpkin and spice flavors beautifully.
- Pumpkin pie spice, 2 teaspoons — Or make your own: 1 teaspoon cinnamon, ½ teaspoon ginger, ¼ teaspoon nutmeg, ¼ teaspoon cloves. I always make my own because I can control the ratios.
- Baking powder, 1 ½ teaspoons — Make sure it’s fresh! Old baking powder is the number one reason muffins don’t rise properly.
- Baking soda, ½ teaspoon — Helps the muffins brown and rise. Don’t skip it.
- Salt, ¼ teaspoon — Just enough to balance the sweetness and bring out the pumpkin flavor.
- Optional mix-ins: ½ cup chopped pecans or walnuts, ¼ cup dark chocolate chips, or ¼ cup dried cranberries. I personally love adding pecans for that crunch.
For substitutions, you can swap the maple syrup with honey or agave nectar if that’s what you have. Use almond flour for a gluten-free option — though you’ll need to adjust the liquid slightly. And if you’re out of pumpkin pie spice, cinnamon alone works in a pinch, though you’ll miss some of that warm complexity.
Equipment Needed
You don’t need a fancy kitchen to make these muffins, which is part of why I love this recipe so much.
- Muffin tin — Standard 12-cup muffin tin. I use a non-stick one from Wilton that’s never let me down.
- Muffin liners — Paper or silicone. I prefer parchment paper liners because nothing sticks to them, but silicone works great too.
- Blender or food processor — This is key for grinding the oats into flour. A high-speed blender like a Vitamix works best, but a regular blender or food processor will do the job. (I’ve even used a coffee grinder in a pinch — just do small batches.)
- Large mixing bowl — For the dry ingredients.
- Medium mixing bowl — For the wet ingredients.
- Whisk — For combining wet ingredients smoothly.
- Rubber spatula — For folding the batter. A wooden spoon works too, but a spatula gives you better control.
- Measuring cups and spoons — Accurate measurements matter in baking.
- Cooling rack — Essential for preventing soggy bottoms. If you don’t have one, you can carefully balance the muffins on their sides.
If you don’t have a blender, you can use oat flour from the store — just use the same amount by weight. And if you’re on a budget, dollar store muffin tins work perfectly fine; just grease them well.
Preparation Method
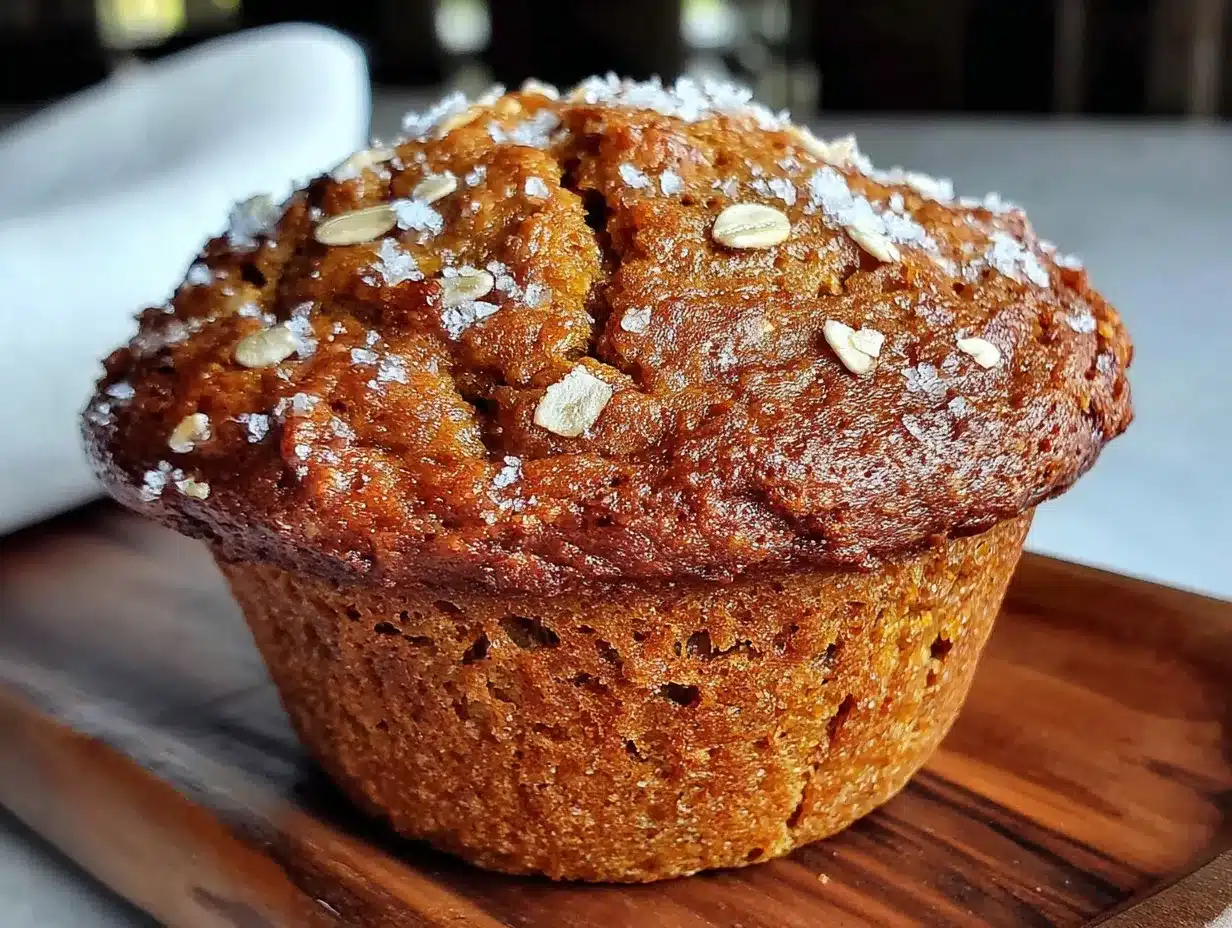
Let me walk you through this step by step. I’ve made these muffins so many times that I could do it in my sleep, but I’ll share all the little tricks I’ve learned along the way.
- Preheat your oven to 350°F (175°C) and line your muffin tin with paper liners. This is one of those steps that seems obvious, but I’ve definitely forgotten to preheat before and then stood there staring at a cold oven with a bowl of batter ready to go. Learn from my mistakes.
- Grind the oats into flour. Place the rolled oats in your blender or food processor and pulse until they turn into a fine powder. This should take about 30-45 seconds. Don’t overdo it — you don’t want oat butter! The flour should look like whole wheat flour, maybe a tiny bit coarser. Set it aside.
- Mix the dry ingredients. In your large bowl, whisk together the oat flour, pumpkin pie spice, baking powder, baking soda, and salt. Make sure everything is evenly distributed. I like to use a whisk for this because it aerates the flour and makes for lighter muffins.
- Mix the wet ingredients. In your medium bowl, whisk together the pumpkin puree, maple syrup, eggs, melted coconut oil, milk, and vanilla extract. Whisk until smooth and well combined. The mixture should be a beautiful deep orange color — like autumn in a bowl.
- Combine wet and dry. Pour the wet ingredients into the dry ingredients and fold gently with your rubber spatula. Here’s the important part: mix only until you don’t see any more dry flour. A few lumps are totally fine. Overmixing will make your muffins tough, and nobody wants tough muffins. Fold in any mix-ins now if you’re using them.
- Fill the muffin cups. Divide the batter evenly among the 12 muffin cups. I use an ice cream scoop for this — it makes the portions perfectly even and keeps the mess to a minimum. Each cup should be about ¾ full. If you want bakery-style domed tops, fill them a little more, almost to the top.
- Bake for 18-22 minutes. Place the muffin tin in the preheated oven and bake until a toothpick inserted into the center of a muffin comes out clean or with just a few moist crumbs. The tops should be golden brown and spring back when lightly touched. My oven runs hot, so I start checking at 18 minutes.
- Cool properly. Let the muffins cool in the tin for 5 minutes, then transfer them to a wire rack to cool completely. This 5-minute rest is crucial — it lets the muffins set so they don’t fall apart when you take them out. If you leave them in the tin too long, the bottoms can get soggy from the steam.
A few sensory cues to watch for: the batter should be thick but scoopable, like a thick cake batter. When you smell pumpkin and spices filling your kitchen, that’s usually a good sign they’re almost done. And the tops should look set and slightly cracked — that’s perfectly normal and actually pretty.
Cooking Tips & Techniques
Over the course of testing this recipe, I’ve made every mistake in the book, so you don’t have to.
Don’t overmix the batter. I cannot stress this enough. The first time I made these, I was so excited that I beat the batter like I was making a cake. The muffins came out dense and almost rubbery. Mix just until combined — a few lumps are your friend. The gluten in the oats will develop as they bake, so you don’t need to help it along.
Room temperature ingredients matter. Cold eggs and cold milk can make the coconut oil solidify into little chunks when you mix them together. I learned this the hard way when my batter looked like it had weird white flecks. If your kitchen is cold, warm your milk slightly in the microwave (about 15 seconds) and let your eggs sit out for 20 minutes.
Toast your oats first for extra flavor. This is a trick I picked up from a baking blog years ago, and it makes a real difference. Spread your rolled oats on a baking sheet and toast them at 350°F for 5-7 minutes before grinding them into flour. It brings out this nutty, warm flavor that pairs perfectly with pumpkin. Just let them cool before grinding.
Use a cookie scoop for even muffins. I used to use two spoons and end up with some muffins huge and some tiny. A cookie scoop (the 2-tablespoon size) gives you perfectly even muffins every time, and they’ll bake more consistently too.
Check for doneness with your finger, not just a toothpick. A toothpick can come out clean while the muffin is still underbaked in the center. Lightly press the top of a muffin — if it springs back, it’s done. If it leaves an indent, give it another 2 minutes.
Variations & Adaptations
One of the best things about this recipe is how flexible it is. Here are some ways I’ve adapted it over the years.
Gluten-Free Version: Use certified gluten-free rolled oats and make sure your baking powder is gluten-free. That’s it! The recipe is naturally gluten-free since there’s no wheat flour involved. I’ve made this for friends with celiac disease and they couldn’t tell the difference.
Vegan Version: Replace the eggs with flax eggs (2 tablespoons ground flaxseed mixed with 6 tablespoons water, let sit for 5 minutes) and use plant-based milk. The texture will be slightly denser, but still delicious. I’ve tested this twice and it works beautifully.
Chocolate Chip Pumpkin Muffins: Fold in ½ cup of dark chocolate chips along with any nuts. The combination of pumpkin, warm spices, and dark chocolate is honestly one of the best flavor combinations I’ve ever discovered. My kids go crazy for this version.
Apple Pumpkin Muffins: Add ½ cup of finely diced apple (I prefer Honeycrisp or Granny Smith) to the batter. The little bursts of tart apple against the sweet pumpkin are incredible. You might need to add an extra tablespoon of oat flour to compensate for the extra moisture.
Savory-Sweet Version: Reduce the maple syrup to ¼ cup and add ½ teaspoon of black pepper and a pinch of cayenne. The heat brings out the pumpkin’s natural sweetness in a completely unexpected way. I made this for a brunch party and people were genuinely confused — in a good way.
Serving & Storage Suggestions
These muffins are best served warm, but they’re honestly delicious at any temperature.
Serving: I love these muffins fresh from the oven with a pat of butter melting into the top. The contrast of the warm, spiced muffin and the cool butter is pure comfort. For a more decadent treat, split one in half and toast it in a skillet with a little butter until the edges are crispy. Serve with a drizzle of maple syrup and a cup of hot coffee or chai tea.
Storage: Store leftover muffins in an airtight container at room temperature for up to 4 days. I line the container with a paper towel to absorb excess moisture, which keeps the muffins from getting soggy. If you live in a humid climate, the fridge might be better, but the muffins will dry out slightly faster.
Freezing: These muffins freeze beautifully. Let them cool completely, then wrap each one individually in plastic wrap and place them in a freezer bag. They’ll keep for up to 3 months. To thaw, just leave one out on the counter for about 30 minutes, or microwave for 20-30 seconds. The texture stays remarkably good.
Reheating: The microwave works in a pinch, but for the best texture, reheat muffins in a 300°F oven for 5-7 minutes. They’ll taste almost as fresh as the day you made them. If you’re in a hurry, split the muffin and toast it — the slightly crispy edges are a nice contrast to the soft center.
One thing I’ve noticed: these muffins actually get better on day two. The flavors meld together and the pumpkin becomes more pronounced. So don’t be disappointed if you don’t finish them all on day one — you’re in for a treat tomorrow.
Nutritional Information & Benefits
While I’m not a nutritionist, I can share some general information about what makes these muffins a healthier choice.
Estimated per muffin: Approximately 180 calories, 7g fat, 26g carbohydrates, 3g fiber, 9g sugar (all natural), 5g protein. These numbers will vary based on your specific ingredients and any mix-ins.
Health Benefits: Pumpkin is packed with vitamin A (great for eye health and immunity), fiber, and antioxidants. Oats provide soluble fiber that helps with heart health and keeps you feeling full longer. Using maple syrup instead of refined sugar means you’re getting trace minerals like zinc and manganese, plus a lower glycemic impact.
Dietary Considerations: This recipe is naturally dairy-free if you use plant-based milk, and can easily be made vegan and gluten-free as mentioned above. It’s also nut-free if you skip the optional pecans or walnuts. The only common allergen is eggs, which can be substituted.
I personally love that these muffins give me energy without the crash that comes from refined sugar. They’re my go-to for busy mornings when I need something that will keep me going until lunch. Plus, knowing that I’m eating real, whole ingredients makes that second muffin feel a lot less guilty.
Conclusion
These cozy pumpkin oat muffins are more than just a recipe to me — they’re a way of holding onto a memory that matters. Every time I make them, I’m back in Mrs. Kowalski’s kitchen, learning that good food doesn’t need to be complicated or full of processed ingredients. It just needs to be made with care.
I hope you’ll give these muffins a try and make them your own. Maybe you’ll add chocolate chips like my kids insist on, or maybe you’ll go the savory route with a pinch of cayenne. However you make them, I promise they’ll fill your kitchen with the kind of warmth that makes fall feel like coming home.
If you make these, I’d love to hear about it! Drop a comment below and let me know how they turned out — did you add any fun mix-ins? Did your family love them as much as mine does? And if you share a photo on Pinterest, tag me so I can see your beautiful muffins. Happy baking, friends!
Frequently Asked Questions
Can I use quick oats instead of rolled oats?
You can, but the texture will be different. Quick oats are more processed and will break down more in the blender, creating a finer flour. The muffins will be slightly less hearty. If that’s all you have, go for it — just reduce the blending time so you don’t end up with oat paste.
How do I know when the muffins are done baking?
Insert a toothpick into the center of a muffin — if it comes out clean or with just a few moist crumbs, they’re done. You can also gently press the top of a muffin; if it springs back, it’s ready. The tops should be golden brown and the kitchen should smell like pumpkin pie.
Can I make these muffins ahead of time?
Absolutely! These muffins actually taste better on day two. You can bake them up to 4 days in advance and store them in an airtight container at room temperature. They also freeze beautifully for up to 3 months — just wrap each one individually in plastic wrap and pop them in a freezer bag.
Why did my muffins turn out dense?
This usually happens from overmixing the batter. When you combine the wet and dry ingredients, mix only until you don’t see any more dry flour. A few lumps are perfectly fine. Overmixing develops the gluten in the oats and creates a tough, dense texture. Also, make sure your baking powder and baking soda are fresh — old leavening agents won’t give you the rise you need.
Can I substitute the maple syrup with another sweetener?
Yes! Honey or agave nectar work beautifully as direct substitutes in the same quantity. If you want to use a granulated sweetener like coconut sugar, you’ll need to add an extra 2-3 tablespoons of milk to compensate for the missing liquid. The texture will be slightly different, but still delicious.
Pin This Recipe!
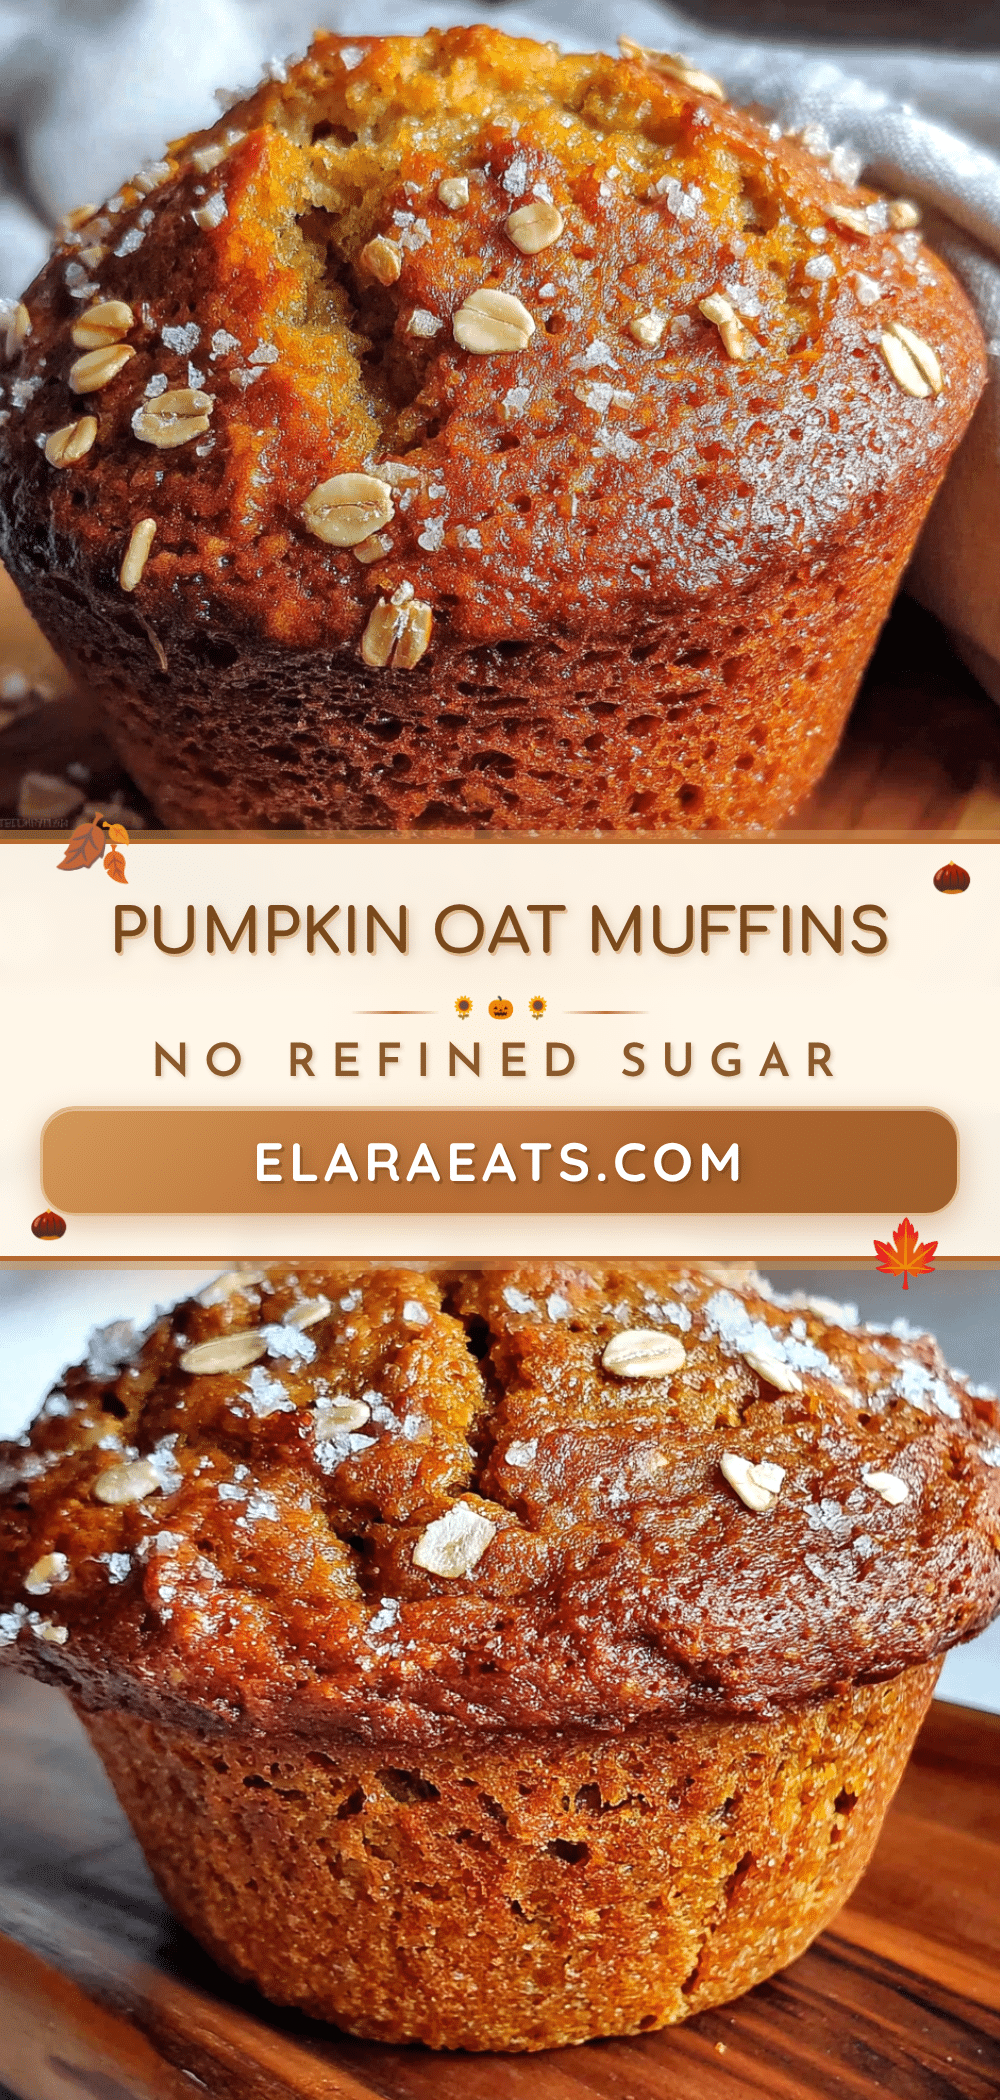
Cozy Pumpkin Oat Muffins: Easy, No Refined Sugar Recipe
These cozy pumpkin oat muffins are sweetened with maple syrup and pumpkin, using no refined sugar. They’re hearty, moist, and perfect for fall mornings, capturing the warmth of a classic autumn bake.
- Prep Time: 15 minutes
- Cook Time: 20 minutes
- Total Time: 35 minutes
- Yield: 12 muffins 1x
- Category: Breakfast
- Cuisine: American
Ingredients
- 1 ½ cups (150g) rolled oats
- 1 cup (245g) pumpkin puree
- ⅓ cup (80ml) maple syrup
- 2 large eggs, room temperature
- ¼ cup (60ml) coconut oil, melted
- ¼ cup (60ml) milk (any kind)
- 1 teaspoon vanilla extract
- 2 teaspoons pumpkin pie spice
- 1 ½ teaspoons baking powder
- ½ teaspoon baking soda
- ¼ teaspoon salt
- Optional: ½ cup chopped pecans or walnuts, ¼ cup dark chocolate chips, or ¼ cup dried cranberries
Instructions
- Preheat your oven to 350°F (175°C) and line a 12-cup muffin tin with paper liners.
- Grind the rolled oats in a blender or food processor until they turn into a fine powder (about 30-45 seconds). Set aside.
- In a large bowl, whisk together the oat flour, pumpkin pie spice, baking powder, baking soda, and salt.
- In a medium bowl, whisk together the pumpkin puree, maple syrup, eggs, melted coconut oil, milk, and vanilla extract until smooth.
- Pour the wet ingredients into the dry ingredients and fold gently with a rubber spatula until just combined. Do not overmix. Fold in any optional mix-ins if using.
- Divide the batter evenly among the 12 muffin cups, filling each about ¾ full.
- Bake for 18-22 minutes, or until a toothpick inserted into the center comes out clean or with a few moist crumbs. The tops should be golden brown and spring back when lightly touched.
- Let the muffins cool in the tin for 5 minutes, then transfer them to a wire rack to cool completely.
Notes
For extra flavor, toast the rolled oats at 350°F for 5-7 minutes before grinding. Use room temperature ingredients to prevent coconut oil from solidifying. Muffins can be stored in an airtight container at room temperature for up to 4 days or frozen for up to 3 months. They taste even better on day two.
Nutrition
- Serving Size: 1 muffin
- Calories: 180
- Sugar: 9
- Sodium: 180
- Fat: 7
- Saturated Fat: 4
- Carbohydrates: 26
- Fiber: 3
- Protein: 5
Keywords: pumpkin muffins, oat muffins, no refined sugar, healthy muffins, fall baking, pumpkin oat muffins, easy muffins