Love this? Save it for later!
Share the inspiration with your friends
I wasn’t expecting cooking advice from a plumber, but there I was, standing in the hardware aisle at our local home improvement store, listening to a man named Frank describe exactly how to get his kids to eat shrimp. My youngest had just gone through another dinner where he pushed his plate away, and I was complaining to anyone who would listen. Frank, who was holding a pipe wrench and looking completely out of place giving culinary advice, told me about the honey garlic sauce he makes for his grandkids. “They won’t eat anything green,” he said, “but they’ll eat these shrimp clean off the stick.” I laughed, grabbed a bag of shrimp on the way home, and honestly, I haven’t looked back since. The whole thing felt ridiculous—taking cooking advice from a plumber in the plumbing aisle—but let me tell you, Frank knew what he was talking about.
These kid-friendly honey garlic grilled shrimp skewers have become our go-to for those nights when everyone is hungry, tired, and the last thing you want is a fight at the table. The sauce is sweet enough to win over picky eaters but balanced with enough garlic to keep the adults happy. I mean, the first time I made them, my kid asked for seconds before he even finished his first serving. That never happens in our house. Maybe you’ve been there too—the dinner table standoff where you’re just hoping someone will take one bite without complaining. These skewers changed that for us. The whole meal comes together in about fifteen minutes, which honestly feels like cheating. I keep coming back to this recipe because it makes me feel like I’ve got dinner handled, even on the chaos days.
Why You’ll Love This Recipe
Let me tell you why this recipe has earned a permanent spot in our weekly rotation. After testing it about six times—yes, six—I can say with confidence that this is the version you want. I’ve tweaked the honey-to-garlic ratio, tried different cooking methods, and even got my neighbor who’s a nutritionist to weigh in on the ingredients. Here’s what makes these skewers special:
- Quick & Easy: From start to table in under 15 minutes. Seriously. By the time you get the grill hot and the kids washed up, dinner is ready.
- Simple Ingredients: You probably have everything in your kitchen right now. Honey, garlic, soy sauce, shrimp. That’s basically it. No fancy trips to specialty stores.
- Perfect for Family Meals: These work for busy weeknights, weekend cookouts, or even a quick lunch. They’re versatile enough for any occasion that calls for happy eaters.
- Crowd-Pleaser: I’ve served these at family gatherings and watched kids and adults go back for more. The sweet glaze is like magic for picky palates.
- Unbelievably Delicious: The combination of sticky honey and savory garlic creates this glaze that caramelizes on the grill. It’s comfort food that feels a little special without being fussy.
What makes this recipe different from the dozens of other shrimp skewer recipes out there? It’s the balance. The honey isn’t overpowering, and the garlic doesn’t bite back. I tested this with my own kids—who are notoriously suspicious of anything that looks “different”—and they devoured it. This isn’t just another grilled shrimp recipe. It’s the one that gets your kids asking for seafood. The sauce clings to the shrimp just right, and the quick grilling time means you won’t end up with rubbery bites. It’s comfort food reimagined for real families who need dinner to work without a lot of drama.
What Ingredients You Will Need
This recipe uses simple, wholesome ingredients to deliver bold flavor and satisfying texture without the fuss. Most of these are pantry staples, which makes this dish perfect for those nights when you need dinner fast.
- Raw large shrimp, peeled and deveined (1 pound / 450 grams) — Look for shrimp that are raw and peeled to save time. I prefer wild-caught when the budget allows, but frozen works great too. Just thaw them in the fridge overnight or run them under cold water for a few minutes.
- Honey (1/3 cup / 110 grams) — Go for a mild honey like clover or orange blossom. Strong honey can overpower the garlic. I use local honey when I can find it, but any grocery store honey works fine.
- Soy sauce (3 tablespoons / 45 ml) — Low-sodium is your friend here. Regular soy sauce can make the dish too salty, especially since the sauce reduces on the grill. Tamari works if you need gluten-free.
- Garlic, minced (4 cloves, about 2 teaspoons) — Fresh garlic makes a big difference here. The pre-minced stuff in jars has a sharper taste that doesn’t mellow as well. Take the extra minute to mince fresh cloves.
- Olive oil (2 tablespoons / 30 ml) — Helps the sauce coat the shrimp and prevents sticking on the grill. Avocado oil works too if that’s what you have.
- Rice vinegar (1 tablespoon / 15 ml) — This adds a tiny bit of acidity to balance the sweetness. Apple cider vinegar works in a pinch, but rice vinegar is milder.
- Fresh ginger, grated (1 teaspoon / 2 grams) — Optional but highly recommended. It adds warmth without being spicy. My kids don’t even notice it’s there.
- Wooden skewers (about 8-10) — Soak them in water for 20 minutes before using so they don’t burn on the grill. Metal skewers work too and don’t need soaking.
- Green onions, sliced (for garnish) — Adds a pop of color and mild onion flavor. Sesame seeds also make a nice finishing touch.
- Salt and pepper (to taste) — Go easy on the salt since the soy sauce brings plenty.
For the best texture, I recommend buying shrimp that are labeled 21-25 count per pound. That size is big enough to hold up on the grill but small enough to cook through quickly. If you’re feeding really little kids, you can cut the shrimp in half before skewering. Just watch the cooking time since smaller pieces cook faster.
Equipment Needed
You don’t need a fancy kitchen to make these skewers work. Here’s what you’ll need:
- Grill (gas or charcoal) — A gas grill heats up faster and gives you more control, but charcoal adds a smoky flavor that’s hard to beat. A grill pan on the stove works perfectly if you don’t have outdoor space.
- Mixing bowl — Medium size is fine for whisking the sauce and tossing the shrimp.
- Whisk or fork — For mixing the honey garlic sauce until smooth.
- Tongs — For flipping the skewers on the grill. Long ones keep your hands safe from the heat.
- Basting brush (optional) — Helps apply extra sauce while grilling. You can also just use a spoon.
- Cutting board and knife — For mincing garlic and slicing green onions.
- Measuring cups and spoons — For accurate ingredient portions.
- Plate or platter — For serving the finished skewers.
If you don’t have skewers, you can grill the shrimp directly on the grates. Just make sure they’re large enough that they won’t fall through. I’ve done it both ways, and honestly, skewers are easier for flipping and serving, especially with kids who like to hold their food.
Preparation Method
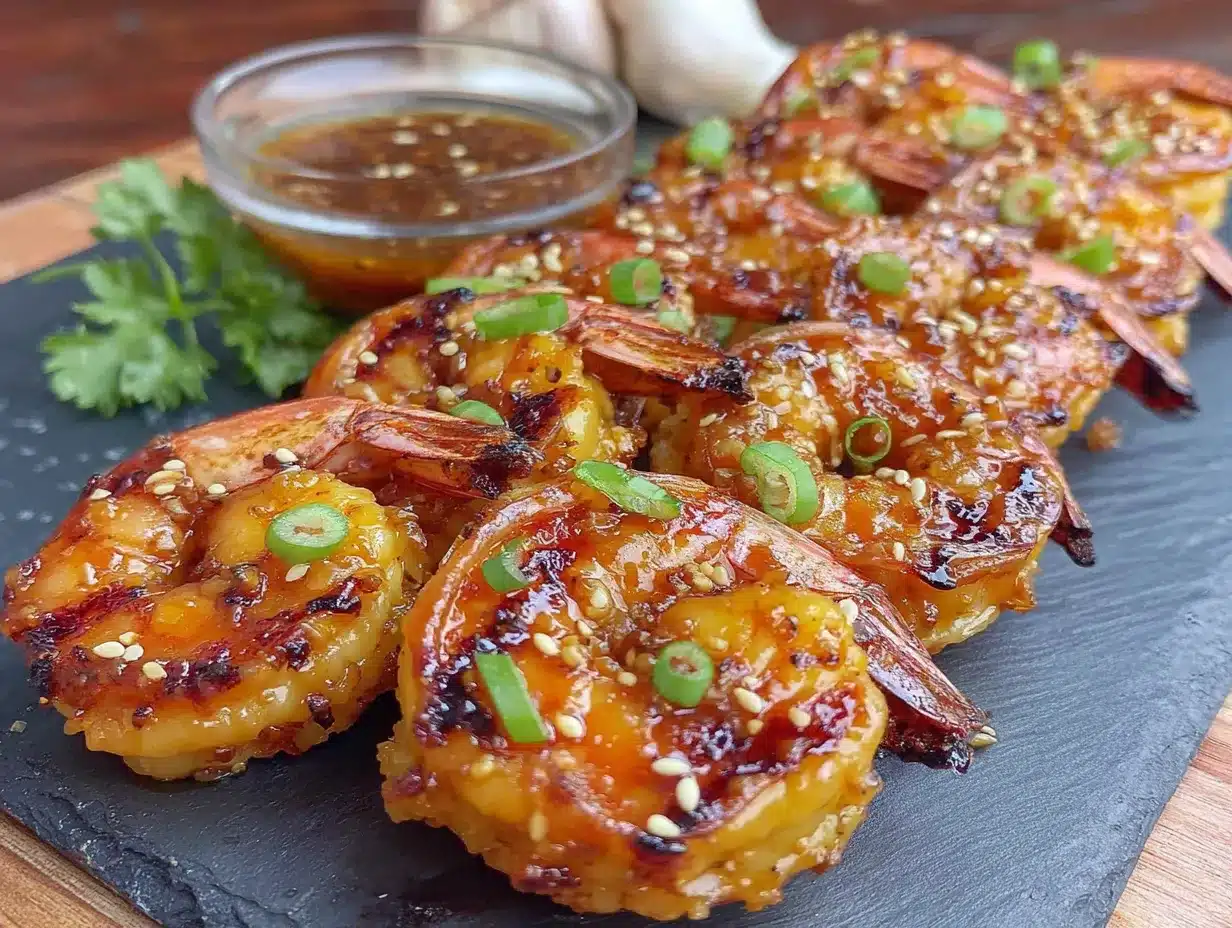
These skewers come together fast, so have everything ready before you start. Trust me on this one—the cooking time is so short that you won’t have time to prep once things hit the grill.
- Soak your wooden skewers in water for at least 20 minutes. If you’re using metal skewers, skip this step. I’ve forgotten to soak them before and ended up with charred sticks that snapped in half. Learn from my mistakes.
- Make the honey garlic sauce by whisking together the honey, soy sauce, minced garlic, olive oil, rice vinegar, and grated ginger in a medium bowl. Set aside about 2 tablespoons of the sauce for basting later. You’ll use the rest for marinating.
- Prep the shrimp by patting them dry with paper towels. This helps the sauce stick better. If your shrimp are frozen, make sure they’re fully thawed and drained. Wet shrimp won’t hold the glaze well.
- Toss the shrimp in the bowl with the larger portion of sauce. Use your hands or a spatula to coat them evenly. Let them sit for 5 minutes while you heat the grill. Don’t marinate longer than 15 minutes—the acid in the sauce can start to cook the shrimp and make them mushy.
- Thread the shrimp onto the skewers. Push the skewer through the thickest part of each shrimp, about 4-5 shrimp per skewer. Leave a little space between each one so they cook evenly. My kids love helping with this part, even though they usually end up with sauce everywhere.
- Preheat your grill to medium-high heat, about 400°F (200°C). You want it hot enough to sear the shrimp quickly but not so hot that the honey burns. If you’re using a grill pan, heat it over medium-high heat for about 3 minutes.
- Oil the grates lightly using a paper towel dipped in oil and held with tongs. This prevents sticking and helps those beautiful grill marks form.
- Grill the skewers for 2-3 minutes per side. You’ll know they’re ready to flip when the edges turn pink and opaque. The total cooking time is about 4-6 minutes depending on the size of your shrimp. Don’t walk away—these cook fast.
- Brush with reserved sauce during the last minute of cooking. This adds an extra layer of glaze without burning the honey. Watch for flare-ups if the sauce drips onto the flames.
- Remove from the grill immediately when the shrimp are pink and firm to the touch. Overcooked shrimp turn rubbery, so err on the side of underdone. They’ll continue cooking slightly off the heat.
- Garnish with sliced green onions and serve right away. The skewers look beautiful on a platter, and kids love having their own personal stick of food.
The shrimp should look glossy and caramelized when they’re done. If you see black spots forming on the glaze, your heat is too high. Back it off a notch next time. The smell in your kitchen will be incredible—sweet, savory, and slightly smoky.
Cooking Tips & Techniques
I’ve made these skewers enough times to know what can go wrong. Here are the lessons I learned the hard way so you don’t have to.
Don’t overcook the shrimp. This is the number one mistake people make. Shrimp cook in minutes, and they go from perfect to rubbery fast. Watch for the color change—when they turn pink and curl slightly into a C shape, they’re done. If they curl into an O shape, they’re overcooked.
Pat your shrimp dry. Wet shrimp create steam instead of searing. That steam keeps the glaze from sticking and caramelizing properly. Take the extra thirty seconds to blot them with paper towels before adding the sauce.
Use two skewers per row of shrimp. If you’re making larger skewers, threading each shrimp onto two parallel skewers keeps them from spinning when you try to flip them. This is a game-changer for even cooking.
Watch the sugar in the glaze. Honey burns faster than you think. Keep your heat at medium-high, not high, and stay close to the grill. If you see the sauce bubbling too aggressively, move the skewers to a cooler part of the grill.
Let the grill get hot before adding the shrimp. A properly preheated grill gives you those nice sear marks and prevents sticking. Give it a full 10 minutes to heat up if you’re using a gas grill.
Make extra sauce for dipping. I always double the sauce recipe and keep half aside for serving. Kids especially love dipping their skewers into more honey garlic goodness. Just don’t use the raw marinade as a dipping sauce—set some aside before adding the shrimp.
Variations & Adaptations
This recipe is flexible enough to work with different diets and preferences. Here are some ways I’ve adapted it over the years.
Gluten-Free Version: Swap the soy sauce for tamari or coconut aminos. Both work beautifully and the flavor difference is minimal. My sister-in-law has celiac disease, and she loves this version just as much.
Spicy Kick: Add a teaspoon of sriracha or red pepper flakes to the sauce for adults who want heat. I make a separate spicy batch for myself and keep the original for the kids. A little goes a long way.
Chicken Option: Use boneless chicken thighs cut into bite-sized pieces instead of shrimp. The cooking time increases to about 8-10 minutes, and you’ll need to make sure the internal temperature reaches 165°F (74°C). My kids actually prefer this version sometimes.
Vegetable Skewers: Thread chunks of bell pepper, zucchini, and pineapple onto separate skewers and brush with the same sauce. Grill for about 5-7 minutes. Great for Meatless Mondays or feeding vegetarian guests.
Oven Method: On rainy days, I broil the skewers on a lined baking sheet. Place them about 6 inches from the heat source and cook for 4-5 minutes, flipping halfway through. No grill required.
Air Fryer Version: Cook the skewers at 375°F (190°C) for 6-8 minutes, flipping halfway. The glaze gets beautifully caramelized without the risk of burning. This is my go-to when I’m cooking for just myself.
Serving & Storage Suggestions
These skewers are best served hot off the grill, but they’re forgiving enough to work in different situations.
Serving Temperature: Serve immediately while the glaze is still sticky and warm. The shrimp will cool down fast on the plate, so have everything else ready before you pull them off the grill.
What to Serve With: Steamed rice or coconut rice soaks up the extra sauce beautifully. A simple cucumber salad with rice vinegar adds freshness. Steamed broccoli or snap peas round out the meal without much effort. For a fun twist, serve with toothpicks as appetizers at your next gathering.
Storage: Remove the shrimp from the skewers and store in an airtight container in the refrigerator for up to 3 days. The texture won’t be as snappy as fresh, but the flavor holds up well.
Reheating: Reheat gently in a skillet over medium-low heat for about 2 minutes. The microwave works in a pinch but can make the shrimp rubbery. I’ve also eaten them cold straight from the fridge on busy days—they’re surprisingly good that way.
Freezing: Cooked shrimp skewers freeze well for up to 2 months. Cool completely, then wrap tightly in plastic wrap and foil. Thaw in the refrigerator overnight and reheat gently. The sauce may lose some of its gloss, but the flavor stays great.
The flavors actually meld together more overnight, so leftovers make excellent lunch the next day. My husband packs them with rice for work and says they’re the envy of the break room.
Nutritional Information & Benefits
These skewers pack a surprising nutritional punch for how indulgent they taste. Here’s a rough breakdown per serving (about 4-5 shrimp):
- Calories: Approximately 250-280
- Protein: 24 grams
- Carbohydrates: 18 grams
- Fat: 8 grams
- Fiber: 0 grams
- Sugar: 15 grams (mostly from honey)
Shrimp are an excellent source of lean protein, which helps keep kids full and focused. They’re also rich in selenium, vitamin B12, and iodine—nutrients that support thyroid function and brain health. The honey provides quick energy, while garlic offers anti-inflammatory benefits. This recipe is naturally low in saturated fat and can be made gluten-free with a simple swap.
If you’re watching sugar intake, you can reduce the honey to 1/4 cup and add an extra splash of rice vinegar to balance the flavor. The dish still tastes sweet enough for kids but cuts back on carbs. For a lower-sodium option, use low-sodium soy sauce and skip the added salt.
This recipe is dairy-free, nut-free, and egg-free, making it suitable for many common dietary restrictions. Always check your specific ingredient labels if you’re cooking for someone with allergies.
Conclusion
These kid-friendly honey garlic grilled shrimp skewers have become a staple in our house for a reason. They’re fast, affordable, and they actually get my kids excited about dinner. That’s no small feat in a household where chicken nuggets used to be the only guaranteed win. The sweet glaze, the quick cooking time, and the fun of eating off a stick make this meal feel like a treat without blowing your grocery budget.
I love that this recipe adapts to whatever you have on hand. Swap in chicken, add vegetables, or turn up the heat for the adults. It’s forgiving enough for beginner cooks but impressive enough for company. Frank the plumber would probably be proud that his grandkids’ favorite recipe found its way into so many other kitchens.
Give these skewers a try on your next busy weeknight. I promise the cleanup is minimal, the smiles are guaranteed, and you’ll feel like a dinner hero without spending hours in the kitchen. If you make them, let me know how your family liked them—I love hearing about other people’s dinner table victories.
Frequently Asked Questions
Can I use frozen shrimp for this recipe?
Absolutely. Just thaw them completely and pat them dry before marinating. Frozen shrimp work just as well as fresh, and they’re often more budget-friendly. Look for raw, peeled, and deveined frozen shrimp to save prep time.
How do I prevent the honey from burning on the grill?
Keep your grill at medium-high heat, not high. Watch the skewers closely and flip them after 2-3 minutes. If you see dark spots forming, move the skewers to a cooler part of the grill. Brushing on extra sauce only during the last minute also helps prevent burning.
Can I make these skewers ahead of time?
You can marinate the shrimp up to 15 minutes ahead, but don’t go longer or the texture will suffer. Cooked skewers can be refrigerated for up to 3 days and reheated gently. They’re great for meal prep lunches.
What if I don’t have a grill?
No problem. Use a grill pan on the stove, broil them in the oven, or cook them in an air fryer. The flavor will be slightly different without the smoky char, but the honey garlic glaze is delicious no matter how you cook it.
How do I get my kids to eat shrimp if they’re picky?
Start by letting them help thread the skewers—kids are more likely to eat food they helped prepare. The sweet honey garlic flavor is familiar and appealing to most children. You can also cut the shrimp into smaller pieces and serve with extra dipping sauce on the side.
Pin This Recipe!
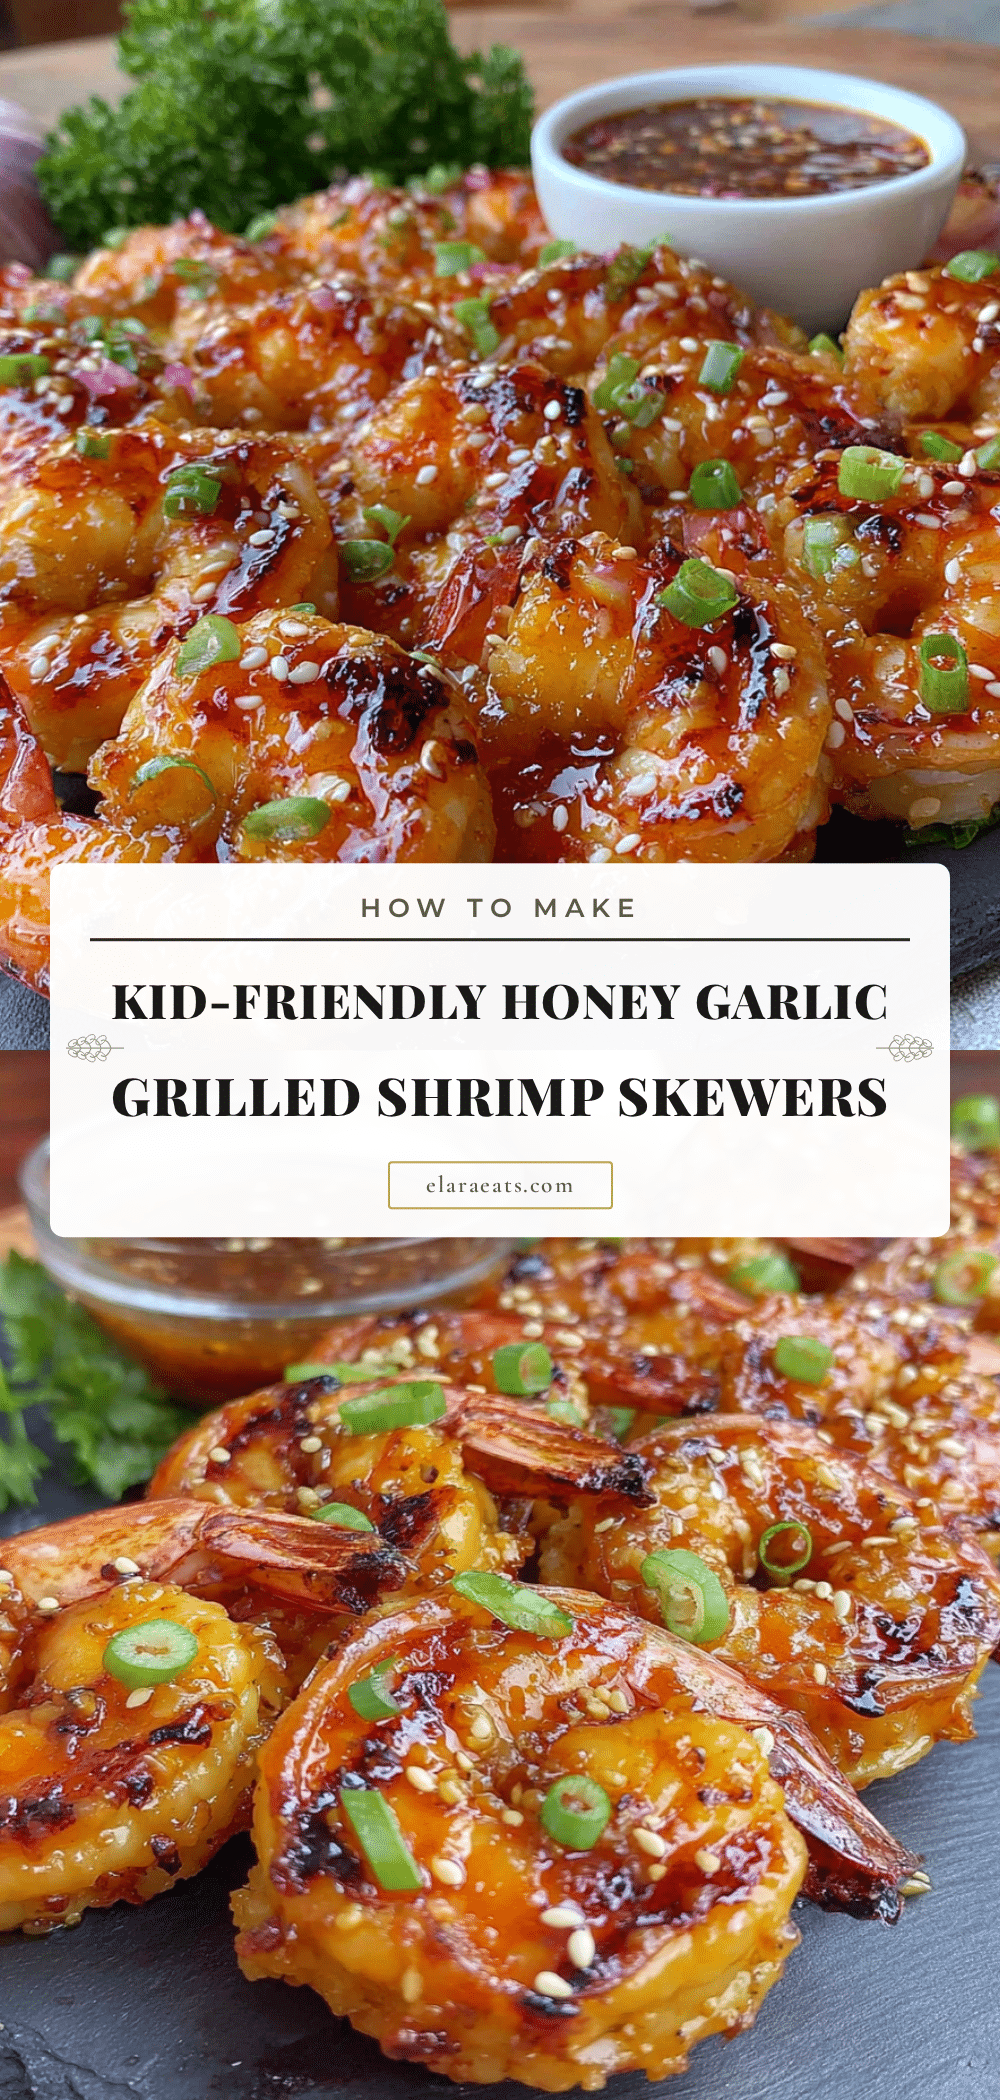
Kid Friendly Honey Garlic Grilled Shrimp Skewers (Easy 15-Minute Meal)
These kid-friendly honey garlic grilled shrimp skewers are a quick and easy 15-minute meal that wins over picky eaters with a sweet and savory glaze. Perfect for busy weeknights, they’re made with simple ingredients and guaranteed to get everyone asking for seconds.
- Prep Time: 10 minutes
- Cook Time: 5 minutes
- Total Time: 15 minutes
- Yield: 4 servings 1x
- Category: Main Course
- Cuisine: American
Ingredients
- 1 pound raw large shrimp, peeled and deveined (21–25 count per pound)
- 1/3 cup honey (110 grams)
- 3 tablespoons low-sodium soy sauce (45 ml)
- 4 cloves garlic, minced (about 2 teaspoons)
- 2 tablespoons olive oil (30 ml)
- 1 tablespoon rice vinegar (15 ml)
- 1 teaspoon fresh ginger, grated (2 grams, optional)
- 8–10 wooden skewers, soaked in water for 20 minutes
- Green onions, sliced (for garnish)
- Salt and pepper to taste
Instructions
- Soak wooden skewers in water for at least 20 minutes. If using metal skewers, skip this step.
- Make the honey garlic sauce by whisking together honey, soy sauce, minced garlic, olive oil, rice vinegar, and grated ginger in a medium bowl. Set aside about 2 tablespoons of the sauce for basting later.
- Prep the shrimp by patting them dry with paper towels. If frozen, ensure they are fully thawed and drained.
- Toss the shrimp in the bowl with the larger portion of sauce. Use your hands or a spatula to coat evenly. Let sit for 5 minutes while heating the grill. Do not marinate longer than 15 minutes.
- Thread the shrimp onto the skewers, pushing the skewer through the thickest part of each shrimp, about 4-5 shrimp per skewer. Leave a little space between each one.
- Preheat grill to medium-high heat, about 400°F (200°C). If using a grill pan, heat over medium-high heat for about 3 minutes.
- Lightly oil the grates using a paper towel dipped in oil and held with tongs.
- Grill the skewers for 2-3 minutes per side, until the edges turn pink and opaque. Total cooking time is about 4-6 minutes.
- Brush with reserved sauce during the last minute of cooking.
- Remove from the grill immediately when shrimp are pink and firm to the touch.
- Garnish with sliced green onions and serve right away.
Notes
Don’t overcook the shrimp; they are done when pink and curled into a C shape. Pat shrimp dry for better glaze adhesion. Use two skewers per row of shrimp to prevent spinning. Watch the sugar in the glaze to prevent burning. Make extra sauce for dipping. For gluten-free, use tamari or coconut aminos instead of soy sauce.
Nutrition
- Serving Size: 4-5 shrimp per servi
- Calories: 265
- Sugar: 15
- Sodium: 600
- Fat: 8
- Saturated Fat: 1
- Carbohydrates: 18
- Protein: 24
Keywords: honey garlic shrimp, grilled shrimp skewers, kid-friendly shrimp, easy shrimp recipe, 15-minute meal, weeknight dinner, picky eater recipe


