Love this? Save it for later!
Share the inspiration with your friends
My nephew asked why I couldn’t just use crescent roll dough instead of making homemade pastry for our Halloween party snacks. I started to explain why that wouldn’t work — then stopped. Honestly, I had no good reason. I’d just always done it the hard way, assuming store-bought dough would turn out soggy or weird. But watching his seven-year-old face scrunch up in confusion made me realize I was being stubborn for no reason. So I grabbed a can of crescent rolls from the fridge, and let me tell you — it was a total game changer.
That first batch of mummy hot dogs came out of the oven looking ridiculous in the best way. The dough puffed up perfectly, the “bandages” stretched just right, and the little mustard eyes stared back at us like tiny undead soldiers. I mean, we stood there laughing at how silly they looked for a solid five minutes before anyone even took a bite. And the taste? Buttery, flaky, salty — everything you want from a wrapped hot dog, but somehow better because it came from a can of dough I almost talked myself out of using.
Maybe you’ve been there too — overcomplicating something that really doesn’t need to be complicated. That’s exactly what happened here. I spent years making these from scratch, rolling out dough at 10 PM, covered in flour, questioning my life choices. Then a kid with zero cooking experience showed me the obvious answer in about three seconds. These easy mummy hot dogs have become our official Halloween tradition now, and I make them exactly that way every single time. No flour, no rolling pin, no regrets. Just buttery little mummies that disappear before the first movie even starts.
Why You’ll Love This Recipe
These mummy hot dogs are the kind of recipe that makes you look like a Halloween hero with almost zero effort. I’ve tested this with four different types of dough over the years, and the crescent roll version wins every single time for texture, taste, and sheer simplicity. Here’s why you’re going to fall for them too:
- Quick & Easy: Ready in under 25 minutes from start to finish. Perfect for last-minute Halloween parties or when the kids suddenly announce they want to bring treats to school tomorrow.
- Simple Ingredients: You need exactly four things — hot dogs, crescent roll dough, mustard, and an egg for washing. That’s it. No specialty stores required.
- Perfect for Parties: These little guys are the life of any Halloween gathering. Kids go crazy for them, and adults secretly love them too (I’ve caught more than a few parents sneaking seconds).
- Crowd-Pleaser: I’ve brought these to potlucks, classroom parties, and neighborhood gatherings. They always disappear first, even before the candy.
- Unbelievably Fun: The look on people’s faces when they see a plate of hot dogs wrapped like mummies is pure gold. It’s silly, it’s delicious, and it works.
What makes this version different from other mummy hot dog recipes? It’s the technique. Most recipes tell you to wrap the dough in a single layer, but I’ve found that leaving small gaps between the strips creates that authentic “mummy” look. The exposed hot dog bits get slightly browned and crispy, which adds this amazing texture contrast against the soft, buttery dough. Plus, the mustard eyes stay put better when you add them after baking — trust me on this one. I learned the hard way that putting them on before the oven makes them melt into weird yellow puddles.
This isn’t just another Halloween snack. It’s the one that makes you close your eyes after the first bite because it’s exactly what you wanted — salty, warm, buttery, and wrapped in pure childhood nostalgia. Perfect for movie nights, classroom parties, or turning a regular Tuesday into something a little spooky.
What Ingredients You Will Need
This recipe uses simple, everyday ingredients to create something that feels special without any fuss. Everything is easy to find at any grocery store, and you probably already have most of it in your kitchen right now.
- Hot dogs (8 standard-sized, about 6 inches each) — Use your favorite brand. I prefer beef hot dogs for richer flavor, but turkey or chicken work great too. Look for ones that are plump and evenly shaped so the dough wraps smoothly.
- Crescent roll dough (1 can, 8-count) — This is the shortcut that makes everything easy. Pillsbury is my go-to because the dough separates into perfect triangles. The refrigerated section at any grocery store has it. Don’t get the seamless sheet version — you want the one that’s already perforated into triangles.
- Egg (1 large) — For the egg wash that gives the dough that gorgeous golden-brown finish. If you forget, you can brush on a little milk or melted butter instead, but the egg really does make them look bakery-quality.
- Mustard (about 1 tablespoon) — Regular yellow mustard works best for the “eyes.” The bright yellow color pops against the golden dough and looks properly creepy. You can also use ketchup or sriracha for different colored eyes if you’re feeling adventurous.
Optional but recommended:
- Sesame seeds or poppy seeds (1 teaspoon) — Sprinkle these on before baking for extra texture. They make the mummies look like they’ve been wandering through a dusty tomb. Totally optional, but adds a nice touch.
- Ketchup or ranch dressing for dipping — Because everything is better with something to dip it in. My nephew insists on ketchup, but I’m team ranch all the way.
Ingredient tips from my kitchen: If you’re using jumbo hot dogs, you’ll need to cut them in half lengthwise so they cook through properly. For mini cocktail sausages, just cut the dough strips smaller and adjust the baking time down by about 5 minutes. I’ve also made these with vegan hot dogs and dairy-free crescent dough — they work perfectly, just check the dough package for dairy-free options. And here’s a weird one I discovered by accident: refrigerated pizza dough works in a pinch, but it’s denser and doesn’t get as flaky. Stick with crescent rolls if you can find them.
Equipment Needed
The beauty of this recipe is that you don’t need anything fancy. Here’s what you’ll actually use:
- Baking sheet (standard half-sheet pan, about 13×18 inches) — Line it with parchment paper for easy cleanup. I’ve learned the hard way that these little guys can stick if you skip the paper.
- Sharp knife or pizza cutter — For cutting the dough into strips. A pizza cutter makes this incredibly fast and gives you clean edges. A regular knife works fine too, just make sure it’s sharp so you don’t squish the dough.
- Pastry brush — For applying the egg wash. If you don’t have one, just use a clean paper towel or your fingers. I’ve done both and honestly, the finger method works surprisingly well.
- Small bowl — For whisking the egg wash. Any small bowl you have will do.
- Toothpicks (optional) — For holding the dough ends in place if they start to unwrap. I rarely need them, but they’re nice to have on hand for peace of mind.
- Cooling rack (optional but nice) — Lets the hot dogs cool evenly so the bottoms don’t get soggy. If you don’t have one, just transfer them to a plate after a couple minutes on the baking sheet.
I found my favorite baking sheet at a thrift store for three dollars, and it’s been going strong for years. You really don’t need expensive equipment for these mummy hot dogs — just something that fits in your oven and doesn’t warp. If you’re buying new, look for heavy-gauge aluminum sheets that won’t buckle under high heat. And please, for the love of all things spooky, use parchment paper. I forgot once and spent twenty minutes scrubbing baked-on dough off the pan. Never again.
Preparation Method
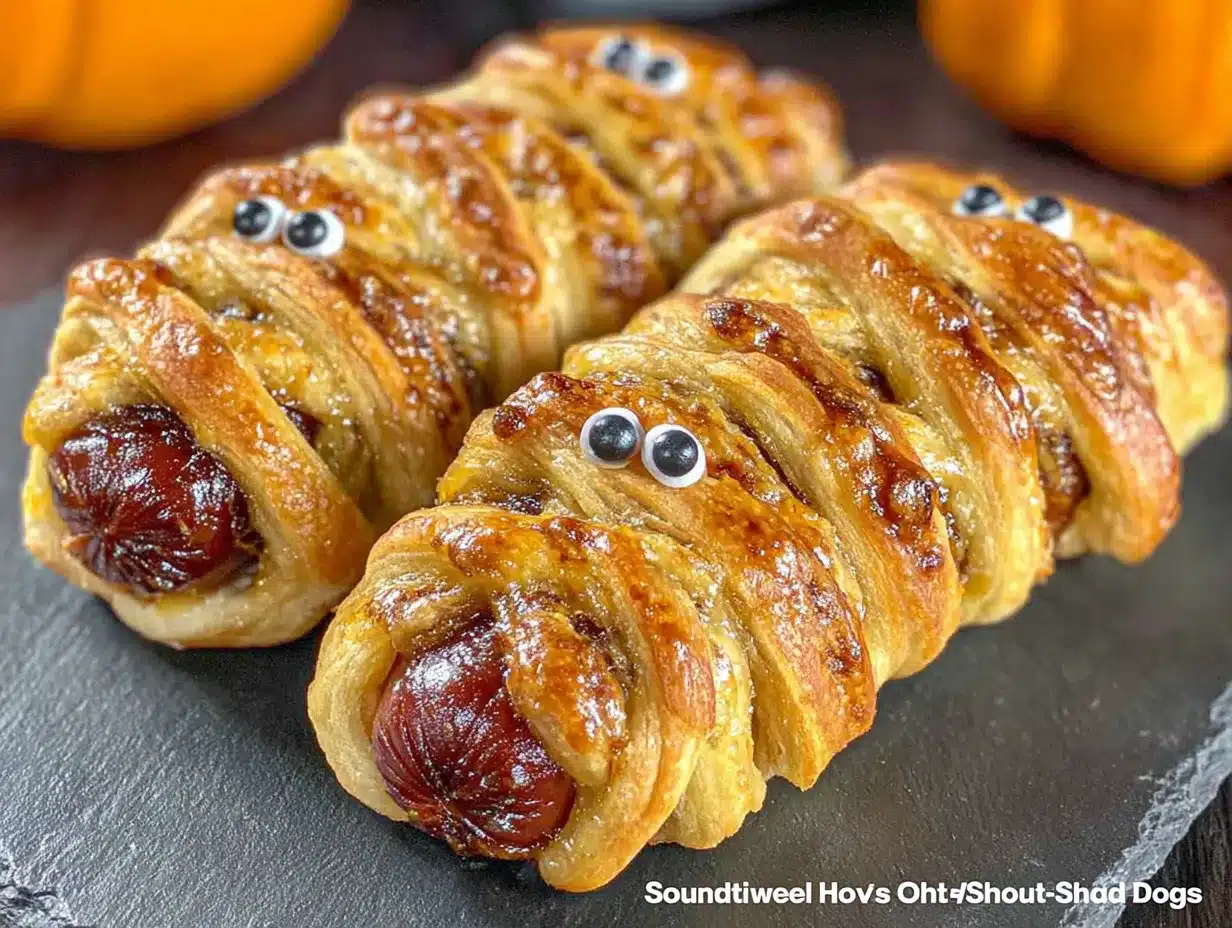
Let me walk you through this step by step. I’ve made these so many times I could do it in my sleep, and I’ve picked up a few tricks along the way to make everything go smoothly.
- Preheat your oven to 375°F (190°C). Line your baking sheet with parchment paper. Getting the oven hot before you start wrapping is crucial — you want that dough to hit the heat immediately so it puffs up properly.
- Prepare your hot dogs. Pat them dry with a paper towel. This helps the dough stick better. If any are curved, gently straighten them with your fingers — it just makes wrapping easier. Leave them whole for standard-sized hot dogs.
- Open the crescent roll can. Pop that tube open — you know the sound. Unroll the dough and separate it into 8 triangles along the perforated lines. Press the seams together gently if they separate.
- Cut the dough into strips. Take each triangle and cut it lengthwise into 3-4 thin strips using your pizza cutter or knife. Aim for strips about 1/4 inch wide. They don’t need to be perfect — actually, uneven strips look more authentic on the mummies. The dough is forgiving, so don’t stress about precision.
- Wrap the hot dogs. Starting at one end, wrap a strip of dough around each hot dog at a slight angle, leaving small gaps between each wrap so you can see the hot dog peeking through. Overlap the strips slightly as you go. When you reach the other end, tuck the last bit of dough underneath. Leave a small space at one end for the “face” — about 1 inch of exposed hot dog.
- Place on the baking sheet. Arrange the wrapped hot dogs about 2 inches apart on your prepared sheet. They don’t spread much, but you want air to circulate around each one for even browning.
- Apply the egg wash. Whisk the egg with 1 tablespoon of water in your small bowl. Brush this mixture over all the exposed dough. Don’t skip this step — it’s what gives them that beautiful golden color that makes them look so appetizing. If you’re using seeds, sprinkle them on now while the egg wash is still wet.
- Bake for 12-15 minutes. Check at the 12-minute mark. You’re looking for deep golden brown dough and hot dogs that are heated through. The edges of the dough should be crispy and flaky. If they need more time, give them another 2-3 minutes but watch carefully — they can go from perfect to burned pretty fast.
- Cool slightly. Let them rest on the baking sheet for 2-3 minutes. This lets the dough set so it doesn’t fall apart when you move them. Transfer to a cooling rack or plate.
- Add the eyes. Dip a toothpick into the mustard and dot two small eyes onto the exposed hot dog at the “face” end. Don’t make them too big — a tiny dab is plenty. The contrast between the bright yellow mustard and the dark hot dog is what makes them look like mummies. Let the mustard set for a minute before serving.
My personal timing tip: If you’re making these for a party, wrap the hot dogs up to 2 hours ahead and keep them in the fridge. Then just brush with egg wash and bake right before serving. This way they come out hot and fresh, and you’re not scrambling at the last minute. I’ve done this for every Halloween party for the past three years and it works like a charm.
Cooking Tips & Techniques
After making these mummy hot dogs more times than I care to count, I’ve collected a few hard-won lessons. Let me save you from my mistakes.
The biggest mistake I see: People wrap the dough too tightly. You want it snug but not stretched. If you pull the dough too tight, it can tear during baking or shrink back and leave huge gaps. Give it a little breathing room — about 1/8 inch of give between the dough and the hot dog. This also creates those lovely little pockets where butter from the dough pools and gets all crispy. That’s the good stuff.
My first batch was a disaster. I wrapped them too loosely and the dough basically unwrapped itself in the oven. I ended up with naked hot dogs surrounded by crispy dough shards. Still tasted fine, but they looked nothing like mummies. Now I always tuck the end piece underneath the hot dog, and if a strip seems especially stubborn, I use a tiny dab of water to “glue” it in place. Works like magic.
Timing strategy for multiple batches: If you’re making a big batch, work in assembly line fashion. Wrap all the hot dogs first, then do the egg wash on all of them at once, then bake. Trying to do it one at a time takes forever and the first ones get cold while you’re still wrapping. Also, if you’re using two baking sheets, rotate them halfway through baking for even results.
The mustard eye trick: Add the eyes after baking, not before. I learned this the hard way when my mustard eyes melted into sad yellow blobs that looked more like hot dog acne than mummy eyes. The heat of the oven makes the mustard spread and lose its shape. Cold mustard on warm hot dogs stays perfectly put and looks way creepier. Also, use a toothpick for precision — squeeze bottles give you way too much mustard and the eyes end up looking like they’re crying.
For consistently perfect results: Take the crescent roll dough out of the fridge about 5 minutes before you start working with it. Cold dough is easier to cut cleanly without squishing. If it gets too warm and sticky, just pop it back in the fridge for a few minutes. And always, always use parchment paper — it’s not just about cleanup, it helps the bottoms brown evenly without burning.
Variations & Adaptations
One of the best things about this recipe is how easy it is to change up. Here are some variations I’ve tried and loved:
Spicy Mummy Dogs: Before wrapping, brush the hot dogs with sriracha or your favorite hot sauce. The heat pairs beautifully with the buttery dough. I made these for a grown-up Halloween party and they were a huge hit. For extra kick, mix a little cayenne pepper into the egg wash.
Cheese-Stuffed Mummies: Cut a slit lengthwise down the center of each hot dog and stuff it with a thin strip of cheddar or mozzarella cheese before wrapping. The cheese gets all melty and oozes out slightly during baking. Just be careful — the cheese gets extremely hot and can burn your mouth if you bite in too fast. Ask me how I know this.
Breakfast Mummies: Swap the hot dogs for breakfast sausages or link sausages. These are perfect for Halloween morning before school or a spooky brunch. I’ve also used fully cooked chicken sausages for a lighter option. The cooking time stays about the same since the sausages are already cooked.
Veggie Mummy Dogs: Use your favorite plant-based hot dogs and check that your crescent roll dough is dairy-free (most are, but always read the label). I’ve tested this with three different brands and they all worked great. The baking time might need an extra minute or two depending on the brand.
Pizza Mummies: Before wrapping, brush the hot dogs with a little pizza sauce and sprinkle with Italian seasoning. Serve with warm marinara for dipping. My nephew calls these “Italian mummies” and requests them year-round, not just for Halloween.
My personal favorite variation: I once made these with jalapeño cheddar hot dogs and wrapped them in dough that I’d sprinkled with everything bagel seasoning. The saltiness, the heat, the flaky dough — it was honestly one of the best things I’ve ever eaten. Just don’t tell my regular mummy hot dogs I said that.
Serving & Storage Suggestions
These mummy hot dogs are best served warm, right after the mustard eyes go on. The contrast between the hot, flaky dough and the cool mustard is part of what makes them so good. Arrange them on a platter with the eyes facing outward so everyone can see their silly little faces. I like to serve them with small bowls of ketchup, ranch dressing, and honey mustard for dipping.
For a full Halloween spread, pair them with some of my other favorites. They go great with spooky Halloween punch for a complete party menu. If you’re doing a full dinner, add a simple side salad or some roasted pumpkin seeds for crunch.
Storage: Leftover mummy hot dogs (if you somehow have any) can be stored in an airtight container in the refrigerator for up to 3 days. The dough will soften over time, so they won’t be as crispy as fresh ones, but they’re still tasty. I don’t recommend freezing them — the texture of the hot dog changes and the dough gets weirdly rubbery.
Reheating: The best way to bring them back to life is in the oven or toaster oven at 350°F for about 5-7 minutes. The microwave works in a pinch (30 seconds on high) but the dough will be soft, not crispy. If you’re reheating a big batch, spread them out on a baking sheet and pop them in the oven — they’ll taste almost as good as fresh.
Flavor development note: These really are best fresh from the oven. The dough is at its peak flakiness, the hot dog is perfectly heated, and the mustard eyes are bright and perky. After a few hours in the fridge, the dough absorbs moisture from the hot dog and loses that crisp texture. So make what you’ll eat, and don’t plan on leftovers lasting long — they never do at my house.
Nutritional Information & Benefits
Let’s be real — these are a treat, not a health food. But here’s what you’re looking at per serving (one mummy hot dog):
| Nutrient | Amount |
|---|---|
| Calories | 220-250 |
| Protein | 8-10g |
| Carbohydrates | 18-22g |
| Fat | 14-16g |
| Saturated Fat | 5-7g |
| Sodium | 500-600mg |
Values will vary based on the specific brands you use. If you’re watching your sodium, look for lower-sodium hot dogs and check the crescent roll package — some brands have significantly less salt than others.
A few health notes: Hot dogs do provide protein and iron, and the crescent roll dough gives you carbohydrates for quick energy. Not exactly a superfood, but for a fun Halloween treat, it’s reasonable. If you want to make them a little lighter, use turkey or chicken hot dogs and skip the egg wash (just brush with a little milk instead). You’ll save about 40-50 calories per serving.
Personally, I don’t stress about the nutrition numbers on these. Halloween comes once a year, and these mummy hot dogs bring so much joy that a few extra calories seem totally worth it. Balance is everything — enjoy the treats, eat your vegetables the rest of the week, and don’t overthink it.
Frequently Asked Questions
Can I make these ahead of time?
Yes! Wrap the hot dogs up to 2 hours ahead and keep them in the fridge. Add the egg wash and bake right before serving for the best texture. You can also freeze the wrapped, unbaked mummy hot dogs for up to 1 month — just bake from frozen, adding 3-5 minutes to the cooking time.
Why did my dough shrink during baking?
This usually happens when the dough is too cold or too warm. Let it sit at room temperature for about 5 minutes before cutting. Also, avoid stretching the dough as you wrap — gentle wrapping with natural tension works best. If the dough still shrinks, try pressing the ends down firmly on the baking sheet.
Can I use puff pastry instead of crescent rolls?
Absolutely! Puff pastry gives you an even flakier, more buttery result. Thaw the pastry according to package directions, cut it into thin strips, and wrap the same way. Baking time might be slightly longer — check at 15 minutes and add time as needed. The texture is amazing, but it’s a bit more work than crescent rolls.
How do I keep the mustard eyes from smearing?
Let the hot dogs cool for 2-3 minutes before adding the eyes. The mustard will set better on a slightly cooler surface. Use a toothpick to apply tiny dots — squeeze bottles give you too much control. If you’re transporting them, add the eyes right before serving so they stay fresh and clean.
My kids are picky eaters. Will they like these?
In my experience, even the pickiest kids go crazy for these. The fun mummy look makes them exciting, and the familiar hot dog flavor is comforting. I’ve served these to kids who “don’t like hot dogs” and watched them eat three. Something about the wrapping makes them feel like a totally different food. Plus, kids love helping with the wrapping part — it’s a great way to get them involved in the kitchen.
Conclusion
These easy mummy hot dogs have become my go-to Halloween recipe for a reason. They’re simple enough for a weeknight, fun enough for a party, and delicious enough that nobody cares how easy they were to make. The combination of buttery, flaky dough wrapped around a salty hot dog, with those silly little mustard eyes staring back at you — it’s pure Halloween magic in the best possible way.
I hope you give these a try and make them your own. Maybe you’ll add cheese, or go spicy, or find your own twist that makes them special. That’s the beauty of a simple recipe — there’s so much room to play. And honestly, the imperfect ones are always the most fun. The mummy with the lopsided eyes, the one that unwrapped a little, the one that got extra golden brown — they all taste amazing and they all make people smile.
If you make these, I’d love to hear about it. Drop a comment below and tell me how they turned out, what variations you tried, or just share your best Halloween party story. And if you’re looking for more spooky snack ideas, don’t miss my spiderweb dip recipe — it’s the perfect partner for these little mummies. Happy Halloween, and happy snacking!
Pin This Recipe!
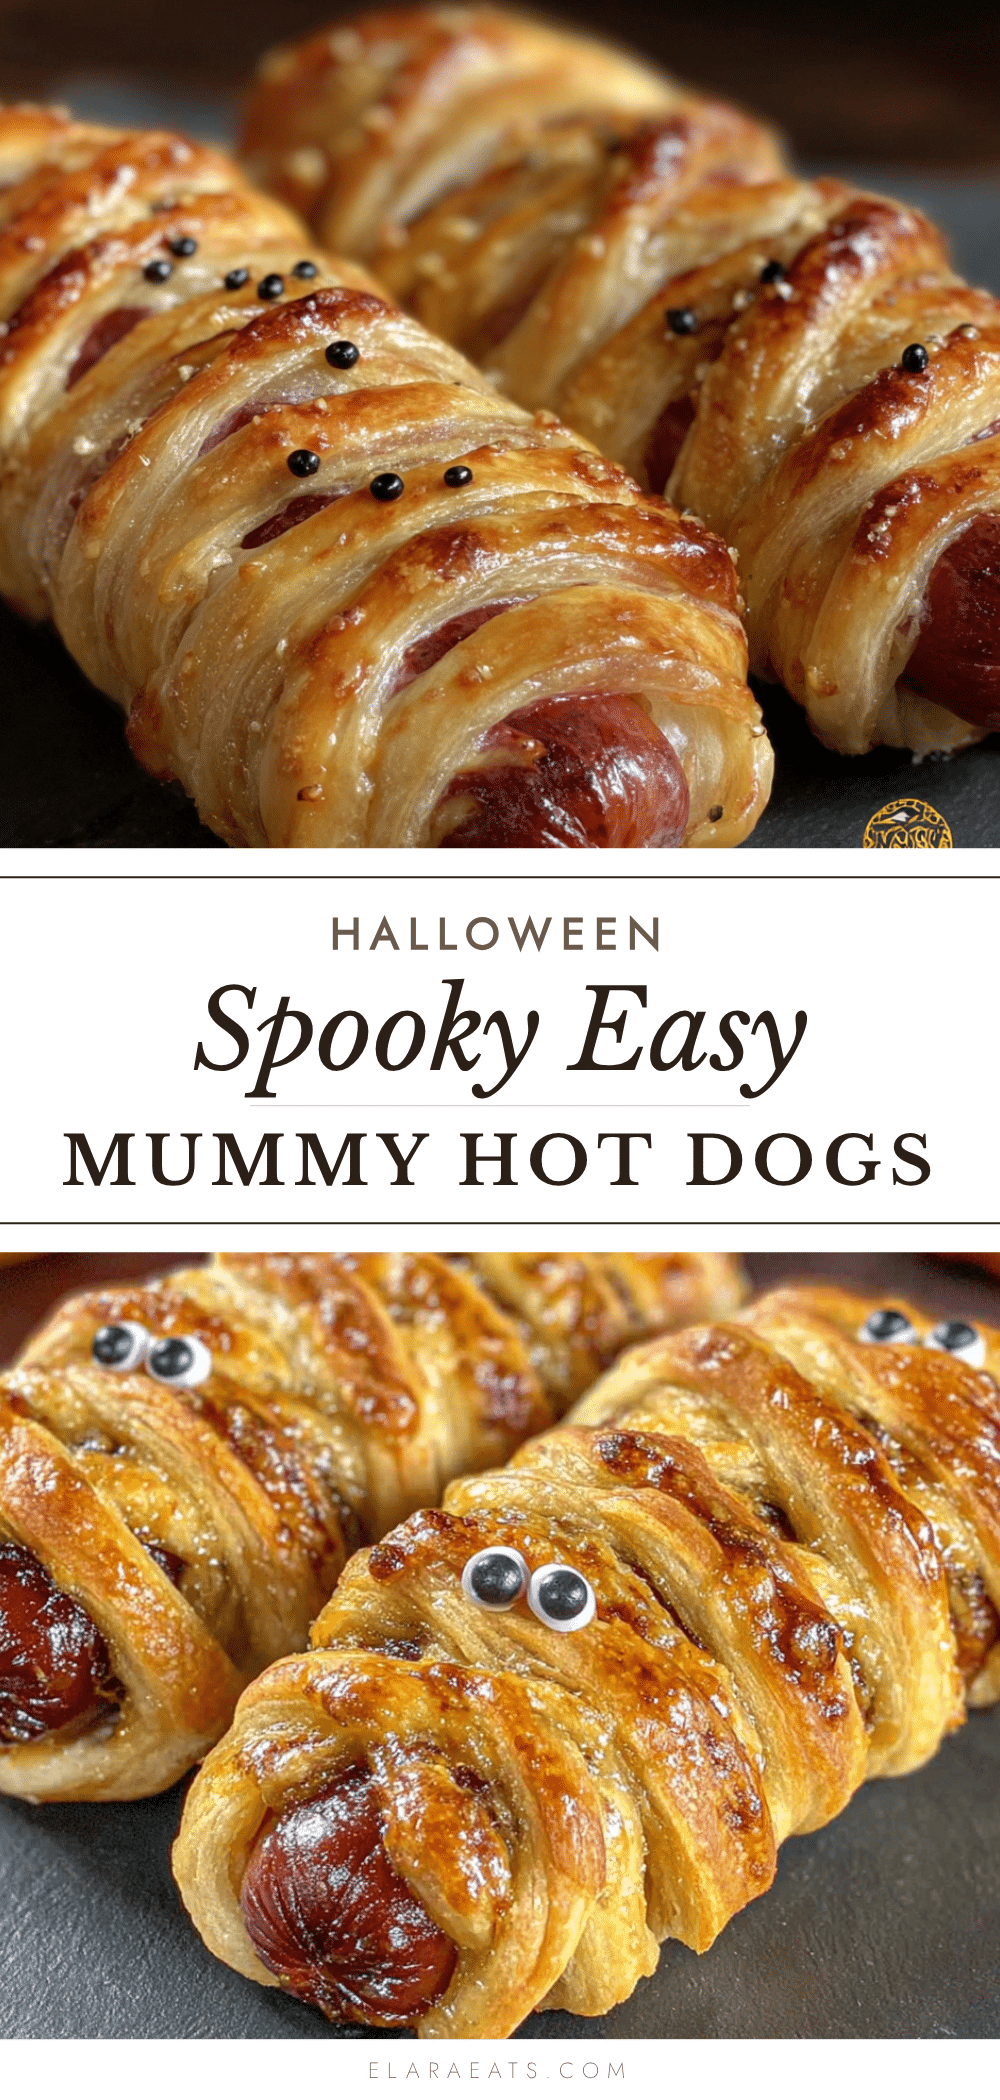
Easy Mummy Hot Dogs: Best Halloween Party Snack
These easy mummy hot dogs are the ultimate Halloween party snack, made with just four simple ingredients and ready in under 25 minutes. Buttery crescent roll dough wraps around salty hot dogs, with mustard eyes that make them look adorably spooky.
- Prep Time: 10 minutes
- Cook Time: 15 minutes
- Total Time: 25 minutes
- Yield: 8 servings 1x
- Category: Appetizer
- Cuisine: American
Ingredients
- 8 standard-sized hot dogs (about 6 inches each)
- 1 can (8-count) crescent roll dough
- 1 large egg (for egg wash)
- 1 tablespoon yellow mustard (for eyes)
- 1 teaspoon sesame seeds or poppy seeds (optional)
- Ketchup or ranch dressing for dipping (optional)
Instructions
- Preheat your oven to 375°F (190°C). Line a baking sheet with parchment paper.
- Pat the hot dogs dry with a paper towel. Gently straighten any curved hot dogs with your fingers.
- Open the crescent roll can, unroll the dough, and separate it into 8 triangles along the perforated lines.
- Using a sharp knife or pizza cutter, cut each triangle lengthwise into 3-4 thin strips, about 1/4 inch wide.
- Starting at one end, wrap a strip of dough around each hot dog at a slight angle, leaving small gaps between wraps so the hot dog peeks through. Overlap strips slightly as you go. Tuck the last bit of dough underneath. Leave about 1 inch of hot dog exposed at one end for the face.
- Place the wrapped hot dogs about 2 inches apart on the prepared baking sheet.
- Whisk the egg with 1 tablespoon of water in a small bowl. Brush the egg wash over all exposed dough. If using seeds, sprinkle them on now.
- Bake for 12-15 minutes, until the dough is deep golden brown and the hot dogs are heated through. Check at 12 minutes.
- Let the mummy hot dogs rest on the baking sheet for 2-3 minutes, then transfer to a cooling rack or plate.
- Dip a toothpick into the mustard and dot two small eyes onto the exposed hot dog at the face end. Let the mustard set for a minute before serving.
Notes
For best results, add mustard eyes after baking to prevent melting. Wrap hot dogs up to 2 hours ahead and refrigerate, then brush with egg wash and bake before serving. For jumbo hot dogs, cut in half lengthwise. For mini cocktail sausages, cut dough strips smaller and reduce baking time by 5 minutes. Leftovers can be stored in an airtight container in the refrigerator for up to 3 days; reheat in the oven at 350°F for 5-7 minutes for best texture.
Nutrition
- Serving Size: 1 mummy hot dog
- Calories: 235
- Sugar: 3
- Sodium: 550
- Fat: 15
- Saturated Fat: 6
- Carbohydrates: 20
- Protein: 9
Keywords: mummy hot dogs, Halloween snack, easy Halloween recipe, crescent roll hot dogs, spooky appetizer, party food, kid-friendly Halloween


