Love this? Save it for later!
Share the inspiration with your friends
I was standing in line at the hardware store, of all places, holding a squeaky new garbage disposal and trying to remember if I needed Teflon tape. The guy ahead of me—let’s call him Dave, because that was his name on his work shirt—turned around and squinted at my shopping cart. “You’re hosting something big,” he said. It wasn’t a question. I looked down at my cart: a bulk bag of tortilla chips, three kinds of cheese, a can of black beans, and a jar of pickled jalapeños. I guess the evidence was pretty damning. I laughed and admitted I was stressing about a game day party I’d volunteered to host. That’s when Dave, a man I’d never met, started telling me about his loaded nacho bar.
Honestly, I almost didn’t listen. I was in a hurry, my garbage disposal was dripping through the plastic bag, and I had a mental list of forty-seven things to do. But Dave was insistent. He talked about layering, about the cheese sauce his wife refused to share the recipe for, about the time he forgot the beans and his friends never let him forget it. He scribbled a few notes on a receipt from his pocket. I took it home, shoved it in a drawer, and forgot about it for three days. Then, the morning of the game, I found it again and figured, why not?
That scribbled-upon receipt changed my entire approach to game day food. This isn’t just a pile of chips with some melted cheese thrown in the microwave—no, this is a strategic, crowd-feeding, flavor-packed operation. The best loaded nacho bar for game day is about giving people choices, but also guiding them toward perfection. It’s about having a system so you’re not stuck in the kitchen while the touchdown happens. Maybe you’ve been there—frantic, with a burnt pot and a cold appetizer. I know I have. But this recipe? It’s the one that lets you sit down, grab a plate, and actually watch the game. It’s the one Dave, the hardware store prophet, swore by. And after making it a dozen times, I get it. I really get it.
Why You’ll Love This Recipe
Let’s be real for a second. Game day food should be fun, not a source of stress. This loaded nacho bar is designed from the ground up to be the MVP of your party spread. I’ve tested this setup for everything from Super Bowl blowouts to casual Saturday afternoon games, and it never, ever lets me down.
- Quick & Easy: The entire bar comes together in under 30 minutes. You can prep the toppings while the meat browns, and the cheese sauce takes about five minutes flat. It’s faster than ordering delivery.
- Simple Ingredients: No fancy grocery trips needed. Ground beef, cheese, beans, chips—these are things you probably already have in your pantry or can grab in one aisle at the store.
- Perfect for Game Day: This isn’t just a recipe; it’s an experience. People love building their own plates. It’s interactive, it’s messy, and it’s exactly what you want when you’re cheering for your team.
- Crowd-Pleaser: I have yet to meet a person who doesn’t love a good nacho. Kids, adults, picky eaters—everyone finds something to love. It’s the safest bet you can make for a hungry crowd.
- Unbelievably Delicious: This isn’t your average nacho. The secret is in the layering and the homemade cheese sauce. It’s rich, it’s creamy, and it coats every single chip perfectly. No dry chips allowed here.
What makes this recipe different from every other nacho recipe on the internet? It’s the method. I’m not just throwing chips on a tray and hoping for the best. I’m using a technique that ensures every chip gets a little bit of everything. There’s a specific way to layer the meat and beans so they don’t make the chips soggy. There’s a trick to the cheese sauce that keeps it smooth and dippable for the whole game. This is the version I’ve perfected after years of trial and error. It’s the one where people go back for thirds. It’s the one where the plate comes back empty. Honestly, it’s the kind of recipe that makes you look like a hero in the kitchen with very little actual effort. And isn’t that what we all want on game day?
What Ingredients You Will Need
This recipe uses simple, wholesome ingredients to deliver bold, crowd-pleasing flavor. The beauty of a nacho bar is that you can scale it up or down based on how many people you’re feeding. Here’s what you’ll need to build the ultimate spread.
- For the Seasoned Beef:
- 1 lb (450g) ground beef (80/20 is ideal for flavor, but you can use lean)
- 1 tablespoon (15ml) olive oil
- 1 small yellow onion, finely diced (about 1/2 cup)
- 2 cloves garlic, minced
- 1 packet (1 oz or 28g) taco seasoning (I prefer the mild variety for a crowd, or use homemade)
- 1/2 cup (120ml) water
- For the Ultimate Cheese Sauce:
- 2 tablespoons (28g) unsalted butter
- 2 tablespoons (16g) all-purpose flour
- 1 cup (240ml) whole milk (warm, for smoother sauce)
- 8 oz (225g) sharp cheddar cheese, freshly shredded (please, for the love of all things cheesy, shred it yourself—the pre-shredded stuff has anti-caking agents that ruin the texture)
- 4 oz (115g) Monterey Jack cheese, freshly shredded
- 1/4 teaspoon (1.25g) cumin
- 1/4 teaspoon (1.25g) smoked paprika
- Salt and pepper to taste
- For the Nacho Base & Toppings Bar:
- 1 large bag (13-16 oz or 370-450g) sturdy tortilla chips (restaurant-style are best—they hold up better)
- 1 can (15 oz or 425g) black beans, drained and rinsed
- 1 can (15 oz or 425g) pinto beans, drained and rinsed
- 1 cup (150g) fresh or frozen corn kernels
- 1 large tomato, diced
- 1 avocado, diced (toss with a little lime juice to prevent browning)
- 1/2 cup (80g) pickled jalapeños (or more, if you like heat)
- 1/2 cup (120ml) sour cream
- 1/2 cup (120ml) salsa (your favorite kind—restaurant-style or chunky)
- 1/4 cup (15g) fresh cilantro, chopped
- 1 lime, cut into wedges
- Optional: sliced black olives, shredded lettuce, diced red onion
A few notes on ingredients. For the ground beef, I really do recommend 80/20. It has enough fat to stay juicy and flavorful without making the nachos greasy. If you’re using lean ground beef, add a little extra olive oil when cooking. For the cheese sauce, whole milk makes a huge difference. It creates a richer, creamier sauce that doesn’t break. I’ve tried this with 2% milk, and it works, but it’s just not as luxurious. And please, I beg you, shred your own cheese. It melts so much better. The pre-shredded bag stuff is coated in cellulose, which stops it from clumping in the bag but also stops it from turning into a silky sauce. Trust me on this one.
Equipment Needed
You don’t need a professional kitchen to pull this off. Most of this stuff you probably already have. Here’s what you’ll need to make the best loaded nacho bar for game day.
- Large skillet or frying pan: For browning the beef. A 12-inch skillet works perfectly. Cast iron is great for even heat, but non-stick works fine too.
- Medium saucepan: For the cheese sauce. You want something with a heavy bottom to prevent scorching.
- Whisk: Essential for a smooth cheese sauce. A silicone whisk is nice because it won’t scratch your pan.
- Cutting board and sharp knife: For dicing onions, tomatoes, and avocados. A dull knife is a recipe for frustration.
- Large baking sheet or two: For the final assembly. A half-sheet pan (18×13 inches) is the perfect size for a big batch. Line it with foil for easy cleanup.
- Small bowls or ramekins: For serving the toppings. This makes the “bar” part of the nacho bar work. You can use little cereal bowls or even small Mason jars.
- Measuring cups and spoons: For accuracy.
- Grater: For shredding your own cheese. A box grater is a workhorse, but a Microplane works in a pinch.
If you don’t have a baking sheet, a large oven-safe dish or even a cast iron skillet can work for the final bake. Just make sure it’s oven-safe. For the cheese sauce, if you don’t have a whisk, you can use a fork, but you’ll be there a while. Honestly, a whisk is a good investment—they cost like three dollars. Also, a tip from my own experience: use a splatter guard when browning the beef. It saves you from scrattering grease all over your stovetop. I learned that the hard way.
Preparation Method
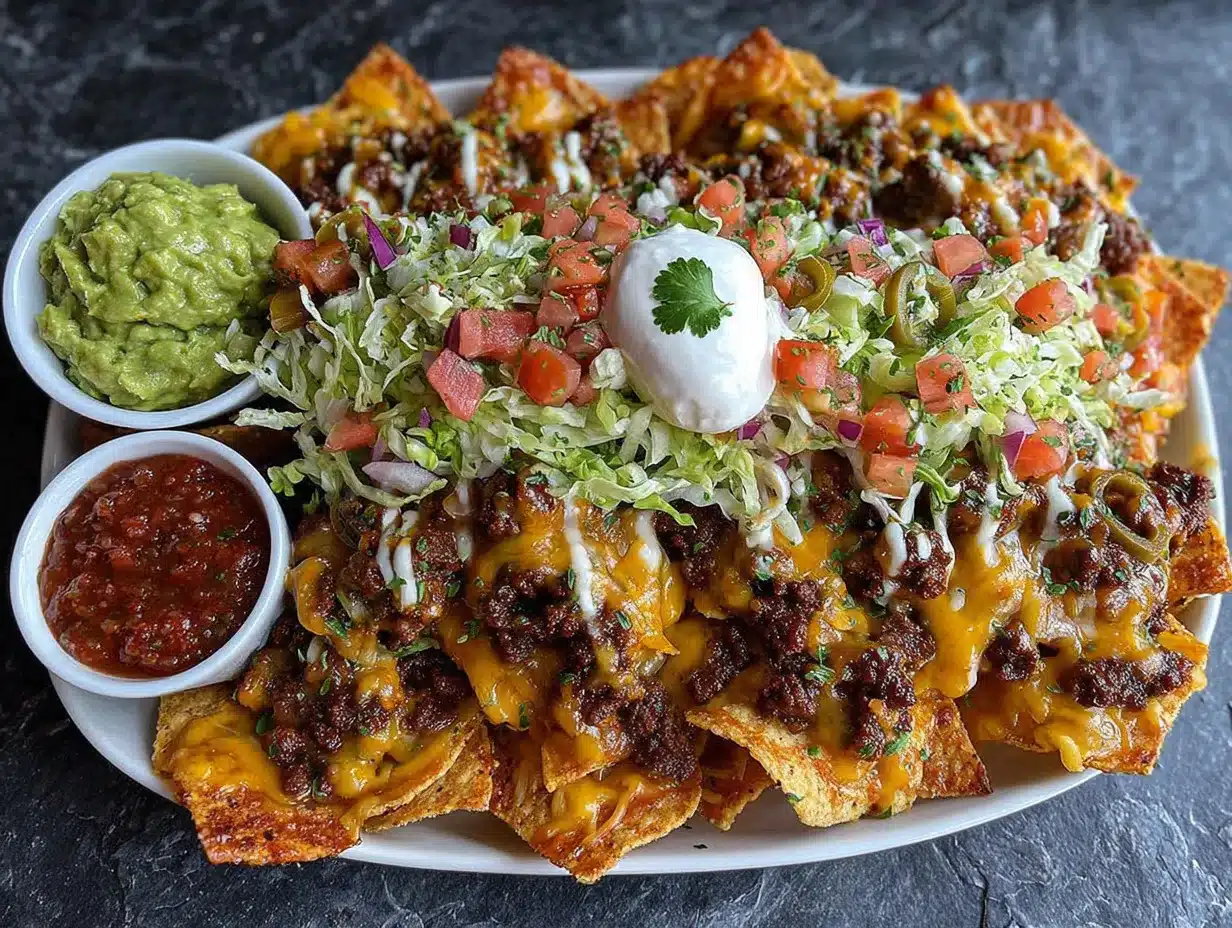
Alright, let’s get cooking. This process is broken down into simple steps. I’ll walk you through it exactly how I do it in my own kitchen. The key is to work efficiently—prep your toppings while the meat cooks, and you’ll have everything ready in no time.
- Preheat the oven to 375°F (190°C). This gives it time to come to temperature while you work. Line a large baking sheet with aluminum foil for easy cleanup. Trust me, you’ll thank me later.
- Cook the seasoned beef. Heat 1 tablespoon of olive oil in a large skillet over medium-high heat. Add the finely diced onion and cook for 2-3 minutes, until it’s softened and translucent. Add the minced garlic and cook for another 30 seconds, just until fragrant—don’t let it burn. Add the ground beef, breaking it up with a wooden spoon. Cook for 5-7 minutes, until it’s browned and no longer pink. Drain off any excess fat (I usually tilt the pan and spoon it out, leaving just a little for flavor). Reduce heat to medium-low. Sprinkle the taco seasoning over the beef, add the 1/2 cup of water, and stir. Let it simmer for 3-4 minutes, until the liquid has mostly evaporated and the beef is coated in a thick, flavorful sauce. Set aside.
- Make the cheese sauce. While the beef is simmering, start the cheese sauce. In a medium saucepan, melt 2 tablespoons of butter over medium heat. Once it’s bubbly, whisk in the 2 tablespoons of flour. Cook for 1 minute, whisking constantly. This is your roux—it should smell a little nutty and look like a thick paste. Slowly pour in the warm milk, whisking constantly to prevent lumps. Continue whisking until the mixture thickens, about 2-3 minutes. It should be thick enough to coat the back of a spoon. Reduce the heat to low. Add the shredded cheddar and Monterey Jack cheese, one handful at a time, whisking until completely melted before adding the next. Stir in the cumin and smoked paprika. Taste and add salt and pepper as needed. Keep the sauce warm over the lowest heat, stirring occasionally. If it gets too thick, add a splash more milk.
- Prep the toppings. This is where you can get your assembly line going. Drain and rinse the black beans and pinto beans. If you’re using frozen corn, thaw it under warm water and drain it well. Dice the tomato and avocado. Chop the cilantro. Slice the lime into wedges. Put each topping into its own small bowl. This makes it easy for people to build their own plates.
- Assemble the nachos (first layer). Spread a single, even layer of tortilla chips on your prepared baking sheet. You want them overlapping slightly but not piled too high. Sprinkle half of the seasoned beef over the chips. Scatter half of the black beans and pinto beans over the meat. Drizzle about 1/3 of the cheese sauce over everything. This base layer ensures every chip gets some goodness.
- Add the second layer. Add another layer of chips on top. Repeat with the remaining beef and beans. Drizzle another 1/3 of the cheese sauce over the top. Reserve the last 1/3 of the cheese sauce for serving.
- Bake the nachos. Place the baking sheet in the preheated oven. Bake for 8-10 minutes, just until the chips are warmed through and the edges are starting to get slightly golden. You don’t want to over-bake them, or the chips on the bottom will burn. The cheese sauce should be bubbly and hot.
- Finish and serve. Remove the baking sheet from the oven. Immediately drizzle the remaining cheese sauce over the top. Scatter the fresh toppings—diced tomato, avocado, corn (if using), and pickled jalapeños. Dollop with sour cream and salsa. Sprinkle with fresh cilantro. Serve immediately with lime wedges on the side.
A quick note on timing: you can prep the beef and cheese sauce up to an hour ahead of time. Just keep the beef warm in a low oven (200°F) and the cheese sauce on the stovetop over very low heat, stirring occasionally. If the cheese sauce thickens too much, whisk in a splash of milk before using. The actual assembly and baking only takes about 15 minutes, so you can do it right before your guests arrive.
Cooking Tips & Techniques
I’ve made this recipe more times than I can count, and I’ve made every mistake in the book so you don’t have to. Here are my best tips for nacho bar success.
Don’t skimp on the cheese sauce. This is the heart of the dish. If your sauce is lumpy, you probably added the cheese too fast or the heat was too high. Always shred your own cheese, add it gradually, and keep the heat low. If disaster strikes and your sauce breaks (it looks greasy and separated), don’t panic. Whisk in a tablespoon of cold milk or a squeeze of lemon juice—it can sometimes bring it back together.
Layer strategically. The biggest mistake people make is just dumping everything on top of a pile of chips. The bottom chips end up bare and sad. By layering the chips, meat, beans, and cheese sauce, you ensure every chip is a perfect bite. It takes an extra two minutes, and it’s absolutely worth it.
Watch the oven time. Nachos go from perfect to burnt in about 30 seconds. Keep an eye on them. You want the cheese bubbly and the chips warm, not dark brown around the edges. If your oven runs hot, check them at the 7-minute mark.
Keep the toppings cold. The fresh toppings—tomato, avocado, sour cream, salsa—should be added after baking. If you bake them, the tomatoes get mushy and the avocado turns into warm paste. Not good. Keep them chilled until the very end.
Multitask like a pro. Start the beef first, then start the cheese sauce while the beef simmers. While those are going, prep your toppings. With a little practice, you can have the entire bar ready in under 20 minutes. I once timed myself—18 minutes and 42 seconds. Not that I’m competitive.
One thing I learned the hard way: I once used way too many chips in the first layer. They were piled so high that the middle chips never got warm, and the ones on the bottom turned into charcoal. A single, even layer on the bottom is key. You want about 2/3 of the bag for the first two layers, and save the rest for people to scoop up the remaining toppings.
Variations & Adaptations
The beauty of a nacho bar is that it’s endlessly customizable. Here are some of my favorite variations to keep things interesting.
Vegetarian Nacho Bar: Skip the ground beef and double up on the beans. Use a mix of black beans, pinto beans, and refried beans. You can also add sautéed bell peppers and onions, or roasted sweet potatoes for extra heartiness. The cheese sauce makes it feel just as indulgent.
Spicy Southwest Nachos: For those who like it hot, add a diced jalapeño (seeds and all) to the beef while it cooks. Use pepper jack cheese in the sauce instead of Monterey Jack. Top with a drizzle of hot sauce or chipotle crema (mix sour cream with adobo sauce from a can of chipotles).
Chicken or Pork Nachos: Swap the ground beef for shredded rotisserie chicken or pulled pork. If using chicken, toss it with a little cumin and chili powder before adding it to the nachos. For pork, a smoky barbecue-style pulled pork works wonderfully. Just make sure it’s not too wet, or it will make the chips soggy.
Breakfast Nachos: Yes, this is a thing, and it’s glorious. Use the same base, but top the baked nachos with a fried or scrambled egg, crumbled bacon or chorizo, and a drizzle of hot sauce. Serve with a side of salsa verde. It’s my go-to for a lazy Sunday morning.
Low-Carb/Gluten-Free Option: Use pork rinds or cheese crisps instead of tortilla chips. The toppings and cheese sauce are naturally gluten-free (just make sure your taco seasoning doesn’t have any hidden wheat flour). You can also skip the chips entirely and serve the toppings over a bed of lettuce for a nacho salad.
I once made a version with ground lamb and feta cheese, inspired by a Greek salad. It was… interesting. Not my best work. Stick with the classics for a crowd. But don’t be afraid to experiment for yourself on a quiet Tuesday night.
Serving & Storage Suggestions
This recipe is best served fresh and hot, right out of the oven. The chips start to soften after about 10-15 minutes, so timing is everything. Here’s how to serve and store it like a pro.
Serving: Bring the baking sheet directly to the table. It makes a great centerpiece. Set out all the small bowls of toppings around it so people can customize their plates. I like to provide small plates or shallow bowls so people can pile things high without everything falling off. Serve with extra napkins—this is a messy, glorious affair.
What to serve with it: A simple side of guacamole and extra chips is always a hit. For drinks, a cold beer or a margarita is the perfect pairing. If you’re keeping it non-alcoholic, a pitcher of limeade or horchata works beautifully. You can also serve it alongside other game day classics like wings or sliders, but honestly, this is usually the main event.
Storage: Leftover nachos are a bit tricky. The chips will be soft, but the flavors are still delicious. Store any leftovers in an airtight container in the refrigerator for up to 2 days. I don’t recommend freezing them—the texture of the cheese sauce and chips will be very sad.
Reheating: The best way to reheat is in the oven, not the microwave. Spread the leftovers on a baking sheet and warm them at 350°F (175°C) for 5-7 minutes. It won’t be as crispy as the first time, but it’ll be close. You can also reheat the components separately—warm the beef and cheese sauce on the stovetop, and use fresh chips. That’s my preferred method for leftovers.
Flavor development: Honestly, the flavors meld together overnight in the fridge. I’ve been known to make extra beef and cheese sauce on purpose, just so I can have a “nachos bowl” the next day—beef, cheese sauce, beans, and fresh chips. It’s a different experience, but a good one.
Nutritional Information & Benefits
Let’s be honest—this is indulgent food. But that doesn’t mean it can’t have some redeeming qualities. Here’s a rough estimate of the nutritional breakdown per serving (assuming 8 generous servings).
- Calories: Approximately 480-520 per serving
- Protein: 22g
- Fat: 28g
- Carbohydrates: 38g
- Fiber: 6g
- Sugar: 5g
- Sodium: 890mg
Health benefits of key ingredients: The black beans and pinto beans are excellent sources of fiber and plant-based protein. They help keep you full and support digestive health. The tomatoes provide vitamin C and lycopene, an antioxidant. Avocado is packed with healthy monounsaturated fats and potassium. Even the cheese has some calcium and protein. It’s not a health food, but it’s not pure junk either.
Dietary considerations: This recipe contains dairy and gluten (from the flour in the cheese sauce and the tortilla chips). For a gluten-free version, use corn tortilla chips and a gluten-free flour blend (or skip the roux and use a cornstarch slurry instead). For a dairy-free version, use a plant-based cheese sauce (I like cashew-based sauces) and dairy-free sour cream. The beef can be swapped for plant-based crumbles for a vegan option.
Potential allergens: Dairy, gluten, and corn (from the chips). Always check your taco seasoning packet for hidden allergens.
My personal take: I believe in balance. Game day is a celebration. You’re not eating this every day. So enjoy it, savor every cheesy, crunchy bite, and don’t feel guilty about it. Pair it with a big salad the next day, and you’re good.
Conclusion
So there you have it—the best loaded nacho bar for game day, born from a chance encounter in a hardware store and perfected through years of trial and error. This is the recipe that lets you be a part of the party, not just a prisoner in the kitchen. It’s forgiving, it’s flexible, and it’s absolutely delicious.
I love this recipe because it’s more than just food—it’s an experience. It’s the sound of people cheering as they build their plates. It’s the little arguments over who gets the last chip with the most cheese. It’s the mess on the coffee table that nobody cares about because everyone is too busy having a good time. That’s what game day is all about, and this nacho bar delivers it every single time.
Now, I want to hear from you. What’s your favorite topping for nachos? Do you have a secret ingredient you swear by? Drop a comment below and let me know. And if you try this recipe, tag me in your photos—I love seeing your creations. Seriously, go make this for your next game day. Your friends will thank you, and you’ll wonder why you ever stressed about party food in the first place. Happy cooking, and go team!
Frequently Asked Questions
Can I make the cheese sauce ahead of time?
Yes! You can make the cheese sauce up to 2 days in advance. Store it in an airtight container in the refrigerator. To reheat, warm it gently in a saucepan over low heat, whisking in a splash of milk to restore the creamy texture. Don’t use the microwave—it tends to break the sauce.
What’s the best way to keep the nachos from getting soggy?
The key is to not over-bake them and to use sturdy chips. Restaurant-style tortilla chips are thicker and hold up better. Also, don’t add the fresh toppings like tomatoes and sour cream until after baking. Moisture is the enemy of crispy nachos.
Can I use pre-shredded cheese for the sauce?
I strongly recommend against it. Pre-shredded cheese is coated with anti-caking agents like cellulose and potato starch, which prevent it from melting smoothly. You’ll end up with a grainy, clumpy sauce. Shredding a block of cheese takes two minutes and makes a world of difference.
How do I scale this recipe for a larger crowd?
This recipe serves about 8 people as a main dish or 12-15 as an appetizer. To double it, use two baking sheets and bake them on separate racks. You can also set up two separate “bars” to avoid crowding. Just double all the ingredients for the beef and cheese sauce.
What if I don’t have taco seasoning?
No problem! You can make your own with spices you probably already have. Mix together 1 tablespoon chili powder, 1 teaspoon cumin, 1 teaspoon paprika, 1/2 teaspoon garlic powder, 1/2 teaspoon onion powder, 1/2 teaspoon oregano, 1/4 teaspoon cayenne (optional), and salt and pepper to taste. It’s actually better than the packet stuff.
Pin This Recipe!
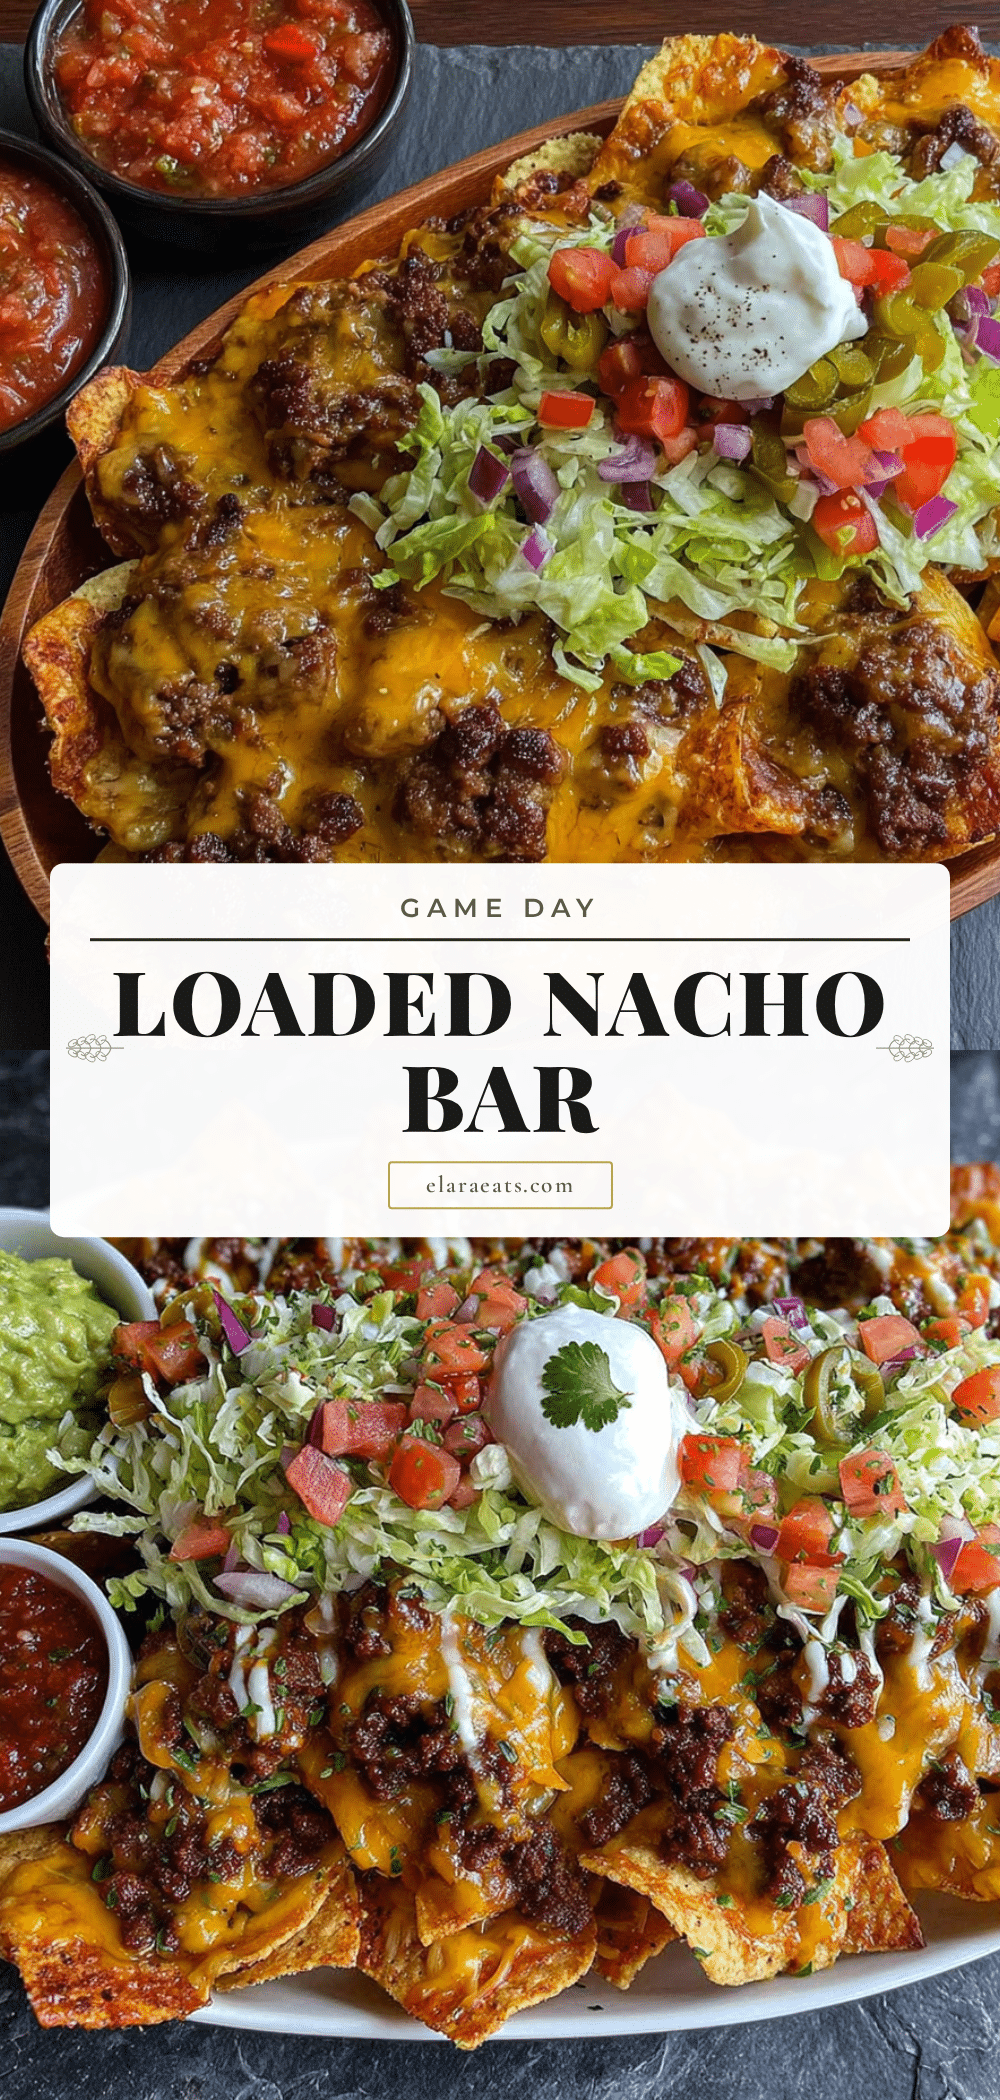
Best Loaded Nacho Bar for Game Day – Easy Crowd-Pleaser
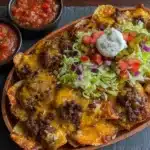
A strategic, crowd-feeding, flavor-packed loaded nacho bar that comes together in under 30 minutes. Perfect for game day, this recipe features seasoned beef, a creamy homemade cheese sauce, and a customizable toppings bar that lets everyone build their perfect plate.
- Prep Time: 15 minutes
- Cook Time: 15 minutes
- Total Time: 30 minutes
- Yield: 8 servings 1x
- Category: Main Course
- Cuisine: Mexican
Ingredients
- 1 lb (450g) ground beef (80/20 is ideal)
- 1 tablespoon (15ml) olive oil
- 1 small yellow onion, finely diced (about 1/2 cup)
- 2 cloves garlic, minced
- 1 packet (1 oz or 28g) taco seasoning (mild variety recommended)
- 1/2 cup (120ml) water
- 2 tablespoons (28g) unsalted butter
- 2 tablespoons (16g) all-purpose flour
- 1 cup (240ml) whole milk (warm)
- 8 oz (225g) sharp cheddar cheese, freshly shredded
- 4 oz (115g) Monterey Jack cheese, freshly shredded
- 1/4 teaspoon (1.25g) cumin
- 1/4 teaspoon (1.25g) smoked paprika
- Salt and pepper to taste
- 1 large bag (13–16 oz or 370-450g) sturdy tortilla chips (restaurant-style)
- 1 can (15 oz or 425g) black beans, drained and rinsed
- 1 can (15 oz or 425g) pinto beans, drained and rinsed
- 1 cup (150g) fresh or frozen corn kernels
- 1 large tomato, diced
- 1 avocado, diced (toss with lime juice to prevent browning)
- 1/2 cup (80g) pickled jalapeños
- 1/2 cup (120ml) sour cream
- 1/2 cup (120ml) salsa
- 1/4 cup (15g) fresh cilantro, chopped
- 1 lime, cut into wedges
- Optional: sliced black olives, shredded lettuce, diced red onion
Instructions
- Preheat the oven to 375°F (190°C). Line a large baking sheet with aluminum foil.
- Cook the seasoned beef: Heat olive oil in a large skillet over medium-high heat. Add diced onion and cook for 2-3 minutes until softened. Add minced garlic and cook for 30 seconds. Add ground beef, breaking it up, and cook for 5-7 minutes until browned. Drain excess fat. Reduce heat to medium-low, add taco seasoning and water, and simmer for 3-4 minutes until liquid mostly evaporates. Set aside.
- Make the cheese sauce: In a medium saucepan, melt butter over medium heat. Whisk in flour and cook for 1 minute. Slowly pour in warm milk, whisking constantly, and cook until thickened (2-3 minutes). Reduce heat to low. Add shredded cheddar and Monterey Jack cheese, one handful at a time, whisking until melted. Stir in cumin and smoked paprika. Season with salt and pepper. Keep warm over low heat.
- Prep the toppings: Drain and rinse beans. Thaw corn if frozen. Dice tomato and avocado. Chop cilantro. Slice lime into wedges. Place each topping in small bowls.
- Assemble the first layer: Spread a single, even layer of tortilla chips on the prepared baking sheet. Sprinkle half of the seasoned beef over the chips. Scatter half of the black beans and pinto beans. Drizzle about 1/3 of the cheese sauce over everything.
- Add the second layer: Add another layer of chips. Repeat with remaining beef and beans. Drizzle another 1/3 of the cheese sauce over the top. Reserve the last 1/3 for serving.
- Bake: Place the baking sheet in the preheated oven and bake for 8-10 minutes, until chips are warmed through and edges are slightly golden.
- Finish and serve: Remove from oven. Immediately drizzle remaining cheese sauce over the top. Scatter fresh toppings (tomato, avocado, corn, pickled jalapeños). Dollop with sour cream and salsa. Sprinkle with cilantro. Serve immediately with lime wedges.
Notes
For best results, shred your own cheese—pre-shredded cheese contains anti-caking agents that prevent smooth melting. Layer chips strategically to ensure every chip gets toppings. Watch the oven time to avoid burning. Add fresh toppings after baking to keep them crisp. The beef and cheese sauce can be made up to an hour ahead and kept warm.
Nutrition
- Serving Size: 1 serving (about 1/8
- Calories: 500
- Sugar: 5
- Sodium: 890
- Fat: 28
- Saturated Fat: 12
- Carbohydrates: 38
- Fiber: 6
- Protein: 22
Keywords: nachos, game day, loaded nachos, nacho bar, party food, easy appetizer, crowd-pleaser