Love this? Save it for later!
Share the inspiration with your friends
There used to be a tiny lunch counter tucked inside an old hardware store on Main Street in my hometown—the kind of place that smelled like sawdust and simmering tomatoes. They made this creamy tomato soup that was pure magic in a mug. When the hardware store closed in 2018, that soup vanished. I mourned it, honestly. I mean, who gets emotional over a lunch counter in a hardware store? Me, apparently. After about twelve tries—some too watery, others weirdly sweet—I finally cracked the code.
Here’s the thing about that soup: it wasn’t fancy. It was just creamy, comforting, and absolutely perfect for dipping a grilled cheese into. And it stayed hot for hours. That last part became my obsession when my oldest started school. You know that feeling when you pack a thermos and pray the food is still warm by lunchtime? I’ve been there. Let me tell you, nothing breaks your heart like opening a thermos to find lukewarm soup your kid won’t touch.
So I spent a whole fall perfecting this easy thermos creamy tomato soup for school. It had to be thick enough not to leak, smooth enough for picky eaters, and sturdy enough to stay piping hot until the lunch bell rang. The day my daughter came home and said her friends were jealous of her soup? That was the day I knew I’d done it. This recipe is the one that finally matched that hardware store magic, and I keep making it because watching my kids actually finish their lunch is a win I’ll never get tired of.
Why You’ll Love This Recipe
I’ve tested this soup more times than I care to admit. Some batches were too thin and turned into a thermos disaster. Others were so thick they were basically tomato paste. But this version? It’s the Goldilocks of school lunch soups.
- Thermos-Friendly Consistency: This soup is thick enough to stay put but smooth enough to sip. No leaks, no spills, no sad lunchroom moments.
- Simple Ingredients: You probably have everything in your pantry right now. Canned tomatoes, butter, onion, a little cream—that’s it. No fancy trips to specialty stores.
- Quick & Easy: From start to finish, this soup comes together in about 30 minutes. You can make it in the morning before school or batch-cook it on Sundays.
- Kid-Approved and Parent-Tested: My kids call this “pink soup” and ask for it weekly. Their friends have started requesting lunch trades. I consider that a parenting win.
- Stays Hot for Hours: The real magic here is the technique. Preheating your thermos and using the right fat content means this soup stays warm until the last spoonful.
- Freezer-Friendly: Make a double batch and freeze individual portions. School mornings just got a whole lot easier.
This isn’t just another tomato soup recipe. It’s the one that makes you close your eyes after that first bite and remember why comfort food exists. It’s the soup that turns a regular Tuesday into something your kids will actually look forward to.
What Ingredients You Will Need
This recipe uses simple, wholesome ingredients to deliver that rich, creamy texture and bold tomato flavor without any fuss. Most of these are pantry staples you likely already have on hand.
- 2 tablespoons unsalted butter (I prefer Kerrygold for the richness—it makes a real difference in the final flavor)
- 1 medium yellow onion, diced (about 1 cup; sweet onions work great too if you have them)
- 2 cloves garlic, minced (fresh is best, but jarred minced garlic works in a pinch)
- 2 cans (14.5 ounces each) crushed tomatoes (I recommend San Marzano tomatoes for the best flavor, but any good-quality crushed tomatoes will work)
- 1 cup chicken or vegetable broth (low-sodium is best so you can control the salt level)
- 1/2 cup heavy cream (this is what gives the soup that luxurious texture and helps it hold heat in the thermos)
- 1 teaspoon sugar (balances the acidity of the tomatoes—don’t skip this!)
- 1/2 teaspoon salt (plus more to taste)
- 1/4 teaspoon black pepper
- 1/4 teaspoon dried basil (or 1 tablespoon fresh basil, chopped)
- 1/4 teaspoon dried oregano
- Optional: 1/4 cup grated Parmesan cheese (adds a savory depth that adults especially love)
Ingredient Tips: For the creamiest texture, use full-fat heavy cream—half-and-half will work but won’t be as rich. If you’re dairy-free, canned coconut cream is a surprisingly good substitute, though it will add a slight coconut flavor. For a vegan version, use olive oil instead of butter and vegetable broth. I’ve also made this with fire-roasted crushed tomatoes, and the smoky flavor is incredible if your kids are okay with a little extra depth.
Brand Note: I’ve tested this with Hunt’s, Muir Glen, and Cento tomatoes. Muir Glen gives the smoothest texture, but Cento has the best flavor balance. Honestly, any good-quality canned tomato will work—just avoid tomato sauce or tomato paste as the base; they don’t have the right consistency.
Equipment Needed
You don’t need a fancy kitchen to make this soup. Here’s what you’ll actually use:
- Large pot or Dutch oven (a 4-quart pot works perfectly; I use my trusty Le Creuset, but any heavy-bottomed pot will do)
- Immersion blender (this is my favorite tool for silky soup—no transferring hot liquid to a blender and risking burns)
- Chef’s knife and cutting board
- Wooden spoon or silicone spatula
- Measuring cups and spoons
- Thermos (a wide-mouth thermos works best for this soup; I recommend the Stanley or Thermos brand for heat retention)
- Fine-mesh strainer (optional, only if you want an ultra-smooth texture)
Budget-Friendly Tip: If you don’t have an immersion blender, let the soup cool for 5 minutes, then carefully transfer it to a regular blender in batches. Fill the blender only halfway, hold the lid down with a towel, and blend until smooth. I learned this the hard way after a hot soup explosion incident—please don’t skip the cooling step!
Thermos Tip: Preheat your thermos by filling it with boiling water and letting it sit for 5 minutes before adding the soup. This single step makes a huge difference in how long your soup stays hot. I learned this from a mom friend who packs lunches for three kids, and it changed everything.
Preparation Method

Let me walk you through this step by step. I’ve included all the little details I wish someone had told me when I first started making thermos soups.
- Melt the butter in a large pot over medium heat. Add the diced onion and cook for 5-7 minutes, stirring occasionally, until the onions are soft and translucent. They should look glassy, not browned. If they start to brown, turn the heat down a notch.
- Add the minced garlic and cook for 30 seconds until fragrant. You’ll smell it immediately—that’s your cue to move to the next step. Garlic burns fast, so don’t walk away here.
- Pour in the crushed tomatoes and broth. Stir everything together, scraping up any brown bits from the bottom of the pot. Those bits are pure flavor.
- Add the sugar, salt, pepper, basil, and oregano. Stir well. Bring the soup to a gentle simmer, then reduce the heat to low. Let it cook for 15 minutes, stirring occasionally. The soup will darken slightly and the flavors will meld together beautifully.
- Remove the pot from heat. Let it cool for about 2 minutes—this prevents splattering when you blend. Use your immersion blender directly in the pot and blend until completely smooth. If you’re using a regular blender, let the soup cool for 5 minutes, then blend in batches.
- Stir in the heavy cream and Parmesan cheese if using. The soup will turn a beautiful pale orange color. Taste it and adjust the salt and pepper. This is the moment of truth—if it tastes flat, add a pinch more salt. If it’s too acidic, add another 1/2 teaspoon of sugar.
- Preheat your thermos while the soup is still hot. Fill the thermos with boiling water, screw the lid on, and let it sit for 5 minutes. Pour out the water just before adding the soup.
- Ladle the hot soup directly into the preheated thermos. Fill it to the top—less air space means better heat retention. Screw the lid on tightly.
- Wrap the thermos in a clean kitchen towel or place it in an insulated lunch bag. This extra layer helps maintain temperature until lunchtime.
Sensory Cue: At step 4, the soup should smell rich and slightly sweet, not sharp or acidic. If it smells too tangy, you need a pinch more sugar. At step 6, the soup should coat the back of a spoon—if it’s too thin, let it simmer uncovered for another 5 minutes before adding the cream.
Time-Saving Tip: Make the soup the night before and reheat it in the morning. The flavors actually get better overnight. Just add the cream after reheating, not before storing.
Cooking Tips & Techniques
I’ve made every mistake in the book with this soup. Here’s what I learned so you don’t have to repeat my failures.
The Biggest Mistake: Adding the cream too early. I once added cream right at the beginning, and the soup curdled into this grainy mess. Cream goes in at the very end, after the soup is off the heat. Trust me on this one.
Texture Troubleshooting: If your soup is too thin, let it simmer uncovered for 10-15 minutes to reduce and thicken. If it’s too thick, add a splash of broth or milk until it reaches your desired consistency. For thermos packing, slightly thicker is better—it stays warm longer and doesn’t leak.
Thermos Strategy: I learned this trick from a lunch-packing pro: fill the thermos with boiling water while you’re making the soup. By the time the soup is ready, the thermos is preheated and ready to go. This single step keeps soup hot for 4-5 hours instead of 2-3. Also, never pack cold soup and expect it to stay warm—it won’t work. The soup needs to be piping hot when it goes in.
Batch Cooking Strategy: I make a triple batch on Sundays and freeze it in individual portions. On school mornings, I grab a frozen container, reheat it on the stove while I’m making toast, and pack it in the thermos. Takes less than 10 minutes total. This has saved me on so many chaotic mornings.
Flavor Boost: For adults or older kids who want more depth, add a splash of balsamic vinegar or a pinch of red pepper flakes at the end. My husband loves it with a drizzle of olive oil on top. For kids, keep it simple—they’ll appreciate the creamy texture more than complex flavors.
Variations & Adaptations
This recipe is incredibly flexible. Here are some variations I’ve tried and loved:
Dairy-Free Version: Substitute the butter with olive oil and use full-fat canned coconut cream instead of heavy cream. The coconut flavor is subtle and actually complements the tomatoes beautifully. My dairy-sensitive niece gobbles this up.
Roasted Tomato Version: For a deeper, smokier flavor, roast 2 pounds of fresh tomatoes at 400°F for 30 minutes before adding them to the pot. Swap the canned tomatoes for roasted fresh ones and proceed with the recipe. This version is incredible in late summer when tomatoes are at their peak.
Spicy Tomato Soup: Add 1/4 teaspoon of red pepper flakes along with the garlic, or stir in a tablespoon of harissa paste at the end. My teenager loves this version with a grilled cheese sandwich.
Protein-Packed Version: Stir in 1/2 cup of cooked white beans or lentils before blending. You won’t taste them, but they add protein and fiber. This is my go-to when I want the soup to be more filling for active kids.
Herb Variations: Swap the dried basil and oregano for 1 tablespoon of fresh thyme or rosemary. Each herb gives the soup a completely different personality. I make a thyme version in fall and a basil version in summer.
Serving & Storage Suggestions
Serving Temperature: This soup is designed to be served hot, straight from the thermos. It should be steaming when packed and still warm 4-5 hours later. If you’re serving it at home, let it cool for 2-3 minutes before serving—it’s dangerously hot straight off the stove.
What to Serve With It: The classic pairing is a grilled cheese sandwich, but I’ve also packed it with cheese crackers, breadsticks, or even tortilla chips for dipping. My kids love it with a side of apple slices and a small container of goldfish crackers. For a grown-up lunch, pair it with a simple salad or crusty bread.
Storage Instructions: Store leftover soup in an airtight container in the refrigerator for up to 5 days. The flavors actually deepen and improve after a day or two. Freeze in individual portions for up to 3 months—I use silicone muffin trays for single-serving portions, then pop them out and store them in a freezer bag.
Reheating Instructions: Reheat on the stovetop over medium-low heat, stirring occasionally. Add a splash of milk or broth if the soup has thickened too much. You can also microwave it in 30-second bursts, stirring between each. Do not boil the soup after adding cream—it can separate and become grainy.
Flavor Development Note: This soup tastes even better the next day. The onion and garlic flavors mellow out and meld with the tomatoes in a way that’s hard to achieve on day one. I actually prefer leftovers for this reason.
Nutritional Information & Benefits
Here’s the estimated nutritional breakdown for one serving (about 1 cup) of this creamy tomato soup:
| Nutrient | Amount |
|---|---|
| Calories | 220 |
| Total Fat | 16g |
| Saturated Fat | 10g |
| Carbohydrates | 16g |
| Fiber | 3g |
| Sugar | 9g |
| Protein | 4g |
| Sodium | 580mg |
| Vitamin A | 25% DV |
| Vitamin C | 20% DV |
| Calcium | 8% DV |
| Iron | 10% DV |
Health Benefits: Tomatoes are rich in lycopene, a powerful antioxidant that’s been linked to heart health and reduced inflammation. Cooking tomatoes actually increases the bioavailability of lycopene, so this soup is a great way to get those benefits. The cream adds calcium and vitamin D, while the onions provide prebiotic fiber for gut health.
Dietary Considerations: This recipe is naturally gluten-free and can be made dairy-free with the substitutions mentioned above. It’s also vegetarian if you use vegetable broth. For a lower-sodium version, use no-salt-added canned tomatoes and reduce the added salt.
Personal Perspective: I love that this soup feels indulgent but is actually pretty balanced. It’s comfort food that doesn’t leave you feeling heavy. For my kids, it’s a way to get vegetables into their lunch without any complaints. Win-win.
Conclusion
This easy thermos creamy tomato soup for school has become a staple in our house for good reason. It’s simple, reliable, and genuinely delicious—the kind of recipe that makes lunch packing feel less like a chore and more like a small act of love. I’ve made it on frantic school mornings and lazy Sunday afternoons, and it never disappoints.
I hope you give this recipe a try and make it your own. Maybe your kids will ask for it every week like mine do. Maybe you’ll find yourself making a batch just for yourself on a cold afternoon. However you use it, I’d love to hear about it. Drop a comment below and tell me how your thermos soup turned out—did your kids love it? Did you try a fun variation? Share your wins (and your learning moments) with our community. And if you snap a photo of that perfectly packed thermos, tag me so I can celebrate with you.
Here’s to warm lunches, happy kids, and one less thing to worry about on busy mornings. You’ve got this.
Frequently Asked Questions
Can I use fresh tomatoes instead of canned?
Absolutely! Use about 2 pounds of ripe Roma or San Marzano tomatoes. Roast them at 400°F for 30 minutes before adding to the pot for the best flavor. You may need to simmer the soup a little longer to achieve the right consistency since fresh tomatoes have more water content.
How long will the soup stay hot in a thermos?
With proper preheating (filling the thermos with boiling water for 5 minutes before adding the soup), this soup stays hot for 4-5 hours. Without preheating, expect about 2-3 hours. The key is to fill the thermos completely to minimize air space.
Can I make this soup ahead of time?
Yes! This soup actually tastes better the next day. Make it the night before, refrigerate it without the cream, then reheat and add the cream in the morning before packing. You can also freeze individual portions for up to 3 months.
My soup turned out too thin. What went wrong?
This usually happens if you added too much broth or if the tomatoes were particularly watery. Next time, use crushed tomatoes instead of whole tomatoes, and simmer the soup uncovered for 10-15 minutes to reduce it. If it’s already made, stir in a tablespoon of tomato paste to thicken it up.
Can I use milk instead of heavy cream?
You can, but the soup won’t be as creamy or hold heat as well in a thermos. Whole milk works better than skim, but heavy cream really is the best choice for thermos packing. If you’re watching calories, try half-and-half as a middle ground.
Pin This Recipe!
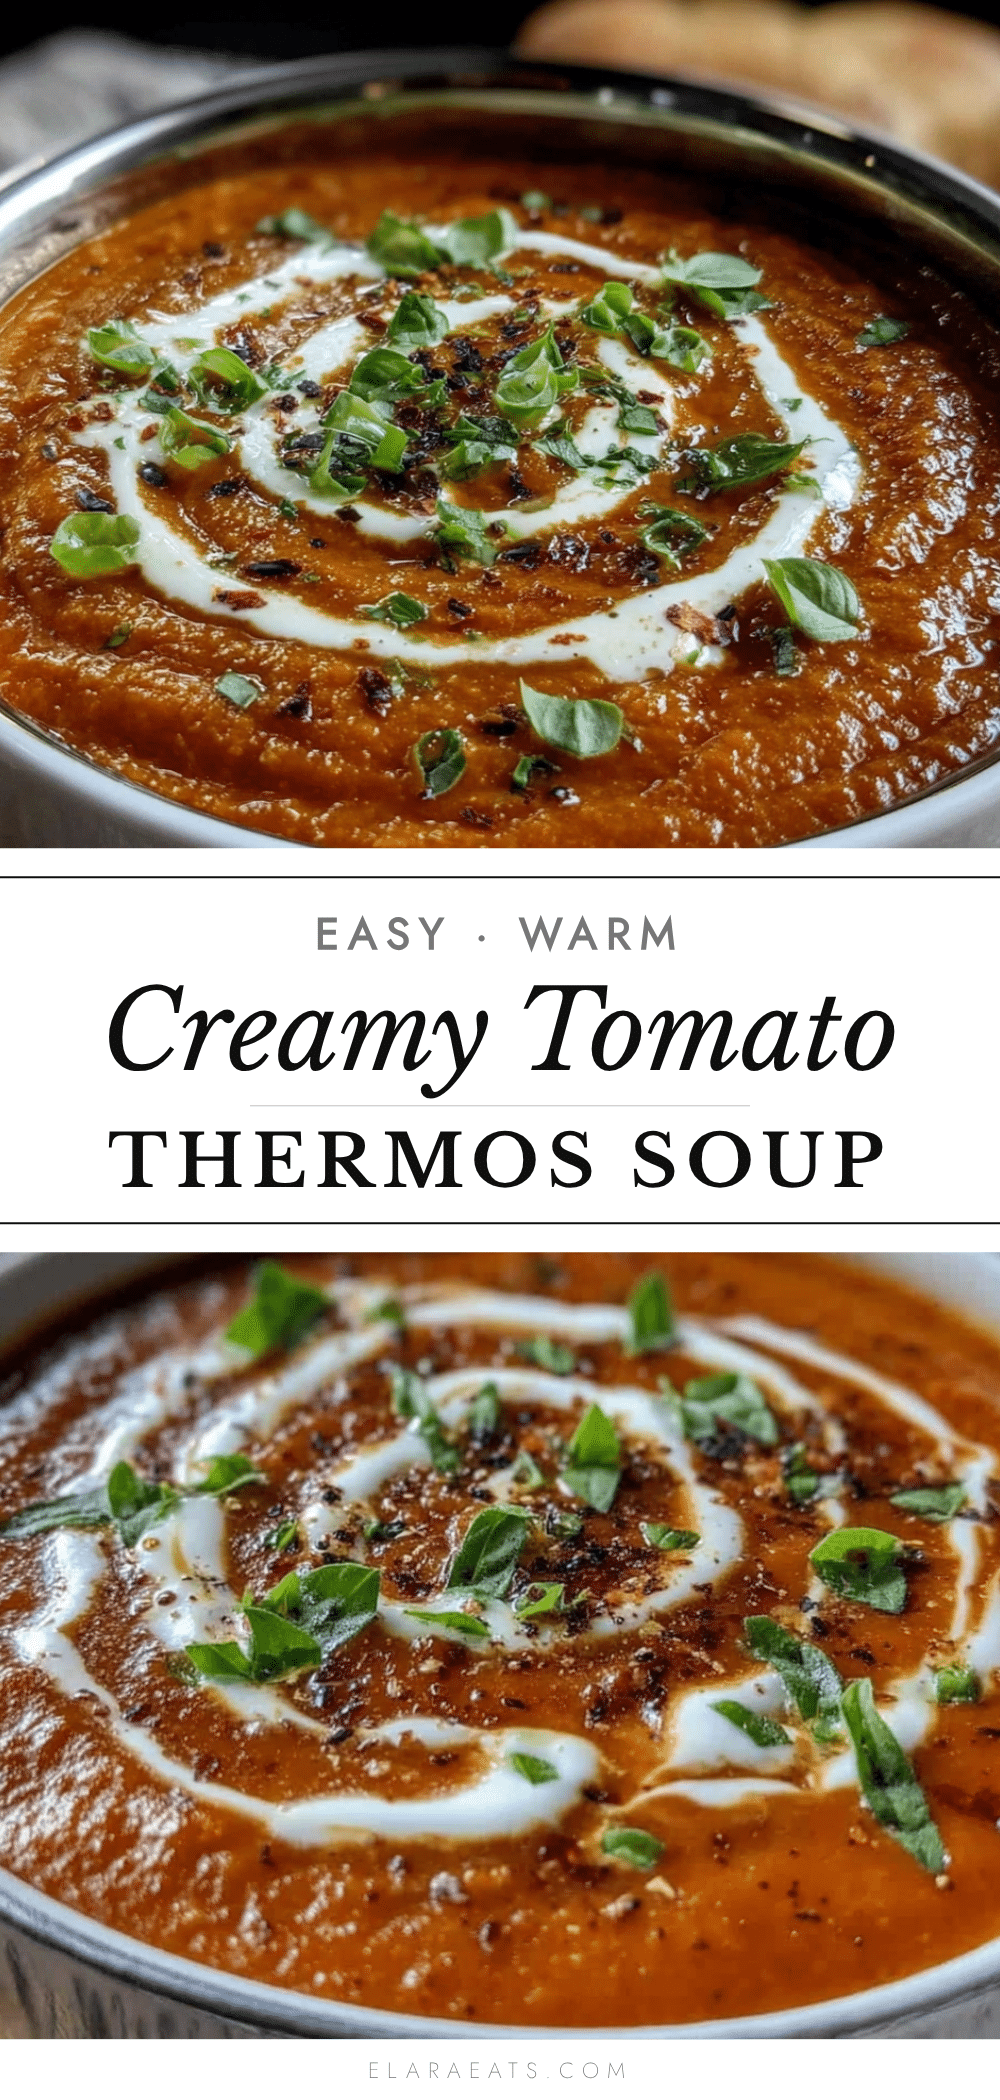
Easy Thermos Creamy Tomato Soup for School Lunches

This creamy tomato soup is thick enough to stay put in a thermos, smooth enough for picky eaters, and stays piping hot until lunchtime. Made with simple pantry ingredients, it’s a comforting lunch that kids love and parents can feel good about.
- Prep Time: 10 minutes
- Cook Time: 20 minutes
- Total Time: 30 minutes
- Yield: 4 servings 1x
- Category: Soup
- Cuisine: American
Ingredients
- 2 tablespoons unsalted butter
- 1 medium yellow onion, diced (about 1 cup)
- 2 cloves garlic, minced
- 2 cans (14.5 ounces each) crushed tomatoes
- 1 cup chicken or vegetable broth (low-sodium)
- 1/2 cup heavy cream
- 1 teaspoon sugar
- 1/2 teaspoon salt
- 1/4 teaspoon black pepper
- 1/4 teaspoon dried basil
- 1/4 teaspoon dried oregano
- Optional: 1/4 cup grated Parmesan cheese
Instructions
- Melt the butter in a large pot over medium heat. Add the diced onion and cook for 5-7 minutes, stirring occasionally, until soft and translucent.
- Add the minced garlic and cook for 30 seconds until fragrant.
- Pour in the crushed tomatoes and broth. Stir, scraping up any brown bits from the bottom of the pot.
- Add the sugar, salt, pepper, basil, and oregano. Stir well. Bring to a gentle simmer, then reduce heat to low. Cook for 15 minutes, stirring occasionally.
- Remove the pot from heat. Let cool for about 2 minutes. Use an immersion blender to blend until completely smooth. (Alternatively, let cool 5 minutes, then blend in batches in a regular blender.)
- Stir in the heavy cream and Parmesan cheese if using. Taste and adjust salt and pepper.
- Preheat the thermos by filling it with boiling water, screwing on the lid, and letting it sit for 5 minutes. Pour out the water just before adding the soup.
- Ladle the hot soup directly into the preheated thermos, filling to the top. Screw the lid on tightly.
- Wrap the thermos in a clean kitchen towel or place it in an insulated lunch bag to help maintain temperature.
Notes
For the creamiest texture, use full-fat heavy cream. Preheat the thermos with boiling water for 5 minutes before adding soup to keep it hot for 4-5 hours. Add cream at the very end to prevent curdling. Soup can be made the night before and reheated; flavors improve overnight. Freeze individual portions for up to 3 months.
Nutrition
- Serving Size: 1 cup
- Calories: 220
- Sugar: 9
- Sodium: 580
- Fat: 16
- Saturated Fat: 10
- Carbohydrates: 16
- Fiber: 3
- Protein: 4
Keywords: creamy tomato soup, thermos soup, school lunch, easy tomato soup, kid-friendly, freezer-friendly, gluten-free