Love this? Save it for later!
Share the inspiration with your friends
My neighbor, a man named Frank who I’d only ever seen grilling steaks and scowling at his hedges, claimed for years that pumpkin desserts were a “waste of good oven space.” He said it every fall with the kind of conviction that made you wonder if a pumpkin pie had wronged him in his youth. For a decade, I just nodded and kept my pumpkin bread to myself. Then, last Thanksgiving, I brought this triple layer pumpkin dump cake to the block party. I set it down, turned around to grab a fork, and when I looked back, Frank was standing there, plate in hand, with a smear of cream cheese frosting on his chin. He didn’t say a word. He just pointed at the cake and gave me a thumbs-up. Honestly, I think that was the most satisfying culinary victory of my life.
The thing is, I didn’t even set out to convert anyone. I was just craving something that felt like fall but didn’t require the fuss of a traditional layer cake. You know that feeling when you want the wow-factor of a tall, impressive dessert but you’re fresh out of patience for piping bags and crumb coats? That was me. I had a can of pumpkin, a box of yellow cake mix, and a desperate need for something that tasted like it took hours. Let me tell you, this cake delivers on that promise and then some. The layers—gooey pumpkin, buttery cake, and rich, tangy frosting—build on each other in a way that feels both rustic and completely indulgent. It’s the kind of dessert that makes people close their eyes on the first bite, and honestly, that’s why I keep making it year after year.
Why You’ll Love This Recipe
I’ve tested a lot of pumpkin dump cakes in my time. Some were too soggy, some were too dry, and some just tasted like a box of cake mix with a sad can of pumpkin stirred in. This version is different. It’s the one I’ve landed on after years of tweaking, and it’s the one that finally got Frank to admit that pumpkin might have a place at the table after all.
- Incredibly Easy: This isn’t a complicated layer cake. You dump, you layer, you bake. It’s that simple. The “triple layer” magic happens in the pan with almost no extra work.
- Perfectly Balanced Flavors: The spiced pumpkin layer is rich and moist, the cake topping is buttery and crisp, and the cream cheese frosting adds that tangy, creamy finish that ties it all together.
- Made with Simple Ingredients: You probably have most of these in your pantry right now. No fancy extracts or hard-to-find spices. Just honest, good baking staples.
- A Total Crowd-Pleaser: I’ve brought this to potlucks, family dinners, and holiday parties. It disappears every single time. Even the pumpkin skeptics (like Frank) come back for seconds.
- Make-Ahead Friendly: This cake actually gets better after a day in the fridge. The flavors meld together, and the frosting sets up perfectly. It’s a stress-free dessert for entertaining.
What really sets this recipe apart is the texture. The bottom layer is a luscious, almost pudding-like pumpkin custard. The middle layer is the classic dump cake crunch—a buttery, golden crust that soaks up all that pumpkin goodness. And the top layer is a cloud of homemade cream cheese frosting. It’s not just another dump cake; it’s the best version of the one you’ve been searching for. It’s comfort food that feels a little bit special, without the stress of a complicated baking project.
What Ingredients You Will Need
This recipe relies on a handful of simple, wholesome ingredients that work together to create something truly spectacular. Most of these are pantry staples, which makes this cake perfect for a last-minute dessert craving or a planned holiday feast.
- For the Pumpkin Layer:
- 1 can (15 oz) pure pumpkin puree (not pumpkin pie filling). I prefer Libby’s for its consistent texture and deep flavor.
- 1 can (12 oz) evaporated milk. This adds richness without making the layer too heavy.
- 3 large eggs, room temperature. Room temperature eggs blend more smoothly into the custard.
- 1 cup granulated sugar. Just enough to sweeten the pumpkin without overpowering the spices.
- 2 teaspoons pumpkin pie spice. You can use a store-bought blend or make your own with cinnamon, nutmeg, ginger, and cloves.
- 1/2 teaspoon salt. A pinch of salt balances the sweetness and enhances the pumpkin flavor.
- For the Cake Layer:
- 1 box (15.25 oz) yellow cake mix. I use Duncan Hines or Betty Crocker. Do not prepare the mix; use it dry straight from the box.
- 1 cup (2 sticks) unsalted butter, melted. Melted butter is key here. It creates that signature crisp, buttery topping.
- 1 cup chopped pecans or walnuts (optional, but highly recommended). The nuts add a wonderful crunch and nutty flavor that pairs beautifully with pumpkin.
- For the Cream Cheese Frosting:
- 8 oz cream cheese, softened. Full-fat cream cheese gives the best texture and tang.
- 1/2 cup (1 stick) unsalted butter, softened.
- 3 cups powdered sugar, sifted. Sifting prevents lumps and ensures a silky smooth frosting.
- 1 teaspoon vanilla extract. Pure vanilla extract makes a difference here.
- 1-2 tablespoons milk or heavy cream, as needed for consistency.
When selecting your pumpkin puree, look for a can that lists only “pumpkin” as the ingredient. Avoid the pre-sweetened pie filling, as it has a different consistency and added sugars that will throw off the balance of this recipe. For the cake mix, any standard yellow cake mix will work, but I’ve found that the ones with a touch of pudding in the mix (like Duncan Hines Signature) create an even more tender crumb on top.
Equipment Needed
You don’t need a bakery-grade kitchen to pull this off. Here’s what you’ll need:
- A 9×13-inch baking pan. Glass or metal both work well. I prefer glass because I can see the layers as they bake, but metal heats up a bit faster.
- Large mixing bowls. You’ll need one for the pumpkin mixture and one for the frosting.
- A whisk and a rubber spatula. The whisk for the pumpkin custard, the spatula for folding and scraping.
- An electric hand mixer or stand mixer. You can whisk the frosting by hand, but a mixer makes it much easier to get that light, fluffy texture.
- Measuring cups and spoons. Precision matters, especially for the pumpkin layer.
If you don’t have a 9×13 pan, you could use a deep lasagna dish or even two 8×8 pans, but you’ll need to adjust the baking time. I once made this in a disposable aluminum pan for a camping trip, and it worked just fine—just keep an eye on the edges so they don’t burn. For the frosting, a sturdy spatula is your best friend for spreading it evenly over the warm cake.
Preparation Method
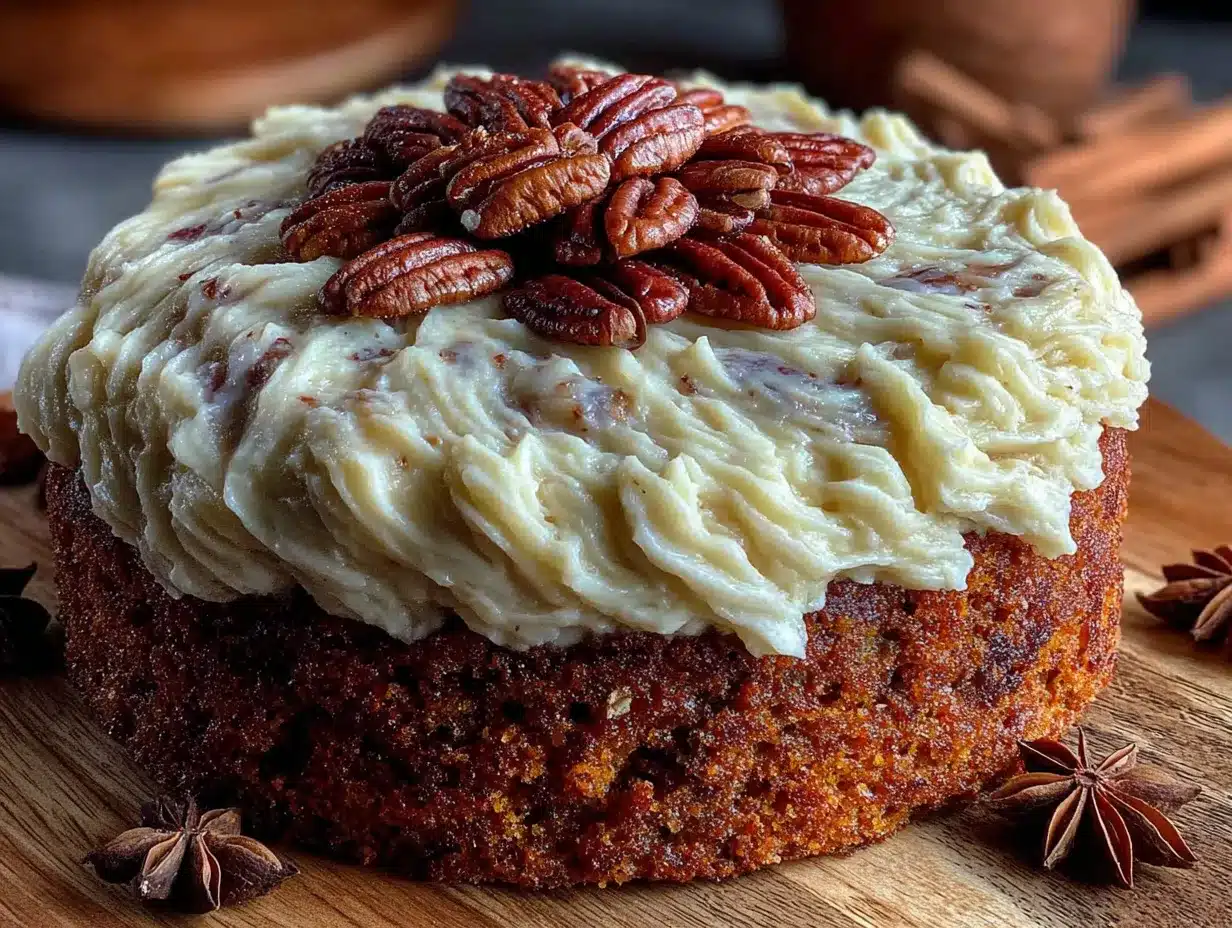
This recipe comes together in a few simple stages. Trust the process, and you’ll be rewarded with a stunning dessert that tastes like you spent all day in the kitchen.
- Preheat your oven to 350°F (175°C). Grease your 9×13-inch baking pan generously with butter or non-stick spray. I like to use a bit of butter for flavor, but spray works perfectly fine.
- Make the pumpkin layer. In a large bowl, whisk together the pumpkin puree, evaporated milk, eggs, granulated sugar, pumpkin pie spice, and salt. Whisk until the mixture is completely smooth and uniform. It should be a beautiful, deep orange color. Pour this mixture into your prepared pan and spread it evenly.
- Add the dry cake mix. This is the “dump” part. Sprinkle the entire box of dry cake mix evenly over the pumpkin layer. Do not stir it in. Just let it sit on top like a blanket. It will look like a lot of powder, but that’s exactly what you want.
- Add the melted butter. Drizzle the melted butter as evenly as you can over the dry cake mix. Try to cover as much of the surface as possible. The butter will soak into the cake mix as it bakes, creating that classic buttery crust. If you’re using nuts, sprinkle them over the top now.
- Bake for 45-50 minutes. The cake is done when the top is golden brown and the edges are bubbly. The center might still have a slight jiggle, but it will set as it cools. Let the cake cool completely on a wire rack. This is important—if you add the frosting while the cake is still warm, it will melt into a puddle.
- Make the cream cheese frosting. While the cake cools, beat the softened cream cheese and butter together in a large bowl until smooth and creamy. This takes about 2-3 minutes with a hand mixer. Add the vanilla extract and mix to combine. Gradually add the sifted powdered sugar, one cup at a time, beating on low speed until incorporated. If the frosting is too thick, add a tablespoon of milk or cream. If it’s too thin, add a bit more powdered sugar. The finished frosting should be spreadable but not runny.
- Frost the cake. Once the cake is completely cool, spread the cream cheese frosting evenly over the top. Don’t worry about making it perfect—a rustic swirl is part of the charm. For a finishing touch, you can sprinkle a little extra pumpkin pie spice or some chopped pecans on top.
- Chill before serving. For the cleanest slices, refrigerate the frosted cake for at least 2 hours, or overnight. This allows the layers to set up and makes cutting much easier. The cake is also delicious at room temperature, so let it sit out for 15 minutes before serving if you prefer.
Cooking Tips & Techniques
I’ve made this cake more times than I can count, and I’ve learned a few things along the way. Here are my best tips for getting it right every time.
Don’t overmix the pumpkin layer. Whisk just until everything is combined. Overmixing can incorporate too much air and create a spongy texture instead of that silky, custard-like layer we’re after.
Use room temperature ingredients for the frosting. Cold cream cheese and butter will create a lumpy frosting. Let them sit on the counter for about 30 minutes before you start. If you’re in a hurry, you can cut the cream cheese into small cubes to speed up the softening process.
Let the cake cool completely. I know, it’s hard to wait. But I learned this lesson the hard way when I frosted a slightly warm cake and ended up with a sweet, orange-tinted soup on top. Patience is your friend here.
Watch the edges. Every oven runs a little differently. If the edges of the cake are browning too quickly but the center isn’t done, tent the pan loosely with foil for the last 10-15 minutes of baking.
Make it ahead. This cake is actually better on day two. The pumpkin layer gets even more luscious, and the flavors have time to meld. I often make it the day before a gathering and just keep it covered in the fridge.
Variations & Adaptations
One of the best things about this recipe is how adaptable it is. Here are a few ways to make it your own.
- Spice it up. If you love a warm, spicy kick, add an extra teaspoon of cinnamon and a pinch of ground ginger to the pumpkin layer. You can also sprinkle a little cinnamon sugar over the top before baking.
- Go nut-free. Simply omit the pecans or walnuts. The cake will still be delicious. You could also substitute them with toasted pumpkin seeds for a similar crunch.
- Try a different cake mix. Spice cake mix is a fantastic alternative to yellow cake mix. It adds another layer of warm spice that complements the pumpkin beautifully. You can also use a gluten-free yellow cake mix for a gluten-free version.
- Make it dairy-free. Use a dairy-free butter substitute (like Miyoko’s or Earth Balance) and a dairy-free cream cheese (like Kite Hill or Tofutti). The texture will be slightly different, but it still works wonderfully.
- Add a caramel drizzle. For an extra-indulgent touch, drizzle some store-bought or homemade caramel sauce over the top of the frosted cake. It’s a game-changer.
I once tried a version with a chocolate cake mix, and honestly, it was a bit of a mess. The chocolate overpowered the delicate pumpkin spice. Stick with yellow or spice cake mix for the best balance.
Serving & Storage Suggestions
This cake is incredibly versatile when it comes to serving. Here’s how to get the most out of it.
Serving: This cake is best served chilled or at room temperature. For clean, beautiful slices, use a sharp knife and wipe it clean between cuts. A dollop of whipped cream on the side is never a bad idea. It pairs wonderfully with a hot cup of coffee or a mug of spiced apple cider.
Storage: Cover the cake tightly with plastic wrap or aluminum foil and store it in the refrigerator. It will keep well for up to 5 days. The flavors actually deepen and improve after a day or two. I’ve also found that this cake freezes beautifully. Wrap individual slices or the entire frosted cake (without the nuts on top) in plastic wrap, then in foil, and freeze for up to 3 months. Thaw overnight in the refrigerator before serving.
Reheating: If you prefer your cake warm, you can microwave individual slices for about 15-20 seconds. Just be careful not to overheat it, or the frosting will melt. For a larger portion, you can reheat it in a 300°F oven for 10-15 minutes, but I find it’s best straight from the fridge.
Nutritional Information & Benefits
This is a dessert, so let’s be honest—it’s a treat. But there are a few redeeming qualities hidden in those layers.
- Estimated per serving (based on 12 servings): Calories: 480, Fat: 28g, Carbohydrates: 55g, Protein: 6g, Fiber: 2g, Sugar: 40g.
- Pumpkin is a powerhouse. It’s packed with vitamin A (from beta-carotene), fiber, and antioxidants. It’s one of the few dessert ingredients that actually brings some nutritional value to the table.
- Nuts add healthy fats. If you include the pecans or walnuts, you’re getting a dose of heart-healthy omega-3 fatty acids and a little extra protein.
- Dietary considerations: This recipe is not gluten-free as written, but can be made with a gluten-free cake mix. It contains dairy, eggs, and nuts (if added). For a lower-sugar version, you can use a sugar substitute in the pumpkin layer, but I can’t vouch for the results with the cake mix.
I don’t make this cake thinking it’s health food. But I do feel a little better knowing that the star ingredient is a vegetable. It’s comfort food with a tiny, delicious silver lining.
Conclusion
This triple layer pumpkin dump cake is more than just a dessert—it’s a conversation starter, a crowd-pleaser, and a testament to the fact that simple ingredients can create something truly memorable. It’s the cake that won over my neighbor Frank, and it’s the cake I reach for every single fall when I want to impress without the stress.
I’d love for you to try it and make it your own. Maybe you’ll add a pinch more spice, or skip the nuts, or drizzle it with caramel. Whatever you do, I hope it brings a little warmth and joy to your table. When you make it, drop a comment below and let me know how it turned out. Did you convert a pumpkin skeptic in your life? I’d love to hear your story. Happy baking, friends!
Frequently Asked Questions
Can I use pumpkin pie filling instead of pure pumpkin puree?
I wouldn’t recommend it. Pumpkin pie filling is already sweetened and spiced, which will throw off the balance of the recipe. The pure pumpkin puree gives you control over the sweetness and spice level. Stick with the pure stuff for the best results.
Do I need to refrigerate this cake?
Yes, because of the cream cheese frosting, this cake needs to be stored in the refrigerator. It will keep well for up to 5 days. Let it sit at room temperature for about 15 minutes before serving if you prefer a softer texture.
Can I make this cake without the nuts?
Absolutely. The nuts are optional. If you omit them, the cake will still have that wonderful buttery, crunchy top layer from the cake mix and butter. You can also substitute them with toasted pumpkin seeds for a similar texture.
Why is my dump cake soggy in the middle?
A slightly soft center is normal for this type of cake, but if it’s truly soggy, it might need a few more minutes in the oven. Make sure you’re spreading the cake mix and butter evenly, and that your oven is properly calibrated. Baking it until the edges are golden and bubbly is a good indicator it’s done.
Can I freeze this pumpkin dump cake?
Yes, it freezes beautifully. Wrap the unfrosted or frosted cake tightly in plastic wrap and then in foil. It will keep in the freezer for up to 3 months. Thaw it overnight in the refrigerator before serving or frosting.
Pin This Recipe!
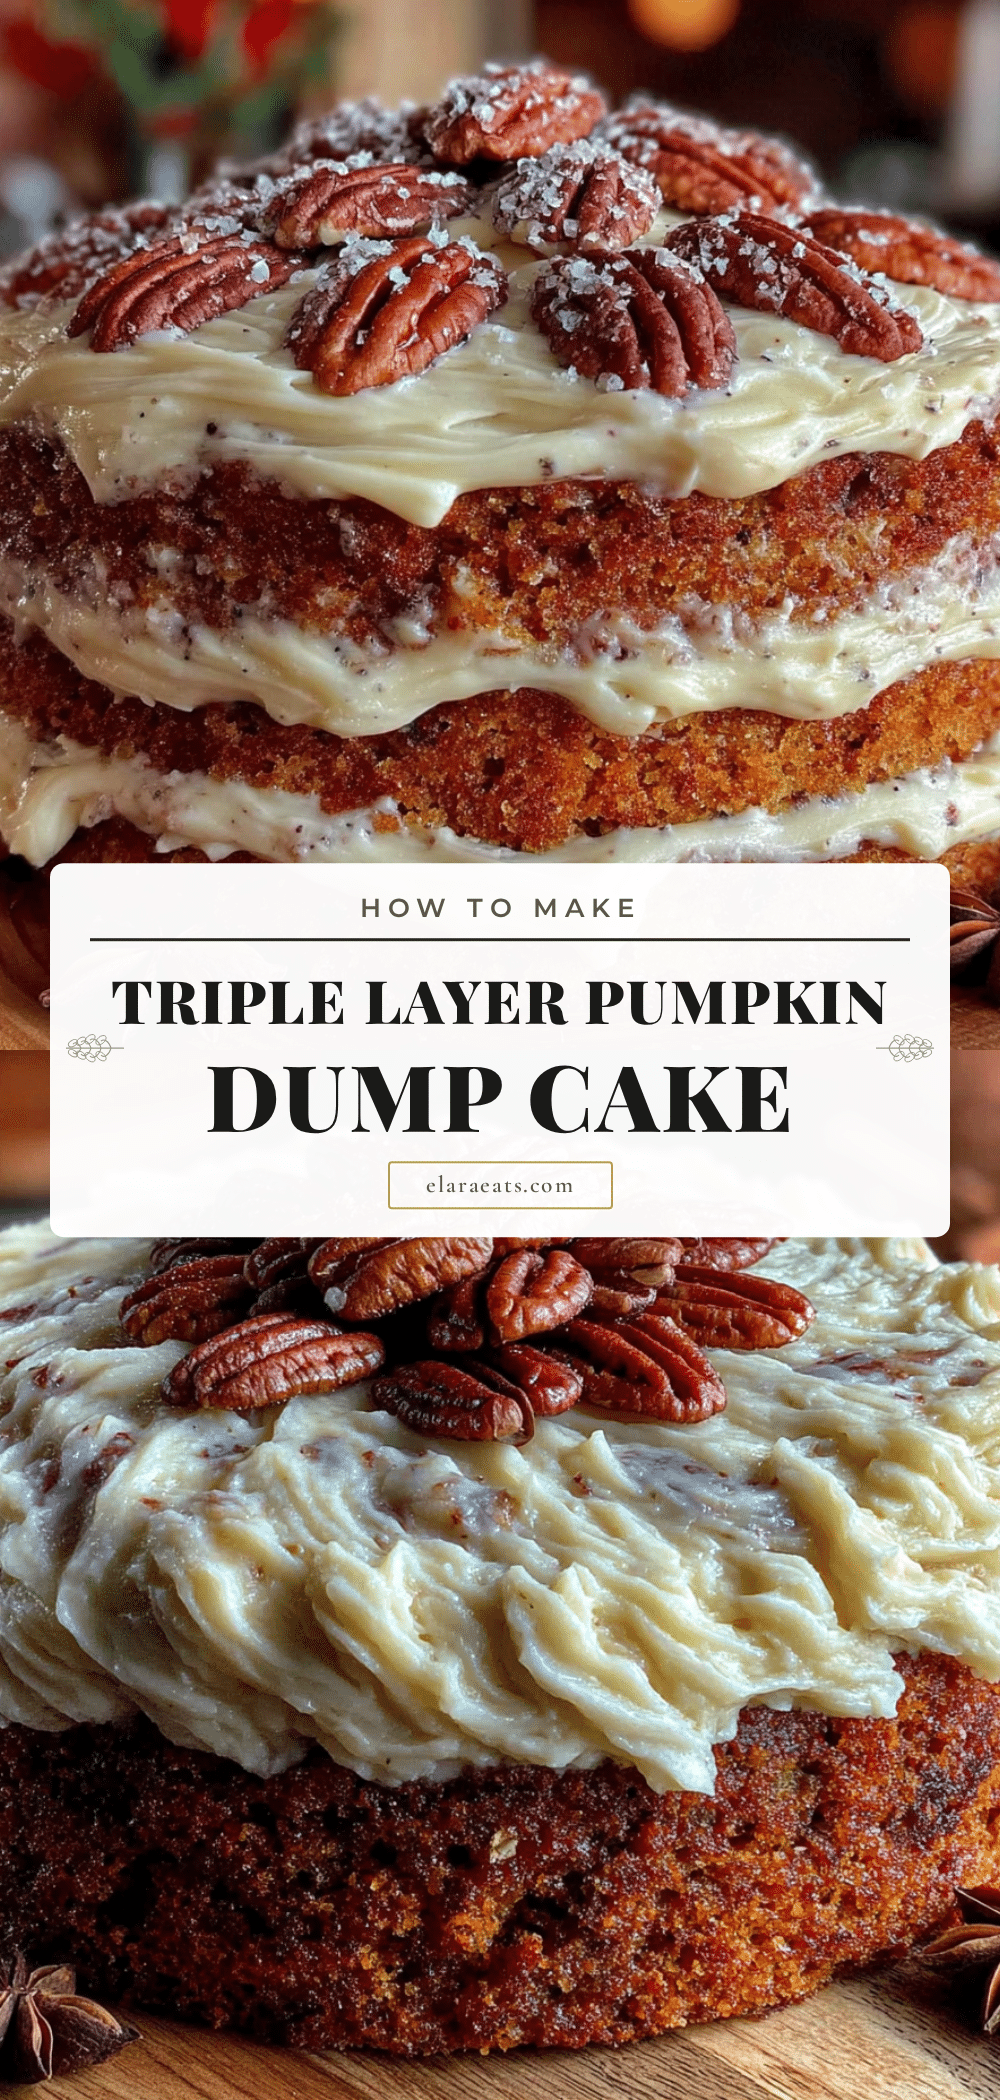
Best Triple Layer Pumpkin Dump Cake with Cream Cheese Frosting
This triple layer pumpkin dump cake features a luscious pumpkin custard base, a buttery cake mix topping, and a rich cream cheese frosting. It’s an incredibly easy dessert that tastes like it took hours, perfect for fall gatherings and holiday tables.
- Prep Time: 20 minutes
- Cook Time: 50 minutes
- Total Time: 1 hour 10 minutes (plus cooling and chilling time)
- Yield: 12 servings 1x
- Category: Dessert
- Cuisine: American
Ingredients
- 1 can (15 oz) pure pumpkin puree (not pumpkin pie filling)
- 1 can (12 oz) evaporated milk
- 3 large eggs, room temperature
- 1 cup granulated sugar
- 2 teaspoons pumpkin pie spice
- 1/2 teaspoon salt
- 1 box (15.25 oz) yellow cake mix (dry, not prepared)
- 1 cup (2 sticks) unsalted butter, melted
- 1 cup chopped pecans or walnuts (optional)
- 8 oz cream cheese, softened
- 1/2 cup (1 stick) unsalted butter, softened
- 3 cups powdered sugar, sifted
- 1 teaspoon vanilla extract
- 1–2 tablespoons milk or heavy cream (as needed for consistency)
Instructions
- Preheat your oven to 350°F (175°C). Grease a 9×13-inch baking pan generously with butter or non-stick spray.
- Make the pumpkin layer: In a large bowl, whisk together the pumpkin puree, evaporated milk, eggs, granulated sugar, pumpkin pie spice, and salt until completely smooth. Pour this mixture into the prepared pan and spread evenly.
- Add the dry cake mix: Sprinkle the entire box of dry cake mix evenly over the pumpkin layer. Do not stir it in.
- Add the melted butter: Drizzle the melted butter as evenly as possible over the dry cake mix. If using nuts, sprinkle them over the top now.
- Bake for 45-50 minutes, until the top is golden brown and the edges are bubbly. Let the cake cool completely on a wire rack.
- Make the cream cheese frosting: Beat the softened cream cheese and butter together until smooth and creamy. Add vanilla extract and mix. Gradually add sifted powdered sugar, one cup at a time, beating on low speed. Add milk or cream as needed to reach a spreadable consistency.
- Frost the cake: Once the cake is completely cool, spread the cream cheese frosting evenly over the top. Sprinkle with extra pumpkin pie spice or chopped pecans if desired.
- Chill before serving: Refrigerate the frosted cake for at least 2 hours or overnight for clean slices. Let sit at room temperature for 15 minutes before serving if desired.
Notes
Let the cake cool completely before frosting to prevent the frosting from melting. The cake actually gets better after a day in the fridge as the flavors meld. For a gluten-free version, use a gluten-free yellow cake mix. For a dairy-free version, use dairy-free butter and cream cheese substitutes.
Nutrition
- Serving Size: 1 slice (1/12 of cak
- Calories: 480
- Sugar: 40
- Sodium: 380
- Fat: 28
- Saturated Fat: 16
- Carbohydrates: 55
- Fiber: 2
- Protein: 6
Keywords: pumpkin dump cake, triple layer pumpkin cake, cream cheese frosting, easy fall dessert, pumpkin dessert, dump cake recipe


