Love this? Save it for later!
Share the inspiration with your friends
I was standing in the baking aisle of our local grocery store last Tuesday, staring at a bag of chocolate chips like they held the secrets to the universe. My three-year-old was having a meltdown in the cart because I wouldn’t buy the dinosaur-shaped chicken nuggets, and my six-year-old was debating the merits of every single type of chip on the shelf. “Mom, just pick one,” he sighed, and honestly, I felt the weight of that decision. But it wasn’t just about the chips. It was about the promise of a warm, gooey cookie in under thirty minutes — the kind that makes everyone stop arguing and just breathe for a second. That’s when I remembered my aunt’s kitchen, the smell of butter and sugar mixing with the sound of her humming off-key. She’d pull a tray of perfect, golden cookies out of the oven, and we’d all crowd around, burning our fingers because we just couldn’t wait. I wanted that. Right there, in the middle of the grocery store, I wanted that feeling for my own kids. So I grabbed the chips, ignored the whining, and went home to figure it out. And let me tell you, after a few burnt batches and one memorable disaster involving baking soda instead of powder, I landed on this recipe. It’s the one I’ve been making ever since — no chill time, small batch, and absolutely, undeniably kid-approved.
Why You’ll Love This Recipe
Let’s be honest — who has time to chill cookie dough for hours when a cookie craving hits? Not me, and probably not you either. This recipe cuts straight to the good stuff: warm, soft-centered cookies with crispy edges, ready in about 20 minutes from start to finish. It’s the kind of recipe that makes you look like a hero on a Tuesday afternoon.
- Quick & Easy: From mixing bowl to cookie in your hand in under 25 minutes. No waiting, no complicated steps.
- Simple Ingredients: You probably already have everything in your pantry. Butter, sugar, an egg, flour, and chocolate chips — that’s it.
- Perfect for Small Cravings: This makes exactly 6-8 cookies. No more, no less. Perfect for when you want a treat without a week’s worth of leftovers tempting you.
- Kid-Approved & Parent-Approved: My kids devour these, and I love that they’re made with real ingredients. Plus, the no-chill factor means impatient little hands don’t have to wait.
- Unbelievably Delicious: The texture is spot-on — soft and chewy in the middle, slightly crispy around the edges. The flavor is pure, buttery comfort.
This isn’t just another cookie recipe. It’s the one I’ve tested and tweaked until it was perfect for real life. No fancy techniques, no obscure ingredients, just a solid, reliable cookie that delivers every single time. It’s the kind of cookie that makes you close your eyes after the first bite and remember why homemade is always better.
What Ingredients You Will Need
This recipe uses simple, everyday ingredients to create something truly special. Each one plays a crucial role in getting that perfect texture and flavor. Here’s what you’ll need to grab from your pantry:
- Unsalted Butter (4 tablespoons, softened): I always use unsalted so I can control the salt level. Let it sit out for about 30 minutes before you start — it should be soft but not melted. If you’re in a hurry, you can microwave it for 10-15 seconds, but watch it carefully. (Trust me, melted butter changes the texture completely.)
- Granulated Sugar (¼ cup): This gives the cookies their structure and helps create those crispy edges.
- Light Brown Sugar (¼ cup, packed): This is the secret to soft, chewy cookies. The molasses in brown sugar adds moisture and a deeper flavor. Pack it firmly into your measuring cup for best results.
- Large Egg (1, room temperature): The egg binds everything together and adds richness. A room-temperature egg mixes more evenly into the butter and sugar. If you forgot to take it out of the fridge, place it in a bowl of warm water for 5 minutes.
- Vanilla Extract (½ teaspoon): Pure vanilla extract makes a noticeable difference in flavor. I prefer Nielsen-Massey, but any good quality extract works. (Avoid imitation vanilla — it has a chemical aftertaste.)
- All-Purpose Flour (¾ cup): Standard all-purpose flour gives these cookies the perfect structure. Spoon it into your measuring cup and level it off with a knife — don’t scoop directly from the bag or you’ll pack in too much flour.
- Baking Soda (½ teaspoon): This helps the cookies spread just the right amount and gives them a nice golden color.
- Salt (¼ teaspoon): Don’t skip this! Salt balances the sweetness and enhances the chocolate flavor. I use fine sea salt.
- Semi-Sweet Chocolate Chips (½ cup): Semi-sweet is my go-to because it’s not too sweet and not too bitter. I love Ghirardelli or Guittard chips for their rich flavor. If you prefer milk chocolate or dark chocolate, feel free to swap. (You can also chop up a chocolate bar for bigger puddles of chocolate.)
Equipment Needed
You don’t need any fancy equipment for this recipe — just the basics you probably already have in your kitchen. Here’s what you’ll need:
- Mixing Bowls: One medium bowl for dry ingredients and one large bowl for wet ingredients. I use a set of Pyrex nesting bowls — they’re sturdy and microwave-safe for those quick butter-softening moments.
- Electric Mixer or Wooden Spoon: An electric hand mixer makes creaming the butter and sugar a breeze, but a good old-fashioned wooden spoon works too. I actually prefer the spoon for small batches — less to clean up!
- Measuring Cups and Spoons: Accuracy matters in baking, so use proper measuring cups for dry and liquid ingredients. A set of stainless steel measuring spoons is a worthwhile investment.
- Baking Sheet: A standard half-sheet pan works perfectly. I recommend a light-colored baking sheet for even browning — dark pans can cause the bottoms to burn before the tops are done.
- Parchment Paper or Silicone Baking Mat: This prevents sticking and makes cleanup a breeze. Parchment paper is cheap and disposable; silicone mats are reusable and eco-friendly. Both work great.
- Cookie Scoop or Spoon: A 1.5-tablespoon cookie scoop ensures uniformly sized cookies. If you don’t have one, just use a regular spoon and try to make each ball about the same size.
- Cooling Rack: This allows air to circulate around the cookies so they cool evenly without getting soggy on the bottom.
I’ve made these cookies with just a bowl and a fork before, and they still turned out great. Don’t let the lack of fancy tools stop you — this recipe is forgiving.
Preparation Method
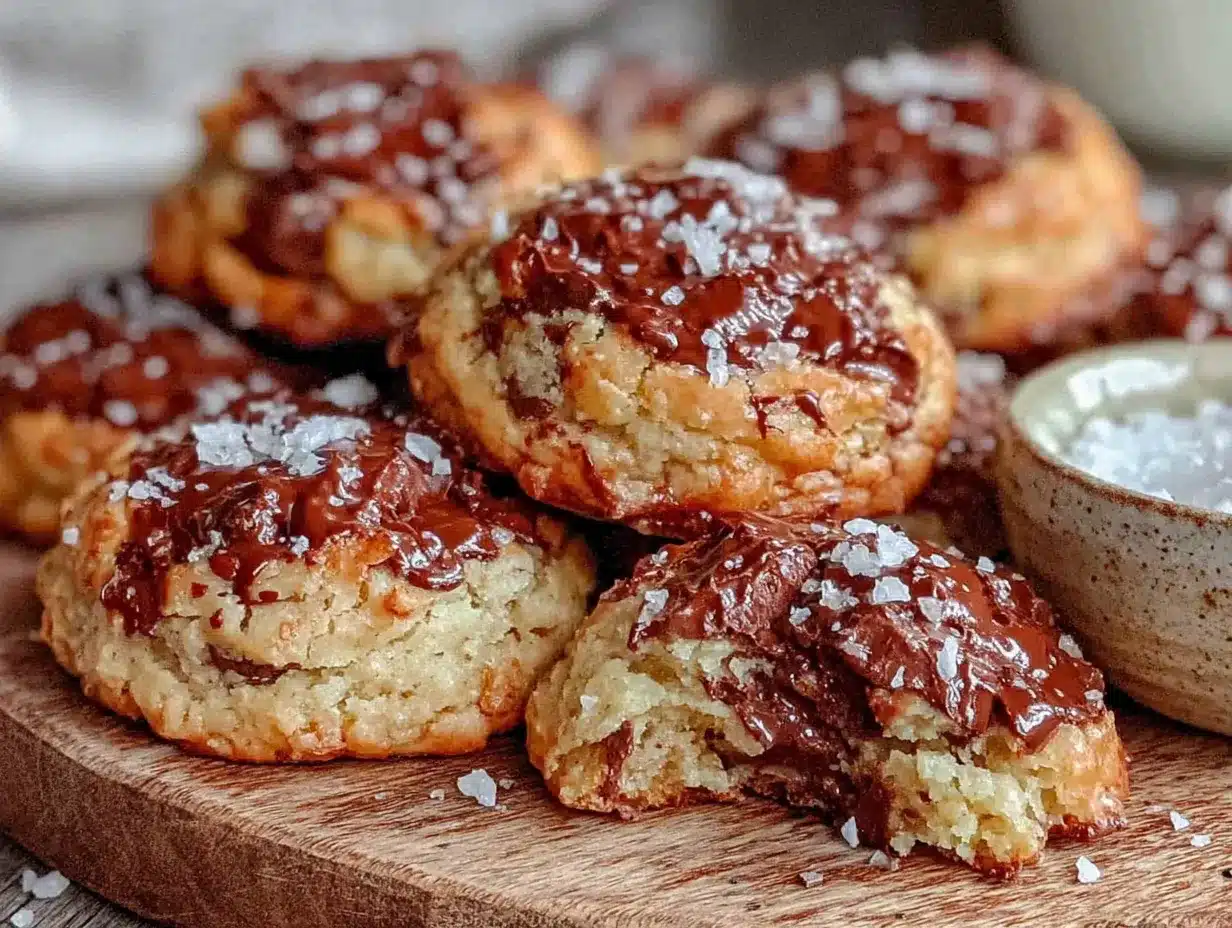
Alright, let’s get to the fun part! Follow these steps carefully, and you’ll have warm, perfect cookies in no time.
- Preheat your oven to 350°F (175°C). Line your baking sheet with parchment paper or a silicone mat. This is important — it ensures even baking and easy cleanup.
- Cream the butter and sugars together. In a large bowl, combine the softened butter, granulated sugar, and packed brown sugar. Beat with an electric mixer on medium speed for about 2-3 minutes, or until the mixture is light, fluffy, and pale in color. If you’re using a wooden spoon, give it some elbow grease — you want it smooth and well-combined. (The mixture should look like wet sand when you’re done.)
- Add the egg and vanilla. Crack the egg into the butter-sugar mixture, then add the vanilla extract. Beat on low speed until just combined — about 30 seconds. Scrape down the sides of the bowl with a spatula to make sure everything is incorporated. Don’t overmix here, or your cookies might turn out tough.
- Whisk the dry ingredients together. In a separate medium bowl, whisk together the flour, baking soda, and salt. This ensures the baking soda and salt are evenly distributed throughout the flour. (I learned this the hard way after biting into a cookie that tasted like pure salt. Not fun.)
- Combine the wet and dry ingredients. Gradually add the flour mixture to the wet ingredients, mixing on low speed or stirring with a wooden spoon until just combined. Stop as soon as you no longer see streaks of flour — overmixing develops gluten and makes cookies tough. The dough should be soft and slightly sticky.
- Fold in the chocolate chips. Gently stir in the chocolate chips with a spatula until they’re evenly distributed throughout the dough. If you want chocolate in every bite, press a few extra chips into the tops of the dough balls after scooping. (This is my kids’ favorite trick.)
- Scoop the dough. Using a 1.5-tablespoon cookie scoop or a regular spoon, scoop out 6-8 equal-sized balls of dough. Place them on the prepared baking sheet, spacing them about 2 inches apart. They’ll spread a bit, so don’t crowd them.
- Bake immediately. Place the baking sheet in the preheated oven and bake for 9-11 minutes. The cookies are done when the edges are golden brown and the centers look slightly underdone and puffy. They will continue to set as they cool on the baking sheet. For soft, chewy cookies, pull them out at the 9-minute mark. For crispier cookies, go for 11 minutes.
- Cool on the baking sheet. Let the cookies rest on the baking sheet for 5 minutes. This is crucial — they’re too fragile to move right away. After 5 minutes, transfer them to a wire rack to cool completely. Or, you know, eat one warm and burn your tongue a little. It’s worth it.
Pro Tip: If you want perfectly round cookies, use a round cookie cutter or a glass to gently swirl the cookies while they’re still warm on the baking sheet. This gives them that bakery-style look.
Cooking Tips & Techniques
After dozens of batches (and a few disasters), I’ve learned a thing or two about making these cookies perfect every time. Here are my best tips:
- Measure flour correctly: The number one mistake in cookie baking is using too much flour. Spoon it into your measuring cup and level it off with a knife. Don’t scoop directly from the bag — you’ll end up with dense, dry cookies.
- Use room-temperature ingredients: Cold butter won’t cream properly with the sugar, and a cold egg can cause the butter to seize up. Take them out of the fridge 30 minutes before you start.
- Don’t overmix the dough: Once you add the flour, mix only until it’s incorporated. Overmixing develops gluten, which leads to tough, cakey cookies instead of soft, chewy ones.
- Chill the dough if you must: Even though this is a “no chill” recipe, if your kitchen is really warm or your butter got too soft, popping the dough in the fridge for 10-15 minutes can prevent excessive spreading. It’s optional but helpful.
- Use parchment paper: I know it’s tempting to skip it, but parchment paper prevents sticking and promotes even browning. Plus, cleanup is a breeze.
- Bake one tray at a time: If you’re doubling the recipe, bake one sheet at a time in the center of the oven. Two trays at once can cause uneven baking.
- Watch the edges: The cookies are done when the edges are golden and the centers are still soft. They’ll continue to cook on the hot baking sheet, so don’t wait until they look fully set in the oven.
I once forgot to add the sugar to a batch — yeah, that was a sad, sad cookie. But you know what? I learned to double-check my ingredients before I start mixing. Mistakes happen, and that’s okay. It’s all part of becoming a better baker.
Variations & Adaptations
This recipe is incredibly versatile. Here are some of my favorite ways to switch it up:
- Gluten-Free Version: Substitute the all-purpose flour with a 1:1 gluten-free baking flour blend. I use Bob’s Red Mill, and the cookies turn out just as soft and chewy. No one will notice the difference.
- Dairy-Free Option: Use vegan butter sticks (like Earth Balance) in place of regular butter. The texture will be slightly different, but they’re still delicious. Just make sure your chocolate chips are dairy-free too.
- Double Chocolate Chip: Replace 2 tablespoons of the flour with unsweetened cocoa powder for a rich, chocolatey twist. Add white chocolate chips along with the semi-sweet for a beautiful contrast.
- Add-In Variations: Swap the chocolate chips for chopped nuts (walnuts or pecans work great), dried cranberries, or even M&M’s for a colorful option. My kids love when I add peanut butter chips and chocolate chips together.
- Spiced Cookies: Add ½ teaspoon of cinnamon and a pinch of nutmeg to the dry ingredients for a warm, cozy flavor. Perfect for fall baking sessions.
- Bigger Batch: To make a full batch (about 18-20 cookies), simply double all the ingredients. The baking time remains the same — just make sure you have enough space on your baking sheets.
One of my favorite variations is adding a sprinkle of flaky sea salt on top of the cookies just before baking. That sweet-salty combo is irresistible. Try it — you won’t regret it.
Serving & Storage Suggestions
These cookies are best enjoyed warm, straight from the oven. But let’s be real — sometimes you need to save a few for later. Here’s how to handle both scenarios:
Serving: Serve these cookies slightly warm with a tall glass of cold milk. For an extra treat, sandwich two cookies with a scoop of vanilla ice cream for an instant ice cream sandwich. They’re also perfect alongside a cup of coffee or a mug of hot cocoa. For a fun weekend activity, set up a cookie decorating station with sprinkles, drizzled chocolate, and crushed candy canes.
Storage: Store leftover cookies in an airtight container at room temperature for up to 3 days. To keep them soft, add a slice of bread to the container — the cookies will absorb the moisture from the bread and stay chewy. (The bread will get stale, but that’s a small price to pay.)
Freezing: These cookies freeze beautifully. You can freeze the baked cookies for up to 3 months in a freezer-safe bag or container. To reheat, pop them in a 300°F oven for 5 minutes, or microwave for 10-15 seconds. For an even better option, freeze the raw dough balls on a baking sheet, then transfer them to a freezer bag. Bake from frozen, adding 2-3 minutes to the baking time. Fresh cookies anytime you want them — it’s a game-changer.
Flavor Development: Here’s a secret — these cookies actually taste even better the next day. The flavors meld together overnight, and the texture becomes perfectly balanced. If you can resist eating them all on day one, you’re in for a treat on day two.
Nutritional Information & Benefits
Let’s be honest — these are cookies, not health food. But that doesn’t mean they can’t be part of a balanced lifestyle. Here’s the estimated nutritional breakdown per cookie (based on 8 cookies per batch):
| Nutrient | Amount Per Cookie |
|---|---|
| Calories | 210 |
| Total Fat | 12g |
| Saturated Fat | 7g |
| Cholesterol | 35mg |
| Sodium | 160mg |
| Total Carbohydrates | 25g |
| Dietary Fiber | 1g |
| Sugars | 16g |
| Protein | 2g |
Health Benefits: While these cookies are an indulgence, they do offer some redeeming qualities. Dark chocolate chips contain antioxidants, and the small batch size makes portion control easier. Plus, baking with your kids creates memories and teaches valuable skills — that’s good for the soul.
Dietary Considerations: This recipe contains gluten, dairy, and eggs. For dietary restrictions, check the variations section above for gluten-free and dairy-free options. Always check your ingredient labels for potential allergens.
Personal Perspective: I believe in balance. These cookies are a treat, and there’s nothing wrong with enjoying a treat in moderation. The joy of sharing a warm, homemade cookie with someone you love is worth every calorie.
Conclusion
There you have it — my go-to recipe for small-batch chocolate chip cookies that are kid-approved and require zero chill time. These cookies have saved countless afternoons in my house, turning grumpy moods into happy faces and ordinary days into little celebrations. They’re simple, reliable, and absolutely delicious.
I hope you give this recipe a try, and I hope it brings you and your family the same joy it brings mine. Don’t be afraid to make it your own — add your favorite mix-ins, adjust the bake time to your liking, or double the batch for a crowd. The best recipes are the ones that become part of your story.
If you make these cookies, I’d love to hear about it! Leave a comment below and let me know how they turned out. Did your kids help? Did you try a fun variation? Share your cookie stories — I read every single one. And if you’re looking for more easy, family-friendly recipes, check out my easy oatmeal raisin cookies — they’re another weeknight favorite in our house.
Happy baking, friend. May your cookies always be warm, your milk always be cold, and your kitchen always be full of laughter.
Frequently Asked Questions
Can I use margarine instead of butter?
You can, but the texture won’t be the same. Butter gives cookies their signature flavor and helps them spread properly. Margarine has a higher water content, which can lead to flatter, greasier cookies. If you need a dairy-free option, use vegan butter sticks instead.
Why did my cookies turn out flat?
Flat cookies usually mean the butter was too soft or melted, or there wasn’t enough flour. Make sure your butter is softened but not melted, and measure your flour correctly by spooning it into the measuring cup and leveling it off. If your kitchen is warm, chill the dough for 10-15 minutes before baking.
Can I make these cookies without an electric mixer?
Absolutely! A wooden spoon and a little elbow grease work just fine. Cream the butter and sugar together until smooth and light in color — it might take a few extra minutes, but it’s totally doable. I actually prefer using a spoon for small batches because there’s less cleanup.
How do I get perfectly round cookies?
Right after the cookies come out of the oven, use a round cookie cutter or a glass that’s slightly larger than the cookies to gently swirl them in a circular motion. This pushes the edges inward and creates a perfect circle. Work quickly while they’re still warm and soft.
Can I double this recipe?
Yes! This recipe doubles beautifully. Simply double all the ingredients and follow the same instructions. The baking time remains the same, but you may need to bake in batches depending on your oven size. For a full batch, I recommend using a stand mixer to make the creaming process easier.
Pin This Recipe!

Best Small-Batch Chocolate Chip Cookies: Kid-Approved & No Chill

These small-batch chocolate chip cookies are soft, chewy, and ready in under 25 minutes with no chill time. Made with simple pantry ingredients, they’re perfect for satisfying a cookie craving without a week’s worth of leftovers.
- Prep Time: 10 minutes
- Cook Time: 10 minutes
- Total Time: 20 minutes
- Yield: 6-8 cookies 1x
- Category: Dessert
- Cuisine: American
Ingredients
- 4 tablespoons unsalted butter, softened
- ¼ cup granulated sugar
- ¼ cup light brown sugar, packed
- 1 large egg, room temperature
- ½ teaspoon vanilla extract
- ¾ cup all-purpose flour
- ½ teaspoon baking soda
- ¼ teaspoon salt
- ½ cup semi-sweet chocolate chips
Instructions
- Preheat your oven to 350°F (175°C). Line your baking sheet with parchment paper or a silicone mat.
- In a large bowl, cream together the softened butter, granulated sugar, and packed brown sugar until light, fluffy, and pale in color, about 2-3 minutes.
- Add the egg and vanilla extract, beating on low speed until just combined, about 30 seconds. Scrape down the sides of the bowl.
- In a separate medium bowl, whisk together the flour, baking soda, and salt.
- Gradually add the flour mixture to the wet ingredients, mixing on low speed or stirring with a wooden spoon until just combined. Do not overmix.
- Gently fold in the chocolate chips until evenly distributed.
- Using a 1.5-tablespoon cookie scoop or spoon, scoop out 6-8 equal-sized balls of dough and place them on the prepared baking sheet, spacing them about 2 inches apart.
- Bake immediately for 9-11 minutes, until the edges are golden brown and the centers look slightly underdone and puffy.
- Let the cookies rest on the baking sheet for 5 minutes, then transfer to a wire rack to cool completely.
Notes
For perfectly round cookies, use a round cookie cutter or glass to gently swirl the cookies while still warm. For extra chocolate in every bite, press a few additional chips into the tops of the dough balls before baking. If your kitchen is warm, chill the dough for 10-15 minutes to prevent excessive spreading.
Nutrition
- Serving Size: 1 cookie
- Calories: 210
- Sugar: 16
- Sodium: 160
- Fat: 12
- Saturated Fat: 7
- Carbohydrates: 25
- Fiber: 1
- Protein: 2
Keywords: small-batch chocolate chip cookies, no chill cookies, kid-approved cookies, easy chocolate chip cookies, quick cookies


