Love this? Save it for later!
Share the inspiration with your friends
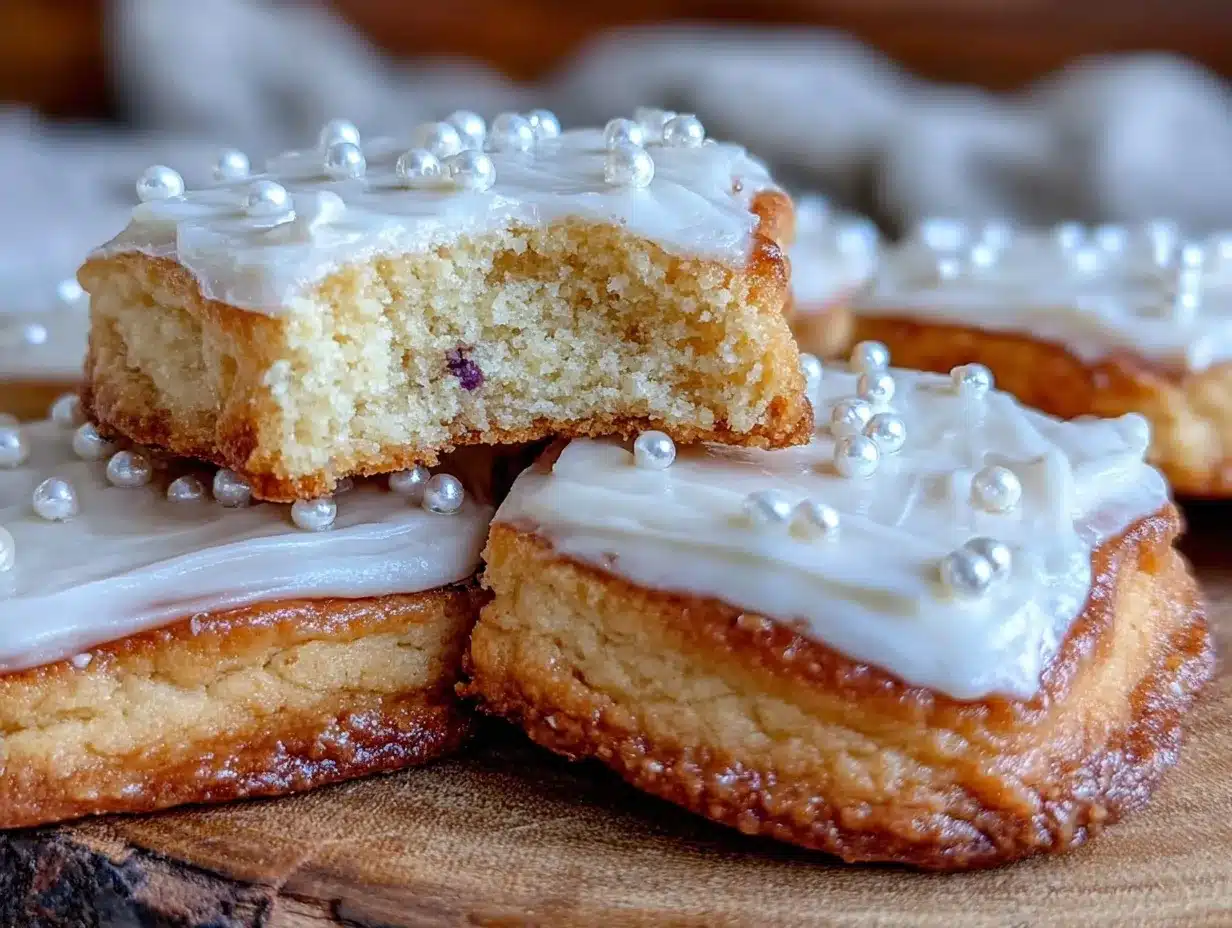
“I never thought a simple cookie could cause such a ruckus,” my friend Jenna confessed one chilly April afternoon as we chatted over coffee. She was juggling last-minute preparations for her son’s first communion and had just realized she forgot to order the traditional cross-shaped cookies she’d promised her guests. Panicked yet determined, she asked if I could help whip up something quick. Honestly, I was skeptical at first—royal icing can be tricky, and perfectly cut-out sugar cookies require patience. But with a borrowed cross cookie cutter and a little improvisation, we managed to create these charming Perfect Communion Cross Cut-Out Sugar Cookies with Royal Icing that not only saved the day but became the hit of the celebration.
That afternoon, the kitchen was a mess—flour dusted every surface, and I accidentally dropped the mixing bowl once (classic me!). Yet, the smell of vanilla sugar dough baking and the sight of those delicate white crosses drying on the racks stayed with me. Maybe you’ve been there, caught in a last-minute scramble with guests arriving soon, or maybe you’re planning ahead for a special occasion. Either way, these cookies have that warm, comforting feel that feels both festive and personal.
Since then, I’ve refined this recipe until it’s foolproof, easy enough for anyone to follow yet impressive enough to make your communion celebration memorable. Let me tell you, there’s something special about handing out these sweet, beautifully iced crosses that makes the day feel even more significant. So, whether you’re a seasoned baker or just starting out, I promise this recipe will become your go-to for elegant, heartfelt cookie treats.
Why You’ll Love This Recipe
After many baking sessions and tests (including a few frosting disasters), I’m confident these Perfect Communion Cross Cut-Out Sugar Cookies with Royal Icing stand out for several reasons. Here’s why I keep coming back to this recipe:
- Quick & Easy: You can have these cookies ready in under two hours, perfect for those busy days before the ceremony.
- Simple Ingredients: No need for fancy or hard-to-find items; most of these are pantry staples you probably already have.
- Perfect for Special Occasions: These cookies add a personal touch to communions, confirmations, or any religious celebration.
- Crowd-Pleaser: Both kids and adults rave about the balance of sweetness and buttery crumb.
- Unbelievably Delicious: The royal icing dries with a smooth, glossy finish that’s just the right sweetness without overpowering the cookie.
What makes this recipe different? It’s the texture—the cookies are crisp yet tender, not too hard or cakey—ideal for cutting out detailed shapes like crosses. Plus, my royal icing recipe is simple but holds up beautifully, allowing for clean, polished decorations that won’t crack or run. Honestly, this is the kind of recipe that makes you close your eyes after the first bite because it feels both nostalgic and special. It’s like comfort food with a delicate, celebratory twist.
What Ingredients You Will Need
This recipe uses simple, wholesome ingredients to deliver bold flavor and satisfying texture without the fuss. Most are pantry staples, and substitutions are straightforward if needed.
- For the Sugar Cookies:
- 2 ¾ cups (345g) all-purpose flour (I prefer King Arthur for consistent results)
- 1 teaspoon baking powder
- ½ teaspoon salt
- 1 cup (225g) unsalted butter, softened (European-style butter adds extra richness)
- 1 ½ cups (300g) granulated sugar
- 1 large egg, room temperature
- 1 teaspoon pure vanilla extract (Madagascar bourbon vanilla is my go-to)
- 1 teaspoon almond extract (optional, but gives a lovely subtle depth)
- For the Royal Icing:
- 3 cups (360g) powdered sugar, sifted
- 2 large egg whites (or 4 tablespoons meringue powder mixed with ⅓ cup water for a safer option)
- 1 teaspoon fresh lemon juice (helps the icing dry with a glossy finish)
- Food coloring (optional, usually white or soft pastels for communion themes)
Substitution tip: For gluten-free cookies, swap the all-purpose flour with a 1:1 gluten-free baking blend. If dairy-free is needed, use vegan butter and egg replacer (like flax egg) with slightly more liquid, but note the texture will differ.
Equipment Needed
- Mixing bowls (medium and large)
- Electric mixer (stand or hand-held) – makes creaming butter and whipping icing much easier
- Measuring cups and spoons – precise measurements matter here
- Rolling pin – for evenly rolling out dough
- Cross-shaped cookie cutter (around 3 inches wide works well)
- Baking sheets lined with parchment paper or silicone mats
- Cooling rack – allows cookies to cool evenly
- Piping bags with small round tips (size #2 or #3) for delicate royal icing work
- Small spatula or butter knife for smoothing dough or spreading icing if not piping
If you don’t have a stand mixer, a sturdy hand mixer will do fine. For piping, if you’re new to it, disposable piping bags are budget-friendly and easy to handle. I’ve found that silicone mats help cookies bake evenly and prevent sticking better than parchment sometimes.
Preparation Method
- Prepare the Dough (15 minutes): In a medium bowl, whisk together 2 ¾ cups flour, baking powder, and salt. In a large bowl, cream 1 cup softened butter with 1 ½ cups sugar until light and fluffy (about 3-4 minutes). Beat in the egg, vanilla, and almond extract until combined.
- Combine Ingredients (2-3 minutes): Gradually add the dry ingredients to the wet, mixing on low speed until the dough just comes together. Avoid overmixing; you want a tender cookie, not tough.
- Chill the Dough (at least 1 hour): Wrap the dough in plastic wrap and refrigerate. This step is crucial to prevent spreading and to maintain crisp edges when cut. If pressed for time, 30 minutes in the freezer can work.
- Roll and Cut (10-15 minutes): Lightly flour your work surface and rolling pin. Roll the dough to about ¼-inch (6mm) thickness. Use your cross cookie cutter to cut shapes, transfer them carefully to the prepared baking sheet. (I usually refrigerate the cut shapes on the sheet for 10 minutes before baking to keep their shape.)
- Bake the Cookies (8-10 minutes at 350°F / 175°C): Bake until the edges are just starting to turn golden. The centers may look slightly soft but will firm up as they cool. Remove from oven and cool on baking sheets for 5 minutes before transferring to a wire rack.
- Prepare Royal Icing (10 minutes): Beat egg whites (or meringue powder mixture) with lemon juice until foamy. Gradually add sifted powdered sugar, beating on low then high until stiff peaks form and the icing holds shape. Add food coloring if desired.
- Decorate (Variable time): Transfer icing to piping bags fitted with small round tips. Outline each cookie and flood the inside with thinner icing if you want a smooth surface. Let each layer dry for 30-60 minutes before adding details to avoid colors bleeding. (Pro tip: Keep a damp cloth over the unused icing to prevent drying.)
- Dry and Store: Allow decorated cookies to dry at room temperature for several hours or overnight. Store in an airtight container between layers of parchment.
Occasionally, the dough may feel sticky; if so, add a touch more flour, but be careful not to overdo it. The texture should be soft but manageable. And yes, sometimes the icing takes a bit longer to dry depending on humidity—patience pays off!
Cooking Tips & Techniques
- Don’t Skip Chilling the Dough: This step keeps cookies from spreading and helps the edges stay sharp for perfect cross shapes.
- Roll Evenly: Use rolling pin guides or spacers to maintain consistent thickness, so cookies bake uniformly.
- Use Fresh Ingredients: Fresh butter and eggs make a noticeable difference in flavor and texture.
- Royal Icing Consistency Matters: For outlining, use thicker icing; thin it slightly with water for flooding. Too thin, and it runs; too thick, and it won’t spread smoothly.
- Practice Piping: If you’re new to royal icing, practice piping on parchment paper first. Steady hands come with practice!
- Humidity Challenges: On humid days, icing may take longer to dry—try using a fan or air conditioning to speed things up.
- Personal Lesson: I once skipped sifting powdered sugar and ended with gritty icing—lesson learned the hard way.
Variations & Adaptations
- Flavor Twists: Add lemon or orange zest to the dough for a citrusy note that pairs beautifully with the sweet icing.
- Dietary Options: Use gluten-free flour blends and egg replacers to accommodate allergies. For dairy-free, swap butter for coconut oil or vegan butter.
- Colorful Icing: Instead of classic white, tint royal icing with soft pastel tones—light blue, pale pink, or lavender—to match communion themes or personal preferences.
- Texture Variation: Sprinkle finely chopped nuts or edible glitter lightly on wet icing for subtle texture and sparkle.
- Shape Variety: While crosses are traditional, you can try doves, chalices, or other religious symbols using cookie cutters for a themed variety platter.
I personally once tried a lavender-infused royal icing that was a hit at a friend’s confirmation party—delicate flavor and a gorgeous pale purple shade!
Serving & Storage Suggestions
Serve these cookies at room temperature for the best texture and flavor. They look lovely arranged on a platter with a few sprigs of fresh rosemary or baby’s breath for a simple yet elegant presentation. Pair them with light teas or sparkling water with lemon slices to balance the sweetness.
Store cookies in an airtight container layered with parchment paper to avoid sticking. They keep well for up to a week at room temperature. For longer storage, freeze undecorated cookies by wrapping them tightly; thaw completely before icing. Decorated cookies freeze best if dried thoroughly, wrapped carefully, and placed in a sturdy container to avoid damage.
Reheat frozen cookies gently in a low oven (250°F/120°C for 5-7 minutes) to refresh their crispness. Over time, the flavors meld beautifully, making the cookies taste even better a day or two after baking.
Nutritional Information & Benefits
Each cookie (based on a 3-inch cross shape) contains approximately 150 calories, 7g fat, 22g carbohydrates, and 1g protein. The recipe uses real butter and eggs, providing natural fats and protein without additives. Vanilla and almond extracts add aroma without calories.
While these cookies are a treat, they can be part of a balanced celebration menu. Using fresh, quality ingredients means you’re avoiding artificial flavors or preservatives commonly found in store-bought cookies. For gluten-free or dairy-free adaptations, this recipe can be tailored to meet dietary needs without sacrificing taste.
From a wellness standpoint, sharing these homemade cookies at communion ceremonies adds a mindful, loving touch that processed snacks just can’t match.
Conclusion
If you’re looking for a recipe that combines tradition, simplicity, and a little bit of kitchen magic, these Perfect Communion Cross Cut-Out Sugar Cookies with Royal Icing are it. They bring a handmade, heartfelt element to any celebration, with a texture and flavor that keeps everyone coming back for more.
Feel free to tweak the flavors, colors, or shapes to honor your unique style or occasion. Believe me, once you make these, you’ll understand why I keep this recipe close—it’s more than just cookies; it’s a little sweet moment of joy for meaningful days.
Give it a try, and I’d love to hear how your batch turns out or any creative twists you add. Share your stories, questions, or photos in the comments below. Let’s bake some memories together!
FAQs
Can I make the dough ahead of time?
Yes! You can prepare the dough, wrap it tightly, and refrigerate for up to 3 days or freeze for up to 3 months. Just thaw before rolling out.
Is it safe to use raw egg whites in royal icing?
If concerned, use pasteurized egg whites or meringue powder instead, which are safe and work just as well.
How do I fix royal icing that’s too runny?
Add more powdered sugar a tablespoon at a time until it reaches the desired thickness.
Can I store decorated cookies in the fridge?
It’s best to store them at room temperature in an airtight container to prevent condensation and softening.
What if my cookies spread during baking?
Make sure your dough is well chilled before cutting and baking. Also, avoid overworking the dough to keep gluten development minimal.
Pin This Recipe!
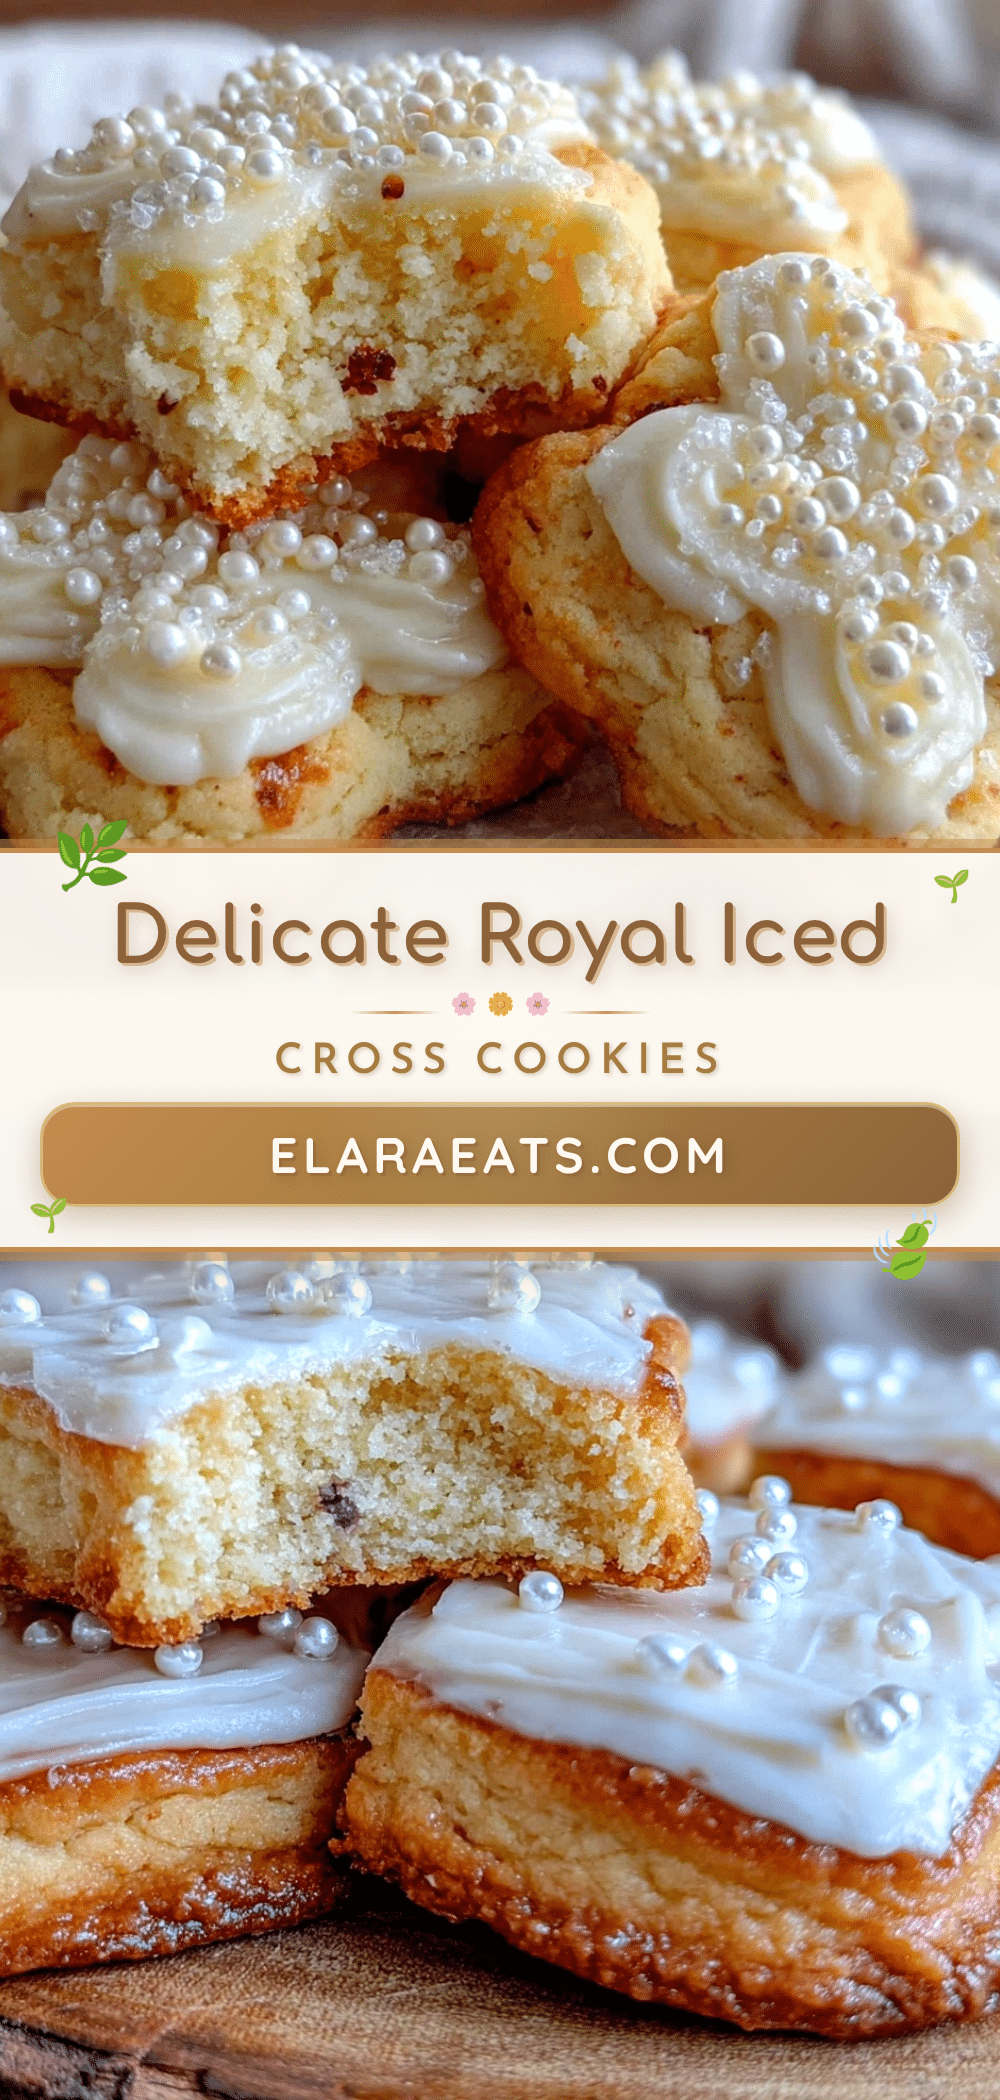
Perfect Communion Cross Cut-Out Sugar Cookies Easy Royal Icing Recipe

These charming cross-shaped sugar cookies with smooth royal icing are perfect for communion celebrations. They are crisp yet tender, easy to make, and beautifully decorated for a special occasion.
- Prep Time: 20 minutes
- Cook Time: 10 minutes
- Total Time: 1 hour 30 minutes
- Yield: 24 cookies 1x
- Category: Dessert
- Cuisine: American
Ingredients
- 2 ¾ cups (345g) all-purpose flour
- 1 teaspoon baking powder
- ½ teaspoon salt
- 1 cup (225g) unsalted butter, softened
- 1 ½ cups (300g) granulated sugar
- 1 large egg, room temperature
- 1 teaspoon pure vanilla extract
- 1 teaspoon almond extract (optional)
- 3 cups (360g) powdered sugar, sifted
- 2 large egg whites (or 4 tablespoons meringue powder mixed with ⅓ cup water)
- 1 teaspoon fresh lemon juice
- Food coloring (optional)
Instructions
- Prepare the Dough (15 minutes): In a medium bowl, whisk together flour, baking powder, and salt. In a large bowl, cream softened butter with sugar until light and fluffy (3-4 minutes). Beat in the egg, vanilla, and almond extract until combined.
- Combine Ingredients (2-3 minutes): Gradually add the dry ingredients to the wet, mixing on low speed until the dough just comes together. Avoid overmixing.
- Chill the Dough (at least 1 hour): Wrap the dough in plastic wrap and refrigerate. Alternatively, chill in the freezer for 30 minutes if pressed for time.
- Roll and Cut (10-15 minutes): Lightly flour work surface and rolling pin. Roll dough to about ¼-inch (6mm) thickness. Use cross cookie cutter to cut shapes and transfer to prepared baking sheet. Refrigerate cut shapes on sheet for 10 minutes before baking.
- Bake the Cookies (8-10 minutes at 350°F / 175°C): Bake until edges start to turn golden. Cool on baking sheets for 5 minutes, then transfer to wire rack.
- Prepare Royal Icing (10 minutes): Beat egg whites (or meringue powder mixture) with lemon juice until foamy. Gradually add sifted powdered sugar, beating until stiff peaks form. Add food coloring if desired.
- Decorate (variable time): Transfer icing to piping bags with small round tips. Outline cookies and flood inside with thinner icing. Let each layer dry 30-60 minutes before adding details.
- Dry and Store: Allow decorated cookies to dry at room temperature for several hours or overnight. Store in airtight container between parchment layers.
Notes
[‘Chill dough to prevent spreading and maintain sharp edges.’, ‘Use rolling pin guides for even thickness.’, ‘Fresh butter and eggs improve flavor and texture.’, ‘Adjust royal icing consistency for outlining and flooding.’, ‘Practice piping on parchment paper if new to royal icing.’, ‘Humidity can affect icing drying time; use fan or AC to speed drying.’, ‘Sift powdered sugar to avoid gritty icing.’, ‘Add a touch more flour if dough feels sticky but avoid overdoing it.’]
Nutrition
- Serving Size: 1 cookie (3-inch cro
- Calories: 150
- Fat: 7
- Carbohydrates: 22
- Protein: 1
Keywords: communion cookies, sugar cookies, royal icing, cut-out cookies, religious celebration, cross cookies, easy sugar cookies