Love this? Save it for later!
Share the inspiration with your friends
My neighbor asked me last week why I couldn’t just dump everything in one pan and bake it. I had been showing her how to layer a pumpkin dessert from scratch—mixing the batter separately, greasing the pan, worrying about the order of ingredients. She watched me for a minute, then said, “Why not just toss it all in the pan and let the oven figure it out?” I started explaining why that wouldn’t work—then stopped. Honestly, I had no good reason.
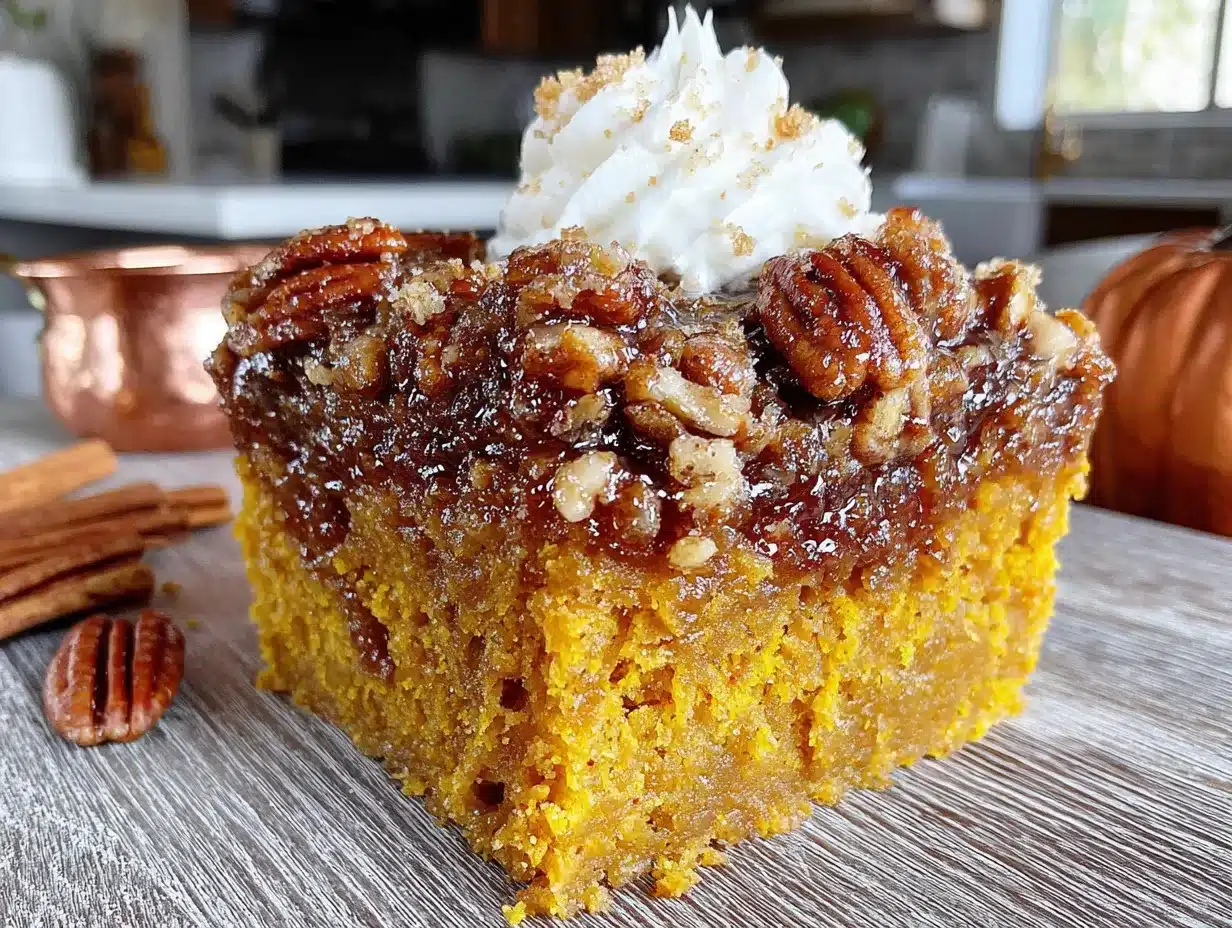
So I tried it. I dumped a can of pumpkin in a 9×13 pan, sprinkled cake mix on top, poured melted butter over everything, and crossed my fingers. The result was this ridiculous, golden-brown, slightly crisp-on-top, soft-and-gooey-on-the-bottom dessert that my family devoured in about twelve minutes. I mean, I actually felt a little sheepish. All those years of careful layering, and the lazy way turned out better. Maybe you’ve been there—spending extra time on a recipe only to realize the shortcut version tastes just as good, if not better.
That was three autumns ago. I’ve made this easy pumpkin dump cake at least twice every fall since, and it’s never let me down. It’s the kind of dessert that makes you close your eyes after the first bite—warm pumpkin spice, buttery crunch, and that soft, custard-like center. And the best part? It costs about eight dollars to make and feeds a crowd. This recipe stayed with me because it taught me something: sometimes the best cooking happens when you stop overthinking and just trust the process. Or, you know, trust your neighbor.
Why You’ll Love This Recipe
I’ve tested this easy pumpkin dump cake more times than I care to admit—different pans, different butter amounts, different cake mix flavors. I’ve burned it, undercooked it, and accidentally used salted butter when the recipe called for unsalted. Through all those trials, I learned exactly what works. This version is the one I’d serve to my mother-in-law without a second thought. Here’s why it stands out:
- Only 5 Ingredients: Pumpkin puree, sweetened condensed milk, eggs, spice cake mix, and butter. That’s it. No fancy grocery trips, no obscure spices you’ll never use again.
- Ready in Under an Hour: From pantry to table in about 50 minutes. Perfect for those evenings when you forgot you promised to bring dessert to tomorrow’s potluck.
- Family-Approved: My kids—who claim to hate anything that looks “orange”—ask for seconds. My husband, who is not a dessert person, eats it straight from the pan with a spoon.
- Budget-Friendly: This whole dessert costs around eight dollars. Compare that to a store-bought pumpkin pie that costs twice as much and serves half as many people.
- Foolproof: You literally dump ingredients in a pan. No mixer, no sifting, no tempering eggs. If you can open a can and stir, you can make this.
What makes this recipe different from other pumpkin dump cakes out there? It’s the ratio. I spent three batches getting the pumpkin-to-cake-mix balance just right—enough pumpkin filling to stay creamy, enough cake mix to get that signature crunchy top. Plus, I use sweetened condensed milk instead of evaporated milk, which gives it a richer, almost caramel-like sweetness that pairs perfectly with the warm pumpkin spice. This isn’t just another version of pumpkin dump cake—it’s the version that makes people ask for the recipe before they finish their first bite.
What Ingredients You Will Need
This recipe uses simple, honest ingredients that you probably already have in your pantry. The beauty of this easy pumpkin dump cake is that it doesn’t require any special baking supplies—just five everyday staples that come together to create something truly special. Here’s what you’ll need:
For the Pumpkin Layer
- 1 can (15 oz) pumpkin puree (not pumpkin pie filling—make sure it’s 100% pure pumpkin. I prefer Libby’s for consistent texture)
- 1 can (14 oz) sweetened condensed milk (this adds richness and sweetness; don’t substitute evaporated milk or the texture will be too thin)
- 2 large eggs (room temperature if you remember, but cold works fine too—I’ve done both)
- 1 teaspoon pumpkin pie spice (optional, but I add it for extra warmth. You can use ½ teaspoon cinnamon, ¼ teaspoon nutmeg, and ¼ teaspoon ginger instead)
For the Topping
- 1 box (15.25 oz) spice cake mix (I use Duncan Hines or Betty Crocker—both work perfectly. Yellow cake mix with 1 teaspoon pumpkin pie spice added is a good substitute)
- ¾ cup (1½ sticks) unsalted butter (melted. If you only have salted butter, just reduce the added salt in any other part of the meal. The butter gets poured over the dry cake mix)
A quick note on ingredient selection: Look for pumpkin puree that lists only pumpkin as the ingredient. Some brands add spices or sugar, which can throw off the sweetness balance. For the cake mix, spice cake is ideal because it already has cinnamon, nutmeg, and clove in it—but yellow cake mix works in a pinch if you add extra pumpkin pie spice. I’ve also tried this with gluten-free yellow cake mix, and it turned out beautifully, so feel free to make that swap if needed.
If you’re dairy-free, use a plant-based butter stick (I like Miyoko’s) and it works just as well. The texture might be slightly less crispy on top, but the flavor is still fantastic.
Equipment Needed
You don’t need a fancy kitchen to make this easy pumpkin dump cake. Here’s what you’ll need—and most of it is probably already in your cabinets:
- 9×13-inch baking pan: Glass, ceramic, or metal all work. I use a glass Pyrex dish because I can see the bottom layer browning through the sides. If you only have a metal pan, reduce the baking time by 5 minutes and check early.
- Large mixing bowl: For whisking the pumpkin filling. Any medium-to-large bowl works—I’ve used a salad bowl in a pinch.
- Whisk or fork: To combine the pumpkin, condensed milk, eggs, and spice. A fork works fine if your whisk is in the dishwasher.
- Spatula or spoon: For spreading the pumpkin mixture evenly. A rubber spatula makes it easier to get every last bit out of the bowl.
- Measuring cups and spoons: For the melted butter and optional spice. If you’re using a full stick of butter, you can eyeball the ¾ cup by cutting off ¼ of the stick.
- Cooling rack: Optional but helpful for even cooling. A trivet or even a folded kitchen towel works too.
I’ve made this recipe without a whisk (used a fork), without a spatula (used a spoon), and without a cooling rack (set the pan on my stovetop). It turned out great every time. Don’t let missing equipment stop you—this recipe is forgiving.
Preparation Method
This easy pumpkin dump cake comes together in about 10 minutes of active prep time. The oven does the rest. Follow these steps, and you’ll have a golden, bubbly dessert that smells like autumn in a pan.
- Preheat your oven to 350°F (175°C). Position the rack in the center of the oven. While the oven heats, lightly grease your 9×13-inch baking pan with butter or nonstick spray. I use a paper towel to spread a thin layer of butter—it adds a little extra flavor to the edges.
- Make the pumpkin filling: In your large mixing bowl, combine the 15-ounce can of pumpkin puree, 14-ounce can of sweetened condensed milk, 2 large eggs, and 1 teaspoon pumpkin pie spice (if using). Whisk until smooth and fully combined. The mixture should be thick, creamy, and a uniform orange color. It will smell like pumpkin pie filling—that’s a good sign. If you see any streaks of egg white, keep whisking until they disappear.
- Pour the filling into the prepared pan: Use your spatula to scrape every bit of the pumpkin mixture into the baking pan. Spread it evenly with the spatula, making sure the corners are filled. The layer should be about ½-inch thick. Don’t worry if it looks thin—the cake mix and butter will transform it.
- Add the cake mix layer: Sprinkle the entire box of spice cake mix evenly over the pumpkin filling. Don’t stir it in—just let it sit on top. I like to tap the box as I go to break up any clumps. Make sure every part of the pumpkin layer is covered, including the corners. If you have bare spots, the cake mix won’t form that signature crunchy top.
- Pour the melted butter over the top: Melt your ¾ cup (1½ sticks) of unsalted butter in the microwave or on the stovetop. Drizzle it as evenly as possible over the dry cake mix. Try to cover as much of the surface as you can—the butter will sink down and create that golden, crispy crust. Don’t stir it! Just let the butter sit on top. Some spots might look dry, and that’s okay—the butter will spread as it bakes.
- Bake for 40-45 minutes: Place the pan in the preheated oven and bake until the top is golden brown and the edges are bubbly. The center should be set but still slightly jiggly—it will continue to set as it cools. At 40 minutes, insert a toothpick into the center. If it comes out with moist crumbs (not wet batter), it’s done. If it’s still liquidy, give it 5 more minutes and check again.
- Cool for at least 15 minutes: Place the pan on a cooling rack or trivet. Let it cool for at least 15 minutes before serving. This allows the filling to set so you get clean slices. If you serve it too soon, it will be runny—still delicious, but messy. I learned this the hard way when I scooped it straight from the oven and ended up with pumpkin soup on my plate.
- Serve warm or at room temperature: Scoop into bowls or cut into squares. A scoop of vanilla ice cream or a dollop of whipped cream takes it over the top. The contrast between the warm, soft pumpkin and the cold, creamy ice cream is absolutely worth the extra step.
Cooking Tips & Techniques
After making this easy pumpkin dump cake more times than I can count—including a few spectacular failures—I’ve picked up some tricks that make a real difference. Here’s what I’ve learned:
Don’t overmix the pumpkin filling. I know it’s tempting to keep whisking until it’s perfectly smooth, but a few tiny lumps are fine. Overmixing can incorporate too much air, which makes the filling puff up in the oven and then collapse as it cools. Just whisk until the eggs are incorporated and you don’t see any white streaks.
Use cold butter for a crunchier top. I usually melt my butter in the microwave, but I’ve found that if I let it cool slightly before drizzling (so it’s warm but not hot), it soaks into the cake mix more slowly and creates a better crust. If you pour boiling-hot butter over the mix, it absorbs too quickly and you lose that signature crunch.
Watch the edges. The edges of the pan cook faster than the center. If the edges are getting too dark at the 35-minute mark, tent the pan loosely with aluminum foil for the remaining baking time. I forgot to do this once and ended up with burnt edges and a undercooked center—not my finest moment.
Let it rest. I know you’ll want to dig in as soon as it comes out of the oven, but trust me on this one. Letting it cool for at least 15 minutes allows the pumpkin filling to set properly. If you scoop it too early, you’ll get a runny mess. I’ve done it. It’s still tasty, but it’s not the beautiful, sliceable dessert you’re aiming for.
Test for doneness correctly. The toothpick test works, but you’re looking for moist crumbs, not a clean toothpick. This dessert is meant to be soft and custard-like in the center. If you wait until the toothpick comes out completely clean, you’ve overbaked it and the filling will be dry.
Variations & Adaptations
This easy pumpkin dump cake is incredibly versatile. I’ve tried several variations over the years, and they’ve all been hits. Here are some of my favorites:
Gluten-Free Version
Swap the regular spice cake mix for a gluten-free yellow or spice cake mix. I’ve used King Arthur’s gluten-free yellow cake mix with great results—just add 1 teaspoon pumpkin pie spice to the dry mix to replace the spice cake flavor. The texture is slightly more crumbly, but the flavor is spot-on.
Dairy-Free Version
Use a plant-based butter stick (I like Miyoko’s or Earth Balance) and a dairy-free cake mix. Most boxed cake mixes are dairy-free by default, but check the label to be sure. The top won’t get quite as crispy, but the pumpkin filling will still be rich and creamy.
Pumpkin Chocolate Chip Dump Cake
Before adding the cake mix layer, sprinkle ½ cup of chocolate chips over the pumpkin filling. The chocolate melts into the pumpkin and creates little pockets of gooey goodness. My kids go crazy for this version—it’s like pumpkin brownies and cake had a baby.
Pecan Praline Topping
After pouring the melted butter over the cake mix, sprinkle ½ cup of chopped pecans and 2 tablespoons of brown sugar on top. The nuts toast in the oven and add a wonderful crunch. I made this for Thanksgiving one year, and it disappeared faster than the pumpkin pie.
Slow Cooker Method
You can make this in a 6-quart slow cooker. Grease the insert, pour in the pumpkin filling, sprinkle the cake mix on top, and drizzle with melted butter. Cook on low for 3-4 hours or high for 1½-2 hours. The top won’t get as crispy, but it’s perfect for potlucks when you need to free up oven space. Place a clean kitchen towel under the lid to catch condensation so it doesn’t drip onto the cake.
Serving & Storage Suggestions
This easy pumpkin dump cake is best served warm, but it’s delicious at room temperature too. Here’s how to make the most of it:
Serving temperature: Warm from the oven is ideal—the pumpkin filling is soft and custard-like, and the top is perfectly crunchy. If you’re serving it later, reheat individual portions in the microwave for 20-30 seconds. A scoop of vanilla ice cream or a generous dollop of whipped cream is practically mandatory—the cold creaminess balances the warm, spiced pumpkin beautifully.
Presentation ideas: Scoop into shallow bowls and top with a sprinkle of cinnamon or a drizzle of caramel sauce. For a prettier presentation, cut into squares and serve on dessert plates with a mint leaf garnish. This dessert looks rustic and homey—embrace the messy, scoopable nature of it.
What to serve with it: A cup of hot coffee or spiced apple cider is perfect alongside. If you’re serving it for a fall gathering, pair it with a simple green salad to balance the richness. For a full Thanksgiving spread, this can stand in for—or alongside—the traditional pumpkin pie.
Storage instructions: Cover the pan tightly with foil or plastic wrap and store in the refrigerator for up to 5 days. The flavor actually improves after a day or two as the spices meld together. To reheat, microwave individual portions for 20-30 seconds, or warm the whole pan in a 300°F oven for 10-15 minutes.
Freezer instructions: This dessert freezes beautifully. Let it cool completely, then cut into individual portions and wrap each piece tightly in plastic wrap and foil. Freeze for up to 3 months. To serve, thaw in the refrigerator overnight and reheat in the microwave or oven. I always make a double batch in the fall and stash one in the freezer for a cozy winter treat.
How flavors develop: The first day, the pumpkin flavor is bright and the top is very crunchy. By day two, the spices have mellowed and blended together, and the top softens slightly. Both versions are delicious—it just depends on your texture preference.
Nutritional Information & Benefits
This easy pumpkin dump cake is a dessert, so it’s not health food—but it does have some redeeming qualities. Here’s the estimated nutritional breakdown per serving (based on 12 servings):
| Nutrient | Amount Per Serving |
|---|---|
| Calories | 380 |
| Total Fat | 18g |
| Saturated Fat | 10g |
| Carbohydrates | 52g |
| Sugar | 36g |
| Protein | 6g |
| Fiber | 3g |
| Vitamin A | 190% DV |
Pin This Recipe!
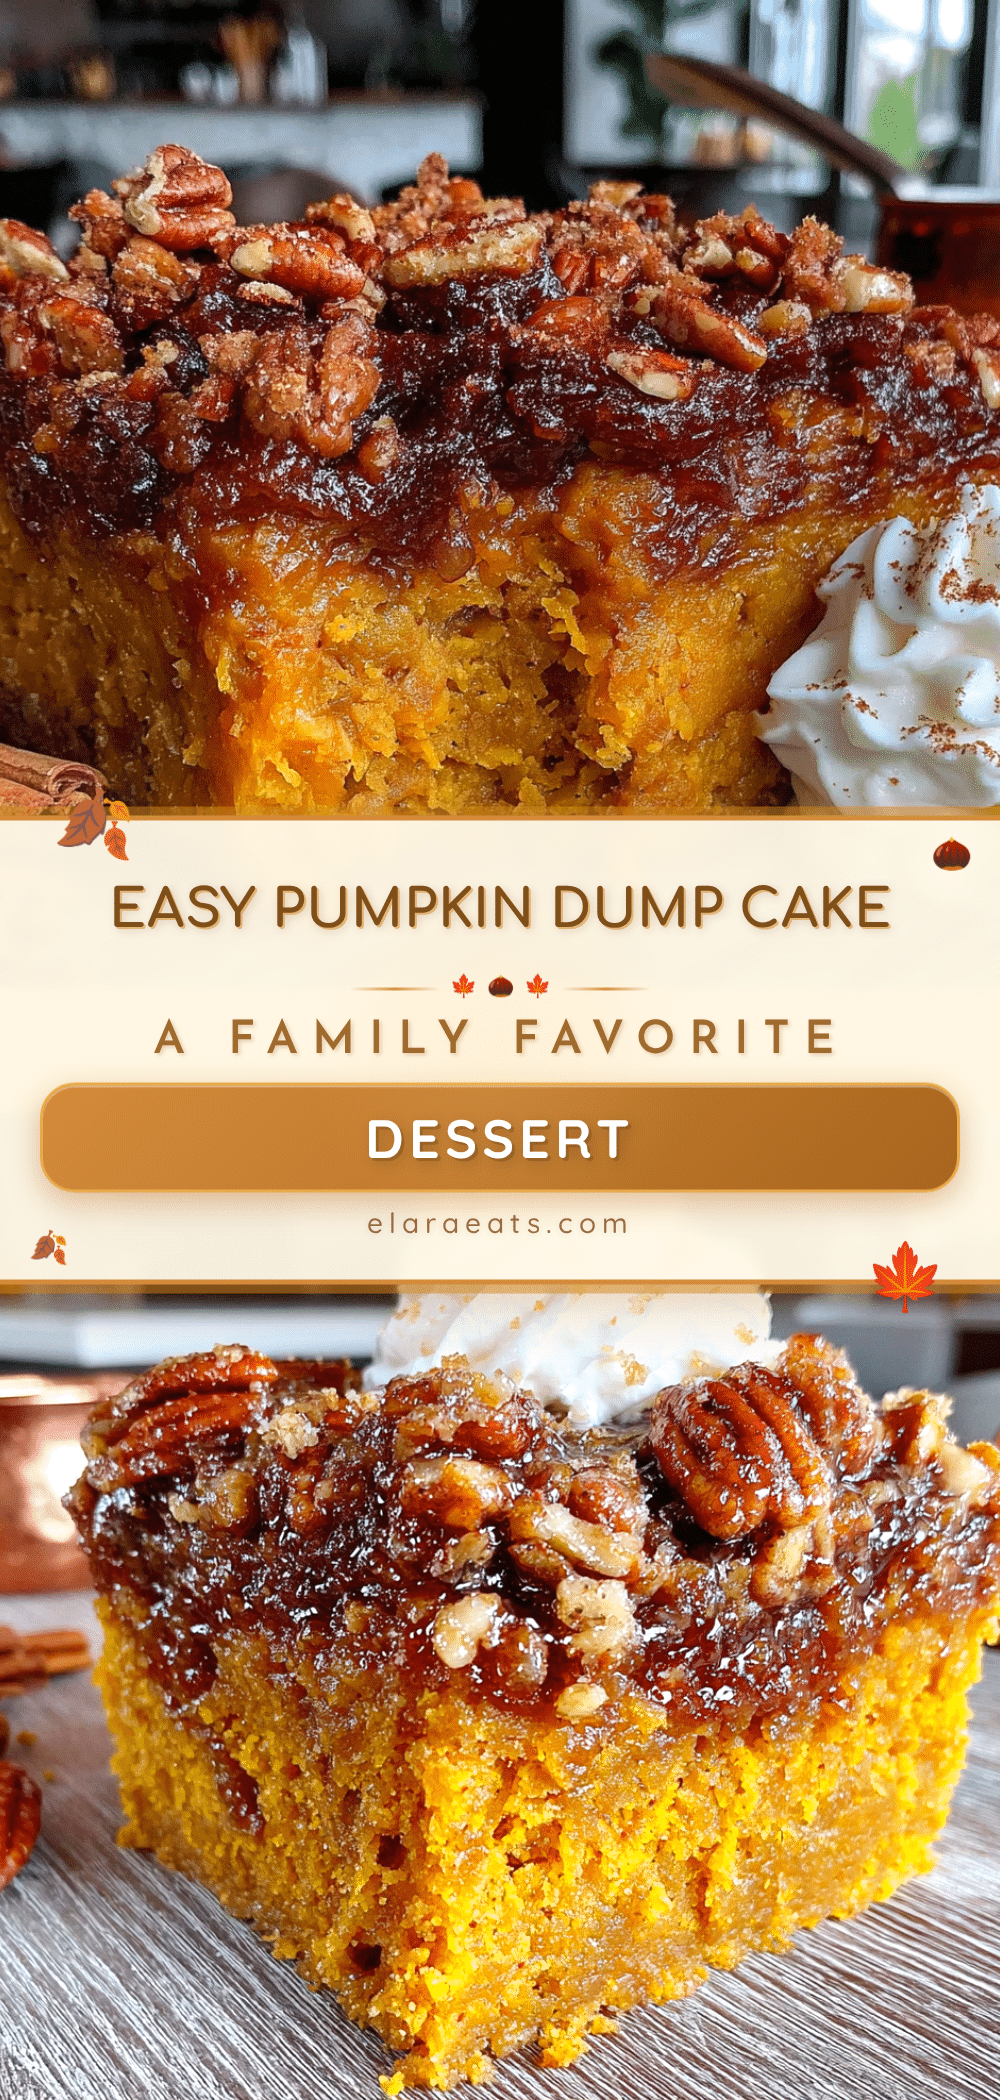
Easy Pumpkin Dump Cake: The Best 5-Ingredient Dessert
A simple, budget-friendly pumpkin dump cake made with just 5 ingredients. Ready in under an hour, this dessert features a creamy pumpkin filling with a buttery, crunchy cake topping.
- Prep Time: 10 minutes
- Cook Time: 40 minutes
- Total Time: 50 minutes
- Yield: 12 servings 1x
- Category: Dessert
- Cuisine: American
Ingredients
- 1 can (15 oz) pumpkin puree
- 1 can (14 oz) sweetened condensed milk
- 2 large eggs
- 1 teaspoon pumpkin pie spice (optional)
- 1 box (15.25 oz) spice cake mix
- ¾ cup (1½ sticks) unsalted butter, melted
Instructions
- Preheat oven to 350°F (175°C). Lightly grease a 9×13-inch baking pan with butter or nonstick spray.
- In a large mixing bowl, whisk together pumpkin puree, sweetened condensed milk, eggs, and pumpkin pie spice (if using) until smooth.
- Pour the pumpkin mixture into the prepared pan and spread evenly.
- Sprinkle the entire box of spice cake mix evenly over the pumpkin filling. Do not stir.
- Drizzle the melted butter evenly over the cake mix. Do not stir.
- Bake for 40-45 minutes, until the top is golden brown and the edges are bubbly. The center should be set but slightly jiggly.
- Cool for at least 15 minutes before serving. Serve warm or at room temperature.
Notes
For a crunchier top, let melted butter cool slightly before drizzling. If edges brown too quickly, tent with foil. Let cool at least 15 minutes before serving to allow filling to set. Store covered in refrigerator for up to 5 days.
Nutrition
- Serving Size: 1 serving
- Calories: 380
- Sugar: 36
- Fat: 18
- Saturated Fat: 10
- Carbohydrates: 52
- Fiber: 3
- Protein: 6
Keywords: pumpkin dump cake, easy pumpkin dessert, 5-ingredient dessert, fall dessert, pumpkin cake


