Love this? Save it for later!
Share the inspiration with your friends
My brother-in-law, Mark, had claimed to hate banana bread for over a decade. “It’s just baby food in a loaf pan,” he’d say every single time someone brought one to a family gathering. I’d roll my eyes, but honestly, I kind of understood where he was coming from. Most banana breads are dense, wet, and one-note sweet. So when I started testing this Maple Pumpkin Banana Bread for a fall dinner party I was hosting, I didn’t even think to offer him a slice. I figured I’d save myself the lecture.
Then I caught him, mid-conversation with my sister, holding a second slice.
He didn’t even see me watching from the kitchen doorway. He just took another bite, closed his eyes for a second—you know that involuntary little pause people do when something genuinely surprises them? That. I walked over and casually asked if he’d changed his mind. He shrugged, trying to play it cool, and muttered something about how it “didn’t taste like banana bread.” And he was right. It doesn’t. The pumpkin puree keeps it impossibly moist without making it soggy, the maple syrup adds a warmth that sugar just can’t, and the spice blend? Let’s just say it fills your kitchen with the kind of smell that makes guests hover near the oven.
This recipe became my secret weapon for hosting fall gatherings. It’s the thing people ask for by name at Thanksgiving, and the loaf I bring to potlucks when I want to leave with an empty plate. Honestly, I keep making it because it’s the one dish that consistently makes people stop talking for a second—and for a host, that’s the highest compliment there is.
Why You’ll Love This Recipe
This isn’t just another banana bread recipe you’ll forget about by next week. This is the one that gets scribbled on napkins and texted to friends before the party’s even over. Here’s why it works so well for hosting:
- Incredibly Moist Texture: The combination of ripe bananas and pumpkin puree creates a crumb that’s tender, never dry, and stays fresh for days. No one likes a dry loaf at a party.
- No Fancy Equipment Needed: You don’t need a stand mixer or any special gadgets. Just a bowl, a whisk, and a loaf pan. Perfect if you’re already juggling multiple dishes before guests arrive.
- Make-Ahead Friendly: Bake this the night before your gathering. The flavors actually get better after a day resting in the fridge, which is a lifesaver for any host.
- Effortlessly Impressive: This loaf looks stunning on a cake stand with a simple drizzle of maple glaze. It steals the table without stealing your time.
- Customizable for Dietary Needs: I’ve tested this with gluten-free flour blends and dairy-free butter, and it works beautifully. Your guests with restrictions won’t feel left out.
- Perfect Fall Flavor Profile: The maple and pumpkin are subtle enough that even banana bread skeptics (yes, Mark) will come back for seconds. It’s warm, spiced, and feels like a hug on a plate.
This recipe is the kind of thing that makes you look like you spent hours in the kitchen when really, you just let the ingredients do the work. It’s comfort food reimagined—familiar enough to feel nostalgic, but different enough to feel special. And when you’re hosting, that’s exactly the balance you want.
What Ingredients You Will Need
This recipe uses simple, wholesome ingredients that come together to deliver a loaf that’s rich, tender, and full of fall flavor. Most of these are pantry staples, which means you can probably make this right now without a trip to the store.
- Ripe Bananas (3 medium, mashed): The riper, the better. You want spots on the peel. Brown bananas are sweeter and easier to mash, which means you can use less added sugar. If your bananas aren’t ripe enough, roast them in a 300°F oven for 15 minutes.
- Pumpkin Puree (1 cup, not pumpkin pie filling): Make sure you grab 100% pure pumpkin, not the pre-sweetened stuff. I prefer Libby’s brand for consistent thickness. If your puree looks watery, blot it with a paper towel before measuring.
- Pure Maple Syrup (½ cup): This is where the magic happens. Use real maple syrup, not pancake syrup. The Grade A dark amber has a stronger flavor that stands up to the pumpkin and spices. I’ve tested this with honey, and it works, but the maple flavor is what makes this recipe special.
- Granulated Sugar (⅓ cup): Just enough to balance the maple and pumpkin without making it cloying. You can reduce this to ¼ cup if your bananas are very ripe.
- Light Brown Sugar (¼ cup, packed): Adds a touch of molasses depth that complements the pumpkin. If you’re out, use all granulated sugar—it’ll still be delicious.
- Large Eggs (2, room temperature): Room temperature eggs incorporate more air into the batter, giving you a lighter loaf. If you forgot to take them out, place them in a bowl of warm water for 5 minutes.
- Vegetable Oil (⅓ cup): Keeps the bread moist without adding butter flavor. You can use melted coconut oil or melted butter, but oil gives the softest crumb. I use canola or avocado oil.
- Vanilla Extract (1 teaspoon): Enhances all the warm flavors. Use pure vanilla extract if you have it, but imitation works fine here.
- All-Purpose Flour (1¾ cups): Spoon and level your flour for accuracy. Scooping directly with the measuring cup packs in too much flour and makes the bread dry. For a gluten-free version, use a 1:1 gluten-free baking blend.
- Baking Soda (1 teaspoon): The main leavening agent. Make sure it’s fresh—test it by dropping a little into vinegar; it should fizz.
- Baking Powder (½ teaspoon): Gives a little extra lift. Check the expiration date; old baking powder won’t do much.
- Salt (½ teaspoon): Balances the sweetness and enhances the spice flavors. I use fine sea salt.
- Pumpkin Pie Spice (1½ teaspoons): A shortcut blend of cinnamon, nutmeg, ginger, and cloves. You can make your own: 1 teaspoon cinnamon, ¼ teaspoon nutmeg, ¼ teaspoon ginger, and a pinch of cloves.
- Cinnamon (1 teaspoon): Adds warmth that pumpkin pie spice alone doesn’t quite cover. I use Saigon cinnamon for a stronger flavor.
For the Maple Glaze (optional but recommended for hosting):
- Powdered Sugar (1 cup): Sifted to avoid lumps.
- Pure Maple Syrup (2 tablespoons): Use the same syrup you used in the batter.
- Milk (1-2 tablespoons): Start with 1 tablespoon and add more for a thinner drizzle. Use any milk you have on hand.
Equipment Needed
You don’t need a professional kitchen to pull this off. Here’s what you’ll need:
- 9×5-inch Loaf Pan: The standard size. If you use an 8×4 pan, your bread will take longer to bake and may dome more. I love my USA Pan loaf pan—it distributes heat evenly and never sticks.
- Large Mixing Bowl: For combining wet and dry ingredients. A glass or stainless steel bowl works best.
- Medium Mixing Bowl: For whisking dry ingredients separately.
- Whisk: A good whisk incorporates ingredients without overmixing. Use a balloon whisk for the dry ingredients.
- Rubber Spatula: For folding the batter and scraping every last bit into the pan. A silicone spatula is heat-resistant and easy to clean.
- Parchment Paper: Lining the pan makes lifting the loaf out effortless. Leave overhang on the long sides for handles.
- Cooling Rack: Essential for even cooling. If you don’t have one, let the bread cool in the pan for 10 minutes, then carefully transfer to a plate.
- Measuring Cups and Spoons: Accurate measurements matter in baking. Use dry measuring cups for dry ingredients and liquid measuring cups for wet.
- Toothpick or Cake Tester: For testing doneness. A wooden skewer works too.
If you don’t have a loaf pan, you can bake this in a 9-inch square pan and reduce the baking time to 25-30 minutes. Just keep an eye on it.
Preparation Method
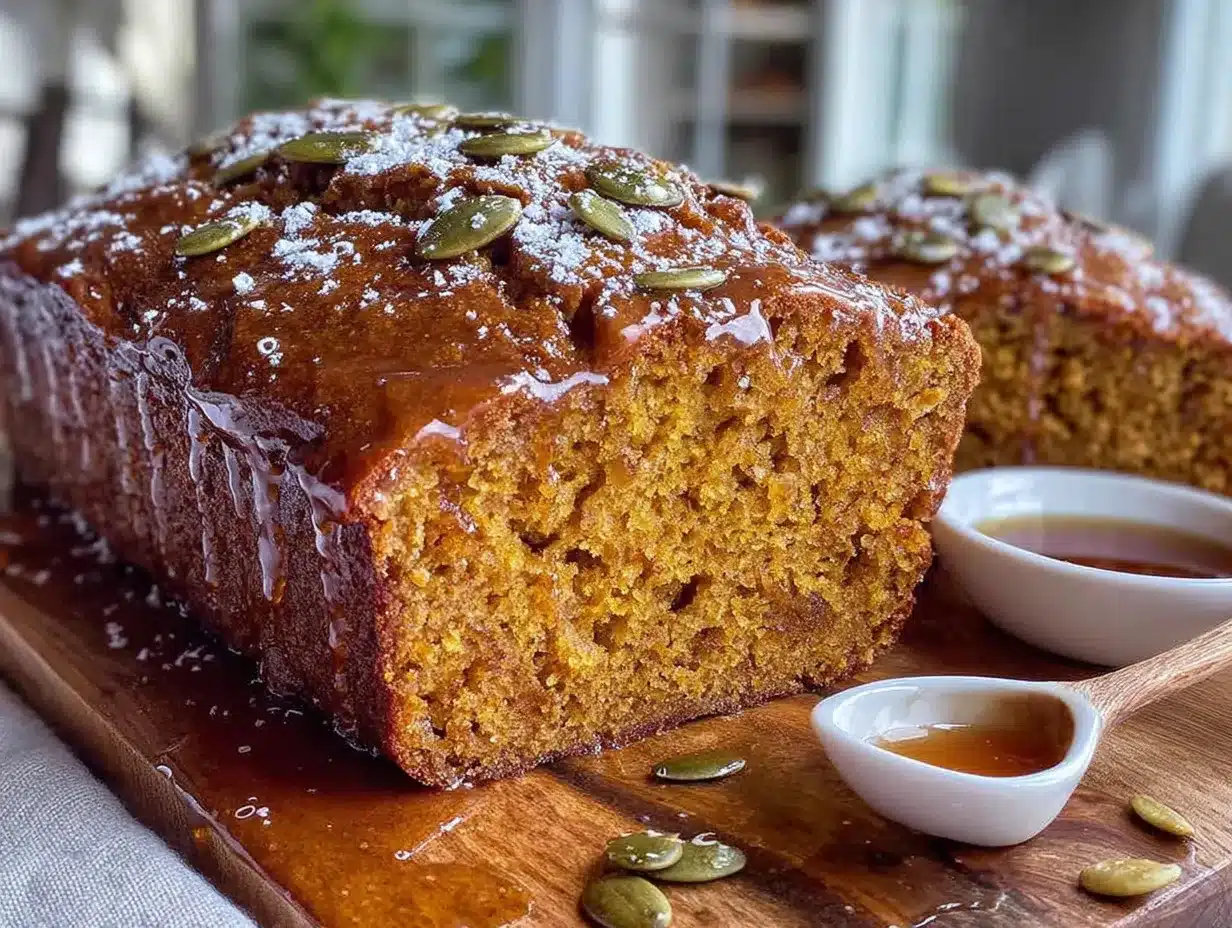
Let’s get baking. This recipe comes together in about 15 minutes of active work, then the oven does the rest.
- Preheat your oven to 350°F (175°C). Position the rack in the center of the oven. Line a 9×5-inch loaf pan with parchment paper, leaving overhang on the two long sides. Lightly grease the exposed ends with cooking spray or butter.
- Mash the bananas. In a large mixing bowl, mash your three ripe bananas with a fork until mostly smooth. A few small lumps are fine—they’ll add texture to the finished loaf. You should have about 1 cup of mashed banana.
- Combine the wet ingredients. To the mashed bananas, add the pumpkin puree, maple syrup, granulated sugar, brown sugar, eggs, vegetable oil, and vanilla extract. Whisk everything together until smooth and evenly combined. The mixture will look glossy and smell amazing already.
- Whisk the dry ingredients. In a separate medium bowl, whisk together the all-purpose flour, baking soda, baking powder, salt, pumpkin pie spice, and cinnamon. Whisking aerates the flour and ensures the leavening agents are evenly distributed. No one wants a pocket of baking soda in their slice.
- Combine wet and dry. Pour the dry ingredients into the wet mixture. Use your rubber spatula to fold gently. Stir just until you no longer see streaks of flour—about 10 to 12 strokes. Overmixing develops gluten and makes the bread tough. A few tiny lumps are perfectly fine.
- Pour into the pan. Scrape the batter into your prepared loaf pan. Spread it evenly with the spatula. Tap the pan gently on the counter a few times to release any air bubbles.
- Bake for 55 to 65 minutes. Place the pan in the preheated oven. Bake until a toothpick inserted into the center comes out clean or with just a few moist crumbs. If the top is browning too quickly after 40 minutes, tent loosely with aluminum foil.
- Cool properly. Let the bread cool in the pan on a wire rack for 15 minutes. Then use the parchment overhang to lift it out and transfer it directly to the cooling rack. Cool completely before slicing—at least 1 hour. Slicing warm bread will result in a crumbly mess, I promise you.
- Make the glaze (optional). While the bread cools, whisk together the powdered sugar, maple syrup, and 1 tablespoon of milk in a small bowl. Add more milk a teaspoon at a time until you reach a drizzle-able consistency. Drizzle over the cooled loaf before serving.
Cooking Tips & Techniques
I’ve made this recipe more times than I can count, and I’ve learned a few things the hard way. Here’s what I wish someone had told me:
Don’t overmix the batter. This is the number one mistake I see. When you combine wet and dry ingredients, mix only until the flour disappears. Overmixing activates the gluten and gives you a dense, rubbery loaf. It should look slightly lumpy, like a muffin batter.
Check your pumpkin puree consistency. Some brands of pumpkin puree are more watery than others. If your puree looks thin or has liquid pooling on top, spoon it onto a paper towel-lined plate for a few minutes to absorb excess moisture. Too much water in the batter will make the bread sink in the middle.
Use room temperature ingredients. Cold eggs and cold pumpkin puree won’t emulsify properly with the oil and sugar. Set everything out 30 minutes before you start baking. If you’re in a hurry, warm your eggs in a bowl of warm water for 5 minutes.
Test for doneness correctly. The toothpick test is reliable, but also look for the edges pulling away from the pan. The top should be golden brown and spring back when lightly touched. If the top looks dark but the center is still jiggly, your oven might run hot—use an oven thermometer to verify.
Let it cool completely. I know it’s tempting to slice into a warm loaf, but trust me on this one. The bread continues to set as it cools. Slicing too early will give you a crumbly, gummy texture. Let it rest at least an hour, preferably two.
Double the recipe for a crowd. This recipe scales perfectly. For a dinner party, I make two loaves: one to serve and one to send home with guests. Bake them on separate racks and swap positions halfway through for even baking.
Variations & Adaptations
One of the best things about this recipe is how adaptable it is. Here are some variations I’ve tried and loved:
- Gluten-Free Version: Substitute the all-purpose flour with a 1:1 gluten-free baking blend. I’ve used Bob’s Red Mill and King Arthur, and both work well. Add 1 tablespoon of milk or water if the batter seems too thick.
- Dairy-Free Version: The recipe is already dairy-free if you use vegetable oil. The glaze can be made with any plant-based milk. Coconut milk gives a lovely subtle flavor.
- Nutty Maple Pumpkin Bread: Fold in ½ cup of toasted chopped pecans or walnuts after combining the wet and dry ingredients. Toast the nuts in a dry skillet for 3-4 minutes to deepen their flavor.
- Chocolate Chip Version: Add ½ cup of dark chocolate chips to the batter. The bitterness of dark chocolate balances the maple and pumpkin beautifully. My niece requests this version every Thanksgiving.
- Vegan Version: Replace the eggs with two flax eggs (2 tablespoons ground flaxseed mixed with 6 tablespoons water, let sit for 5 minutes). Use maple syrup as the sweetener and coconut oil as the fat. The texture will be slightly denser but still delicious.
- Mini Loaves or Muffins: Divide the batter among 4 mini loaf pans or a 12-cup muffin tin. Bake mini loaves for 30-35 minutes and muffins for 18-22 minutes. Perfect for giving as hostess gifts or packing in lunchboxes.
Serving & Storage Suggestions
This bread shines brightest when served at a gathering, but it’s also wonderful for a quiet morning with coffee. Here’s how to make the most of it:
Serving Temperature: Serve at room temperature for the best texture. If you’ve stored it in the fridge, let it sit out for 30 minutes before slicing. For a warm treat, toast slices in a 350°F oven for 5 minutes or pop them in the toaster on a low setting.
Presentation Ideas for Hosting: Place the whole loaf on a wooden cutting board or cake stand. Drizzle with the maple glaze and sprinkle with a pinch of flaky sea salt and a few pepitas (pumpkin seeds). It looks stunning and takes 10 seconds. Slice it at the table for a dramatic reveal.
What to Serve Alongside: This bread pairs beautifully with a hot cup of coffee, chai latte, or mulled cider. For a brunch spread, serve it alongside scrambled eggs and fresh fruit. For dessert, add a dollop of whipped cream or a scoop of vanilla ice cream.
Storage Instructions: Wrap the cooled loaf tightly in plastic wrap or aluminum foil. Store at room temperature for up to 3 days. For longer storage, refrigerate for up to a week. The flavors actually deepen after a day or two.
Freezing Instructions: This bread freezes beautifully. Wrap the cooled, unglazed loaf in plastic wrap, then in a layer of foil. Freeze for up to 3 months. Thaw overnight in the refrigerator, then bring to room temperature before serving. Add the glaze after thawing for the best presentation.
Reheating Tips: For a just-baked experience, reheat individual slices in a 300°F oven for 5-7 minutes. The microwave works in a pinch (15 seconds per slice), but it can make the bread slightly rubbery.
Nutritional Information & Benefits
This bread is a treat, but it also has some redeeming qualities. Here’s a rough estimate per slice (based on 10 slices, without glaze):
| Nutrient | Amount Per Slice |
|---|---|
| Calories | 285 |
| Total Fat | 10g |
| Saturated Fat | 1.5g |
| Cholesterol | 37mg |
| Sodium | 280mg |
| Total Carbohydrates | 45g |
| Dietary Fiber | 3g |
| Sugars | 24g |
| Protein | 5g |
Health Highlights: Pumpkin puree is packed with vitamin A and fiber, which supports eye health and digestion. Bananas provide potassium and vitamin B6. Using maple syrup instead of refined sugar adds trace minerals like zinc and manganese. This bread is also cholesterol-free if you use oil instead of butter.
Dietary Considerations: This recipe is nut-free (unless you add nuts), and can easily be made dairy-free, gluten-free, or vegan with the substitutions listed above. It contains wheat and eggs in its standard form.
Conclusion
This Maple Pumpkin Banana Bread isn’t just a recipe—it’s the thing that makes people linger in the kitchen, asking for the next slice before they’ve finished the first one. It’s the loaf that turned a banana bread hater into a believer, and it’s the dish I bring to every fall gathering because I know it’ll disappear.
Whether you’re hosting a dinner party, bringing something to a potluck, or just want a cozy weekend bake, this recipe delivers. It’s forgiving enough for beginners, impressive enough for seasoned bakers, and delicious enough to become a tradition. I love that it makes me look like I spent hours when really, I just let the pumpkin and maple do the heavy lifting.
I’d love to hear how it turns out for you. Did you add nuts? Try the chocolate chip version? Drizzle it with extra glaze? Drop a comment below and share your twist—I read every single one. And if you snap a photo, tag me so I can see your beautiful loaf. Happy baking, friends.
Frequently Asked Questions
Can I use canned pumpkin pie filling instead of pumpkin puree?
No, please don’t. Pumpkin pie filling is pre-sweetened and spiced, and it will throw off the sugar and spice balance in this recipe. Always use 100% pure pumpkin puree for the best results.
Why did my bread sink in the middle?
A sunken middle usually means the batter was overmixed or the oven temperature was too low. Make sure your oven is fully preheated to 350°F and use an oven thermometer to verify accuracy. Also, check that your baking soda and baking powder are fresh.
Can I make this recipe without maple syrup?
You can substitute the maple syrup with honey or agave nectar, but the flavor profile will change significantly. The maple syrup is what gives this bread its signature warmth and depth. If you must substitute, use the same amount of honey and add an extra ½ teaspoon of cinnamon.
How do I know when the bread is done baking?
Insert a toothpick or cake tester into the center of the loaf. If it comes out clean or with just a few moist crumbs attached, it’s done. The edges should also be pulling away from the pan slightly, and the top should be golden brown and spring back when lightly pressed.
Can I double this recipe?
Absolutely. This recipe doubles beautifully. Use two 9×5-inch loaf pans and bake them on separate oven racks. Swap their positions halfway through baking to ensure even cooking. The baking time may increase by 5-10 minutes, so start checking at the 55-minute mark.
Pin This Recipe!
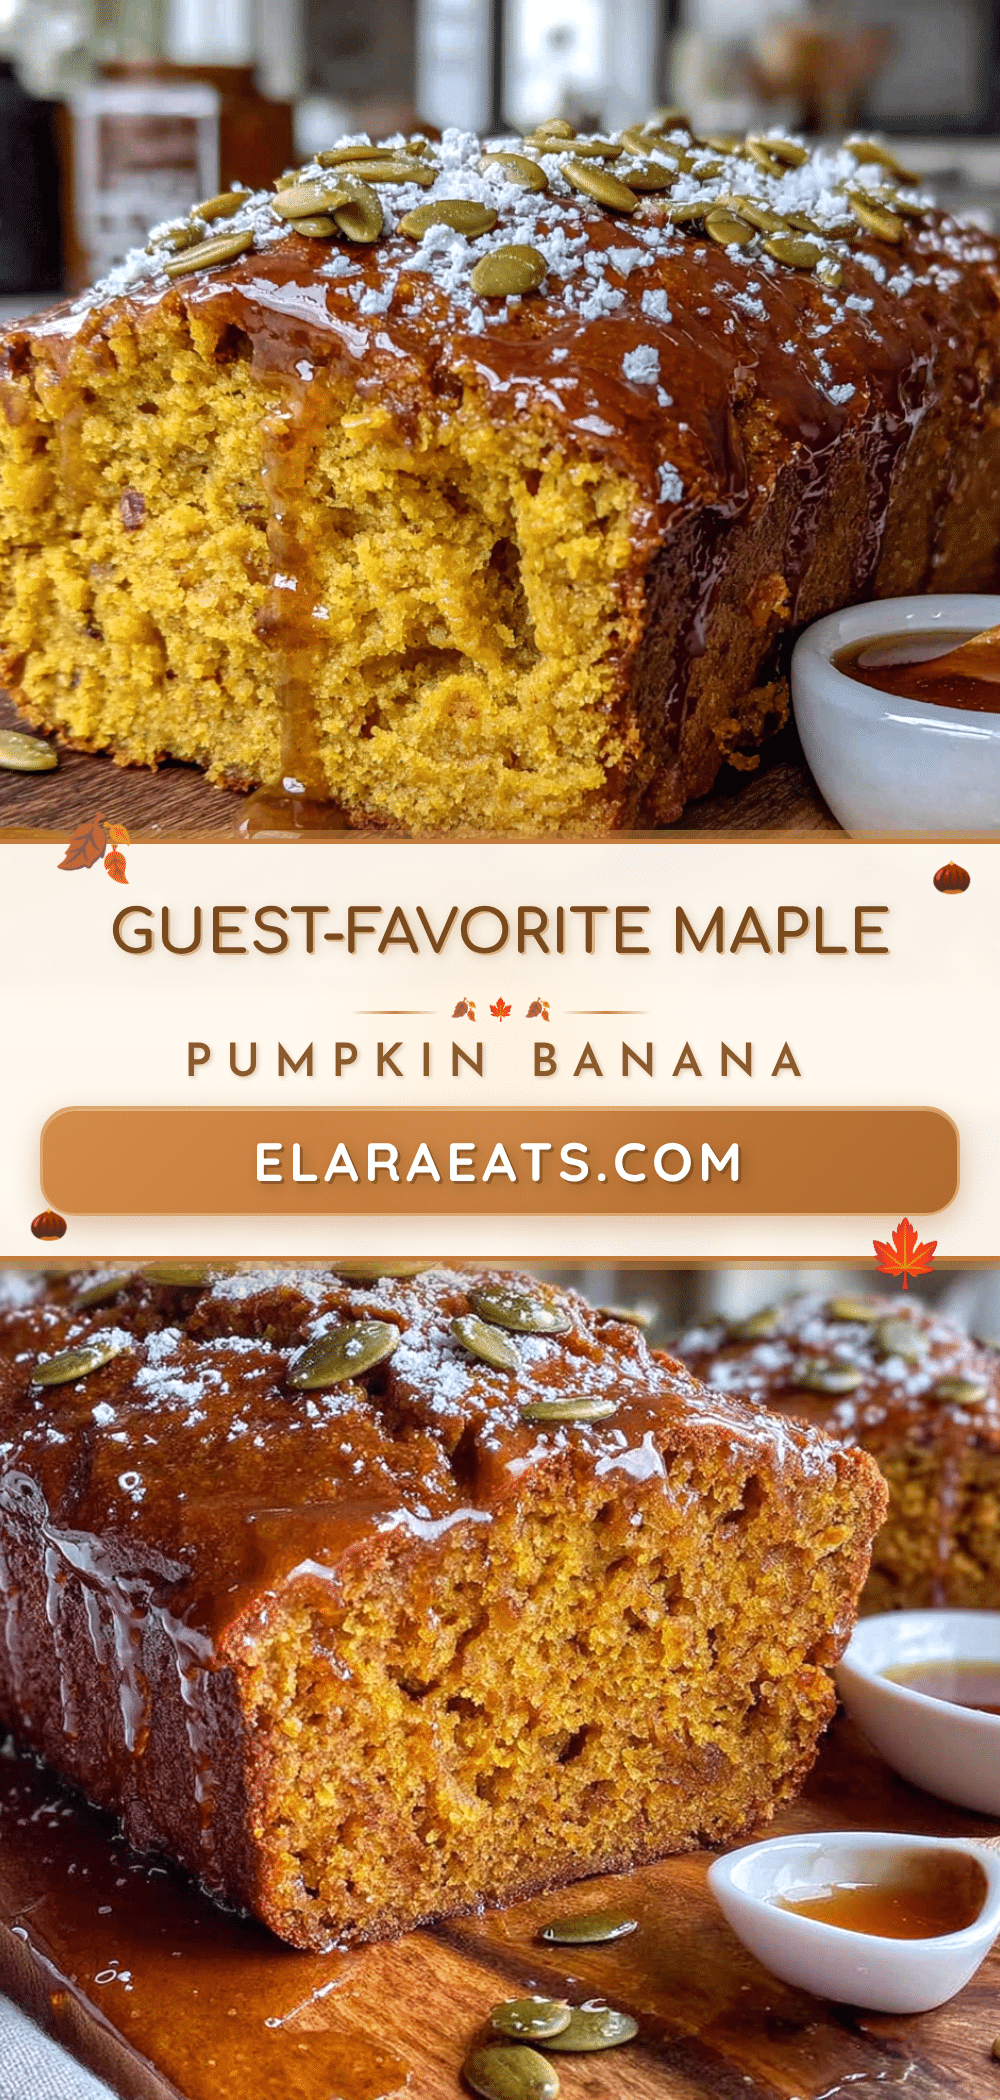
Best Easy Maple Pumpkin Banana Bread Recipe
This Maple Pumpkin Banana Bread is incredibly moist, full of warm fall flavors, and easy to make. It’s the perfect loaf for hosting, potlucks, or a cozy weekend bake, and it even converts banana bread skeptics.
- Prep Time: 15 minutes
- Cook Time: 55-65 minutes
- Total Time: 1 hour 10 minutes - 1 hour 20 minutes
- Yield: 10 servings 1x
- Category: Dessert, Breakfast
- Cuisine: American
Ingredients
- 3 medium ripe bananas, mashed
- 1 cup pumpkin puree (not pumpkin pie filling)
- ½ cup pure maple syrup
- ⅓ cup granulated sugar
- ¼ cup light brown sugar, packed
- 2 large eggs, room temperature
- ⅓ cup vegetable oil
- 1 teaspoon vanilla extract
- 1¾ cups all-purpose flour
- 1 teaspoon baking soda
- ½ teaspoon baking powder
- ½ teaspoon salt
- 1½ teaspoons pumpkin pie spice
- 1 teaspoon cinnamon
- For the Maple Glaze (optional):
- 1 cup powdered sugar, sifted
- 2 tablespoons pure maple syrup
- 1–2 tablespoons milk
Instructions
- Preheat your oven to 350°F (175°C). Position the rack in the center of the oven. Line a 9×5-inch loaf pan with parchment paper, leaving overhang on the two long sides. Lightly grease the exposed ends with cooking spray or butter.
- In a large mixing bowl, mash the three ripe bananas with a fork until mostly smooth. A few small lumps are fine.
- To the mashed bananas, add the pumpkin puree, maple syrup, granulated sugar, brown sugar, eggs, vegetable oil, and vanilla extract. Whisk until smooth and evenly combined.
- In a separate medium bowl, whisk together the all-purpose flour, baking soda, baking powder, salt, pumpkin pie spice, and cinnamon.
- Pour the dry ingredients into the wet mixture. Use a rubber spatula to fold gently, stirring just until no streaks of flour remain (about 10 to 12 strokes). Do not overmix.
- Scrape the batter into the prepared loaf pan and spread evenly. Tap the pan gently on the counter a few times to release air bubbles.
- Bake for 55 to 65 minutes, until a toothpick inserted into the center comes out clean or with a few moist crumbs. If the top browns too quickly after 40 minutes, tent loosely with aluminum foil.
- Let the bread cool in the pan on a wire rack for 15 minutes. Then use the parchment overhang to lift it out and transfer it directly to the cooling rack. Cool completely before slicing (at least 1 hour).
- For the glaze (optional): In a small bowl, whisk together the powdered sugar, maple syrup, and 1 tablespoon of milk. Add more milk a teaspoon at a time until you reach a drizzle-able consistency. Drizzle over the cooled loaf before serving.
Notes
Don’t overmix the batter. Use room temperature ingredients for best results. Check pumpkin puree consistency; blot if watery. Let the bread cool completely before slicing to avoid a crumbly texture. The flavors deepen after a day. For gluten-free, use a 1:1 gluten-free baking blend. For dairy-free, use plant-based milk in the glaze. For vegan, replace eggs with flax eggs.
Nutrition
- Serving Size: 1 slice (1/10 of loa
- Calories: 285
- Sugar: 24
- Sodium: 280
- Fat: 10
- Saturated Fat: 1.5
- Carbohydrates: 45
- Fiber: 3
- Protein: 5
Keywords: maple pumpkin banana bread, pumpkin banana bread, easy banana bread, fall banana bread, moist banana bread, pumpkin bread recipe


