Love this? Save it for later!
Share the inspiration with your friends
I wasn’t expecting to find my new favorite fall dessert from my accountant, but there I was, waiting for my tax appointment, watching him meticulously organize a stack of receipts while he casually described the exact texture he was chasing in a pumpkin bar. “Most of them are too cakey,” he said, not looking up from his spreadsheet. “They fall apart. You want something with a little chew, you know? Something that actually holds together.” He scribbled the recipe on the back of an old envelope—his handwriting was surprisingly neat for someone who clearly lived in a world of numbers. I shoved it in my bag, honestly thinking I’d never actually make it. But a few weeks later, when the first real chill hit the air, I found that envelope crumpled at the bottom of my purse. And let me tell you, I am so glad I did. These are not your average pumpkin bars. They have this perfect, almost fudgy chew that makes every other version feel like a dry sponge cake. Maybe you’ve been searching for that same thing—a pumpkin dessert that actually tastes as good as it sounds. This is it. I’ve tweaked the frosting to include browned butter, because honestly, everything is better with browned butter, and the result is something I now make every single fall without fail.
Why You’ll Love This Recipe
I’ve tested this recipe more times than I care to admit. I burned the first batch of butter, over-mixed the second batch of batter, and let me tell you, the third batch disappeared before I could even photograph it. Through all those trials, I landed on something truly special. These bars have become my go-to for every fall gathering, and here is why they will become yours too.
- Perfectly Chewy Texture: Unlike those fluffy, crumbly pumpkin bars that fall apart the second you pick them up, these have a dense, satisfying chew. They hold their shape beautifully, making them perfect for packing in lunchboxes or serving at parties.
- Simple Pantry Ingredients: You probably have most of these ingredients in your kitchen right now. No need to hunt down specialty flours or exotic spices—just good old-fashioned baking staples.
- Quick & Easy: From start to finish, these come together in about 45 minutes. The batter takes maybe 10 minutes to mix, and the frosting comes together while the bars cool. Perfect for those last-minute fall cravings.
- Browned Butter Magic: The frosting is where this recipe really shines. Browning the butter adds this nutty, caramel-like depth that perfectly complements the warm pumpkin spices. It is next-level comfort food, I promise you.
- Crowd-Pleaser: I have brought these to potlucks, family dinners, and even a book club meeting. Every single time, someone asks for the recipe. Kids love them, adults love them—they are universally adored.
What makes this recipe different from the rest is that perfect balance of moisture and structure. The secret is in the ratio of pumpkin to flour and the precise mixing method. This is not another version—it is the best version, born from burnt butter and happy accidents.
What Ingredients You Will Need
This recipe uses simple, wholesome ingredients to deliver that signature chewy texture and rich flavor. Most of these are pantry staples, but I have a few tips to help you pick the best options for perfect results every time.
For the Pumpkin Bars
- 1 ½ cups all-purpose flour (spooned and leveled—don’t scoop directly from the bag or you will pack in too much)
- 1 teaspoon baking powder
- ½ teaspoon baking soda
- ½ teaspoon salt
- 2 teaspoons pumpkin pie spice (I prefer the McCormick brand for its balanced flavor, but homemade works great too)
- 1 teaspoon ground cinnamon (adds warmth and depth)
- ½ cup unsalted butter, melted and slightly cooled
- 1 cup packed light brown sugar (this is key for moisture and that chewy texture—dark brown sugar works too but will be slightly richer)
- ¼ cup granulated sugar
- 1 large egg, room temperature
- 1 teaspoon vanilla extract
- 1 cup canned pumpkin puree (not pumpkin pie filling—make sure it is 100% pure pumpkin. I recommend Libby’s for consistent results)
For the Browned Butter Frosting
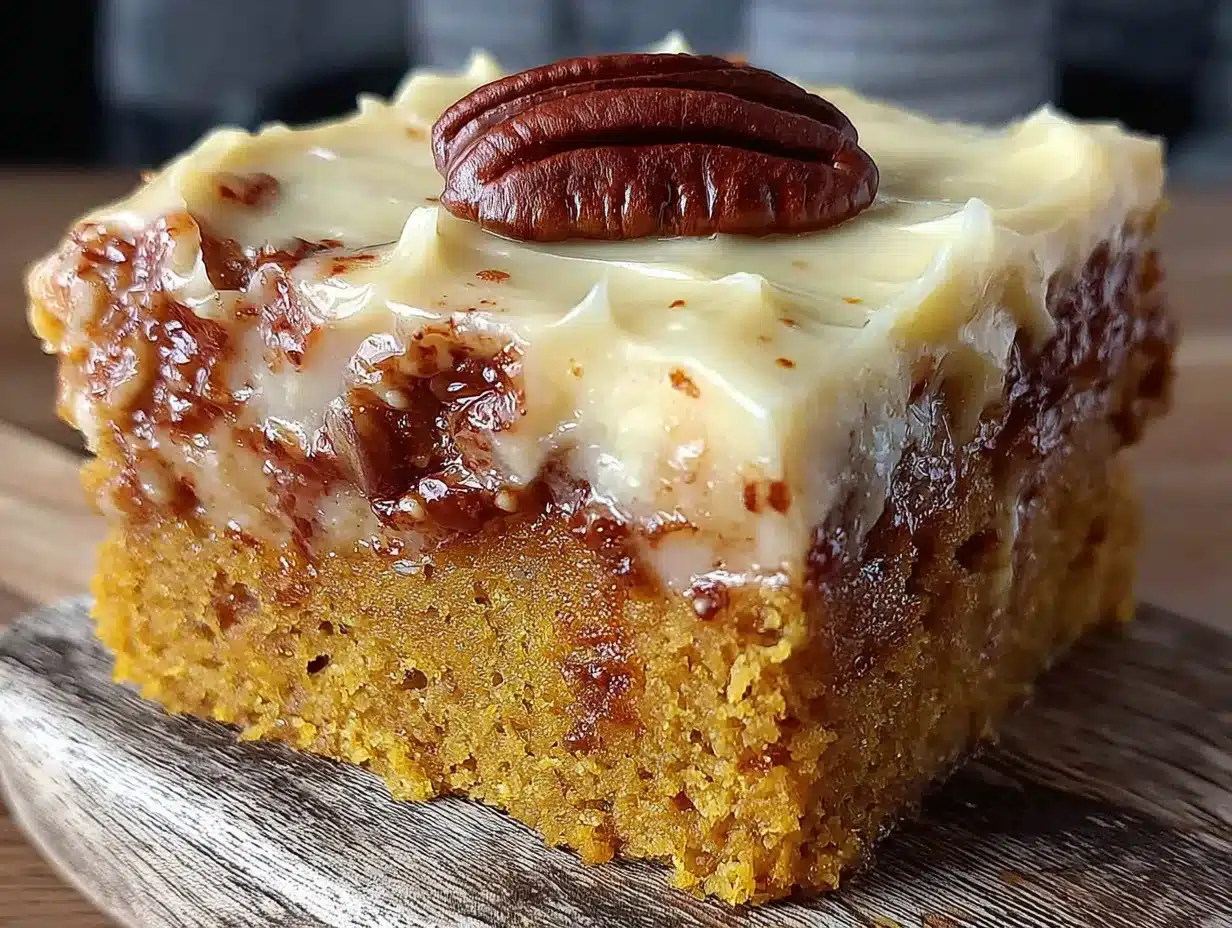
- ½ cup unsalted butter (you will brown this, so keep an eye on it—it goes from perfect to burnt fast)
- 2 cups powdered sugar, sifted (sifting prevents lumps and ensures a silky smooth frosting)
- 2-3 tablespoons milk (whole milk works best, but any milk or even heavy cream will do)
- 1 teaspoon vanilla extract
- Pinch of salt (to balance the sweetness)
Equipment Needed
You do not need a fancy kitchen to make these bars. Here is what I use and a few alternatives if you are working with what you have.
- 9×13-inch baking pan — This is the perfect size for these bars. If you only have an 8×8 pan, the bars will be much thicker and will need extra baking time. A metal pan works best for even browning, but glass works too—just reduce the oven temperature by 25°F.
- Parchment paper — I cannot stress this enough. Line your pan with parchment paper, leaving some overhang on the sides. This makes lifting the bars out so much easier. I learned this the hard way after a stuck-bar disaster that ended in crumbles.
- Mixing bowls — One large and one medium will do the job.
- Whisk and spatula — A whisk for the dry ingredients and a silicone spatula for folding the wet into the dry. Do not overmix, and a spatula helps you be gentle.
- Light-colored saucepan — For browning the butter. A dark pan makes it hard to see the color change, and you will end up with burnt butter. Trust me on this one.
- Hand mixer or stand mixer — For the frosting. You can whisk it by hand, but your arm will thank you if you use a mixer. I use my trusty KitchenAid hand mixer for this.
- Cooling rack — Essential for letting the bars cool evenly before frosting. If you frost them while they are still warm, the frosting will melt into a puddle.
Preparation Method
Alright, let’s get to the good part. Follow these steps carefully, and you will have the most incredible pumpkin bars on your counter in no time.
- Preheat your oven to 350°F (175°C). Line your 9×13-inch baking pan with parchment paper, leaving a few inches of overhang on the long sides. This will be your lifting handle later. Lightly spray the parchment with nonstick cooking spray for extra insurance.
- Whisk the dry ingredients together. In a medium bowl, combine 1 ½ cups all-purpose flour, 1 teaspoon baking powder, ½ teaspoon baking soda, ½ teaspoon salt, 2 teaspoons pumpkin pie spice, and 1 teaspoon ground cinnamon. Whisk until everything is evenly distributed. This ensures you do not get a pocket of baking soda in one bite.
- Mix the wet ingredients. In a large bowl, whisk together ½ cup melted unsalted butter (make sure it is slightly cooled, not hot), 1 cup packed light brown sugar, and ¼ cup granulated sugar. Whisk until smooth and combined—about 30 seconds. Add 1 large egg, 1 teaspoon vanilla extract, and 1 cup pumpkin puree. Whisk again until the mixture is smooth and glossy. It will look a little thick and that is perfect.
- Combine wet and dry ingredients. Pour the dry ingredients into the wet ingredients. Use a silicone spatula to fold them together gently. Stir just until you no longer see streaks of flour. A few small lumps are totally fine. Overmixing will make the bars tough, and we want them chewy, not tough. Stop as soon as it comes together.
- Spread the batter into the prepared pan. The batter will be thick—almost like a cookie dough. Use your spatula to spread it evenly into all corners. Take your time here; an even layer ensures even baking. I like to wet the spatula slightly to make spreading easier.
- Bake for 18-22 minutes. The bars are done when the edges are set and lightly golden, and the center looks just slightly underdone. A toothpick inserted into the center should come out with a few moist crumbs attached—not wet batter, but not completely clean either. Overbaking is the enemy of chewy bars. I usually check at 18 minutes and go from there. My oven runs a little hot, so yours might need the full 22 minutes.
- Cool completely in the pan on a wire rack. This is crucial. Do not rush this step. The bars need to cool completely before you add the frosting, or you will end up with a melty mess. It takes about an hour, but it is worth the wait. While the bars cool, make your frosting.
- Make the browned butter frosting. Place ½ cup unsalted butter in a light-colored saucepan over medium heat. Stir frequently with a whisk or spatula. The butter will melt, then foam, then start to turn golden. Watch it carefully—once you see brown specks forming at the bottom and it smells nutty and amazing, remove it from the heat immediately. This takes about 5-7 minutes. Pour the browned butter into a heatproof bowl, making sure to scrape all those brown bits from the bottom of the pan. Let it cool for about 10 minutes. It should be warm but not hot.
- Finish the frosting. Add 2 cups sifted powdered sugar, 2 tablespoons milk, 1 teaspoon vanilla extract, and a pinch of salt to the browned butter. Beat with a hand mixer on low speed until combined, then increase to medium and beat for 2-3 minutes until light and fluffy. If the frosting is too thick, add the remaining tablespoon of milk. If it is too thin, add a little more powdered sugar. Spread it generously over the completely cooled bars.
- Let the frosting set. Allow the frosted bars to sit at room temperature for about 15-20 minutes so the frosting firms up slightly. Then, use the parchment overhang to lift the entire slab out of the pan. Place it on a cutting board and slice into squares. I get 24 bars from this recipe, but you can cut them larger or smaller depending on your crowd.
Cooking Tips & Techniques
I have made this recipe about a dozen times now, and I have learned a few things the hard way. Let me save you some trouble.
Do not overmix the batter. This is the number one mistake people make with pumpkin bars. Overmixing develops the gluten in the flour, which leads to tough, dense bars instead of tender, chewy ones. Mix just until the flour disappears. A few streaks are fine.
Watch your oven like a hawk. Every oven is different, and the difference between chewy and dry is literally two minutes. I always set my timer for the minimum baking time and check from there. The bars will continue to cook slightly from the residual heat of the pan after you pull them out, so err on the side of underbaking rather than overbaking.
Browning butter is an art. I have burned more butter than I care to admit. Use a light-colored pan so you can actually see the color change. Swirl the pan constantly once the butter starts foaming. The moment you see those brown specks and smell that nutty aroma, pull it off the heat immediately. The residual heat in the pan will continue to cook it, so do not wait until it looks too dark.
Room temperature ingredients matter. I know, I know, it is annoying to wait for eggs to come to room temperature. But a cold egg can seize the melted butter, and cold ingredients do not emulsify as well. Just place your egg in a bowl of warm water for 5 minutes if you are in a hurry.
Let the bars cool completely. I cannot say this enough. I once frosted warm bars because I was impatient, and the frosting slid right off into a buttery puddle. It was delicious, but it was not pretty. Give them the full hour.
Variations & Adaptations
One of the best things about this recipe is how flexible it is. Here are a few ways I have adapted it over the years.
Gluten-Free Version: Substitute the all-purpose flour with a 1:1 gluten-free baking flour blend. I have used King Arthur Measure for Measure with great results. The texture is slightly less chewy but still very good. Do not overmix, as gluten-free batters can get gummy.
Dairy-Free Adaptation: Use a high-quality vegan butter for both the bars and the frosting. I have had good luck with Miyoko’s or Earth Balance. The browned butter flavor will be slightly different, but still delicious. Use oat milk or almond milk in the frosting.
Spice It Up: If you love a stronger spice profile, add ¼ teaspoon ground ginger and ⅛ teaspoon ground cloves to the dry ingredients. I tried this once when I was out of pumpkin pie spice, and honestly, I might like it better. It gives the bars a little extra warmth.
Add Some Texture: Fold in ½ cup chopped pecans or walnuts to the batter before baking. The crunch is a lovely contrast to the soft, chewy bars. I have also added ½ cup white chocolate chips, which melt into little pockets of sweetness—absolutely divine.
Make It a Layer Cake: Double the recipe, bake in two 9-inch round pans, and stack with the browned butter frosting in between. It makes a stunning fall layer cake that looks way more impressive than it is difficult.
Serving & Storage Suggestions
These bars are incredibly versatile when it comes to serving. Here is how I like to enjoy them and how to keep them fresh.
Serving Temperature: These are best at room temperature. The frosting is perfectly creamy, and the bars have that ideal chewy texture. If you refrigerate them, let them sit out for about 15 minutes before serving so they soften up a bit.
Presentation Ideas: For a casual gathering, just pile them on a pretty plate. For something more special, dust the tops with a little extra cinnamon or a sprinkle of flaky sea salt. The salt really makes the browned butter flavor pop. I sometimes add a few toasted pumpkin seeds on top for a festive touch.
What to Serve With Them: A hot cup of coffee or chai latte is my go-to pairing. The spices in the bars complement the chai beautifully. For a dessert spread, serve them alongside vanilla ice cream or a dollop of whipped cream. They also pair wonderfully with a glass of cold milk—classic for a reason.
Storage Instructions: Store the bars in an airtight container at room temperature for up to 3 days. I layer them with parchment paper between each layer to prevent sticking. If your kitchen is warm, you can store them in the refrigerator, but bring them to room temperature before serving.
Freezing Instructions: These freeze beautifully. Freeze the unfrosted bars in a single layer on a baking sheet, then wrap them tightly in plastic wrap and foil. They will keep for up to 3 months. Thaw overnight in the refrigerator, then bring to room temperature and frost. You can also freeze the frosted bars, but the texture of the frosting might change slightly. I prefer to freeze them unfrosted.
Flavor Development: Honestly, these bars taste even better the next day. The flavors meld together overnight, and the texture becomes even more fudgy and chewy. I often make them a day ahead of when I plan to serve them.
Nutritional Information & Benefits
Let’s be real—this is a dessert, and it is meant to be enjoyed. But there are a few bright spots in the nutritional profile worth noting.
| Nutrient | Per Bar (1/24 of recipe) |
|---|---|
| Calories | ~185 |
| Total Fat | 9g |
| Saturated Fat | 5.5g |
| Cholesterol | 30mg |
| Sodium | 115mg |
| Total Carbohydrates | 26g |
| Dietary Fiber | 1g |
| Sugars | 18g |
| Protein | 2g |
| Vitamin A | 35% DV |
Pumpkin is packed with Vitamin A, which is great for your eyes and immune system. It is also a good source of fiber, which helps with digestion. The brown butter frosting, well, that is pure indulgence—and that is okay. Life is about balance, and these bars are about joy.
Dietary Considerations: This recipe contains dairy (butter, milk) and gluten (flour). For a dairy-free option, see my variations above. For a gluten-free option, use a 1:1 gluten-free flour blend. It is not suitable for vegans in its current form, but with the dairy-free adaptations, it can be made vegan-friendly.
Conclusion
There is something special about a recipe that comes from an unexpected place. That crumpled envelope from my accountant’s office has become one of my most treasured fall traditions. These pumpkin bars are everything I want in a fall dessert—chewy, spiced, and topped with that nutty browned butter frosting that honestly makes everything better. They are simple enough for a Tuesday night treat but impressive enough for a holiday table.
I hope you give these a try and make them your own. Maybe you will add extra cinnamon, or swap in some pecans, or double the frosting like I sometimes do. That is the beauty of a good recipe—it is a starting point, not a rulebook. I would love to hear how they turn out for you. Drop a comment below and let me know if you made any tweaks or if they became a new fall favorite in your house. Happy baking, friends!
Frequently Asked Questions
Can I use fresh pumpkin puree instead of canned?
You can, but I recommend sticking with canned pumpkin for this recipe. Fresh pumpkin puree has a much higher water content, which can make the bars too wet and affect the chewy texture. If you do use fresh, be sure to strain it through a cheesecloth or paper towels to remove as much moisture as possible.
Why are my pumpkin bars too cakey?
This usually happens from overmixing the batter or overbaking. Mix just until the flour disappears, and pull the bars out of the oven when a toothpick comes out with a few moist crumbs attached. The bars should still look slightly underdone in the center when you take them out.
Can I make these bars ahead of time?
Absolutely. In fact, I think they taste better the next day. You can bake the bars a day ahead, cool them completely, and store them in an airtight container at room temperature. Make the frosting and frost them the day you plan to serve them. You can also freeze the unfrosted bars for up to 3 months.
How do I prevent the frosting from being too runny?
Make sure your browned butter has cooled to room temperature before you start mixing the frosting. If the butter is too warm, the frosting will be thin. Also, sift your powdered sugar to avoid lumps, and add the milk gradually—you might not need all of it. If the frosting is too runny, add more powdered sugar a tablespoon at a time.
Can I use pumpkin pie filling instead of pumpkin puree?
No, please do not. Pumpkin pie filling is pre-sweetened and spiced, which will throw off the balance of this recipe completely. It also contains thickeners that will change the texture. Always look for 100% pure pumpkin puree for baking.
Pin This Recipe!
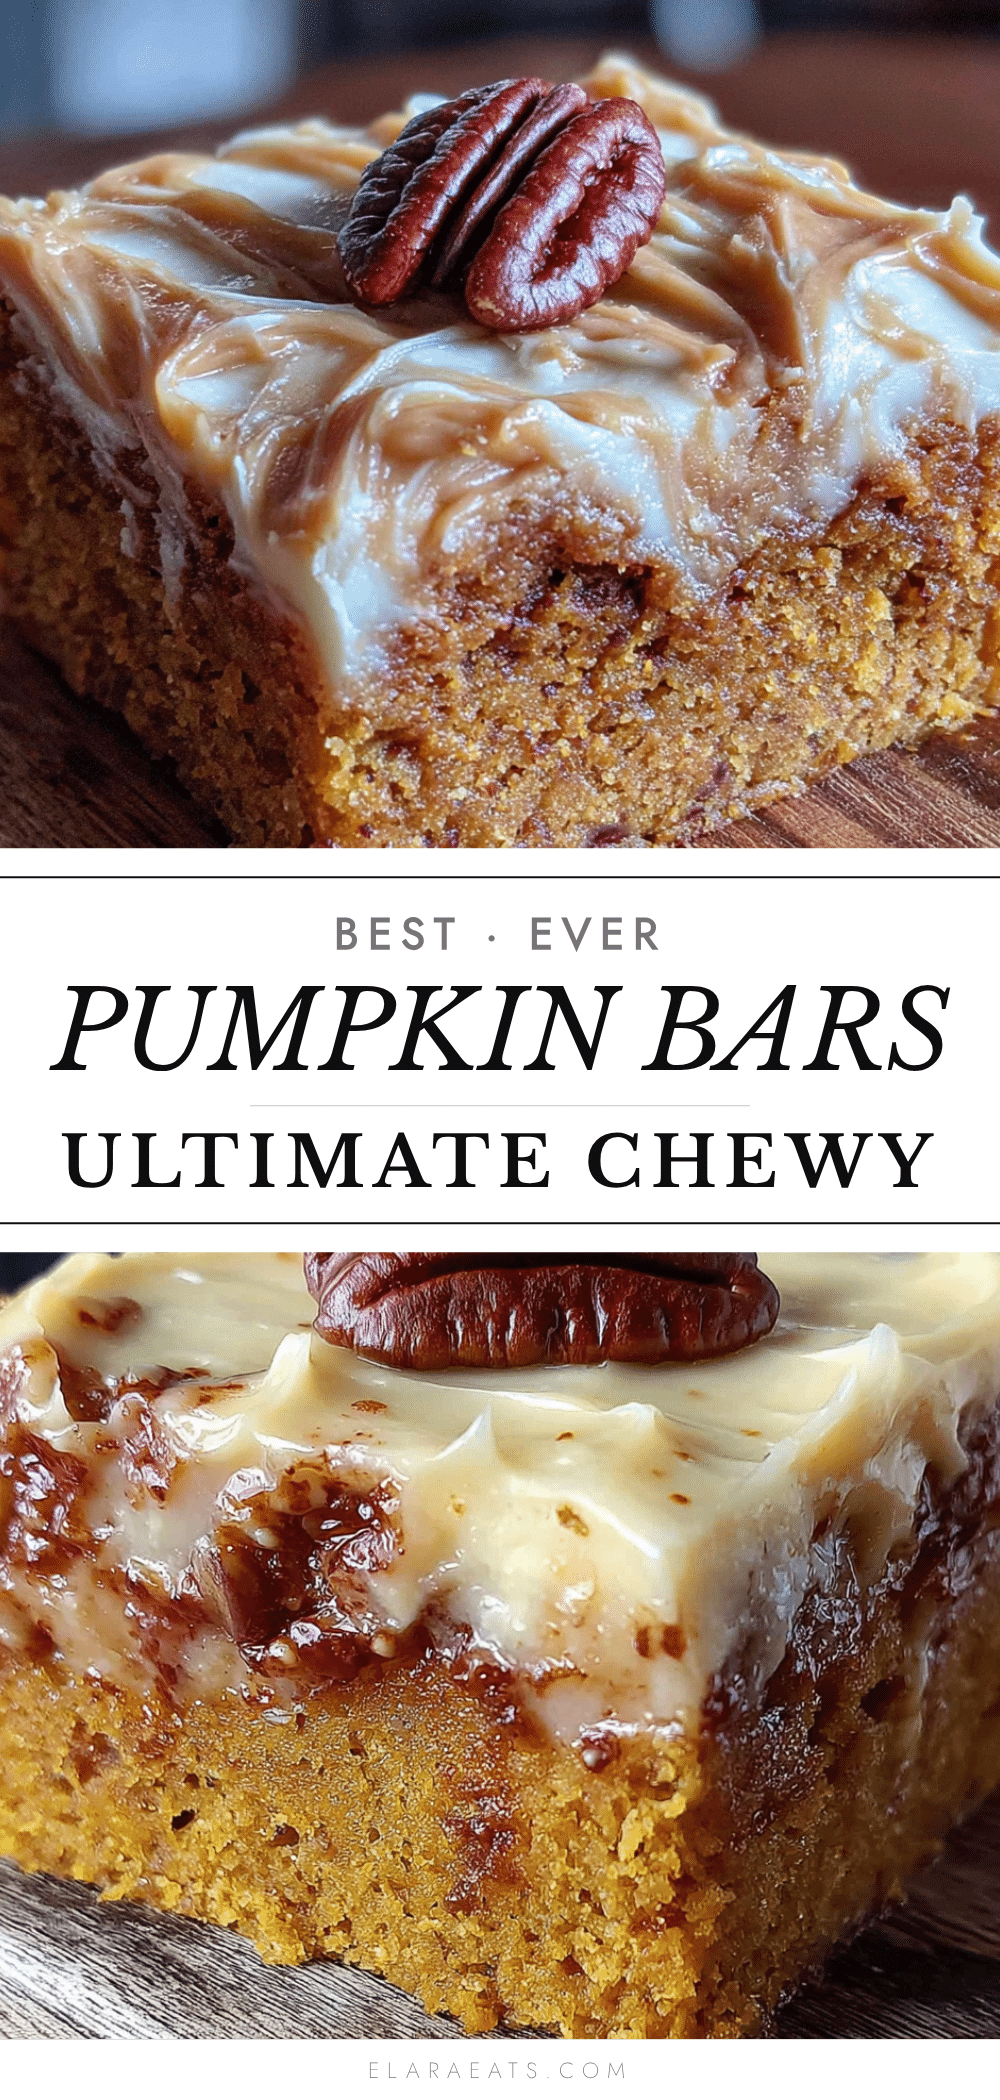
Best Chewy Pumpkin Bars with Browned Butter Frosting (Easy Fall Dessert)
These pumpkin bars have a dense, fudgy chew that sets them apart from typical cakey versions. Topped with a nutty browned butter frosting, they are the perfect easy fall dessert for any gathering.
- Prep Time: 15 minutes
- Cook Time: 20 minutes
- Total Time: 45 minutes
- Yield: 24 bars 1x
- Category: Dessert
- Cuisine: American
Ingredients
- 1 ½ cups all-purpose flour (spooned and leveled)
- 1 teaspoon baking powder
- ½ teaspoon baking soda
- ½ teaspoon salt
- 2 teaspoons pumpkin pie spice
- 1 teaspoon ground cinnamon
- ½ cup unsalted butter, melted and slightly cooled
- 1 cup packed light brown sugar
- ¼ cup granulated sugar
- 1 large egg, room temperature
- 1 teaspoon vanilla extract
- 1 cup canned pumpkin puree (100% pure, not pumpkin pie filling)
- ½ cup unsalted butter (for frosting)
- 2 cups powdered sugar, sifted
- 2–3 tablespoons milk (whole milk preferred)
- 1 teaspoon vanilla extract (for frosting)
- Pinch of salt
Instructions
- Preheat your oven to 350°F (175°C). Line a 9×13-inch baking pan with parchment paper, leaving overhang on the long sides. Lightly spray with nonstick cooking spray.
- In a medium bowl, whisk together 1 ½ cups all-purpose flour, 1 teaspoon baking powder, ½ teaspoon baking soda, ½ teaspoon salt, 2 teaspoons pumpkin pie spice, and 1 teaspoon ground cinnamon.
- In a large bowl, whisk together ½ cup melted unsalted butter (slightly cooled), 1 cup packed light brown sugar, and ¼ cup granulated sugar until smooth. Add 1 large egg, 1 teaspoon vanilla extract, and 1 cup pumpkin puree. Whisk until smooth and glossy.
- Pour the dry ingredients into the wet ingredients. Use a silicone spatula to fold together gently until just combined. Do not overmix; a few small lumps are fine.
- Spread the thick batter evenly into the prepared pan using a spatula. Wet the spatula slightly to make spreading easier.
- Bake for 18-22 minutes, until edges are set and lightly golden and a toothpick inserted in the center comes out with a few moist crumbs. Do not overbake.
- Cool completely in the pan on a wire rack (about 1 hour) before frosting.
- For the frosting: Place ½ cup unsalted butter in a light-colored saucepan over medium heat. Stir frequently until the butter melts, foams, and turns golden with brown specks and a nutty aroma (5-7 minutes). Remove from heat immediately and pour into a heatproof bowl, scraping all brown bits. Cool for 10 minutes.
- Add 2 cups sifted powdered sugar, 2 tablespoons milk, 1 teaspoon vanilla extract, and a pinch of salt to the browned butter. Beat with a hand mixer on low until combined, then on medium for 2-3 minutes until light and fluffy. Add remaining milk if too thick, or more powdered sugar if too thin.
- Spread frosting generously over the completely cooled bars. Let sit for 15-20 minutes to firm up slightly.
- Use the parchment overhang to lift the slab out of the pan. Place on a cutting board and slice into 24 squares.
Notes
Do not overmix the batter to keep bars chewy. Watch the oven closely to avoid overbaking. Brown the butter in a light-colored pan to monitor color change. Let bars cool completely before frosting. For best flavor, make a day ahead.
Nutrition
- Serving Size: 1 bar
- Calories: 185
- Sugar: 18
- Sodium: 115
- Fat: 9
- Saturated Fat: 5.5
- Carbohydrates: 26
- Fiber: 1
- Protein: 2
Keywords: pumpkin bars, chewy pumpkin bars, browned butter frosting, fall dessert, easy pumpkin recipe, pumpkin bars with frosting


