Love this? Save it for later!
Share the inspiration with your friends
This was supposed to be a stuffed pepper casserole. I had the ground turkey browning, the rice simmering, and the biggest, most beautiful red bell peppers sitting on my counter, ready to be chopped into a rustic, one-pan mess. But then my three-year-old appeared, wearing a bat costume from the dress-up bin, and demanded we make “spooky snacks.” The casserole idea went out the window. I looked at those whole peppers, then at the clock, and thought, well, what if I just… didn’t chop them? What if I cut them into rings and gave them little faces? I grabbed a paring knife, carved two holes for eyes, and stuffed the thing. What came out was nothing like the plan — it was better. Honestly, I almost didn’t serve them to my husband because I thought he’d think I’d lost my mind. But he took one bite, laughed, and said, “These are the best thing you’ve made all month.” So, here we are. These Mummy Stuffed Pepper Bites are now a non-negotiable part of our Halloween tradition, and I think you’re going to love them too.
Maybe you’ve been there — staring at a pile of ingredients, wondering how to make a holiday meal feel special without spending three hours in the kitchen. These little mummies are the answer. They’re fun, fast, and they actually taste incredible. You get the sweet pop of bell pepper, the savory kick of seasoned meat, and that gooey, melted cheese “bandage” that makes the whole thing look like a tiny, delicious zombie. Let me tell you, they disappear faster than candy at a trunk-or-treat.
Why You’ll Love This Recipe
I’ve tested this recipe about four times to get the texture just right. The first batch was too watery, the second fell apart, and the third? The third was pure magic. Here is why I think this is the best version you’ll find.
- Quick & Easy: From start to table in about 35 minutes. Perfect for a busy weeknight when you still want to surprise the kids with something festive.
- Simple Ingredients: You likely have everything in your fridge and pantry right now. No weird Halloween-shaped pasta or specialty spices required.
- Perfect for Halloween Parties: These are great for potlucks, classroom treats, or a pre-trick-or-treat dinner that fills little bellies without slowing them down.
- Crowd-Pleaser: I’ve served these to picky toddlers and skeptical adults, and they always get rave reviews. The cheese “bandages” are a huge hit.
- Unbelievably Delicious: The combination of sweet pepper, savory filling, and melted mozzarella is just next-level comfort food. You will close your eyes after the first bite.
What makes this recipe different from the rest is the little trick I use to keep the peppers from getting soggy. I pre-bake the pepper rings for just five minutes before adding the filling. It sounds like an extra step, but it makes a world of difference. The peppers stay tender but firm, holding their shape and that cute mummy face. It’s not just another stuffed pepper recipe — it’s your best version.
What Ingredients You Will Need
This recipe uses simple, wholesome ingredients to deliver bold flavor and satisfying texture without the fuss. Most of these are pantry staples, which makes this a perfect last-minute Halloween recipe.
- For the Pepper “Mummies”:
- 3 large bell peppers (red, orange, or yellow — I prefer red for sweetness)
- 1 tablespoon olive oil (for brushing the peppers)
- For the Filling:
- 1 pound ground turkey (or ground beef, chicken, or plant-based crumbles)
- 1/2 cup finely diced onion (yellow or white)
- 2 cloves garlic, minced
- 1 cup cooked white rice (or quinoa, or cauliflower rice for low-carb)
- 1/2 cup tomato sauce (I like Muir Glen for its rich flavor)
- 1 teaspoon dried oregano
- 1/2 teaspoon smoked paprika
- 1/2 teaspoon salt
- 1/4 teaspoon black pepper
- For the “Bandages”:
- 6-8 ounces part-skim mozzarella cheese, cut into thin strips (about 1/4 inch wide and 2 inches long)
- 24 black olive slices (for the eyes — use canned or jarred)
Ingredient Selection Tips: Look for bell peppers that are squat and wide rather than tall and narrow. They will sit flatter on the baking sheet and look more like a mummy head. I recommend using part-skim mozzarella because it melts beautifully without getting too greasy. If you want to swap the ground turkey for something else, Italian sausage works wonderfully and adds a ton of flavor. For a vegetarian version, use a plant-based ground meat substitute and add a little extra smoked paprika.
Equipment Needed
You don’t need any fancy gadgets for this recipe, which is part of why I love it. Here is what you’ll need:
- Baking sheet: A standard half-sheet pan works perfectly. Line it with parchment paper for easy cleanup.
- Paring knife: For carving the pepper faces. A small, sharp knife gives you the most control.
- Cutting board: Any sturdy board will do.
- Large skillet: For cooking the filling. I use a cast-iron skillet, but non-stick works fine too.
- Mixing spoon: A wooden spoon or silicone spatula works best.
- Measuring cups and spoons: For accuracy, though I often eyeball the spices at this point.
- Small bowl: To hold your olive slices while you assemble the mummies.
If you don’t have a paring knife, a small serrated knife or even a clean pair of kitchen shears can work for cutting the pepper eyes. Just be careful not to tear the pepper rings.
Preparation Method

Let me walk you through this step by step. I promise it’s easier than it looks.
- Preheat and Prep (5 minutes): Preheat your oven to 375°F (190°C). Line a baking sheet with parchment paper. Wash your bell peppers and pat them dry.
- Cut the Peppers (5 minutes): Slice the top and bottom off each bell pepper, about 1/2 inch from each end. Discard the stem and the very bottom. You should have a hollow pepper tube. Carefully remove the seeds and white membranes from the inside. Now, slice each pepper tube into 1-inch thick rings. You should get about 3-4 rings per pepper, giving you 9-12 mummy heads total.
- Create the Faces (5 minutes): Using a paring knife, cut two small slits in each pepper ring to look like eyes. Don’t cut all the way through — just make a small slit that you can push an olive slice into later. Pro tip: Hold the pepper ring steady on the cutting board and cut away from your fingers.
- Pre-Bake the Peppers (5 minutes): Place the pepper rings on the prepared baking sheet. Brush them lightly with olive oil on both sides. Bake for 5 minutes. This step is crucial — it helps the peppers stay firm and prevents them from releasing too much water later.
- Make the Filling (10 minutes): While the peppers are pre-baking, heat a large skillet over medium-high heat. Add the ground turkey and cook, breaking it up with a spoon, until browned (about 5-6 minutes). Add the diced onion and cook for 2 minutes until softened. Stir in the minced garlic and cook for 30 seconds until fragrant. Reduce the heat to low. Stir in the cooked rice, tomato sauce, oregano, smoked paprika, salt, and pepper. Mix well and let it simmer for 2 minutes. Taste and adjust seasoning if needed.
- Assemble the Mummies (5 minutes): Remove the pre-baked pepper rings from the oven. Using a small spoon, carefully fill each pepper ring with the meat mixture, pressing gently to pack it in. Don’t overfill — you want the filling to be level with the top of the pepper ring.
- Add the Bandages (3 minutes): Take your mozzarella strips and drape them across the top of each stuffed pepper ring, crisscrossing them like mummy bandages. Leave the eye area exposed. Place two black olive slices into the slits you cut earlier to create the eyes.
- Bake the Mummies (10-12 minutes): Return the baking sheet to the oven and bake for 10-12 minutes, until the cheese is melted and bubbly and the filling is heated through. If you want the cheese to be slightly browned, switch the oven to broil for the last 1-2 minutes. Watch it carefully so it doesn’t burn.
- Rest and Serve (2 minutes): Let the mummies rest on the baking sheet for 2 minutes before serving. This helps them set and makes them easier to handle. Serve warm.
Cooking Tips & Techniques
I learned a few things the hard way so you don’t have to. Here are my best tips for perfect Mummy Stuffed Pepper Bites every time.
Don’t skip the pre-bake. I know it feels like an extra step, but it is the single most important thing you can do to avoid soggy peppers. That five-minute head start makes the peppers tender but sturdy.
Cut the mozzarella strips the right size. If they are too thick, they won’t melt properly and will just slide off. If they are too thin, they will melt into a puddle. Aim for strips about 1/4 inch wide and 2 inches long. I like to use string cheese for this — it is already the perfect shape and you just cut it into thin strips.
Make the filling ahead of time. This recipe is great for meal prep. You can cook the filling up to two days in advance and store it in the fridge. When you are ready to assemble, just reheat it slightly so it is easier to spoon into the peppers.
Watch the oven. I once got distracted answering the door for a neighbor and my mummies went from perfectly melted to slightly charred. Set a timer. If you want that golden brown cheese, use the broiler for the last minute and watch it like a hawk.
Use a cookie scoop for the filling. If you have a small cookie scoop (about 1 tablespoon size), it makes filling the pepper rings so much faster and less messy. I wish I had thought of this on my first attempt.
Variations & Adaptations
One of the best things about this recipe is how flexible it is. Here are some ways to make it your own.
Dietary Variations:
- Vegetarian: Swap the ground turkey for a plant-based crumble or cooked lentils. Add a little extra smoked paprika for depth.
- Low-Carb / Keto: Replace the cooked rice with cauliflower rice. It works beautifully and you won’t miss the grains.
- Gluten-Free: This recipe is naturally gluten-free as written! Just double-check your tomato sauce and spices for any hidden gluten.
Flavor Twists:
- Spicy Mummies: Add 1/2 teaspoon of red pepper flakes or a chopped jalapeño to the filling. It gives them a nice kick.
- Mexican-Style: Use taco seasoning instead of oregano and paprika. Top with a little salsa verde before adding the cheese bandages.
- Italian Mummies: Add 1/4 cup of grated Parmesan cheese to the filling and use fresh basil leaves under the mozzarella strips.
Cooking Method Adaptations:
- Air Fryer: Preheat the air fryer to 350°F (175°C). Place the assembled mummies in the basket in a single layer. Cook for 8-10 minutes, until the cheese is melted and the filling is hot. No need to flip them.
- Make Ahead: Assemble the mummies completely (without baking) up to 24 hours in advance. Cover and refrigerate. When ready to serve, bake as directed, adding 3-5 extra minutes to the cooking time.
I tried the spicy version last Halloween and it was a huge hit with the adults. I just made a separate batch without the heat for the kids. It is so easy to customize.
Serving & Storage Suggestions
These mummies are best served warm, right out of the oven. The cheese is gooey, the peppers are tender, and the filling is perfectly seasoned. I like to arrange them on a platter with a small bowl of marinara sauce on the side for dipping. They also look amazing on a bed of fresh arugula or mixed greens — the green contrasts beautifully with the red peppers and white cheese.
What to serve with them:
- A simple green salad with a lemon vinaigrette
- Roasted sweet potato wedges
- A bowl of warm tomato soup
- For a Halloween party, serve them alongside other spooky snacks like “witches’ fingers” (breadstick pretzels) or “spider web” dip.
Storage: Leftover mummies can be stored in an airtight container in the refrigerator for up to 3 days. The peppers will soften a bit, but they are still delicious. To reheat, place them on a baking sheet in a 350°F (175°C) oven for 8-10 minutes, or until heated through. You can also microwave them for 60-90 seconds, but the cheese won’t be as melty.
Freezing: I do not recommend freezing these after they are assembled, as the peppers will become mushy when thawed. However, you can freeze the filling alone for up to 3 months. Just thaw it in the fridge overnight and use it to make fresh mummies whenever the craving strikes.
The flavors actually get better after a day in the fridge. I sometimes make a double batch just so I can have leftovers for lunch the next day.
Nutritional Information & Benefits
Here is the estimated nutritional information for one mummy (based on a recipe that yields 10 mummies, using ground turkey and part-skim mozzarella):
- Calories: 145
- Protein: 14g
- Fat: 6g
- Carbohydrates: 10g
- Fiber: 1.5g
- Sugar: 3g
Health Benefits: Bell peppers are packed with vitamin C — one red bell pepper contains more than 100% of your daily needs. They are also a great source of vitamin A and antioxidants. Ground turkey is a lean protein that supports muscle health and keeps you feeling full. Using part-skim mozzarella reduces the saturated fat content without sacrificing flavor. This recipe is a great way to sneak vegetables and protein into a fun, kid-friendly meal.
Dietary Considerations: This recipe is gluten-free and can easily be made low-carb by swapping the rice for cauliflower rice. It is not suitable for a dairy-free diet as written, but you could use a dairy-free mozzarella alternative. Always check labels for hidden allergens if you are cooking for someone with specific dietary needs.
FAQs
Can I use different colors of bell peppers?
Absolutely! Red, orange, and yellow peppers are the sweetest and most tender. Green peppers work too, but they have a slightly more bitter flavor. I personally love using a mix of red and orange for a colorful platter.
How do I keep the mummies from falling apart?
The pre-bake step is key. It firms up the peppers so they hold their shape. Also, make sure you don’t overfill them — pack the filling gently so it stays level with the top of the pepper ring.
Can I make these vegetarian?
Yes! Use a plant-based ground meat substitute or cooked lentils instead of turkey. You might need to add a little extra moisture, like a tablespoon of tomato sauce, to keep the filling from drying out.
How far in advance can I assemble these?
You can assemble them up to 24 hours ahead of time. Just cover the baking sheet tightly with plastic wrap and refrigerate. Add about 5 minutes to the baking time if starting from cold.
My cheese didn’t melt properly. What went wrong?
Your mozzarella strips might have been too thick. Try cutting them thinner next time. Also, make sure your oven is fully preheated before baking. If the cheese still isn’t melting, pop the mummies under the broiler for the last 30 seconds.
Conclusion
These Easy Mummy Stuffed Pepper Bites are proof that Halloween dinner doesn’t have to be a bag of chips and a candy bar. They are fun to make, even more fun to eat, and they actually taste incredible. The combination of sweet pepper, savory filling, and gooey cheese is just unbeatable. I love that I can put these on the table in under 40 minutes and still feel like I did something special for my family. They are the kind of recipe that makes you feel like a kitchen rockstar, even on a chaotic Tuesday night.
I would love to hear how yours turn out! Did you try a fun variation? Did your kids help with the faces? Drop a comment below and let me know. And if you loved this recipe, please share it with a friend who needs a little Halloween inspiration. Happy cooking, and happy Halloween!
Pin This Recipe!
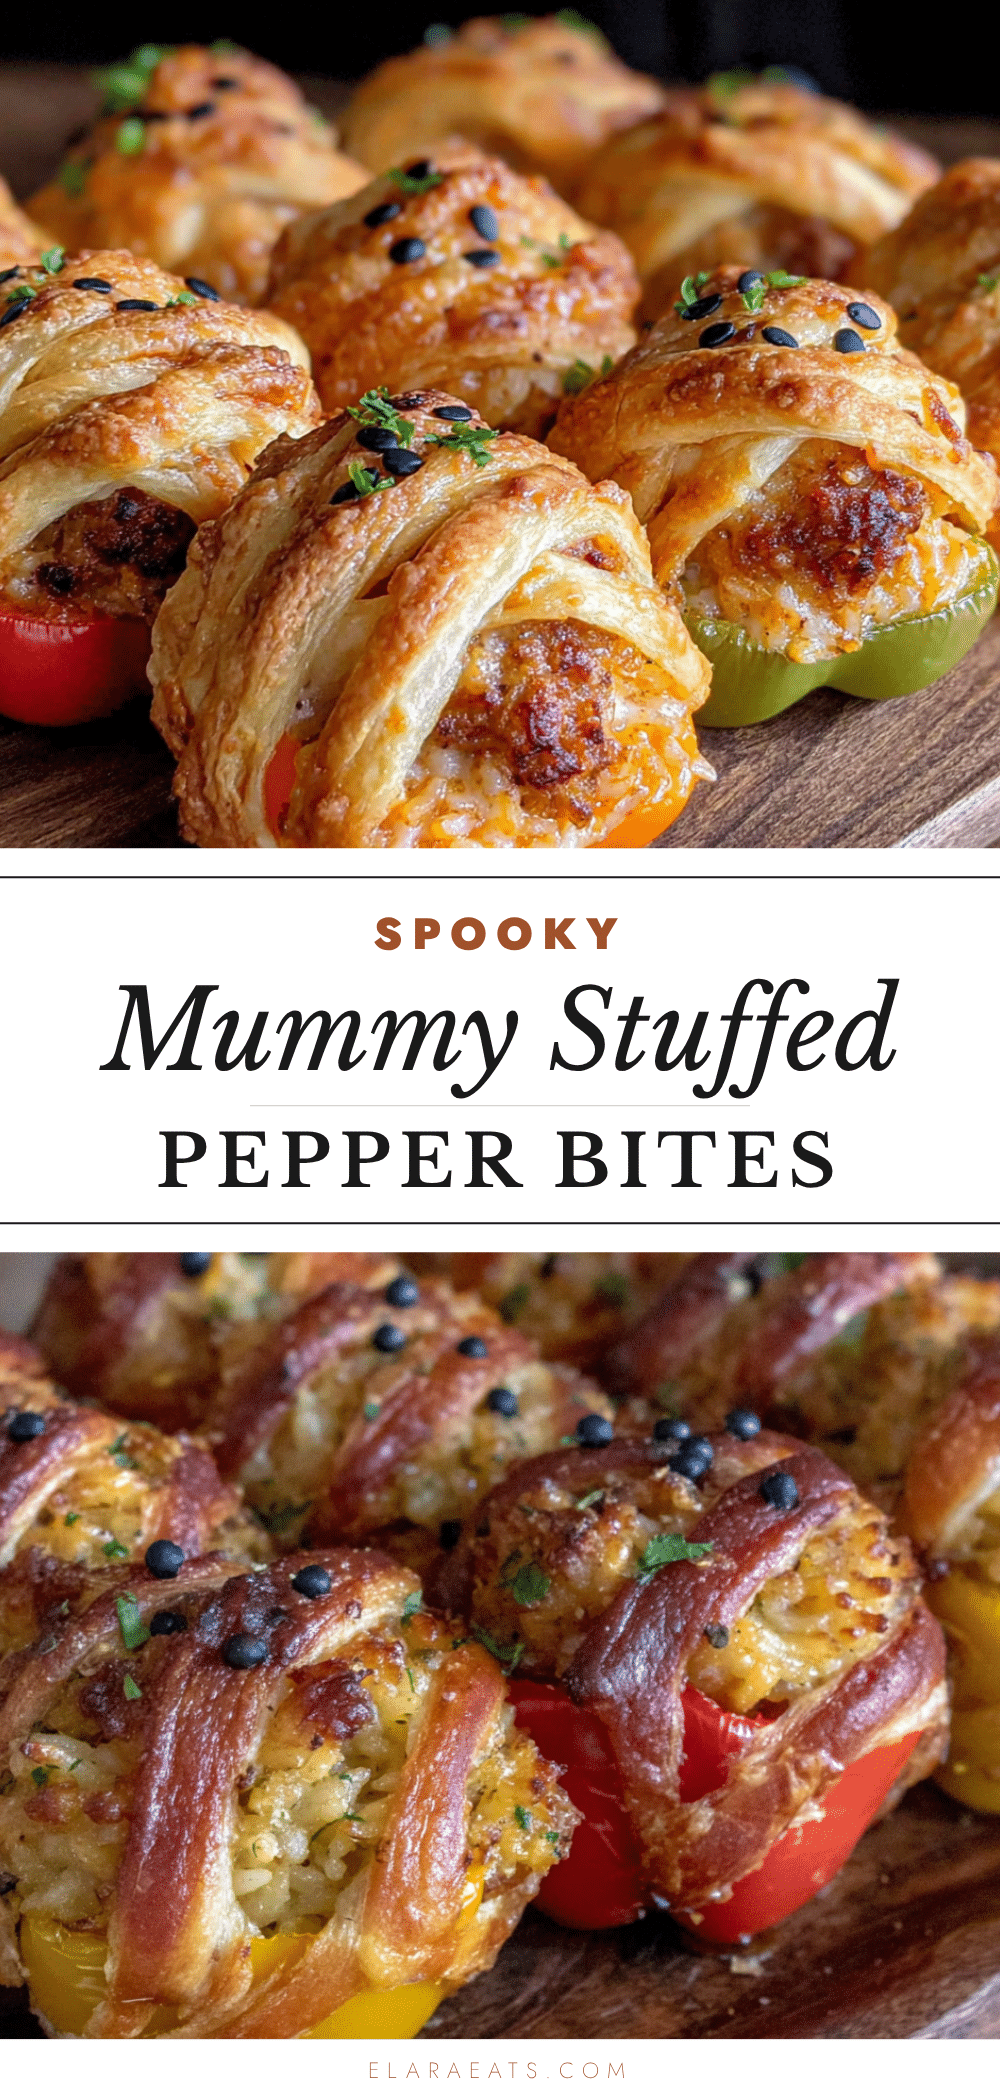
Best Easy Mummy Stuffed Pepper Bites for Halloween

These Mummy Stuffed Pepper Bites are a fun, fast, and delicious Halloween dinner. Sweet bell peppers are filled with a savory turkey and rice mixture, topped with gooey mozzarella ‘bandages,’ and baked to perfection.
- Prep Time: 15 minutes
- Cook Time: 20 minutes
- Total Time: 35 minutes
- Yield: 10 servings 1x
- Category: Main Course
- Cuisine: American
Ingredients
- 3 large bell peppers (red, orange, or yellow)
- 1 tablespoon olive oil
- 1 pound ground turkey (or ground beef, chicken, or plant-based crumbles)
- 1/2 cup finely diced onion (yellow or white)
- 2 cloves garlic, minced
- 1 cup cooked white rice (or quinoa, or cauliflower rice for low-carb)
- 1/2 cup tomato sauce
- 1 teaspoon dried oregano
- 1/2 teaspoon smoked paprika
- 1/2 teaspoon salt
- 1/4 teaspoon black pepper
- 6–8 ounces part-skim mozzarella cheese, cut into thin strips (about 1/4 inch wide and 2 inches long)
- 24 black olive slices
Instructions
- Preheat your oven to 375°F (190°C). Line a baking sheet with parchment paper. Wash your bell peppers and pat them dry.
- Slice the top and bottom off each bell pepper, about 1/2 inch from each end. Discard the stem and the very bottom. You should have a hollow pepper tube. Carefully remove the seeds and white membranes from the inside. Now, slice each pepper tube into 1-inch thick rings. You should get about 3-4 rings per pepper, giving you 9-12 mummy heads total.
- Using a paring knife, cut two small slits in each pepper ring to look like eyes. Don’t cut all the way through — just make a small slit that you can push an olive slice into later.
- Place the pepper rings on the prepared baking sheet. Brush them lightly with olive oil on both sides. Bake for 5 minutes.
- While the peppers are pre-baking, heat a large skillet over medium-high heat. Add the ground turkey and cook, breaking it up with a spoon, until browned (about 5-6 minutes). Add the diced onion and cook for 2 minutes until softened. Stir in the minced garlic and cook for 30 seconds until fragrant. Reduce the heat to low. Stir in the cooked rice, tomato sauce, oregano, smoked paprika, salt, and pepper. Mix well and let it simmer for 2 minutes. Taste and adjust seasoning if needed.
- Remove the pre-baked pepper rings from the oven. Using a small spoon, carefully fill each pepper ring with the meat mixture, pressing gently to pack it in. Don’t overfill — you want the filling to be level with the top of the pepper ring.
- Take your mozzarella strips and drape them across the top of each stuffed pepper ring, crisscrossing them like mummy bandages. Leave the eye area exposed. Place two black olive slices into the slits you cut earlier to create the eyes.
- Return the baking sheet to the oven and bake for 10-12 minutes, until the cheese is melted and bubbly and the filling is heated through. If you want the cheese to be slightly browned, switch the oven to broil for the last 1-2 minutes. Watch it carefully so it doesn’t burn.
- Let the mummies rest on the baking sheet for 2 minutes before serving. Serve warm.
Notes
Don’t skip the pre-bake step to avoid soggy peppers. Cut mozzarella strips about 1/4 inch wide and 2 inches long for best melting. The filling can be made up to 2 days ahead. For air fryer, cook at 350°F for 8-10 minutes. Assemble up to 24 hours in advance and refrigerate.
Nutrition
- Serving Size: 1 mummy
- Calories: 145
- Sugar: 3
- Sodium: 350
- Fat: 6
- Saturated Fat: 2.5
- Carbohydrates: 10
- Fiber: 1.5
- Protein: 14
Keywords: Halloween, stuffed peppers, mummy, ground turkey, bell peppers, easy, kid-friendly, spooky snacks


