Love this? Save it for later!
Share the inspiration with your friends
My neighbor asked why I couldn’t just skip the peeling step. I was mid-complaint about wrestling with a butternut squash, knife in hand, ready to wage war on its stubborn skin. I started to explain why that wouldn’t work—something about texture and even roasting. Then I stopped. Honestly, I had no good reason. It was just how I had always done it.
So I did it her way. I halved the squash, scooped out the seeds, and threw the whole thing—skin and all—into the oven. I figured I’d be picking stringy bits out of my soup later. I was so wrong. The skin softened completely during roasting, and when I blended it all together, it vanished into the creamiest, most velvety soup I had ever made. I felt a little sheepish, but mostly just delighted. She had been right all along.
That little moment of being wrong changed how I make this soup forever. It also reminded me that sometimes the best cooking advice comes from someone who is just willing to ask a simple question. This creamy roasted butternut squash soup with brown butter is the result of that happy accident. It is rich, it is nutty, and it has a depth of flavor that makes you wonder why you ever bothered with peeling in the first place. Maybe you have been there—stuck in a kitchen habit that nobody ever questioned. This recipe is permission to break it.
Why You’ll Love This Recipe
This isn’t just another squash soup recipe. I have tested this one more times than I care to count, tweaking the roast time, the liquid ratio, and the butter temperature until everything clicked. It is the version I bring to Friendsgiving and make on quiet Sunday afternoons for myself. Here is why it stands out:
- Incredibly Simple: No peeling, no dicing, no fuss. The oven does the hard work while you do other things.
- Bold, Nutty Flavor: The brown butter takes this from good to unforgettable. It adds a toasty, almost caramel-like richness that pairs perfectly with the sweet squash.
- Luxuriously Creamy: Roasting concentrates the squash’s natural sugars and creates a silky texture without needing heavy cream. It is naturally thick and satisfying.
- Pantry-Friendly Ingredients: You likely have most of these items already. A simple trip for a squash and some butter is all you need.
- Perfect for Meal Prep: This soup tastes even better the next day. Make a big batch for easy lunches or quick weeknight dinners.
- Crowd-Pleasing Comfort: It is warm, cozy, and deeply satisfying. I have served it to picky eaters and foodie friends alike, and it disappears every time.
This recipe is the kind that makes you close your eyes after the first bite. It is comfort food reimagined—healthier, faster, but with the same soul-soothing satisfaction. Perfect for impressing guests without stress, or turning a simple meal into something memorable.
What Ingredients You Will Need
This recipe relies on a short list of wholesome ingredients to build layers of flavor. Each one plays a specific role, from the sweetness of the roasted squash to the nutty depth of the brown butter. Here is everything you will need:
For the Roasted Squash Base
- 1 medium butternut squash (about 2.5 to 3 pounds) — Halved lengthwise and seeded. No need to peel! The skin softens during roasting and blends completely smooth.
- 2 tablespoons olive oil — For brushing the cut sides of the squash. It helps with caramelization and adds a subtle fruity note.
- 1 teaspoon kosher salt — Divided. Use half on the squash before roasting and the rest later for seasoning the soup.
- 1/2 teaspoon black pepper — Freshly ground is best.
For the Aromatic Base
- 1 medium yellow onion — Roughly chopped. It adds a savory backbone to the soup.
- 3 cloves garlic — Smashed but left whole. Roasting them with the onion mellows their sharpness.
- 1 tablespoon olive oil — For sautéing the aromatics.
For the Liquid & Finish
- 4 cups vegetable broth — Use a good quality brand like Pacific Foods or Swanson for the best flavor. Low-sodium is ideal so you can control the salt.
- 1/2 cup full-fat coconut milk — Adds creaminess without dairy. You can also use heavy cream if you prefer.
- 1 tablespoon maple syrup — Optional, but it enhances the natural sweetness of the squash. Use it if your squash isn’t super sweet.
For the Brown Butter Swirl
- 4 tablespoons unsalted butter — Cut into cubes for even browning. I prefer Kerrygold for its rich flavor.
- Pinch of flaky sea salt — Like Maldon. It finishes the butter beautifully.
Ingredient Tips: Look for a squash that feels heavy for its size with matte, firm skin. Avoid any with soft spots. For the coconut milk, shake the can well before opening to incorporate the cream and liquid. If you are dairy-free, use a full-fat oat milk or cashew cream instead of the coconut milk for a neutral flavor.
Equipment Needed
You do not need a fancy kitchen to make this soup. Here is what you will need:
- Large rimmed baking sheet — For roasting the squash. A half-sheet pan works perfectly. Line it with parchment paper for easy cleanup.
- Chef’s knife — A sharp one makes cutting the squash safer and easier. I use an 8-inch Wusthof.
- Large heavy-bottomed pot or Dutch oven — For sautéing the aromatics and simmering the soup. A 5.5-quart Le Creuset is my go-to, but any sturdy pot works.
- Immersion blender — My preferred tool for pureeing the soup directly in the pot. It saves dishes and gives you total control over the texture. A standard blender also works, but work in batches and be careful with the hot liquid.
- Small light-colored skillet or saucepan — For browning the butter. A light-colored pan helps you see the color change clearly. Stainless steel is ideal.
- Measuring cups and spoons — For accuracy.
- Wooden spoon or spatula — For stirring.
Budget-Friendly Tip: If you don’t have an immersion blender, let the soup cool for 10 minutes before transferring it to a countertop blender. Fill it only halfway, hold the lid down with a towel, and blend in batches. Never fill a blender with hot liquid all the way to the top—it will explode.
Preparation Method
This recipe flows from the oven to the stovetop in a simple, logical sequence. Take your time with the brown butter—it is the star of the show.
Step 1: Roast the Squash
Preheat your oven to 400°F (200°C). Carefully halve the butternut squash lengthwise using a sharp chef’s knife. Scoop out the seeds and stringy bits with a spoon. Brush the cut sides with the 2 tablespoons of olive oil and season with half the salt and pepper. Place the squash halves cut-side down on a parchment-lined baking sheet. Roast for 40 to 50 minutes, until the flesh is fork-tender and the skin is wrinkled and soft. The edges should be caramelized and slightly golden. Let it cool for 10 minutes—it will be easier to handle.
Step 2: Sauté the Aromatics
While the squash roasts, heat 1 tablespoon of olive oil in your large pot over medium heat. Add the chopped onion and a pinch of salt. Cook, stirring occasionally, for 6 to 8 minutes, until the onion is translucent and starting to brown at the edges. Add the smashed garlic cloves and cook for 1 more minute, until fragrant. Remove the pot from the heat and set aside.
Step 3: Make the Brown Butter
This step requires your full attention. Place the cubed butter in a small light-colored skillet or saucepan over medium heat. Stir constantly with a spatula or wooden spoon. The butter will melt, then foam, then start to crackle. After about 3 to 4 minutes, the foam will subside and you will see small brown specks forming at the bottom of the pan. The butter will smell nutty and toasty. As soon as it turns a deep amber color and smells like toasted hazelnuts, remove it from the heat immediately. Pour it into a small heatproof bowl to stop the cooking. Sprinkle with a pinch of flaky sea salt. Set aside.
Step 4: Scoop and Blend
Once the squash is cool enough to handle, use a spoon to scoop the flesh away from the skin. It should come off easily in large pieces. Discard the skin. Add the roasted squash flesh to the pot with the sautéed onions and garlic. Pour in the vegetable broth. Place the pot over medium-high heat and bring to a gentle simmer. Reduce the heat to low and let it cook for 5 minutes, allowing the flavors to meld.
Step 5: Puree Until Silky
Remove the pot from the heat. Use an immersion blender to puree the soup until completely smooth. Start at the bottom and work your way up to avoid splashes. If using a countertop blender, work in batches and hold the lid down with a towel. The soup should be thick, velvety, and perfectly uniform.
Step 6: Finish and Season
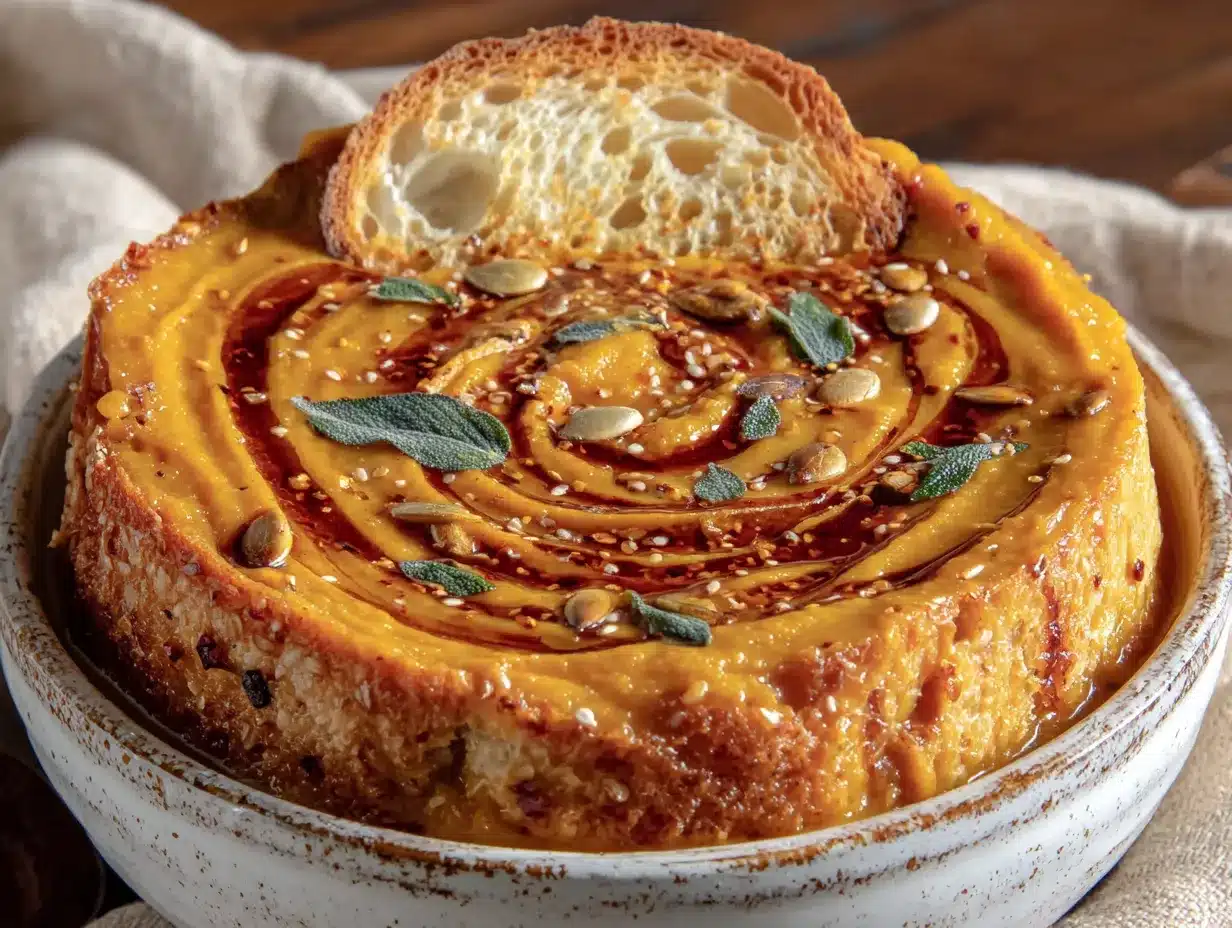
Stir in the coconut milk and maple syrup (if using). Taste and adjust the seasoning with the remaining salt and pepper. You might need a bit more salt depending on your broth. If the soup is too thick, add a splash more broth or water until it reaches your desired consistency. Ladle the soup into bowls and drizzle each serving with a generous swirl of the brown butter. The butter will pool on top in golden ribbons—do not skip this.
Cooking Tips & Techniques
I have made this soup more times than I can count, and I have learned a few things the hard way. Here are the tips that make a real difference:
- Don’t skip the roasting. This is non-negotiable. Roasting concentrates the squash’s sugars and creates a deeper, more complex flavor than boiling ever could. The caramelized edges are where the magic happens.
- Watch the brown butter like a hawk. It goes from perfect to burnt in about 15 seconds. The moment it turns amber and smells nutty, pull it off the heat. I once looked away for a few seconds and ended up with acrid, blackened butter. Learn from my mistake.
- Use full-fat coconut milk. Light versions are too watery and will make the soup thin. The fat in full-fat coconut milk adds richness and a silky mouthfeel that mimics heavy cream.
- Season in layers. Add salt at the roasting stage, the sautéing stage, and the finishing stage. Each layer builds flavor. If you wait until the end, the soup will taste flat no matter how much salt you add.
- Let the soup rest. If you have time, let the finished soup sit for 15 to 20 minutes before serving. The flavors will meld and deepen. It always tastes better after a short rest.
- Texture control. For an ultra-smooth soup, blend for a full 60 seconds. For a slightly rustic texture, blend for 30 seconds and leave a few tiny chunks. Both are delicious—it is your call.
Variations & Adaptations
This recipe is forgiving and easy to adapt. Here are a few ways to make it your own:
- Make it vegan. Use a high-quality vegan butter or coconut oil for the brown butter swirl. The coconut oil version won’t have the same nutty depth, but it will still be delicious. Use full-fat oat milk instead of coconut milk for a neutral creamy base.
- Add some heat. Toss a halved jalapeño or a teaspoon of red pepper flakes onto the baking sheet with the squash. The roasted heat adds a lovely warmth that cuts through the sweetness. I tried this on a whim one rainy Tuesday, and it is now my preferred version.
- Spice it up. Add 1 teaspoon of ground cumin, 1/2 teaspoon of smoked paprika, and a pinch of cayenne to the pot with the onions. This gives the soup a smoky, slightly spicy profile that pairs beautifully with the brown butter.
- Make it a meal. Top each bowl with crispy chickpeas (toss canned chickpeas in olive oil and salt, then roast at 400°F for 20 minutes), a dollop of Greek yogurt, and a handful of toasted pumpkin seeds. It turns a side soup into a hearty lunch.
- Swap the squash. This method works beautifully with other winter squashes. Try it with kabocha, acorn, or even sugar pumpkin. Just adjust the roasting time based on the size and density of the squash.
- Add an apple. Core and quarter a Honeycrisp or Fuji apple and roast it alongside the squash. It adds a subtle fruity sweetness that complements the brown butter perfectly.
Serving & Storage Suggestions
This soup is at its best when served hot, with the brown butter still shimmering on top. Here is how to make the most of it:
Serving Temperature & Presentation: Ladle the soup into warm bowls—this keeps it hot longer. Drizzle the brown butter in a swirl or a zigzag pattern over the top. Garnish with a few fresh thyme leaves or a sprinkle of black pepper. For a special touch, add a dollop of crème fraîche or a handful of crispy sage leaves (fry them in a little butter for 30 seconds).
What to Serve With It: This soup pairs beautifully with crusty sourdough bread for dipping, a simple green salad with a tangy vinaigrette, or a grilled cheese sandwich. For a heartier meal, serve it alongside a roast chicken or a warm grain salad.
Storage Instructions: Let the soup cool completely before transferring it to an airtight container. It will keep in the refrigerator for up to 5 days. The flavors actually deepen and improve after a day or two. For longer storage, freeze the soup in individual portions. Use freezer-safe containers or zip-top bags, leaving an inch of headspace for expansion. It will keep for up to 3 months.
Reheating Methods: Reheat the soup gently on the stovetop over medium-low heat, stirring occasionally. Add a splash of broth or water if it has thickened too much. You can also microwave individual portions in 30-second bursts, stirring between each. Make a fresh batch of brown butter for each serving—it only takes 4 minutes and makes a huge difference. The pre-made brown butter can be stored in the fridge for up to a week, but it loses its fresh nutty aroma over time.
Nutritional Information & Benefits
This soup is as nourishing as it is delicious. Here is a rough estimate per serving (based on 6 servings):
- Calories: 245
- Fat: 16g
- Carbohydrates: 24g
- Fiber: 5g
- Protein: 4g
- Vitamin A: 350% of the Daily Value
- Vitamin C: 35% of the Daily Value
Health Highlights: Butternut squash is packed with beta-carotene, which your body converts into vitamin A for healthy vision and immune function. It is also a great source of fiber, which supports digestion and keeps you feeling full. The brown butter adds a touch of indulgence, but the base of the soup is naturally low in sugar and free from heavy cream. I love that this recipe feels both wholesome and decadent at the same time. It is the kind of meal that fills you up without weighing you down.
Dietary Notes: This recipe is naturally gluten-free and can be made vegan with the substitutions mentioned above. It contains dairy in the butter and coconut milk (if using). For a nut-free version, skip the pumpkin seed garnish.
Conclusion
This creamy roasted butternut squash soup with brown butter is more than just a recipe—it is proof that sometimes the best things come from questioning your own habits. That one suggestion from my neighbor changed how I approach this soup entirely, and now I cannot imagine making it any other way. It is simple enough for a weeknight, elegant enough for company, and deeply satisfying every single time.
I hope you make this soup and love it as much as I do. Drizzle that brown butter on generously, taste as you go, and do not be afraid to make it your own. Add extra spice, swap the toppings, or double the batch—it is your kitchen, after all. I would love to hear how it turns out. Leave a comment below and let me know your favorite variation, or tag me in your photos if you share them online. Happy cooking, friends!
Frequently Asked Questions
Can I use frozen butternut squash instead of fresh?
You can, but the texture will be different. Frozen squash releases a lot of water as it thaws, so it won’t caramelize the same way. If you are short on time, roast the frozen squash on a baking sheet at 425°F for 25 to 30 minutes, then proceed with the recipe. The soup will still be good, just not as deeply flavored.
Why did my brown butter burn?
Brown butter burns easily because the milk solids go from toasted to scorched very quickly. Make sure you are using a light-colored pan so you can see the color change, and keep stirring the whole time. The moment it turns amber and smells nutty, pull it off the heat. If you see black specks, you have gone too far—start over.
Can I make this soup in a slow cooker?
Yes, but you will need to roast the squash first. Roast the squash as directed, then add the flesh to the slow cooker with the sautéed onions, garlic, and broth. Cook on low for 4 to 6 hours or on high for 2 to 3 hours. Blend with an immersion blender before serving. Make the brown butter fresh on the stovetop.
How do I make the soup thinner or thicker?
For a thinner soup, add more broth or water, one quarter-cup at a time, until it reaches your desired consistency. For a thicker soup, let it simmer uncovered for an extra 10 to 15 minutes to reduce the liquid. You can also add an extra half cup of roasted squash if you have some left over.
Can I freeze the soup with the brown butter already swirled in?
I recommend freezing the soup and the brown butter separately. The brown butter can separate or lose its texture when frozen and thawed. Freeze the soup in portions, then make a small batch of fresh brown butter when you are ready to serve. It only takes 4 minutes and tastes much better.
Pin This Recipe!
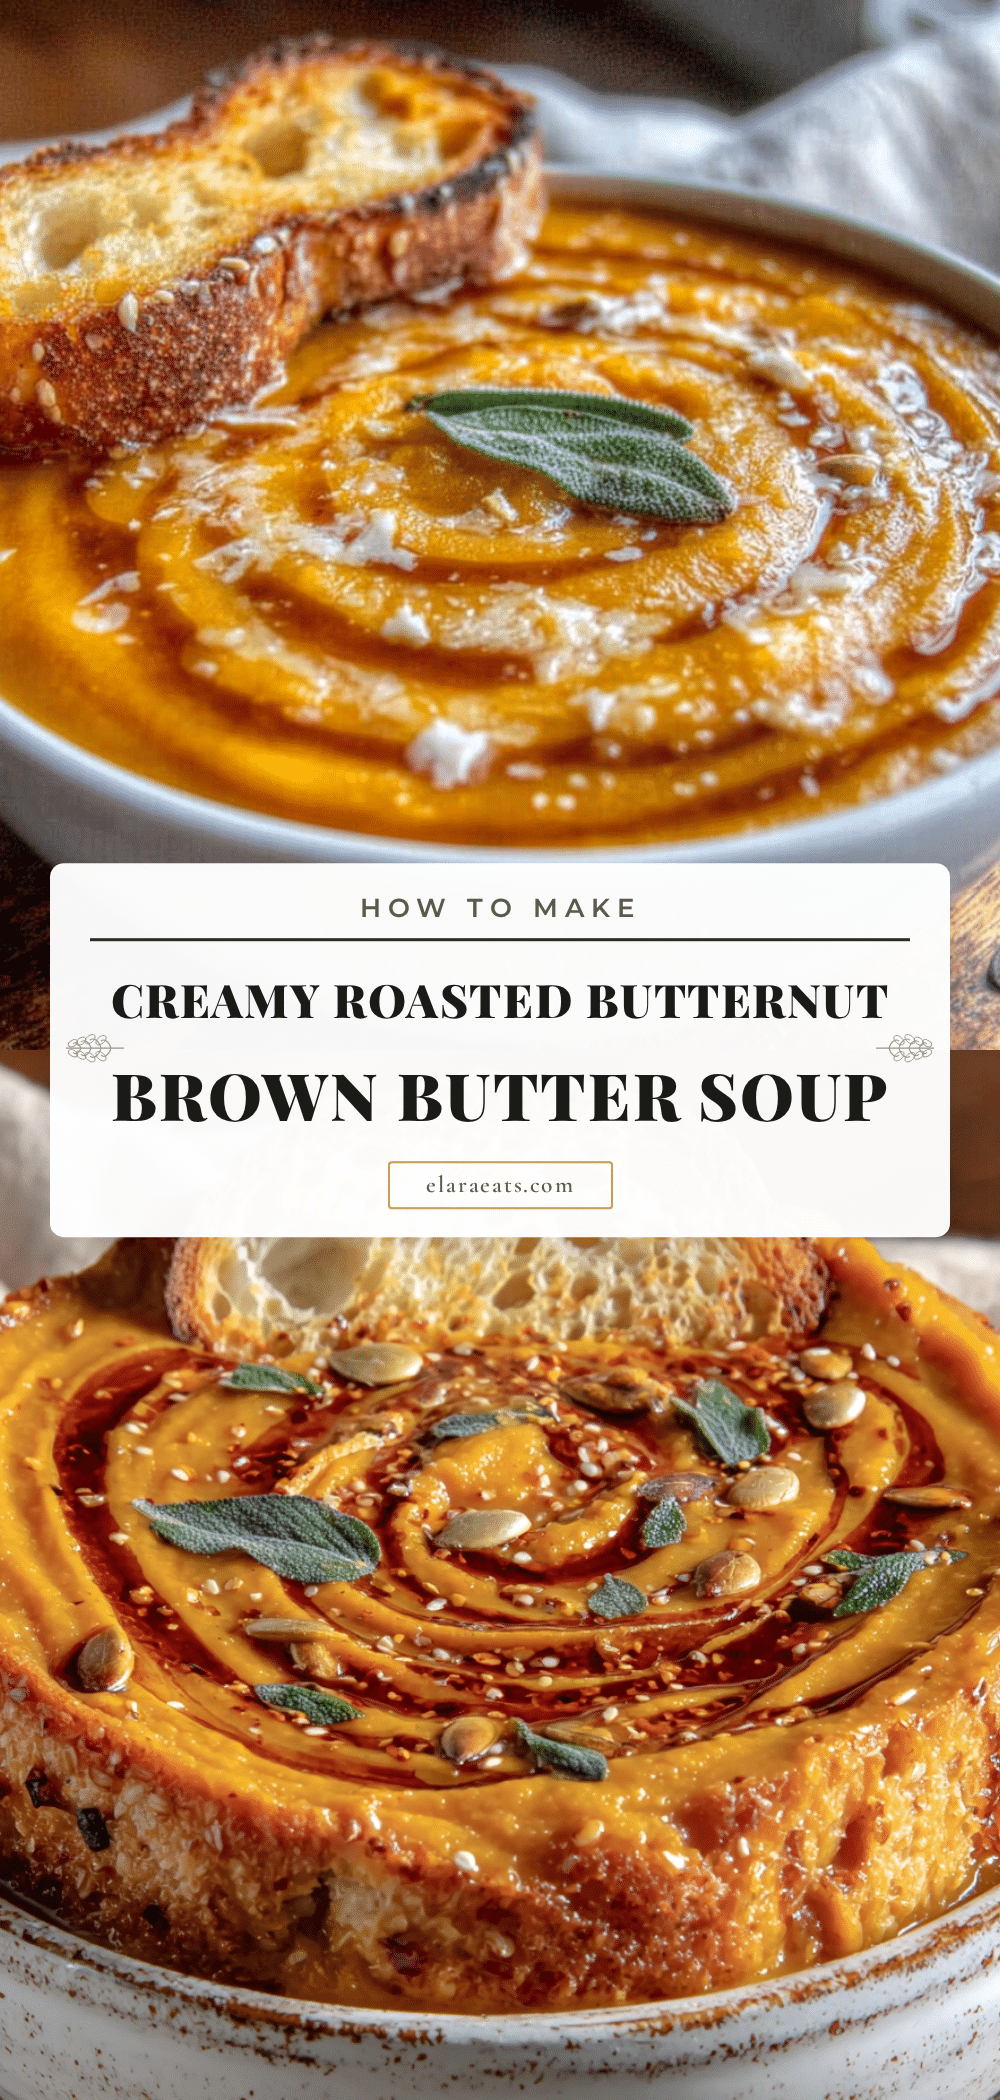
Creamy Roasted Butternut Squash Soup with Brown Butter

This creamy roasted butternut squash soup with brown butter is rich, nutty, and has a depth of flavor that makes you wonder why you ever bothered with peeling in the first place. It is simple enough for a weeknight, elegant enough for company, and deeply satisfying every single time.
- Prep Time: 15 minutes
- Cook Time: 50 minutes
- Total Time: 1 hour 5 minutes
- Yield: 6 servings 1x
- Category: Soup
- Cuisine: American
Ingredients
- 1 medium butternut squash (about 2.5 to 3 pounds), halved lengthwise and seeded
- 2 tablespoons olive oil
- 1 teaspoon kosher salt, divided
- 1/2 teaspoon black pepper, freshly ground
- 1 medium yellow onion, roughly chopped
- 3 cloves garlic, smashed but left whole
- 1 tablespoon olive oil
- 4 cups vegetable broth
- 1/2 cup full-fat coconut milk
- 1 tablespoon maple syrup (optional)
- 4 tablespoons unsalted butter, cut into cubes
- Pinch of flaky sea salt
Instructions
- Preheat oven to 400°F (200°C). Halve butternut squash lengthwise and scoop out seeds. Brush cut sides with 2 tablespoons olive oil and season with half the salt and pepper. Place cut-side down on a parchment-lined baking sheet. Roast for 40 to 50 minutes until fork-tender and skin is wrinkled. Let cool for 10 minutes.
- While squash roasts, heat 1 tablespoon olive oil in a large pot over medium heat. Add chopped onion and a pinch of salt. Cook for 6 to 8 minutes until translucent and starting to brown. Add smashed garlic cloves and cook for 1 more minute until fragrant. Remove from heat and set aside.
- In a small light-colored skillet or saucepan over medium heat, melt cubed butter, stirring constantly. After about 3 to 4 minutes, butter will foam, then subside, and brown specks will form. When it turns deep amber and smells nutty, remove from heat immediately. Pour into a heatproof bowl and sprinkle with flaky sea salt. Set aside.
- Once squash is cool enough to handle, scoop flesh away from skin and discard skin. Add roasted squash to the pot with onions and garlic. Pour in vegetable broth. Bring to a gentle simmer over medium-high heat, then reduce heat to low and cook for 5 minutes.
- Remove pot from heat. Use an immersion blender to puree soup until completely smooth. If using a countertop blender, work in batches and hold lid down with a towel.
- Stir in coconut milk and maple syrup (if using). Taste and adjust seasoning with remaining salt and pepper. If too thick, add a splash more broth or water. Ladle into bowls and drizzle each serving with brown butter.
Notes
Don’t skip roasting the squash—it concentrates sugars and creates deeper flavor. Watch brown butter carefully; it goes from perfect to burnt in about 15 seconds. Use full-fat coconut milk for best creaminess. Season in layers for best flavor. Let soup rest 15-20 minutes before serving for melded flavors. For ultra-smooth soup, blend for 60 seconds; for rustic texture, blend for 30 seconds.
Nutrition
- Serving Size: 1 bowl (about 1.5 cu
- Calories: 245
- Sugar: 8
- Sodium: 680
- Fat: 16
- Saturated Fat: 8
- Carbohydrates: 24
- Fiber: 5
- Protein: 4
Keywords: butternut squash soup, creamy soup, roasted squash, brown butter, fall soup, winter soup, gluten-free, vegetarian


