Love this? Save it for later!
Share the inspiration with your friends
My nephew claimed he hated Halloween desserts. For years. “Too much sugar,” he’d say with this annoying little shrug, turning up his nose at the candy corn and the frosted cookies. Then last October, I caught him—I mean, I actually caught him—sneaking one of these Spooky No-Bake Oreo Truffle Eyeballs from the platter I’d set aside for a party. His hand was literally in the container. He froze, looked at me with those wide, guilty eyes, and mumbled something about “quality control.” Honestly, I didn’t even care. That moment, watching him try to play it cool while clearly loving every bite, is exactly why I keep making these things. They’re the kind of treat that breaks through even the most stubborn dessert skepticism. Let me tell you, there’s something deeply satisfying about watching someone prove themselves wrong with a single, creamy, chocolatey bite.
These little guys have become my go-to for Halloween parties, classroom treats, and honestly, just because. They look like something straight out of a mad scientist’s kitchen, but they’re deceptively simple to throw together. You know that feeling when you need a showstopper but you’re short on time and patience? That’s these. The best part is the reaction you get. People do a double-take, then a little laugh, then they grab one—and then another. I mean, I’ve seen grown adults get weirdly competitive over the last eyeball on the plate. It’s hilarious. And the fact that there’s no oven involved? That’s just the icing on the, well, truffle.
Why You’ll Love This Recipe
These Spooky No-Bake Oreo Truffle Eyeballs aren’t just another Halloween sweet. They’re the perfect storm of creepy, cute, and crazy delicious. Here’s why they’ve earned a permanent spot in my Halloween rotation:
- Quick & Easy: No baking required. You can whip up a batch in under 30 minutes of active time. Perfect for those last-minute Halloween party invites or when the kids suddenly announce they need treats for school tomorrow.
- Simple Ingredients: You only need a handful of basics. Oreos, cream cheese, white chocolate, and a few candy decorations. No fancy grocery store runs needed. You probably have most of this stuff already.
- Perfect for Halloween: These look genuinely spooky but are completely kid-friendly. They’re the star of any Halloween dessert table, from class parties to adult costume gatherings.
- Crowd-Pleaser: I’ve never seen anyone turn one down. Kids love the creepy factor, and adults love that they’re not overly sweet. They disappear fast.
- Unbelievably Delicious: The combo of crushed Oreos and cream cheese creates this rich, fudge-like truffle center that’s pure comfort food. The white chocolate shell adds the perfect snap.
What makes these different from other Halloween truffles? It’s the texture. Blending the Oreos until they’re super fine creates a silky, almost mousse-like filling that’s way better than any store-bought version. Plus, the eyeball design is just fun. It’s not just another chocolate ball—it’s a conversation starter. This recipe isn’t just good; it’s the kind that makes you close your eyes after the first bite, even if you’re standing in a kitchen covered in white chocolate splatters.
What Ingredients You Will Need
This recipe uses simple, pantry-friendly ingredients to deliver that perfect combination of creamy, crunchy, and spooky. The magic is in how they come together. Here’s your shopping list:
- For the Truffle Base:
- 1 standard package (14.3 oz / 405g) Oreo cookies (regular, not double-stuf). You’ll use the whole cookie, cream filling included. I prefer the classic ones for the best texture.
- 8 oz (226g) block-style cream cheese, softened to room temperature. Full-fat is best here for that rich, creamy texture. Let it sit out for about 30 minutes before you start.
- For the Coating:
- 12 oz (340g) white chocolate melting wafers or high-quality white chocolate chips. I’ve had the best luck with Ghirardelli white chocolate melting wafers—they melt smoothly and set with a nice shine. Avoid white chocolate chips that contain stabilizers, as they can seize up.
- 1 tablespoon (15ml) coconut oil or vegetable shortening (optional, but helps thin the chocolate for a smoother coating).
- For the Eyeball Decorations:
- About 24-30 blue or green M&M’s (for the iris). You can also use candy-coated chocolate pieces in any color you like.
- Black gel food coloring or a black edible-ink pen (for the pupils). The gel kind in a tube is easiest to control.
- A small amount of red gel food coloring (optional, for “bloodshot” veins). Adds that extra creepy touch.
A quick note on substitutions: You can use reduced-fat cream cheese, but the truffles will be slightly less creamy and may be a bit softer. For a gluten-free version, use gluten-free chocolate sandwich cookies. Just make sure they have a similar texture to Oreos. If you can’t find melting wafers, you can use almond bark or even dark chocolate for a different flavor profile—just know they won’t look like eyeballs anymore!
Equipment Needed
You don’t need a fancy kitchen to make these Spooky No-Bake Oreo Truffle Eyeballs. Here’s what you’ll need:
- Food processor – This is your best friend for turning Oreos into fine crumbs. A high-speed blender works too, but you might need to work in batches. If you don’t have either, put the cookies in a zip-top bag and crush them with a rolling pin. It’s a workout, but it works.
- Electric hand mixer or stand mixer – For blending the cream cheese and cookie crumbs. A sturdy spatula and some elbow grease can do the job, but a mixer makes it so much easier to get that smooth, uniform texture.
- Large baking sheet – Lined with parchment paper or a silicone baking mat. You’ll need space to freeze the truffle balls.
- Small cookie scoop or melon baller – For portioning the truffle mixture into even balls. A tablespoon works fine if you don’t have one.
- Microwave-safe bowl – For melting the white chocolate. Glass or ceramic works best.
- Fork or dipping tool – For coating the truffles in chocolate. I use a regular dinner fork; it lets the excess chocolate drip off nicely.
- Piping bag or small zip-top bag – For adding the red “bloodshot” veins if you’re going that route.
- Toothpicks – Handy for holding the M&M’s in place while the chocolate sets.
I’ve made these with just a bowl and a spoon before, and honestly, it’s doable. But the food processor saves you about 15 minutes of crushing cookies by hand. Worth it if you ask me.
Preparation Method
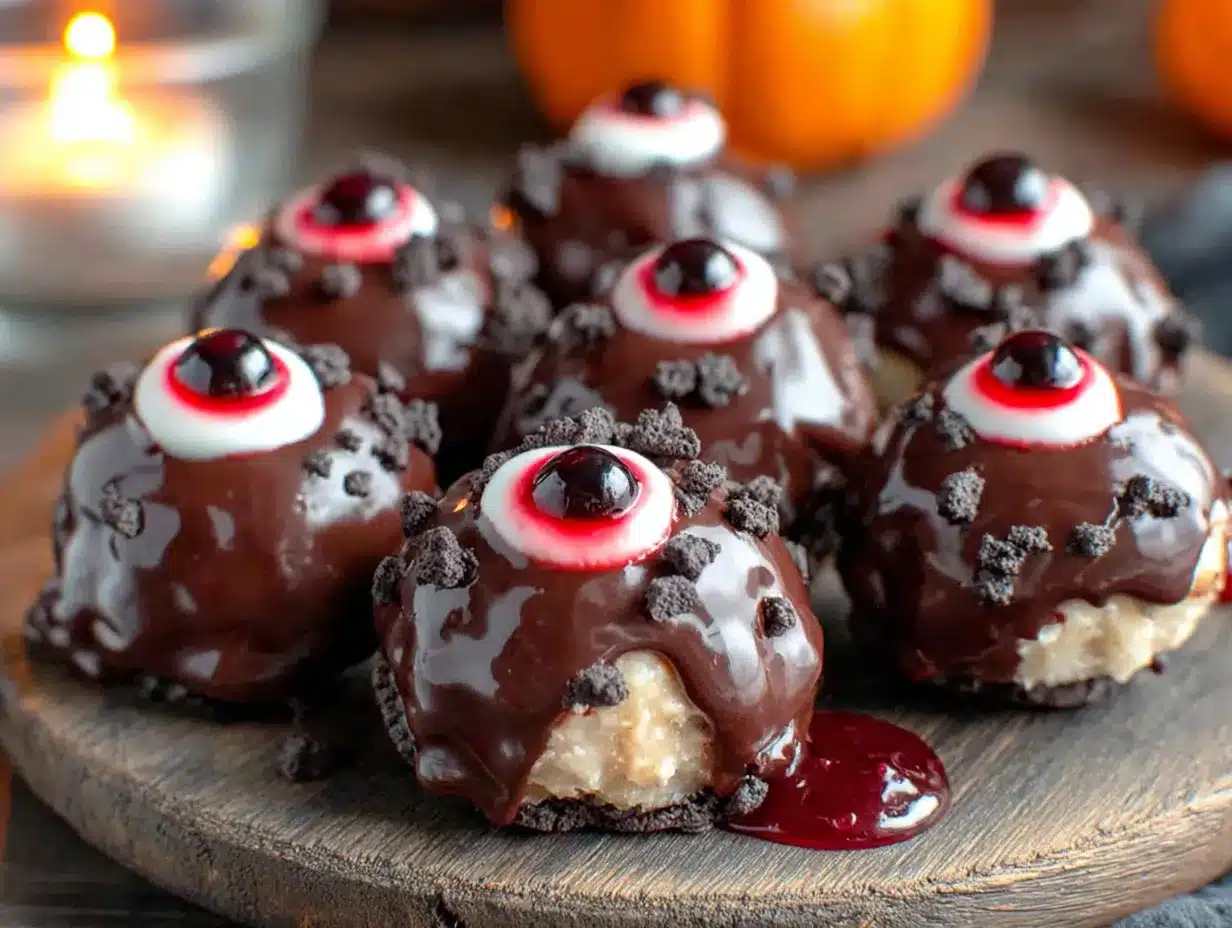
Making these Spooky No-Bake Oreo Truffle Eyeballs is a straightforward process, but there are a few tricks to getting them just right. Follow these steps, and you’ll have a platter of creepy-cute eyeballs in no time.
- Crush the Oreos: Place the entire package of Oreos (cream filling and all) into your food processor. Pulse until you have fine, sand-like crumbs. No big chunks should remain. If you’re using a bag and rolling pin, make sure to crush them thoroughly. This takes about 2-3 minutes of steady work.
- Mix the truffle base: In a large mixing bowl, beat the softened cream cheese with an electric mixer until it’s smooth and fluffy, about 1 minute. Add the Oreo crumbs and mix on low speed until everything is fully incorporated. The mixture should look like a thick, dark, crumbly dough. Don’t overmix—you want it to come together, not get greasy. Scrape down the sides of the bowl once or twice.
- Chill the mixture: Cover the bowl with plastic wrap and pop it in the refrigerator for at least 30 minutes. This step is crucial. The mixture needs to firm up so you can roll it into balls without it sticking to your hands. I’ve skipped this step before, and let me tell you, it was a sticky, frustrating mess. Patience pays off here.
- Roll into balls: Once the mixture is chilled and firm, use your cookie scoop or a tablespoon to portion out even amounts. Roll each portion between your palms to form smooth, round balls. Aim for about 1-inch (2.5 cm) in diameter. Place each ball on your parchment-lined baking sheet. You should get about 24-30 truffles. Pop the baking sheet into the freezer for 15-20 minutes. This helps the truffles hold their shape when you dip them in the warm chocolate.
- Melt the white chocolate: Place the white chocolate melting wafers in a microwave-safe bowl. Microwave in 30-second intervals, stirring well after each, until the chocolate is completely smooth and melted. If you’re using the coconut oil, stir it in now. The chocolate should be fluid but not hot—you don’t want it to melt the truffles. If it’s too thick, add another teaspoon of coconut oil.
- Dip the truffles: Remove the truffle balls from the freezer. Working with one at a time, drop a ball into the melted white chocolate. Use a fork to gently roll it around until it’s fully coated. Lift the truffle out with the fork, letting the excess chocolate drip back into the bowl. Gently tap the fork on the edge of the bowl to help the chocolate settle. Transfer the coated truffle back to the parchment-lined sheet. Repeat with all the truffles. Work quickly—the cold truffles will help the chocolate set fast.
- Add the “iris”: While the white chocolate is still wet, gently press one M&M into the center of each truffle. The candy should be slightly embedded. If the chocolate starts to set before you add the M&M, just let it sit on top—it’ll still look like an eyeball. Use a toothpick to hold it in place for a few seconds if it tries to slide off.
- Create the pupils: Once the white chocolate has fully set (about 10-15 minutes at room temperature, or 5 minutes in the fridge), use your black edible-ink pen or a tiny dab of black gel food coloring to draw a small dot in the center of each M&M. This is the pupil. Don’t make it too big—you want it to look like a real eye.
- Add the “bloodshot” veins (optional): For an extra spooky touch, mix a tiny amount of red gel food coloring with a drop of water or clear extract. Use a small paintbrush or a toothpick to paint thin, squiggly lines radiating outward from the M&M onto the white chocolate. This gives the eyeballs a genuinely creepy, veiny look. I did this for a Halloween party once, and people were genuinely unsettled. In a good way!
- Set and serve: Place the finished truffles back in the refrigerator for at least 30 minutes to fully set the chocolate. They should be firm to the touch. Once set, they’re ready to serve. Keep them chilled until you’re ready to present them.
Cooking Tips & Techniques
After making these Spooky No-Bake Oreo Truffle Eyeballs more times than I can count, I’ve learned a few things the hard way. Here are my best tips to save you from my mistakes.
Don’t skip the chilling steps. I know it’s tempting to rush through, but the mixture needs to be cold to roll easily, and the truffle balls need to be frozen to hold their shape during dipping. I once tried to dip room-temperature truffles, and they basically disintegrated into the white chocolate. It was a disaster. A delicious, chocolatey disaster, but a disaster nonetheless.
Use a fork for dipping, not your fingers. Your body heat will start melting the truffle immediately. Plus, it’s messy. A simple dinner fork lets the excess chocolate drip off cleanly. If you have a dipping tool or a candy fork, even better. But a regular fork works like a charm.
Troubleshooting white chocolate: White chocolate can be finicky. If it seizes up (turns thick and grainy), you’ve likely overheated it or gotten a drop of water in it. Start over with fresh chocolate. To avoid this, always use a dry bowl and melt in short bursts. If your chocolate is too thick for dipping, stir in a teaspoon of coconut oil or shortening—it will thin it out without affecting the flavor.
Work in small batches. Don’t try to dip all the truffles at once if you’re new to this. Take 5-6 truffles out of the freezer at a time, dip them, add the M&M’s, and then move on. This keeps the chocolate from setting before you can add the decorations.
For perfectly round truffles: After rolling the truffle balls, give them a quick chill in the freezer for 5 minutes. Then, roll them again between your palms. This smooths out any imperfections and gives you a perfectly round base for your eyeball.
Variations & Adaptations
One of the best things about this recipe is how easy it is to customize. Here are some variations I’ve tried and loved.
Dietary Adaptations: For a gluten-free version, use gluten-free chocolate sandwich cookies. I’ve tried several brands, and most work well. Just make sure they have a similar texture to Oreos. You can also use dairy-free cream cheese and dairy-free white chocolate for a vegan version. The texture will be slightly different, but they’re still delicious.
Flavor Twists: Try using different flavors of Oreos. Golden Oreos give a lighter, vanilla-flavored truffle. Mint Oreos add a refreshing twist that’s perfect for Halloween. I once made a batch with the Birthday Cake Oreos, and the white chocolate coating made them taste like a spooky cake batter truffle. Amazing.
Different “Eyeball” Looks: Instead of M&M’s, try using candy eyeballs (the ones you find at craft stores) for a super realistic look. You can also use different colored M&M’s for zombie eyes or alien eyes. For a truly terrifying look, use red M&M’s and skip the black pupil—instant demon eyes. I did this for a haunted house party, and people were genuinely creeped out.
Chocolate Coating: Not a fan of white chocolate? Use dark or milk chocolate instead. The truffles will look like chocolate truffles with a candy center. Still delicious, just less “eyeball” like. You can also drizzle the white chocolate over a dark chocolate base for a two-tone effect.
Serving & Storage Suggestions
These Spooky No-Bake Oreo Truffle Eyeballs are best served cold, straight from the fridge. The white chocolate shell has a nice snap, and the truffle center is firm and creamy. Arrange them on a platter lined with black or orange tissue paper for maximum Halloween effect. I like to serve them on a cake stand for a centerpiece that doubles as dessert.
Storage: Keep the truffles in an airtight container in the refrigerator. They’ll stay fresh for up to 5 days, though they rarely last that long in my house. The flavors actually meld together a bit more after a day, making them even better. Just keep them chilled—if they get too warm, the white chocolate can soften and the M&M’s might slide off.
Freezing: These freeze beautifully. Place the finished, fully set truffles in a single layer in a freezer-safe container, with parchment paper between layers. They’ll keep for up to 3 months. To thaw, transfer them to the refrigerator overnight. I’ve done this for Halloween parties, and they taste just as good as fresh. Just don’t thaw them at room temperature—they can get a bit weepy.
Reheating: You don’t really “reheat” these, but if you want to serve them slightly softer, let them sit at room temperature for about 10 minutes before serving. The truffle center will soften just a bit, making it even creamier.
A note on flavor development: I’ve noticed that after a day or two in the fridge, the Oreo flavor really deepens and melds with the cream cheese. It’s like the truffle gets a second wind of deliciousness. So don’t be afraid to make these a day ahead of your party.
Nutritional Information & Benefits
Let’s be honest—these Spooky No-Bake Oreo Truffle Eyeballs are a treat, not a health food. But here’s a rough idea of what you’re working with. Per truffle (based on 30 servings): approximately 150-180 calories, 9g fat, 18g carbs, 2g protein. These are estimates and will vary based on the specific brands you use.
On the plus side, the cream cheese adds a small amount of calcium and protein. The Oreos, well, they’re Oreos. But there’s something to be said for the joy of a homemade treat. These are free of artificial preservatives and made with real ingredients you can recognize. Plus, making them yourself means you control the portion size—one or two is usually plenty satisfying.
Dietary Considerations: This recipe contains gluten, dairy, and soy (from the chocolate). For a gluten-free version, use gluten-free sandwich cookies. For a dairy-free version, use dairy-free cream cheese and white chocolate. Always check labels to ensure your ingredients meet your dietary needs.
Conclusion
These Spooky No-Bake Oreo Truffle Eyeballs are the kind of recipe that makes Halloween feel special without making you feel like you need a culinary degree. They’re fun, they’re creepy, and they’re absolutely delicious. I love how they bring a little bit of mad science to the kitchen, and I love even more how quickly they disappear at parties.
Don’t be afraid to make them your own. Use different candy colors, experiment with the bloodshot veins, or try a different chocolate coating. The base recipe is forgiving and versatile. And honestly, the best part is seeing the look on people’s faces when they realize what they’re eating. That little moment of “Wait, is that an eyeball?” followed by a grin and a “I need the recipe.”
So go ahead, grab a package of Oreos, and get rolling. Your Halloween dessert table is about to get a whole lot creepier—and a whole lot tastier. And if you make them, I’d love to hear about it. Drop a comment below and tell me how your eyeballs turned out. Did you go for the bloodshot veins? Did your kids try to help? I’m all ears. Happy Halloween, and happy snacking!
Frequently Asked Questions
Can I make these Oreo truffle eyeballs ahead of time?
Absolutely! In fact, they taste even better after a day in the fridge. You can make them up to 3 days in advance and store them in an airtight container in the refrigerator. For longer storage, freeze them for up to 3 months.
Why did my white chocolate seize up?
White chocolate is sensitive to heat and moisture. If it gets too hot or if even a single drop of water gets into the bowl, it can turn thick and grainy. To fix it, try stirring in a teaspoon of coconut oil or vegetable shortening. If that doesn’t work, you’ll need to start over with fresh chocolate.
Can I use double-stuf Oreos?
You can, but the truffle mixture will be slightly softer and creamier because of the extra filling. You might need to chill the mixture a bit longer before rolling. I’ve done it before, and they turned out great—just a little more delicate.
How do I get the M&M’s to stay on the truffle?
Press the M&M into the white chocolate while it’s still wet. If the chocolate has started to set, you can use a tiny dab of melted chocolate as “glue” to hold the M&M in place. A toothpick can help hold it steady for a few seconds while the chocolate firms up.
Are these truffles safe for kids to make?
Yes, with some supervision. Kids can help crush the Oreos (if using a bag and rolling pin), roll the truffle balls, and add the M&M decorations. The dipping step involves hot melted chocolate, so that’s best left to adults. But overall, it’s a fun, kid-friendly Halloween activity.
Pin This Recipe!

Spooky No-Bake Oreo Truffle Eyeballs

These Spooky No-Bake Oreo Truffle Eyeballs are the perfect Halloween treat—creepy, cute, and crazy delicious. Made with crushed Oreos, cream cheese, and white chocolate, they’re quick, easy, and a guaranteed crowd-pleaser.
- Prep Time: 30 minutes
- Cook Time: 0 minutes
- Total Time: 1 hour 30 minutes (includes chilling and setting time)
- Yield: 24-30 truffles 1x
- Category: Dessert
- Cuisine: American
Ingredients
- 1 standard package (14.3 oz / 405g) Oreo cookies (regular, not double-stuf)
- 8 oz (226g) block-style cream cheese, softened to room temperature
- 12 oz (340g) white chocolate melting wafers or high-quality white chocolate chips
- 1 tablespoon (15ml) coconut oil or vegetable shortening (optional)
- 24–30 blue or green M&M’s (for the iris)
- Black gel food coloring or a black edible-ink pen (for the pupils)
- A small amount of red gel food coloring (optional, for ‘bloodshot’ veins)
Instructions
- Crush the Oreos: Place the entire package of Oreos (cream filling and all) into your food processor. Pulse until you have fine, sand-like crumbs. No big chunks should remain.
- Mix the truffle base: In a large mixing bowl, beat the softened cream cheese with an electric mixer until it’s smooth and fluffy, about 1 minute. Add the Oreo crumbs and mix on low speed until everything is fully incorporated. The mixture should look like a thick, dark, crumbly dough. Don’t overmix.
- Chill the mixture: Cover the bowl with plastic wrap and refrigerate for at least 30 minutes until firm.
- Roll into balls: Use a cookie scoop or tablespoon to portion out even amounts. Roll each portion between your palms to form smooth, round balls, about 1-inch (2.5 cm) in diameter. Place each ball on a parchment-lined baking sheet. Freeze for 15-20 minutes.
- Melt the white chocolate: Place the white chocolate melting wafers in a microwave-safe bowl. Microwave in 30-second intervals, stirring well after each, until completely smooth and melted. If using, stir in the coconut oil.
- Dip the truffles: Remove the truffle balls from the freezer. Working one at a time, drop a ball into the melted white chocolate. Use a fork to gently roll it around until fully coated. Lift the truffle out with the fork, letting excess chocolate drip off. Transfer back to the parchment-lined sheet. Repeat with all truffles.
- Add the ‘iris’: While the white chocolate is still wet, gently press one M&M into the center of each truffle. Use a toothpick to hold it in place if needed.
- Create the pupils: Once the white chocolate has fully set (about 10-15 minutes at room temperature), use a black edible-ink pen or a tiny dab of black gel food coloring to draw a small dot in the center of each M&M.
- Add the ‘bloodshot’ veins (optional): Mix a tiny amount of red gel food coloring with a drop of water or clear extract. Use a small paintbrush or toothpick to paint thin, squiggly lines radiating outward from the M&M onto the white chocolate.
- Set and serve: Place the finished truffles in the refrigerator for at least 30 minutes to fully set the chocolate. Keep chilled until ready to serve.
Notes
Don’t skip the chilling steps—the mixture needs to be cold to roll easily, and the truffle balls need to be frozen to hold their shape during dipping. Use a fork for dipping, not your fingers. Work in small batches to keep the chocolate from setting before adding decorations. For perfectly round truffles, chill the rolled balls for 5 minutes, then roll again between your palms.
Nutrition
- Serving Size: 1 truffle
- Calories: 165
- Sugar: 14
- Sodium: 95
- Fat: 9
- Saturated Fat: 5
- Carbohydrates: 18
- Protein: 2
Keywords: Halloween, no-bake, Oreo truffles, eyeballs, easy dessert, spooky treats, kid-friendly


