Love this? Save it for later!
Share the inspiration with your friends
The school Halloween party was in six hours and I’d completely forgotten. My son had reminded me that morning, and I’d nodded, typed a note into my phone, and then promptly lost my phone somewhere between the cereal aisle and the carpool line. By the time I found it—wedged between the driver’s seat and the center console, battery dead—it was 2:00 PM. The party started at 6:30. Every other parent was probably already cooling elaborate cupcakes with hand-piped spiderwebs or assembling graham-cracker haunted houses.
I stood in my kitchen, staring into the pantry. A box of cake mix. A bag of powdered sugar. A bag of marshmallows that had been sitting there since last summer’s s’mores phase. Honestly, I almost gave up and grabbed a bag of store-bought cookies on the way. But then I remembered the roll of candy eyes I’d bought on a whim at the dollar store last week. Maybe I could pull something together. Something that looked intentional. Something that looked… spooky.
That’s how this Spooky Mummy Wrapped Halloween Cookie Cake was born. I mean, I was basically making it up as I went, pressing dough into a pan, slicing marshmallows into strips, and hoping the whole thing didn’t collapse into a sugary mess. When I walked into that school gym, carrying what looked like a giant, gooey mummy on a platter, I felt a little ridiculous. But then the kids swarmed. Then the parents asked for the recipe. And by the end of the night, the plate was empty and my son was telling everyone his mom made the “mummy cake.” Maybe you’ve been there—that moment when a desperate kitchen gamble turns into an accidental win. This is that recipe.
Why You’ll Love This Recipe
Let me tell you, this isn’t just another Halloween dessert. This Spooky Mummy Wrapped Halloween Cookie Cake is the kind of recipe that makes you look like a kitchen hero without actually having to be one. I’ve tested this about five times now, tweaking the dough texture and the marshmallow placement until it was just right. Here’s why it works:
- Quick & Easy: From start to finish, you’re looking at about 35-40 minutes. That includes baking time. No chilling dough, no complicated piping—just mix, press, bake, and decorate.
- Simple Ingredients: You probably have most of this stuff already. Butter, sugar, flour, eggs, vanilla. The only “special” thing is the candy eyes, and you can find those at any grocery store around Halloween.
- Perfect for Parties: This thing is a showstopper. It’s giant, it’s cute-spooky, and kids absolutely lose their minds over it. Great for classroom parties, Halloween potlucks, or just a fun family night.
- Crowd-Pleaser: It’s a cookie cake. Who doesn’t love a cookie cake? The marshmallow “bandages” get all toasty and chewy on top, and the soft, buttery cookie underneath is pure comfort.
- Unbelievably Delicious: The combo of soft cookie, gooey marshmallow, and that little pop of chocolate from the candy eyes? Honestly, it’s next-level. It’s sweet, but not sickeningly so, and the texture is just perfect.
What makes this different from every other Halloween dessert out there? It’s the marshmallow mummy wrap. Instead of frosting or fondant, you use marshmallows to create that bandaged look. They melt slightly in the oven, creating a sticky, chewy, slightly toasted crust that tastes amazing. I’ve tried it with fondant (too sweet, too fussy) and with piped icing (took forever, looked messy). Marshmallows are the secret weapon here. They’re forgiving, they’re cheap, and they look genuinely spooky.
This recipe is the one that makes you close your eyes after the first bite. It’s Halloween fun without the Halloween stress. Perfect for impressing a classroom full of kids or turning a regular Tuesday into something memorable.
What Ingredients You Will Need
This Spooky Mummy Wrapped Halloween Cookie Cake uses simple, pantry-friendly ingredients to deliver big flavor and a fun, festive look. Most of these are things you’ll already have on hand if you do any baking at all.
For the Cookie Cake Base
- 1 cup (226g) unsalted butter, softened (I prefer using salted butter in a pinch and just cutting the added salt in half—works fine)
- 1 cup (200g) granulated sugar (adds sweetness and helps the cookie spread just right)
- 1 large egg, room temperature (cold egg will make the dough stiff and harder to press into the pan)
- 2 teaspoons vanilla extract (use pure vanilla if you have it—the flavor is noticeably better)
- 2 cups (250g) all-purpose flour (spoon and level it—don’t scoop straight from the bag or you’ll get too much)
- 1/2 teaspoon baking soda (helps the cookie rise just a tiny bit without puffing up too much)
- 1/2 teaspoon salt (balances the sweetness; don’t skip it)
For the Mummy Wrap & Decoration
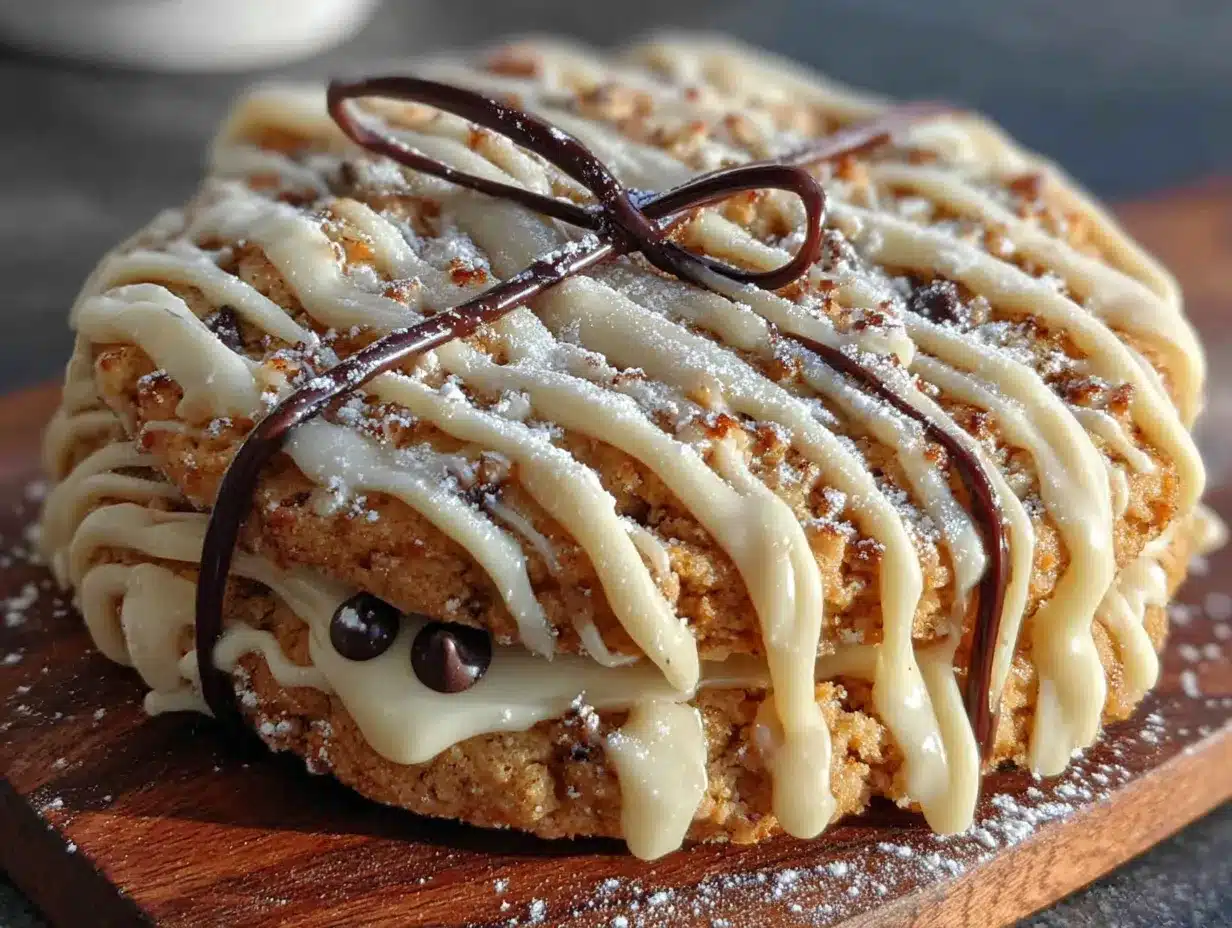
- 1 bag (10 oz or about 280g) large marshmallows (you’ll need about 20-24 marshmallows; mini ones don’t work as well for the bandage look)
- 2-3 tablespoons powdered sugar, for dusting (keeps the marshmallows from sticking to your hands and the knife)
- Candy eyes (about 4-6 pairs) (the classic black-and-white ones work best; I found a pack of 50 at the dollar store)
Ingredient Tips & Substitutions
- Butter: If you only have salted butter, reduce the added salt to 1/4 teaspoon. The cookie will still turn out great.
- Flour: For a gluten-free version, you can use a 1:1 gluten-free baking flour blend. I’ve tested this with Bob’s Red Mill and it worked well—just note the texture will be slightly more crumbly.
- Marshmallows: Don’t use mini marshmallows for the wrap—they’ll melt into a puddle. Large marshmallows are the way to go. You can use vegan marshmallows if needed (Dandies brand works nicely).
- Egg: For an egg-free version, use a flax egg (1 tablespoon ground flaxseed mixed with 3 tablespoons water, let sit for 5 minutes). The cookie will be a bit denser but still delicious.
Equipment Needed
- 9-inch round cake pan or springform pan (a springform pan makes it easier to remove the cookie cake cleanly, but a regular cake pan works too—just line it with parchment)
- Parchment paper (absolute must for easy removal; I learned this the hard way when my first cookie cake stuck to the pan like glue)
- Electric hand mixer or stand mixer (you can mix by hand with a wooden spoon, but it’ll take some elbow grease to get the butter and sugar creamy)
- Large mixing bowls (one for wet ingredients, one for dry)
- Sharp knife or kitchen shears (for cutting marshmallows into strips; kitchen shears are actually easier and less sticky)
- Small bowl of powdered sugar (for dusting your hands and the knife when handling marshmallows)
- Cooling rack (lets the cookie cake cool evenly so the marshmallows don’t slide off)
If you don’t have a springform pan, don’t worry. A regular 9-inch cake pan lined with parchment paper overhang works perfectly. Just lift the whole cookie out after it cools. I’ve also made this in a 9-inch cast iron skillet—it looks rustic and cool, and the edges get extra crispy.
Preparation Method
Alright, let’s make this Spooky Mummy Wrapped Halloween Cookie Cake. Trust me, it’s easier than it looks. Here’s the step-by-step breakdown:
- Preheat your oven to 350°F (175°C). Line your 9-inch round cake pan with parchment paper, letting some hang over the edges for easy lifting later. If you’re using a springform pan, just line the bottom with parchment and grease the sides lightly.
- Cream the butter and sugar. In a large bowl, beat the softened butter and granulated sugar together on medium speed until light and fluffy—about 2-3 minutes. You want it to look pale and slightly increased in volume. Scrape down the sides of the bowl halfway through. Honestly, this is the most important step for a tender cookie cake. Don’t rush it.
- Add the egg and vanilla. Crack the egg into the butter-sugar mixture, add the vanilla, and beat on low until just combined. The mixture might look a little curdled at this point—that’s totally normal. Don’t panic.
- Mix the dry ingredients separately. In a separate bowl, whisk together the flour, baking soda, and salt. This ensures the leavening agent is evenly distributed. I once skipped this step and ended up with a cookie cake that had a weird, bitter pocket of baking soda in one bite. Not pleasant.
- Combine wet and dry. Gradually add the dry ingredients to the wet mixture, mixing on low speed. Stop as soon as the flour disappears—overmixing will make the cookie tough. The dough will be thick and slightly sticky. That’s perfect.
- Press the dough into the pan. Transfer the dough to your prepared pan. Using your hands (lightly dusted with flour if needed), press it into an even layer. Don’t press too hard—just smooth it out until it reaches the edges. The dough should be about 1/2 inch thick. It won’t fill the whole pan completely, and that’s okay—it will spread as it bakes.
- Bake the cookie cake. Place the pan in the preheated oven and bake for 15-17 minutes. You want the edges to be golden brown and the center to look slightly underdone—still soft and puffy. A toothpick inserted in the center should come out with a few moist crumbs. Don’t overbake! The cookie will continue to set as it cools. Overbaking gives you a dry, crumbly cookie cake instead of a soft, chewy one.
- Let it cool slightly. Remove the pan from the oven and place it on a cooling rack. Let the cookie cake cool in the pan for about 10 minutes. This is important—if you try to move it too soon, it will fall apart.
- Prepare the marshmallow bandages. While the cookie cools, get your marshmallows ready. Dust a cutting board and a sharp knife (or kitchen shears) with powdered sugar. Cut each marshmallow in half horizontally, so you have two flat, sticky rounds. Then cut each round into thin strips, about 1/4 inch wide. Dust your fingers with powdered sugar as you work to prevent sticking. You’ll get about 4-5 strips per marshmallow.
- Wrap the mummy. Once the cookie cake is cool enough to handle but still warm (this is key—the warmth helps the marshmallows stick), carefully lift it out of the pan using the parchment paper overhang. Place it on your serving plate. Now, start arranging your marshmallow strips on top of the cookie. Lay them in overlapping, crisscross patterns to mimic mummy bandages. Leave a small gap in the center where the eyes will go. Don’t worry about making it perfect—mummies are supposed to look a little messy!
- Add the eyes. Press two candy eyes into the gap you left in the center. You can place them close together for a cute look or far apart for a more deranged, funny mummy. I’ve done both, and honestly, the far-apart eyes always get more laughs.
- Optional: Toast the marshmallows. If you want that toasted, gooey look, you can use a kitchen torch to gently brown the marshmallow strips. Alternatively, pop the whole cookie cake under the broiler for 30-60 seconds—but watch it like a hawk! Marshmallows burn in seconds. I accidentally set one on fire once. It was dramatic but not delicious.
Cooking Tips & Techniques
After making this Spooky Mummy Wrapped Halloween Cookie Cake about a dozen times (not exaggerating), I’ve picked up a few tricks that make the process smoother and the result better.
Don’t overmix the dough. This is the number one mistake I see. Once you add the flour, mix just until it disappears. Overmixing develops too much gluten, and you’ll end up with a tough, dense cookie cake instead of a tender, buttery one. I learned this when I got distracted by a phone call and kept mixing—the resulting cookie cake was practically a hockey puck.
Underbake slightly. Take the cookie cake out of the oven when the center still looks a little soft and underdone. It will continue to bake from the residual heat of the pan as it cools. If you wait until the center is fully set, it will be overbaked and dry. The perfect cookie cake should have a slight jiggle in the middle when you pull it out.
Work with warm marshmallows. Marshmallows are much easier to cut and shape when they’re at room temperature or slightly warm. If your marshmallows are cold from the pantry, let them sit out for 15 minutes before cutting. And always, always dust your knife and hands with powdered sugar. It’s a game-changer.
Timing is everything. I like to start cutting my marshmallows while the cookie cake is baking. That way, by the time it comes out and cools for 10 minutes, my marshmallow strips are ready to go. Multitasking saves you a solid 5-7 minutes of fumbling around.
If the marshmallows won’t stick. If your cookie cake has cooled too much and the marshmallows aren’t sticking, just dab a tiny bit of corn syrup or honey on the back of each strip. It acts like edible glue. Or, you can microwave the cookie cake for 10-15 seconds to warm it up again.
Variations & Adaptations
One of the best things about this Spooky Mummy Wrapped Halloween Cookie Cake is how adaptable it is. Here are a few variations I’ve tried and loved:
Chocolate Mummy Cookie Cake
Replace 1/4 cup of the all-purpose flour with 1/4 cup of unsweetened cocoa powder. The chocolate base pairs beautifully with the vanilla marshmallow wrap. I made this version for a friend’s Halloween party and it disappeared even faster than the original.
Gluten-Free Version
Use a 1:1 gluten-free baking flour blend. I’ve tested this with King Arthur Measure for Measure and it worked great. The texture is slightly more delicate, so be extra gentle when lifting the cookie cake out of the pan. Let it cool completely before adding the marshmallows.
Funfetti Mummy Cake
Fold 1/4 cup of rainbow sprinkles into the dough before pressing it into the pan. The colorful sprinkles peeking out from under the marshmallow bandages give it a playful, almost party-like vibe. My kids absolutely insist on this version now.
Pumpkin Spice Mummy Cake
Add 1 teaspoon of pumpkin pie spice and 1/4 cup of pumpkin puree to the wet ingredients. Reduce the butter to 3/4 cup to account for the extra moisture. This version is perfect for fall gatherings and has a warm, cozy flavor that screams Halloween.
Dairy-Free Adaptation
Use vegan butter (I like Miyoko’s) and a flax egg. The texture will be slightly less tender, but the flavor is still fantastic. Most marshmallows are naturally dairy-free, but check the label to be sure.
Serving & Storage Suggestions
This Spooky Mummy Wrapped Halloween Cookie Cake is best served at room temperature or slightly warm. If you want to serve it warm, just pop individual slices in the microwave for 10-15 seconds. The marshmallows get all stretchy and gooey again—it’s heaven.
How to serve: Cut the cookie cake into wedges like a pizza. Each slice should have a good balance of cookie, marshmallow bandages, and at least one candy eye. I like to serve it on a black or orange platter for maximum Halloween effect. A scoop of vanilla ice cream on the side is never a bad idea.
What goes with it: This cookie cake pairs beautifully with a cold glass of milk (obviously), a hot apple cider, or even a pumpkin spice latte. If you’re serving it at a party, set out some spooky Halloween punch alongside it for a complete spread.
Storage: Store any leftovers in an airtight container at room temperature for up to 3 days. The marshmallows will soften and become more chewy over time, but the cookie stays nice and tender. I actually think day-old mummy cake is even better—the flavors meld together somehow.
Freezing: You can freeze the undecorated cookie cake (without marshmallows) for up to 2 months. Wrap it tightly in plastic wrap, then foil. When you’re ready to serve, thaw it at room temperature, then warm it slightly before adding the marshmallow strips and eyes. The marshmallows don’t freeze well, so always add them fresh.
Reheating: For individual slices, 10-15 seconds in the microwave is perfect. For a whole cookie cake, reheat it in a 300°F oven for 5-7 minutes, then add the marshmallows and eyes. This keeps the marshmallows from melting into a puddle.
Nutritional Information & Benefits
Let’s be real—this is a treat, not a health food. But here’s the estimated nutritional breakdown for one slice (assuming 8 servings):
- Calories: Approximately 380-420 per slice
- Fat: 18-20g (mostly from butter)
- Carbohydrates: 52-56g
- Protein: 4-5g
- Sugar: 30-34g
- Fiber: 1-2g
Health considerations: This recipe contains gluten, dairy, and eggs. It’s not suitable for vegans in its standard form, but the variations above offer alternatives. The marshmallows are generally gluten-free, but always check the label if you’re serving someone with celiac disease.
The bright side: This cookie cake does use real butter and vanilla, so you’re getting some actual food ingredients instead of a bunch of preservatives and artificial flavors. It’s homemade, which automatically makes it better than anything from a package. And honestly, sometimes you just need a slice of something sweet and silly. Life’s too short to skip dessert.
Conclusion
This Spooky Mummy Wrapped Halloween Cookie Cake is hands-down my favorite Halloween recipe to make. It’s the perfect blend of fun and delicious—the kind of dessert that makes kids giggle and adults ask for seconds. I love that it looks like you spent hours on it when really, it comes together in under 40 minutes. That’s my kind of baking magic.
I hope you give this recipe a try. Don’t be afraid to make it your own—use different candy eyes, add sprinkles, or even try the chocolate version. The best part about this cookie cake is that it’s forgiving. It wants you to have fun with it. So get a little messy, laugh at the lopsided marshmallow strips, and enjoy every gooey, buttery bite.
If you make this Spooky Mummy Wrapped Halloween Cookie Cake, I’d love to hear about it! Drop a comment below and tell me how it turned out. Did your kids love it? Did it steal the show at your Halloween party? Share your photos and tag me—I can’t wait to see your mummy creations. Happy Halloween, and happy baking!
Frequently Asked Questions
Can I use pre-made cookie dough for this recipe?
Yes, you can use a tube of refrigerated sugar cookie dough in a pinch. Press it into the pan and bake according to the package directions, then add the marshmallow wrap. The flavor won’t be quite as good as homemade, but it’s a great shortcut when you’re really short on time.
How do I keep the marshmallows from sticking to my knife?
Dust your knife generously with powdered sugar before cutting. You may need to re-dust between each marshmallow. Kitchen shears actually work better than a knife for this—they cut through the marshmallow cleanly with less sticking.
Can I make this recipe ahead of time?
You can bake the cookie cake base up to 2 days in advance and store it wrapped tightly at room temperature. Add the marshmallow strips and candy eyes on the day you plan to serve it. The marshmallows will start to soften after about 12 hours, so it’s best to add them fresh.
Why did my cookie cake spread too much?
This usually happens if the butter was too soft or if the dough was overmixed. Make sure your butter is softened but not melty, and don’t press the dough too thin in the pan. If your kitchen is very warm, chill the pressed dough in the fridge for 15 minutes before baking.
Can I use mini marshmallows instead of large ones?
I don’t recommend it. Mini marshmallows will melt into a single, sticky layer rather than creating the bandaged mummy look. Large marshmallows cut into strips give you that distinct wrapped appearance. Stick with the large ones for the best visual effect.
Looking for more Halloween baking ideas? Try our Halloween candy bark or these pumpkin cookie bars for even more festive fun!
Pin This Recipe!
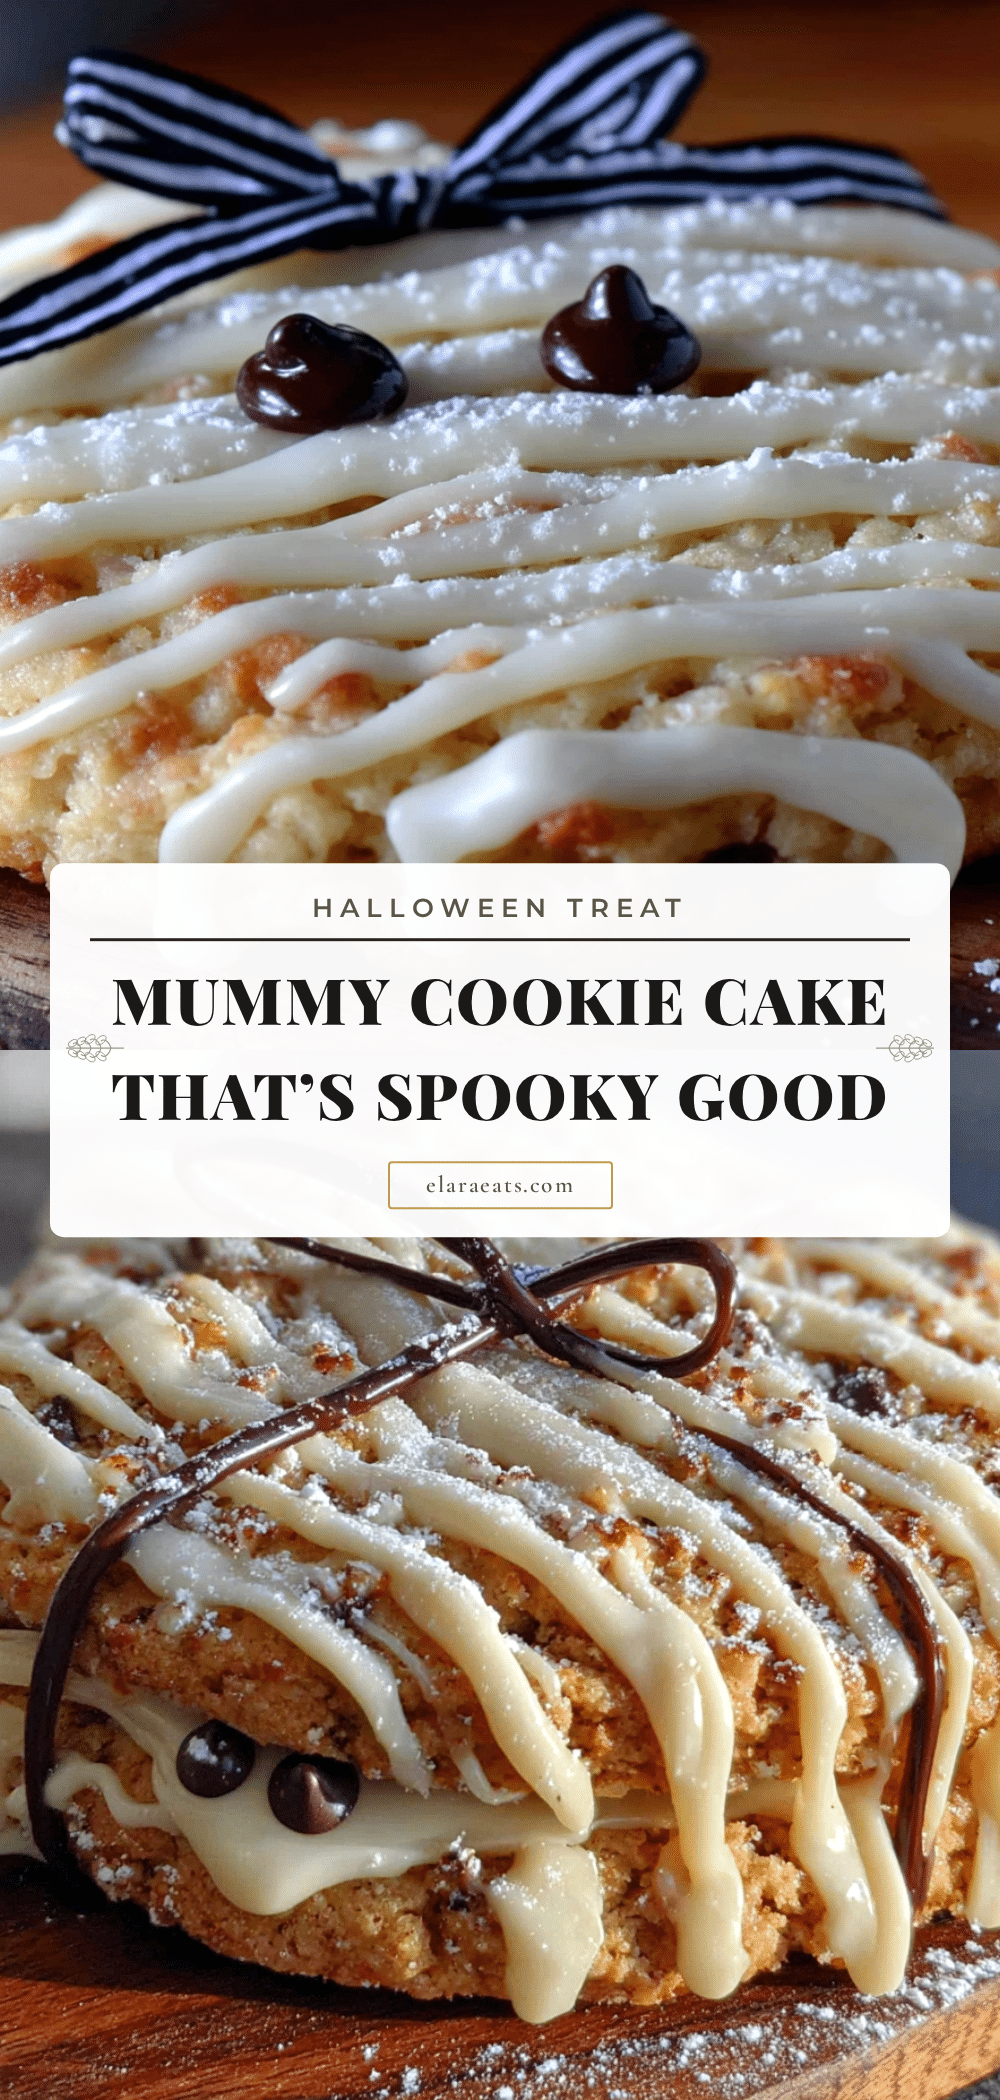
Easy Halloween Mummy Cookie Cake Recipe Under 40 Minutes

A quick and easy Halloween dessert that looks like a spooky mummy, made with a soft cookie cake base, marshmallow bandages, and candy eyes. Perfect for parties and ready in under 40 minutes.
- Prep Time: 20 minutes
- Cook Time: 17 minutes
- Total Time: 37 minutes
- Yield: 8 servings 1x
- Category: Dessert
- Cuisine: American
Ingredients
- 1 cup (226g) unsalted butter, softened
- 1 cup (200g) granulated sugar
- 1 large egg, room temperature
- 2 teaspoons vanilla extract
- 2 cups (250g) all-purpose flour
- 1/2 teaspoon baking soda
- 1/2 teaspoon salt
- 1 bag (10 oz or about 280g) large marshmallows (about 20-24)
- 2–3 tablespoons powdered sugar, for dusting
- Candy eyes (about 4-6 pairs)
Instructions
- Preheat your oven to 350°F (175°C). Line a 9-inch round cake pan with parchment paper, letting some hang over the edges for easy lifting.
- In a large bowl, beat the softened butter and granulated sugar together on medium speed until light and fluffy, about 2-3 minutes.
- Add the egg and vanilla, and beat on low until just combined.
- In a separate bowl, whisk together the flour, baking soda, and salt.
- Gradually add the dry ingredients to the wet mixture, mixing on low speed until just combined. Do not overmix.
- Transfer the dough to the prepared pan and press it into an even layer, about 1/2 inch thick.
- Bake for 15-17 minutes, until the edges are golden brown and the center is slightly underdone. Let cool in the pan for 10 minutes.
- While the cookie cools, prepare the marshmallow bandages: Dust a cutting board and knife with powdered sugar. Cut each marshmallow in half horizontally, then cut each half into thin strips about 1/4 inch wide.
- Carefully lift the cookie cake out of the pan using the parchment paper and place it on a serving plate.
- Arrange the marshmallow strips on top of the cookie in overlapping, crisscross patterns, leaving a small gap in the center for the eyes.
- Press two candy eyes into the gap. Optionally, toast the marshmallows with a kitchen torch or under the broiler for 30-60 seconds.
Notes
For best results, use room temperature egg and softened butter. Do not overmix the dough. Underbake slightly for a soft, chewy texture. If marshmallows don’t stick, dab a tiny bit of corn syrup or honey on the back. Store leftovers in an airtight container at room temperature for up to 3 days.
Nutrition
- Serving Size: 1 slice (1/8 of cake
- Calories: 400
- Sugar: 32
- Sodium: 220
- Fat: 19
- Saturated Fat: 12
- Carbohydrates: 54
- Fiber: 1
- Protein: 4
Keywords: Halloween, mummy, cookie cake, easy, under 40 minutes, party dessert, marshmallow