Love this? Save it for later!
Share the inspiration with your friends
This was supposed to be plain pumpkin bread. I had the can of pumpkin puree open, the spices measured out, and I was already running late for a potluck my neighbor Jen was hosting. I grabbed what I thought was melted butter from the microwave, poured it into the mixing bowl, and only realized my mistake when that nutty, toasty smell hit my nose. Brown butter. I had accidentally browned the butter instead of just melting it. And honestly? I almost dumped it out and started over.
But the clock was ticking, the pumpkin was already mixed in, and I figured—what’s the worst that could happen? I threw in some chocolate chips I had stashed in the pantry, crossed my fingers, and slid the loaf into the oven. Forty-five minutes later, I pulled out something that smelled like autumn had taken physical form in my kitchen. The top was crackled, the edges were perfectly caramelized, and that brown butter had done something magical to the whole thing.
That first slice was a revelation. The brown butter added this deep, almost toasty richness that plain butter just can’t touch. It made the pumpkin taste earthier, the spices warmer, and the chocolate chips—well, they melted into little pockets of gooey goodness throughout the bread. I brought it to Jen’s potluck feeling nervous, like I was presenting a happy accident instead of an actual recipe. It was gone in fifteen minutes. Three people asked for the recipe, and I had to admit I wasn’t even sure what I had done.
You know that feeling when you stumble onto something good by complete accident? That’s this bread. It’s the kind of recipe that makes you wonder why you haven’t been browning butter for everything all along. I’ve made it at least a dozen times since that night, tweaking it here and there, but the core of it—that accidental brown butter, the pumpkin, the chocolate—stayed exactly the same. It’s too good to mess with.
Why You’ll Love This Recipe
Let me tell you why this brown butter pumpkin chocolate chip bread has become my most-requested fall recipe. It’s not just another pumpkin bread—it’s the one that makes people stop mid-bite and look at you with that “what did you put in this?” expression.
- Browned Butter Magic: That extra step of browning the butter transforms the entire flavor profile. It adds a nutty, caramelized depth that complements pumpkin better than you’d expect. I’ve tested this with regular melted butter, and honestly, it’s not the same.
- Perfect Texture: This bread comes out incredibly moist without being dense or gummy. The pumpkin keeps it tender, while the brown butter adds richness that makes each slice feel indulgent.
- Simple Ingredients: You probably have most of these in your pantry already. No weird specialty items—just good, basic baking staples that come together beautifully.
- Make-Ahead Friendly: This bread actually tastes better the next day. The flavors have time to meld together, and the texture stays perfect for days. I’ve made it for weekend brunches, holiday gatherings, and even as hostess gifts.
- Crowd-Pleaser: Kids love the chocolate chips, adults appreciate the sophisticated brown butter flavor, and everyone goes back for seconds. It’s one of those rare recipes that appeals to all ages.
- Freezer-Friendly: Bake two loaves—one for now, one for later. It freezes beautifully and tastes just as fresh after thawing.
What makes this different from every other pumpkin bread recipe out there? It’s the browning of the butter. That one extra step—maybe five minutes of your time—elevates the whole thing from good to unforgettable. I’ve tried versions with spices, with streusel toppings, with cream cheese swirls, and none of them hit quite like this simple combination of brown butter, pumpkin, and chocolate chips.
This is the bread I make when I want to impress without stress. It looks rustic and homemade, tastes like you spent hours on it, and comes together in about fifteen minutes of active work. The kind of recipe that makes you look like a hero in the kitchen with minimal effort.
What Ingredients You Will Need
This recipe uses simple, wholesome ingredients that work together to create something truly special. Most of these are pantry staples, and the few that aren’t are easy to find at any grocery store.
- Unsalted butter, 1/2 cup (1 stick) – This is the star of the show. You’ll be browning it, so use good quality butter. I prefer Kerrygold or Plugrà for their higher fat content, which browns more evenly and adds richer flavor.
- Pumpkin puree, 1 cup (not pumpkin pie filling) – Make sure you grab 100% pure pumpkin puree, not the pre-sweetened pie filling. Libby’s is my go-to brand, but store brands work fine too. If you’re feeling ambitious, homemade pumpkin puree works beautifully.
- All-purpose flour, 1 3/4 cups (210 grams) – Standard all-purpose flour works perfectly here. For a lighter texture, you can substitute up to half with whole wheat pastry flour.
- Granulated sugar, 1 cup (200 grams) – Regular white sugar adds sweetness and helps create that beautiful crackly top.
- Light brown sugar, 1/2 cup (100 grams), packed – Brown sugar adds moisture and a subtle molasses flavor that pairs beautifully with the brown butter. Dark brown sugar works too, for an even deeper flavor.
- Large eggs, 2, at room temperature – Room temperature eggs incorporate more evenly into the batter. If you forget to take them out ahead of time, place them in a bowl of warm water for 5 minutes.
- Vanilla extract, 1 teaspoon – Pure vanilla extract makes a difference here. The artificial stuff has a chemical aftertaste that doesn’t play well with the brown butter.
- Baking soda, 1 teaspoon – This helps the bread rise and gives it a tender crumb.
- Baking powder, 1/2 teaspoon – Adds extra lift for a lighter texture.
- Salt, 1/2 teaspoon – Don’t skip this! Salt balances the sweetness and enhances all the other flavors.
- Ground cinnamon, 1 1/2 teaspoons – The backbone of the spice blend. Use fresh cinnamon for the best flavor.
- Ground nutmeg, 1/2 teaspoon – Freshly grated nutmeg is incredible if you have it, but pre-ground works perfectly fine.
- Ground ginger, 1/4 teaspoon – Adds a subtle warmth that complements the pumpkin.
- Ground cloves, 1/8 teaspoon – Just a pinch for depth. Too much can overpower the other flavors.
- Semi-sweet chocolate chips, 1 cup (180 grams) – I prefer Ghirardelli or Guittard for their superior melting quality. You can also chop up a good-quality chocolate bar for irregular chunks that melt into puddles.
Ingredient Selection Tips: For the best brown butter, use a light-colored pan so you can see the color change clearly. If your pumpkin puree looks watery, blot it with a paper towel before measuring—this prevents a soggy bread. And please, for the love of all things baked, use room temperature eggs. Cold eggs will seize up your brown butter and create a lumpy batter.
Equipment Needed
You don’t need a fancy kitchen to make this bread. Here’s what you’ll need:
- 9×5-inch loaf pan – Standard size works best. If you use an 8×4-inch pan, you’ll need to increase the baking time by about 10 minutes.
- Light-colored saucepan or skillet – Essential for browning the butter. A dark pan makes it hard to see the color change, and you’ll end up with burnt butter. Trust me on this one.
- Mixing bowls – One large, one medium. I use my grandmother’s old ceramic bowls, but any mixing bowls will do.
- Whisk – For combining dry ingredients and mixing the wet ingredients.
- Rubber spatula – For folding everything together without overmixing.
- Parchment paper – Line your loaf pan for easy removal. This is non-negotiable in my kitchen.
- Cooling rack – Allows air to circulate around the bread so it cools evenly.
- Measuring cups and spoons – For accurate measurements. I prefer metal measuring cups for dry ingredients.
- Kitchen scale (optional but recommended) – Weighing your flour ensures consistent results every time.
If you don’t have a light-colored saucepan, you can brown the butter in any pan—just keep a close eye on it and stir constantly. I’ve even browned butter in a nonstick skillet in a pinch. As for the loaf pan, you can find affordable options at any kitchen supply store. I’ve been using the same $12 pan for years, and it works perfectly.
Preparation Method
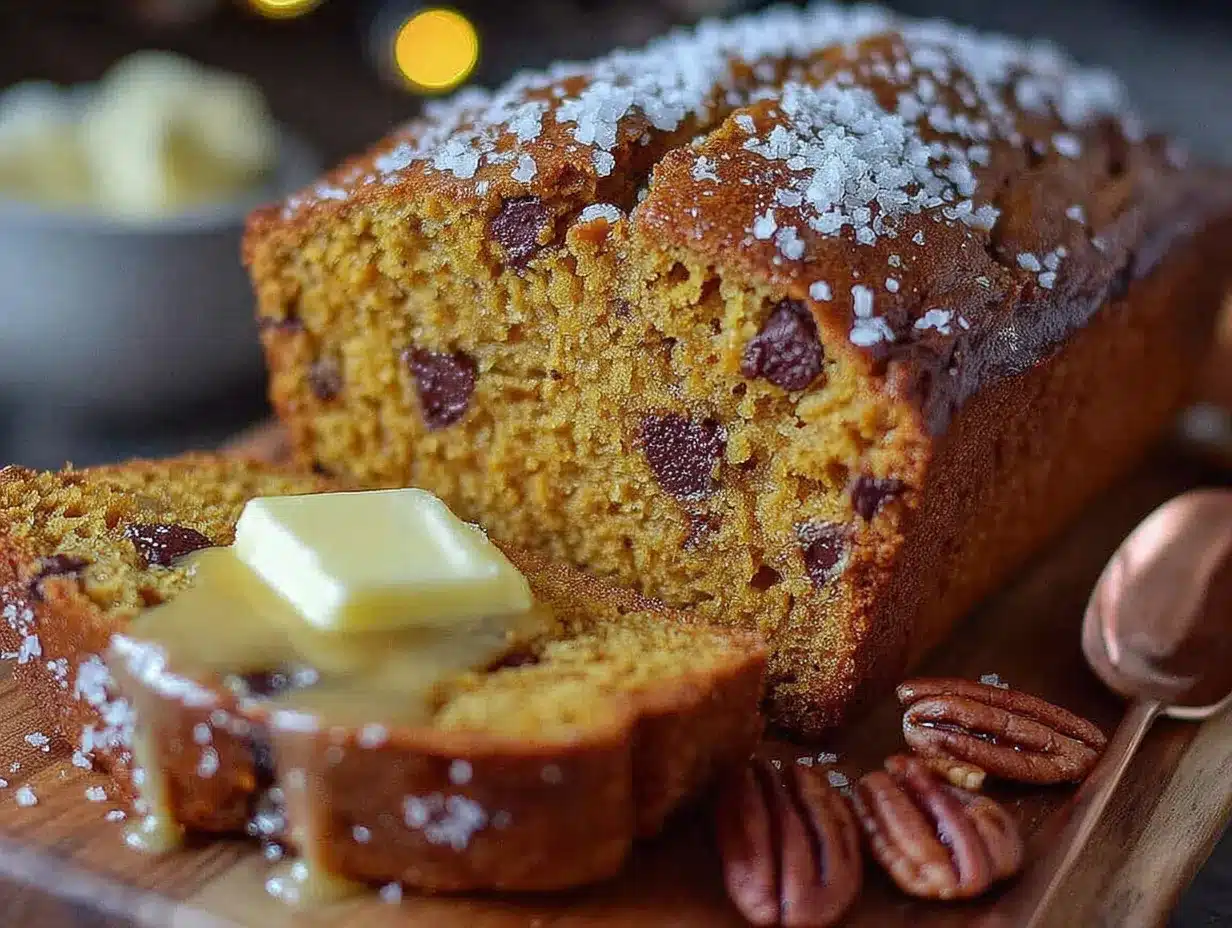
- Preheat your oven to 350°F (175°C). Position the rack in the center of the oven. Line your 9×5-inch loaf pan with parchment paper, leaving some overhang on the long sides for easy lifting. Lightly grease the exposed ends with butter or cooking spray.
- Brown the butter. Place the 1/2 cup of butter in your light-colored saucepan over medium heat. Let it melt completely, then continue cooking, swirling the pan occasionally. You’ll see it foam up, then subside, then start to turn golden. Watch for small brown specks forming at the bottom—that’s the milk solids toasting. When the butter smells nutty and has turned a deep amber color (about 5-7 minutes), remove it from the heat immediately. Pour it into a heatproof bowl to stop the cooking process. Let it cool for about 10 minutes while you prepare the other ingredients.
- Combine dry ingredients. In a medium bowl, whisk together the 1 3/4 cups all-purpose flour, 1 teaspoon baking soda, 1/2 teaspoon baking powder, 1/2 teaspoon salt, 1 1/2 teaspoons cinnamon, 1/2 teaspoon nutmeg, 1/4 teaspoon ginger, and 1/8 teaspoon cloves. Set aside.
- Mix wet ingredients. In a large bowl, whisk together the 1 cup granulated sugar and 1/2 cup packed brown sugar. Pour in the cooled brown butter (make sure it’s not still hot, or it’ll cook the eggs) and whisk until combined. It’ll look a bit grainy—that’s normal.
- Add eggs and vanilla. Whisk in the 2 room temperature eggs, one at a time, until each is fully incorporated. Add the 1 teaspoon vanilla extract and whisk again. The mixture should look smooth and glossy.
- Add the pumpkin. Pour in the 1 cup pumpkin puree and whisk until everything is combined. The batter will look thick and creamy at this point. Don’t worry if it seems a bit thin—that’s how it should be.
- Fold in dry ingredients. Add the dry ingredients to the wet ingredients in two additions, folding gently with your rubber spatula after each. Mix just until you can’t see any more flour streaks—overmixing will make the bread tough. A few small lumps are perfectly fine.
- Add chocolate chips. Reserve about 2 tablespoons of chocolate chips for the top. Gently fold the remaining chocolate chips into the batter. Don’t overmix here either—just a few folds until they’re evenly distributed.
- Transfer to pan. Pour the batter into your prepared loaf pan and spread it evenly. Sprinkle the reserved chocolate chips on top—this gives you those beautiful melty pockets on the surface.
- Bake. Place the pan in the preheated oven and bake for 50-60 minutes. At the 45-minute mark, start checking for doneness. The bread is done when a toothpick inserted into the center comes out clean or with just a few moist crumbs (not wet batter). If the top is browning too quickly, tent it loosely with aluminum foil for the last 10-15 minutes.
- Cool. Let the bread cool in the pan on a wire rack for 15 minutes. Then use the parchment paper overhang to lift it out and transfer it to the rack to cool completely. I know it’s tempting to slice into it warm, but it really needs to cool for at least 1 hour to set properly.
Sensory Cues: When the brown butter is ready, it should smell like toasted nuts and caramel. The batter should be thick but pourable—like a very thick milkshake. When the bread is done, the top will be a deep golden brown with beautiful cracks, and the whole kitchen will smell like autumn and chocolate.
Cooking Tips & Techniques
Let me share some things I’ve learned the hard way so you don’t have to make the same mistakes.
The Brown Butter Secret: This is the most important step, and it’s easy to mess up. Never walk away from browning butter. I did that once, thinking I had time to grab something from the pantry, and came back to burnt butter that smelled like sadness. Keep your eyes on that pan, and as soon as you see those brown specks and smell that nutty aroma, pull it off the heat. The butter continues to cook from the residual heat, so transferring it to a cool bowl is crucial.
Room Temperature Matters: I cannot stress this enough. If your eggs are cold, they’ll seize the brown butter and create a lumpy, separated batter. Same goes for the pumpkin puree—if it’s straight from the fridge, let it sit on the counter for 15 minutes. I’ve made this mistake on a rushed morning and ended up with a grainy-textured bread that just wasn’t as good.
Don’t Overmix: This is the number one rookie mistake with quick breads. Mix until the flour disappears, then stop. Overmixing develops gluten, which makes the bread tough and dense instead of tender and fluffy. A few streaks of flour are better than a tough loaf.
Check for Doneness Early: Every oven runs differently. My old oven would bake this in exactly 52 minutes, but my new one takes 58. Start checking at 45 minutes, and don’t rely solely on the toothpick test—also look for the edges pulling away from the pan slightly and a springy top when gently pressed.
Cool Completely Before Slicing: I know, I know, warm bread with melty chocolate chips sounds incredible. But slicing too early will result in a crumbly mess. The bread needs time to set its structure. If you absolutely must have warm bread, let it cool completely first, then reheat individual slices in the microwave for 15 seconds.
Variations & Adaptations
This recipe is wonderfully adaptable. Here are some variations I’ve tried and loved:
- Gluten-Free Version: Substitute the all-purpose flour with a good quality 1:1 gluten-free baking flour blend. I’ve had great success with King Arthur’s Measure for Measure. Add an extra tablespoon of milk or pumpkin puree to compensate for the drier gluten-free flour.
- Dairy-Free Adaptation: Use vegan butter for browning—I recommend Miyoko’s or Country Crock Plant Butter. They brown surprisingly well. For the chocolate chips, look for dairy-free options like Enjoy Life or Pascha.
- Nutty Twist: Add 1/2 cup of toasted chopped pecans or walnuts along with the chocolate chips. Toast them in a dry pan for 3-4 minutes until fragrant, then let them cool before adding. The crunch contrasts beautifully with the tender crumb.
- Spice It Up: If you love warm spices, increase the cinnamon to 2 teaspoons and add 1/4 teaspoon of cardamom. The cardamom adds an unexpected floral note that pairs beautifully with the brown butter.
- Chocolate Variations: Swap semi-sweet chips for dark chocolate (60-70% cacao) for a more intense chocolate flavor, or use white chocolate chips for a sweeter, creamier version. I once made it with milk chocolate chips and it was almost too sweet—but my kids devoured it.
- Pumpkin Swap: In a pinch, you can use butternut squash puree or sweet potato puree instead of pumpkin. The flavor will be slightly different, but the texture works the same way.
I once tried a version with browned butter and chopped dried apricots instead of chocolate chips, thinking it would be sophisticated. It was… fine. Not bad, but not nearly as good as the original. Some things just aren’t meant to be improved upon.
Serving & Storage Suggestions
This bread is incredibly versatile when it comes to serving. Here’s how I like to enjoy it:
Serving Temperature: Room temperature is ideal. The flavors are most pronounced, and the texture is at its peak. That said, a slightly warm slice with a pat of butter melting into it is pure heaven. For a special treat, toast a slice in a buttered skillet for 2 minutes per side—the edges get crispy while the inside stays tender.
Presentation Ideas: Dust the top with powdered sugar for a prettier presentation. Serve slices on a wooden board with a small dish of honey butter or cinnamon whipped cream on the side. For brunch gatherings, I arrange slices on a cake stand and watch them disappear.
Perfect Pairings: A hot cup of coffee or chai tea is the perfect companion. For a more indulgent experience, serve with a scoop of vanilla bean ice cream or a drizzle of caramel sauce. This bread also pairs beautifully with a glass of cold milk—classic for a reason.
Storage Instructions: Store the bread wrapped tightly in plastic wrap or aluminum foil at room temperature for up to 4 days. The moisture from the pumpkin actually helps keep it fresh longer than most quick breads. Do not refrigerate—it will dry out the bread and dull the flavors.
Freezer Instructions: This bread freezes beautifully. Wrap the completely cooled loaf (or individual slices) tightly in plastic wrap, then in a layer of aluminum foil. Freeze for up to 3 months. To thaw, leave at room temperature for 2-3 hours, or unwrap and microwave individual slices for 20-30 seconds.
Flavor Development: Here’s something interesting—this bread actually tastes better on day two. The brown butter flavor deepens, the spices meld together, and the texture becomes even more moist. If you can resist eating it all on day one, you’re in for a treat on day two.
Nutritional Information & Benefits
While this is definitely a treat, it does have some redeeming qualities. Per slice (based on 12 slices):
- Calories: Approximately 310
- Total Fat: 14g
- Saturated Fat: 8g
- Cholesterol: 55mg
- Sodium: 220mg
- Total Carbohydrates: 44g
- Dietary Fiber: 2g
- Sugars: 28g
- Protein: 4g
- Vitamin A: 85% of Daily Value (from the pumpkin)
Pumpkin is packed with vitamin A, which supports eye health and immune function. It’s also a good source of fiber and antioxidants. The brown butter adds a small amount of vitamin A and healthy fats. Of course, the chocolate chips and sugar are purely for enjoyment—and that’s okay. This is comfort food, not health food.
For those watching their sugar intake, you can reduce the granulated sugar to 3/4 cup without significantly affecting the texture. I’ve done this before and it still tastes plenty sweet, especially with the chocolate chips.
Conclusion
This brown butter pumpkin chocolate chip bread started as a mistake, but it’s become one of my most treasured recipes. It’s the kind of bread that makes you slow down and savor each bite—the nutty richness of the browned butter, the warm spices, the pockets of melted chocolate. It’s autumn in loaf form, and it never fails to bring a smile to people’s faces.
I hope you give this recipe a try, whether you’re a seasoned baker or someone who’s never browned butter before. It’s forgiving, it’s delicious, and it’s exactly the kind of recipe that makes you feel like a kitchen genius. Don’t be afraid to make it your own—add more chocolate, throw in some nuts, or experiment with different spices. That’s how the best recipes are born anyway, right?
If you make this bread, I’d love to hear about it. Leave a comment below and let me know how it turned out, or share your own variations. Did you add something unexpected? Did it disappear at your potluck too? Drop a photo on Pinterest and tag me—I love seeing your creations. Happy baking, friends!
Frequently Asked Questions
Can I use pumpkin pie filling instead of pumpkin puree?
No, please don’t. Pumpkin pie filling is pre-sweetened and spiced, which will throw off the sugar and spice balance in this recipe. Stick with 100% pure pumpkin puree for the best results. If you accidentally bought pie filling, you can still use it—just reduce the sugar by half and skip the added spices.
Why did my brown butter burn?
Brown butter burns easily because the milk solids toast quickly once they separate from the butterfat. The most common mistake is using too high heat or walking away from the pan. Keep the heat at medium, swirl the pan constantly, and pull it off the heat as soon as you see brown specks and smell that nutty aroma. Transfer it to a cool bowl immediately to stop the cooking process.
Can I make this recipe into muffins instead of a loaf?
Absolutely! Grease a 12-cup muffin tin or line with paper liners. Fill each cup about 3/4 full and bake at 350°F for 18-22 minutes, or until a toothpick inserted into the center comes out clean. You’ll get about 12-14 muffins. The baking time is much shorter, so start checking at 15 minutes.
How do I know when the bread is fully baked?
Insert a toothpick or wooden skewer into the center of the bread. If it comes out clean or with just a few moist crumbs (not wet batter), it’s done. You can also check that the edges have pulled away slightly from the pan and the top springs back when gently pressed. If the top is browning too quickly but the center isn’t done, tent with foil for the remaining baking time.
Can I freeze this bread for later?
Yes, this bread freezes beautifully. Let it cool completely, then wrap tightly in plastic wrap followed by a layer of aluminum foil. Freeze for up to 3 months. To thaw, leave at room temperature for 2-3 hours, or unwrap individual slices and microwave for 20-30 seconds. I often bake a double batch and freeze one loaf for later—it’s like finding a gift in your freezer on a busy week.
Pin This Recipe!
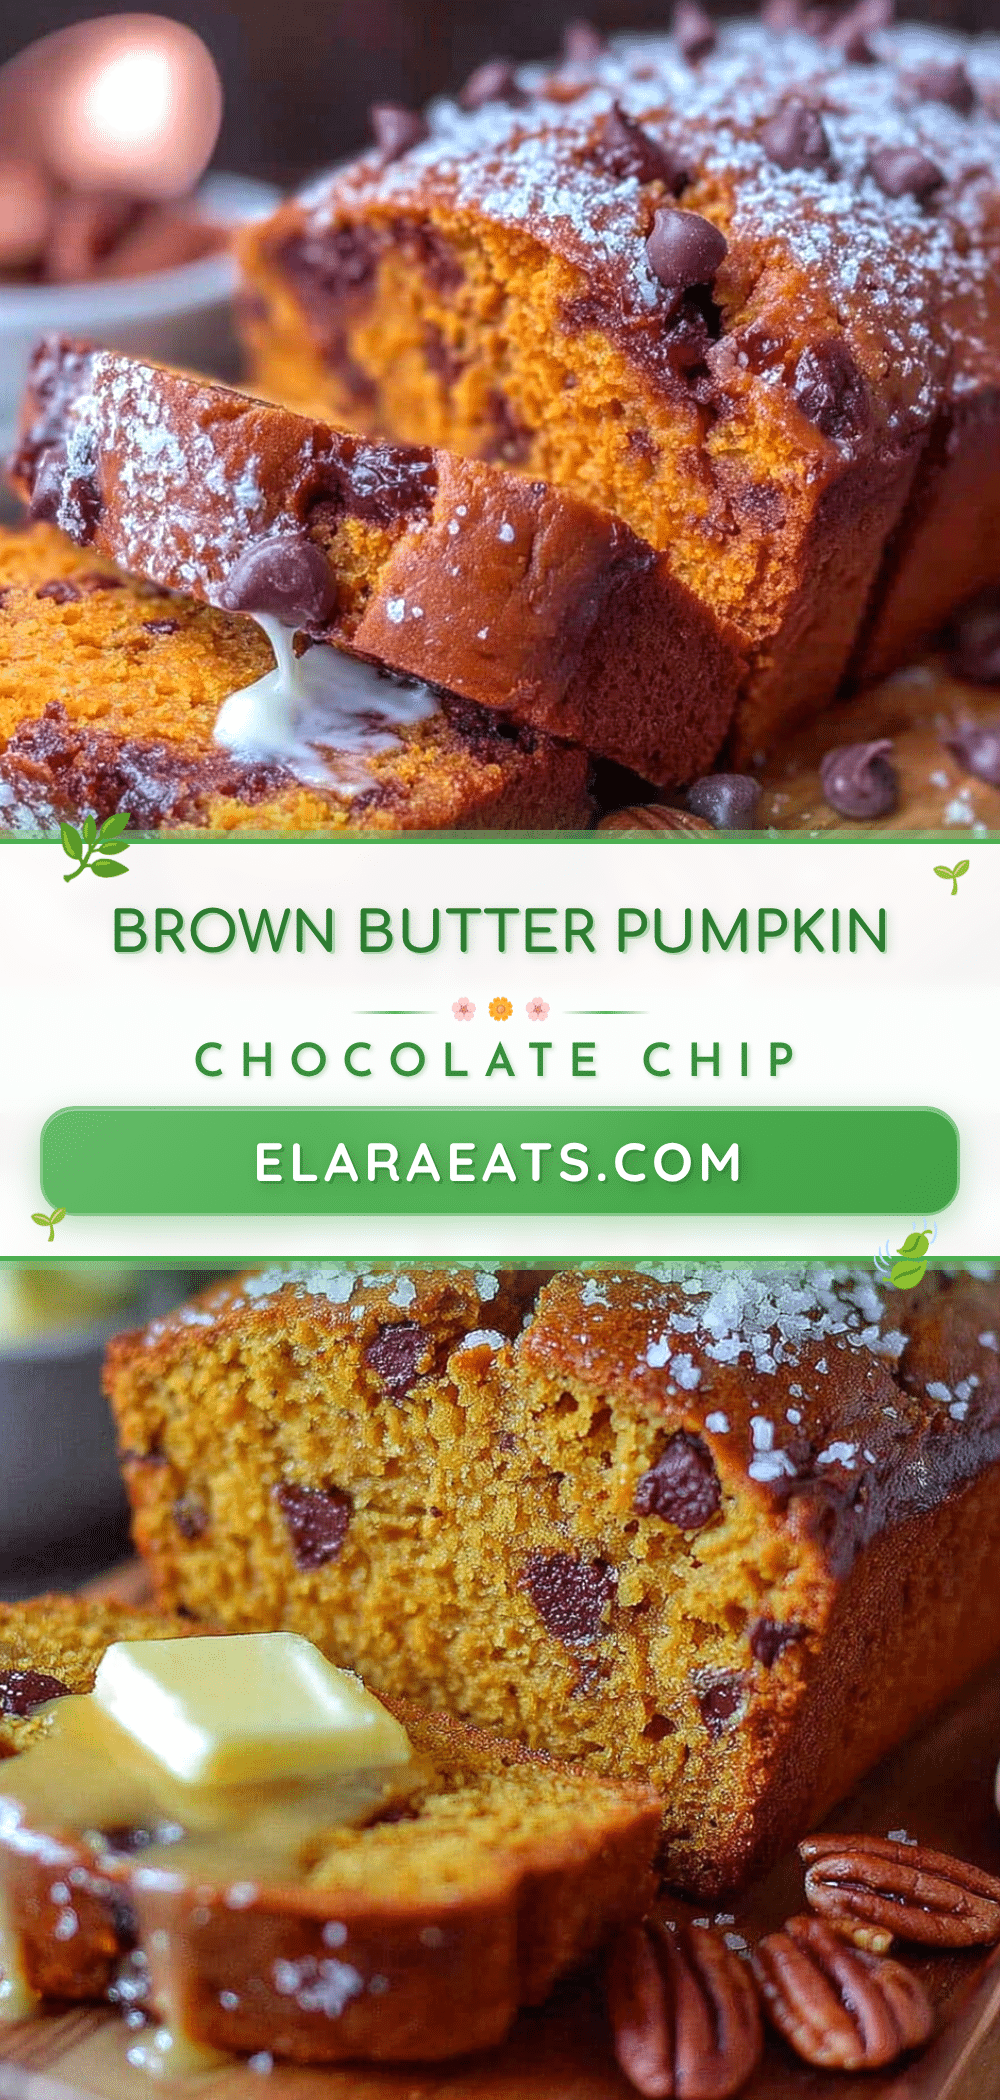
Best Brown Butter Pumpkin Chocolate Chip Bread
This accidental brown butter pumpkin chocolate chip bread is incredibly moist, rich, and flavorful. The nutty browned butter elevates the pumpkin and spices, while pockets of melted chocolate make every slice irresistible.
- Prep Time: 15 minutes
- Cook Time: 50-60 minutes
- Total Time: 1 hour 15 minutes
- Yield: 12 servings 1x
- Category: Dessert
- Cuisine: American
Ingredients
- 1/2 cup (1 stick) unsalted butter
- 1 cup pumpkin puree (not pumpkin pie filling)
- 1 3/4 cups (210 grams) all-purpose flour
- 1 cup (200 grams) granulated sugar
- 1/2 cup (100 grams) packed light brown sugar
- 2 large eggs, at room temperature
- 1 teaspoon vanilla extract
- 1 teaspoon baking soda
- 1/2 teaspoon baking powder
- 1/2 teaspoon salt
- 1 1/2 teaspoons ground cinnamon
- 1/2 teaspoon ground nutmeg
- 1/4 teaspoon ground ginger
- 1/8 teaspoon ground cloves
- 1 cup (180 grams) semi-sweet chocolate chips
Instructions
- Preheat your oven to 350°F (175°C). Position the rack in the center of the oven. Line your 9×5-inch loaf pan with parchment paper, leaving some overhang on the long sides for easy lifting. Lightly grease the exposed ends with butter or cooking spray.
- Brown the butter: Place the 1/2 cup of butter in your light-colored saucepan over medium heat. Let it melt completely, then continue cooking, swirling the pan occasionally. You’ll see it foam up, then subside, then start to turn golden. Watch for small brown specks forming at the bottom—that’s the milk solids toasting. When the butter smells nutty and has turned a deep amber color (about 5-7 minutes), remove it from the heat immediately. Pour it into a heatproof bowl to stop the cooking process….
- Combine dry ingredients: In a medium bowl, whisk together the 1 3/4 cups all-purpose flour, 1 teaspoon baking soda, 1/2 teaspoon baking powder, 1/2 teaspoon salt, 1 1/2 teaspoons cinnamon, 1/2 teaspoon nutmeg, 1/4 teaspoon ginger, and 1/8 teaspoon cloves. Set aside.
- Mix wet ingredients: In a large bowl, whisk together the 1 cup granulated sugar and 1/2 cup packed brown sugar. Pour in the cooled brown butter (make sure it’s not still hot, or it’ll cook the eggs) and whisk until combined. It’ll look a bit grainy—that’s normal.
- Add eggs and vanilla: Whisk in the 2 room temperature eggs, one at a time, until each is fully incorporated. Add the 1 teaspoon vanilla extract and whisk again. The mixture should look smooth and glossy.
- Add the pumpkin: Pour in the 1 cup pumpkin puree and whisk until everything is combined. The batter will look thick and creamy at this point. Don’t worry if it seems a bit thin—that’s how it should be.
- Fold in dry ingredients: Add the dry ingredients to the wet ingredients in two additions, folding gently with your rubber spatula after each. Mix just until you can’t see any more flour streaks—overmixing will make the bread tough. A few small lumps are perfectly fine.
- Add chocolate chips: Reserve about 2 tablespoons of chocolate chips for the top. Gently fold the remaining chocolate chips into the batter. Don’t overmix here either—just a few folds until they’re evenly distributed.
- Transfer to pan: Pour the batter into your prepared loaf pan and spread it evenly. Sprinkle the reserved chocolate chips on top—this gives you those beautiful melty pockets on the surface.
- Bake: Place the pan in the preheated oven and bake for 50-60 minutes. At the 45-minute mark, start checking for doneness. The bread is done when a toothpick inserted into the center comes out clean or with just a few moist crumbs (not wet batter). If the top is browning too quickly, tent it loosely with aluminum foil for the last 10-15 minutes.
- Cool: Let the bread cool in the pan on a wire rack for 15 minutes. Then use the parchment paper overhang to lift it out and transfer it to the rack to cool completely. I know it’s tempting to slice into it warm, but it really needs to cool for at least 1 hour to set properly.
Notes
For best results, use room temperature eggs and pumpkin puree to prevent the brown butter from seizing. Do not overmix the batter. The bread tastes even better the next day as flavors meld. Store wrapped at room temperature for up to 4 days; do not refrigerate. Freezes well for up to 3 months.
Nutrition
- Serving Size: 1 slice
- Calories: 310
- Sugar: 28
- Sodium: 220
- Fat: 14
- Saturated Fat: 8
- Carbohydrates: 44
- Fiber: 2
- Protein: 4
Keywords: brown butter, pumpkin bread, chocolate chip, fall recipe, quick bread, easy pumpkin bread