Love this? Save it for later!
Share the inspiration with your friends
It was 10:47 PM on a random Wednesday in mid-October, and I had a sudden, undeniable need for something chocolatey with a side of ridiculous. The craving hit me while I was scrolling through costume ideas I knew I’d never actually sew, and my brain just locked onto the idea of a witch hat. Not a real one, obviously. An edible one. The kind of thing you’d see at a Halloween party and immediately grab two of.
I didn’t have any fancy candy melts or special cookie cutters. I didn’t have the patience for a complicated frosting situation either. Let’s be honest, at that hour, my standards for “good enough” were pretty low. But I had a box of brownie mix in the pantry, a bag of Hershey’s Kisses I’d stashed for emergency chocolate situations, and a vague memory of seeing something like this on Pinterest three years ago. So I just went for it. I baked the brownies in a mini muffin tin, which felt like a gamble, and when they came out all puffy and perfect, I turned them upside down, stuck a chocolate kiss on top with a dab of frosting, and added a little orange sprinkle collar. It looked like a tiny witch hat. Honestly, it looked better than I expected. I stood there in my kitchen, eating one at midnight, and felt a weird sense of victory.
That’s the thing about this recipe. It’s not complicated. There’s no fancy technique or rare ingredient. It’s just a really good idea that works. And it’s the kind of thing that makes people smile, which is really the whole point of Halloween, isn’t it? You know that feeling when you bring a tray of these to a party and everyone does that little double-take? That’s the good stuff. These Easy Witch Hat Brownie Bites are now my go-to for Halloween, and I keep making them because they’re just so much fun. They’re proof that you don’t need to be a pastry chef to pull off something that looks impressive.
Why You’ll Love This Recipe
Look, I’ve tested a lot of Halloween treats over the years. Some were gorgeous but took three hours. Others were fast but looked like a toddler assembled them. These Easy Witch Hat Brownie Bites hit that sweet spot where they look like you tried really hard, but you actually just used a box mix and some clever assembly. Let me break down why these are worth your time.
- Quick & Easy: From start to finish, you’re looking at about 30 minutes. The brownies bake in under 15 minutes, and assembly is just a matter of sticking things together. Perfect for those nights when you realize Halloween is tomorrow and you have nothing.
- Simple Ingredients: You probably have most of this stuff already. Brownie mix, eggs, oil, Hershey’s Kisses, frosting, and sprinkles. No special trip to a craft store required.
- Perfect for Halloween Parties: These are the star of any spread. Kids love them, adults pretend to be subtle while grabbing three, and they’re small enough that nobody feels guilty having more than one.
- Crowd-Pleaser: I’ve brought these to work parties, family gatherings, and neighborhood get-togethers. They disappear every single time. The combination of fudgy brownie and chocolate kiss is just unbeatable.
- Unbelievably Cute: Let’s be real. The visual payoff here is huge. They look like tiny little hats sitting on a platter, and that’s just delightful.
What makes these different from other Halloween brownie recipes is the texture. I’ve found that using a mini muffin tin and slightly underbaking the brownies gives you that perfect fudgy center that holds up to the chocolate kiss without crumbling. It’s a small tweak, but it makes all the difference. And honestly, this is the kind of recipe that makes you feel like a kitchen genius without actually having to be one. It’s comfort food with a costume on.
What Ingredients You Will Need
This recipe uses simple, pantry-friendly ingredients to create something that looks way more elaborate than it actually is. Here’s what you’ll need to gather before you start.
For the Brownie Bites
- 1 box (18.4 oz) brownie mix (I prefer Ghirardelli or Duncan Hines for the fudgiest texture)
- 1 large egg
- 1/3 cup vegetable oil
- 2 tablespoons water (or brewed coffee for a deeper chocolate flavor)
For the Witch Hats
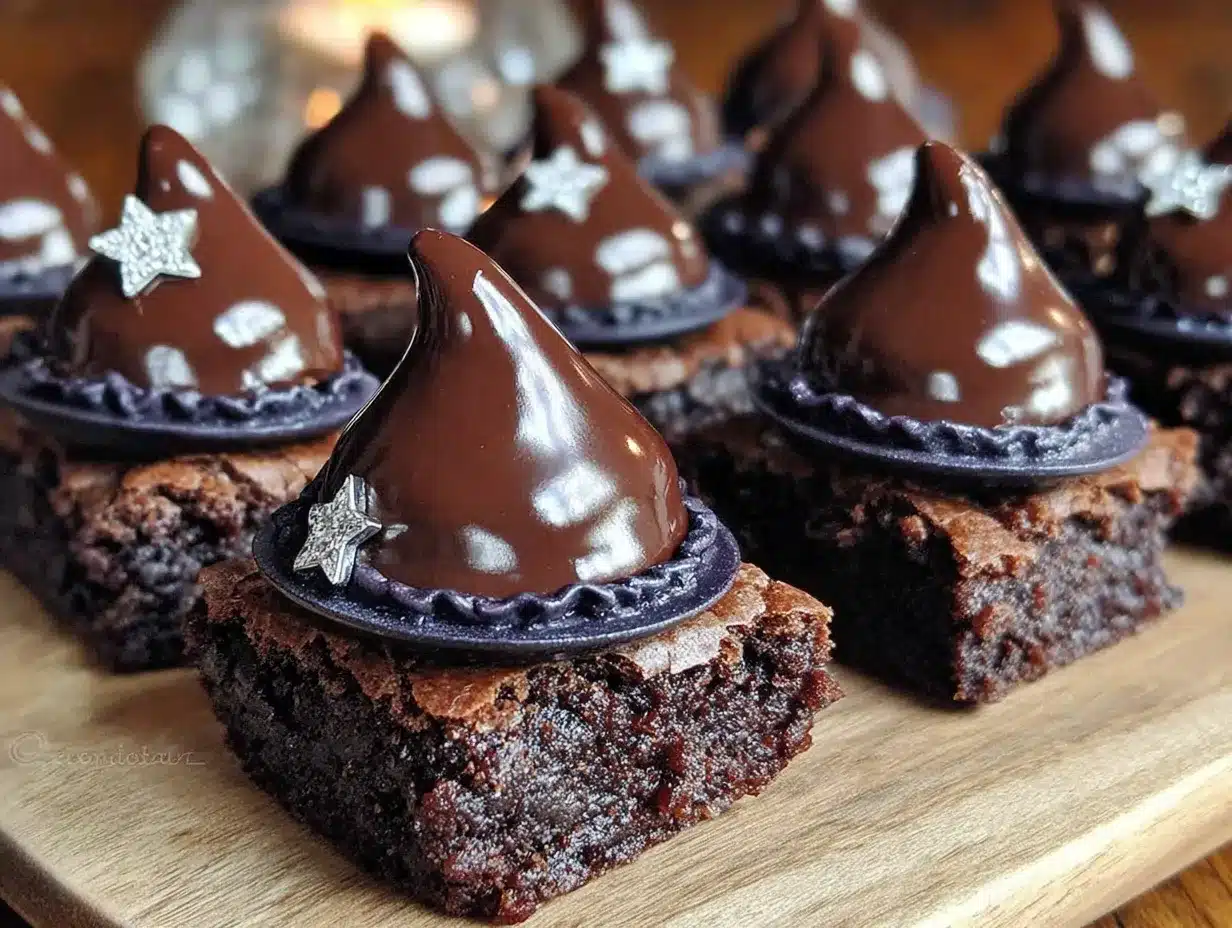
- 24 Hershey’s Kisses, unwrapped (milk chocolate or dark chocolate both work great)
- 1/2 cup chocolate frosting (store-bought is fine, or use a homemade buttercream if you’re feeling ambitious)
- Orange sprinkles or jimmies (for the hat band)
- Green sprinkles (optional, for a little extra color)
Ingredient Tips & Substitutions
For the brownie mix, I really do recommend going with a fudge-style mix rather than a cake-style one. The fudgier the brownie, the better it holds its shape when you flip it over. If you’re gluten-free, there are some excellent gluten-free brownie mixes out there that work perfectly for this. Just make sure you follow the package directions for the GF version.
The Hershey’s Kisses are non-negotiable in terms of shape. You need that pointy tip to mimic the witch hat. If you want to get fancy, you could use the caramel-filled or almond varieties, but plain chocolate is classic and works best for sticking. Make sure they’re at room temperature before you try to attach them, or the frosting will slide right off.
For the frosting, you want something that’s thick enough to act as glue but soft enough to pipe or spread. Canned frosting is actually perfect for this because it’s stable at room temperature. If you’re using homemade buttercream, make sure it’s not too soft or your hats will topple over.
The orange sprinkles are for the hat band, which is that little decorative ring around the base of the kiss. You can use any color you like, but orange is classic Halloween. I’ve also used purple and green for a more whimsical look.
Equipment Needed
You don’t need a lot of fancy gear for this recipe, which is part of its charm. Here’s what you’ll need.
- Mini muffin tin: This is the most important piece of equipment. You need a 24-cup mini muffin tin to get the right size for the hats. If you only have a standard 12-cup tin, the brownies will be too big and won’t look like hats.
- Mixing bowl and whisk: For combining the brownie batter. Nothing fancy needed here.
- Non-stick cooking spray: Absolutely critical. You need to grease that mini muffin tin really well, or your brownies will stick and fall apart when you try to remove them. I’ve learned this the hard way.
- Cooling rack: For letting the brownie bites cool completely before assembly. If they’re warm, the frosting will melt and the kisses will slide off.
- Small piping bag or zip-top bag: For applying the frosting. A zip-top bag with the corner snipped off works perfectly and is way easier to clean.
- Small offset spatula or butter knife: For spreading frosting if you’re not piping it.
If you don’t have a mini muffin tin, you could try using a silicone candy mold in a similar size, but I haven’t tested that method myself. The mini muffin tin really is the way to go. I bought mine for about $10 at a discount store, and it’s one of my most-used baking tools during the fall season.
Preparation Method
Alright, let’s get into the step-by-step. I’m going to walk you through this exactly as I do it, including all the little tricks I’ve picked up from making these more times than I care to count.
- Preheat your oven to 350°F (175°C). Spray your mini muffin tin generously with non-stick cooking spray. And I mean generously. Get into all the nooks and crannies. Trust me on this.
- Make the brownie batter. In a large mixing bowl, combine the brownie mix, egg, oil, and water. Stir until just combined. Don’t overmix, or the brownies will be tough. You want to see a few streaks of dry mix still in there. That’s fine.
- Fill the muffin cups. Using a small cookie scoop or a teaspoon, fill each mini muffin cup about 2/3 full. Don’t overfill, or the brownies will puff up too much and won’t look like hats when you flip them. I usually get about 24 brownie bites out of one box of mix.
- Bake for 10-12 minutes. The edges should look set and slightly pulling away from the sides of the pan, but the centers should still look slightly soft and underdone. A toothpick inserted in the center should come out with a few moist crumbs attached. This is the sweet spot for fudgy brownies that hold their shape.
- Cool in the pan for 5 minutes. This is important. If you try to remove them immediately, they’ll fall apart. Let them rest in the pan for exactly 5 minutes, then carefully transfer them to a cooling rack. Use a small offset spatula or a butter knife to gently loosen the edges if needed.
- Cool completely. Let the brownie bites cool on the rack for at least 20 minutes. They need to be completely room temperature before you start assembling. If they’re even slightly warm, the frosting will melt and the kiss will slide right off. I’ve made this mistake. It’s not pretty.
- Flip the brownie bites over. Once they’re cool, flip each one over so the flat bottom is facing up. This flat surface is what you’ll attach the kiss to. The rounded top becomes the brim of the hat.
- Prepare the frosting. Spoon the chocolate frosting into a small piping bag or a zip-top bag. If using a zip-top bag, snip off a tiny corner. You want a small opening, about 1/8 inch wide.
- Attach the kisses. Pipe a small dollop of frosting onto the flat bottom of each brownie bite. Place a Hershey’s Kiss on top, pointy side up, and press gently to secure. Hold it for a few seconds to make sure it’s stuck.
- Add the hat band. Pipe a small ring of frosting around the base of the kiss where it meets the brownie. Immediately dip the frosted area into a small bowl of orange sprinkles, or sprinkle the sprinkles on by hand. Gently tap off any excess.
- Let the frosting set. Place the finished witch hat brownie bites on a tray or plate and let them sit for about 10-15 minutes so the frosting can set. This helps everything stay in place when you move them.
And that’s it. You’ve just made a tray of the cutest Halloween treats imaginable. The whole process, including cooling time, takes about an hour, but the actual hands-on work is maybe 15 minutes.
Cooking Tips & Techniques
I’ve made these Easy Witch Hat Brownie Bites about a dozen times now, and I’ve definitely learned a few things along the way. Here are my best tips to make sure yours turn out perfect the first time.
Don’t overbake the brownies. This is the number one mistake I see people make. You want them slightly underdone in the center. If you bake them until they’re fully set, they’ll be dry and crumbly, and they won’t hold the kiss properly. The toothpick test is your friend here. A few moist crumbs are what you’re after.
Use a light hand with the frosting. You don’t need a huge dollop to attach the kiss. A small pea-sized amount is plenty. If you use too much, it’ll squish out the sides when you press the kiss down, and you’ll have chocolate frosting everywhere. Less is more.
Work in batches if needed. If you only have one mini muffin tin, that’s fine. Just let it cool completely between batches, or the second batch will start cooking before you even put it in the oven. I usually run the pan under cold water and dry it thoroughly before re-greasing.
Keep the kisses cool. If your kitchen is warm, the kisses might start to soften and lose their shape. I keep mine in the fridge until I’m ready to use them. Just make sure they’re at room temperature before you try to stick them on, or the temperature difference can cause the frosting to seize up.
Prep the sprinkles ahead of time. Pour your sprinkles into a small, shallow bowl before you start assembling. That way, you can just dip the frosted hat band right in without fumbling with the bag. It saves time and keeps things tidy.
One time, I was rushing and didn’t let the brownies cool completely. I started assembling while they were still warm, and the frosting just melted into a puddle. The kisses slid right off, and I ended up with a tray of sad, naked brownie bites with chocolate puddles on top. It was a mess. So learn from my mistakes and be patient with the cooling process.
Variations & Adaptations
One of the best things about this recipe is how easy it is to customize. Here are some variations I’ve tried and loved.
Peanut Butter Witch Hats: Instead of chocolate kisses, use peanut butter cups. You’ll need to cut them in half so they’re not too tall, but the peanut butter and chocolate combination is absolutely killer. I did this for a party last year, and they were gone in minutes.
White Chocolate Witches: Use white chocolate Hershey’s Kisses and tint your frosting purple or green. Add purple or green sprinkles for the hat band. It gives a whole different vibe that’s still very Halloween-appropriate.
Gluten-Free Version: Use a gluten-free brownie mix. Most of the major brands make one now, and they work perfectly in this recipe. Just make sure to check the package for any specific instructions.
Vegan Adaptation: Use a vegan brownie mix and vegan chocolate kisses. There are vegan chocolate kisses available at most health food stores. For the frosting, use a vegan buttercream or a store-bought vegan frosting. The process is exactly the same.
Spooky Sprinkle Mix: Instead of just orange sprinkles, create a custom mix of orange, purple, and green sprinkles. You can also add some edible glitter for extra sparkle. It makes the hats look even more magical.
I tried a variation once where I used caramel-filled Hershey’s Kisses, and honestly, it was a game-changer. The caramel added a whole other layer of flavor that worked beautifully with the chocolate brownie. If you see those in the store, grab a bag and give them a try.
Serving & Storage Suggestions
These Easy Witch Hat Brownie Bites are best served at room temperature. I like to arrange them on a large platter or cake stand, with the hats facing up so everyone can see the cute detail. If you’re bringing them to a party, they travel really well in a single layer in a container with a lid.
For a really dramatic presentation, arrange them in a circle on a round platter with a small pumpkin or a candle in the center. It makes for a great centerpiece that doubles as dessert. You can also place them in mini cupcake liners for individual servings, which makes them easier to grab and go.
Storage: Store any leftovers in an airtight container at room temperature for up to 3 days. Do not refrigerate them, as the brownies will dry out and the kisses can develop a white bloom on the surface. If you need to keep them longer, you can freeze them for up to a month. Just place them in a single layer in a freezer-safe container with wax paper between the layers. Thaw at room temperature for about 30 minutes before serving.
In terms of complementary dishes, these pair beautifully with a warm mug of apple cider or a glass of cold milk. If you’re serving them as part of a Halloween spread, they go great with other finger foods like pumpkin spice popcorn mix or candy corn rice krispie treats. The flavors all work together without competing.
One thing I’ve noticed is that these actually taste better the next day. The flavors meld together, and the brownie gets even fudgier. So don’t be afraid to make them a day ahead. Just wait to add the sprinkles until right before serving, or they might get a little soft.
Nutritional Information & Benefits
Let’s be real here. These are a treat, not a health food. But here’s the estimated nutritional breakdown for one brownie bite, assuming you get 24 servings from the recipe.
| Nutrient | Amount per Serving |
|---|---|
| Calories | 145 |
| Total Fat | 7g |
| Saturated Fat | 3g |
| Cholesterol | 10mg |
| Sodium | 95mg |
| Total Carbohydrates | 20g |
| Dietary Fiber | 1g |
| Sugars | 15g |
| Protein | 2g |
On the plus side, dark chocolate does contain antioxidants, and the small portion size means you can enjoy one or two without going overboard. If you’re looking to lighten them up a bit, you can use a sugar-free brownie mix and sugar-free chocolate kisses. The texture will be slightly different, but the visual effect is the same.
These are not suitable for people with nut allergies unless you specifically use nut-free ingredients. Always check the labels on your brownie mix and chocolate kisses to be sure. The recipe is naturally vegetarian, and with the substitutions I mentioned, it can be made vegan and gluten-free.
Conclusion
These Easy Witch Hat Brownie Bites are everything I want in a Halloween treat. They’re fun to make, adorable to look at, and absolutely delicious to eat. The combination of fudgy brownie and smooth chocolate kiss is a classic for a reason, and the little sprinkle hat band just takes it over the top. Honestly, every time I make these, I’m surprised by how much joy they bring. There’s something about seeing a tray of tiny little hats that just makes people smile.
I really hope you give these a try. They’re the perfect project for a cozy October afternoon, and they’re guaranteed to be a hit at any Halloween gathering. Don’t be afraid to make them your own, either. Swap in different sprinkles, try different chocolate fillings, or even add a little drizzle of white chocolate on top. The possibilities are endless, and that’s part of the fun.
If you make these, I’d love to hear about it. Leave a comment below and let me know how they turned out, or share a photo on social media and tag me. There’s nothing I love more than seeing your creations. Happy Halloween, and happy baking!
Frequently Asked Questions
Can I use a homemade brownie recipe instead of a box mix?
Absolutely. Any fudgy brownie recipe will work. Just make sure it’s a recipe designed for a mini muffin tin, or adjust the baking time accordingly. Homemade brownies might be slightly more delicate, so handle them gently when flipping.
How far in advance can I make these?
You can make the brownie bites up to 2 days in advance and store them in an airtight container at room temperature. Assemble the hats on the day you plan to serve them for the best visual effect. The frosting and sprinkles stay freshest that way.
My brownie bites stuck to the pan. What did I do wrong?
This usually happens when the pan isn’t greased well enough. Next time, use a generous amount of non-stick spray, and make sure you’re getting into the crevices. You can also use paper mini muffin liners, though the brownies won’t have that nice rounded top that looks like a hat brim.
Can I freeze these after assembly?
Yes, but the sprinkles might lose their crunch. I recommend freezing the brownie bites and kisses separately, then assembling after thawing. If you need to freeze them assembled, place them in a single layer in an airtight container and thaw at room temperature for about 30 minutes.
How do I keep the kisses from falling off?
Make sure your brownie bites are completely cool before you start assembling. Use a thick frosting that acts as glue, and press the kiss down gently but firmly. Let the assembled hats sit for 10-15 minutes to allow the frosting to set before moving them.
Pin This Recipe!
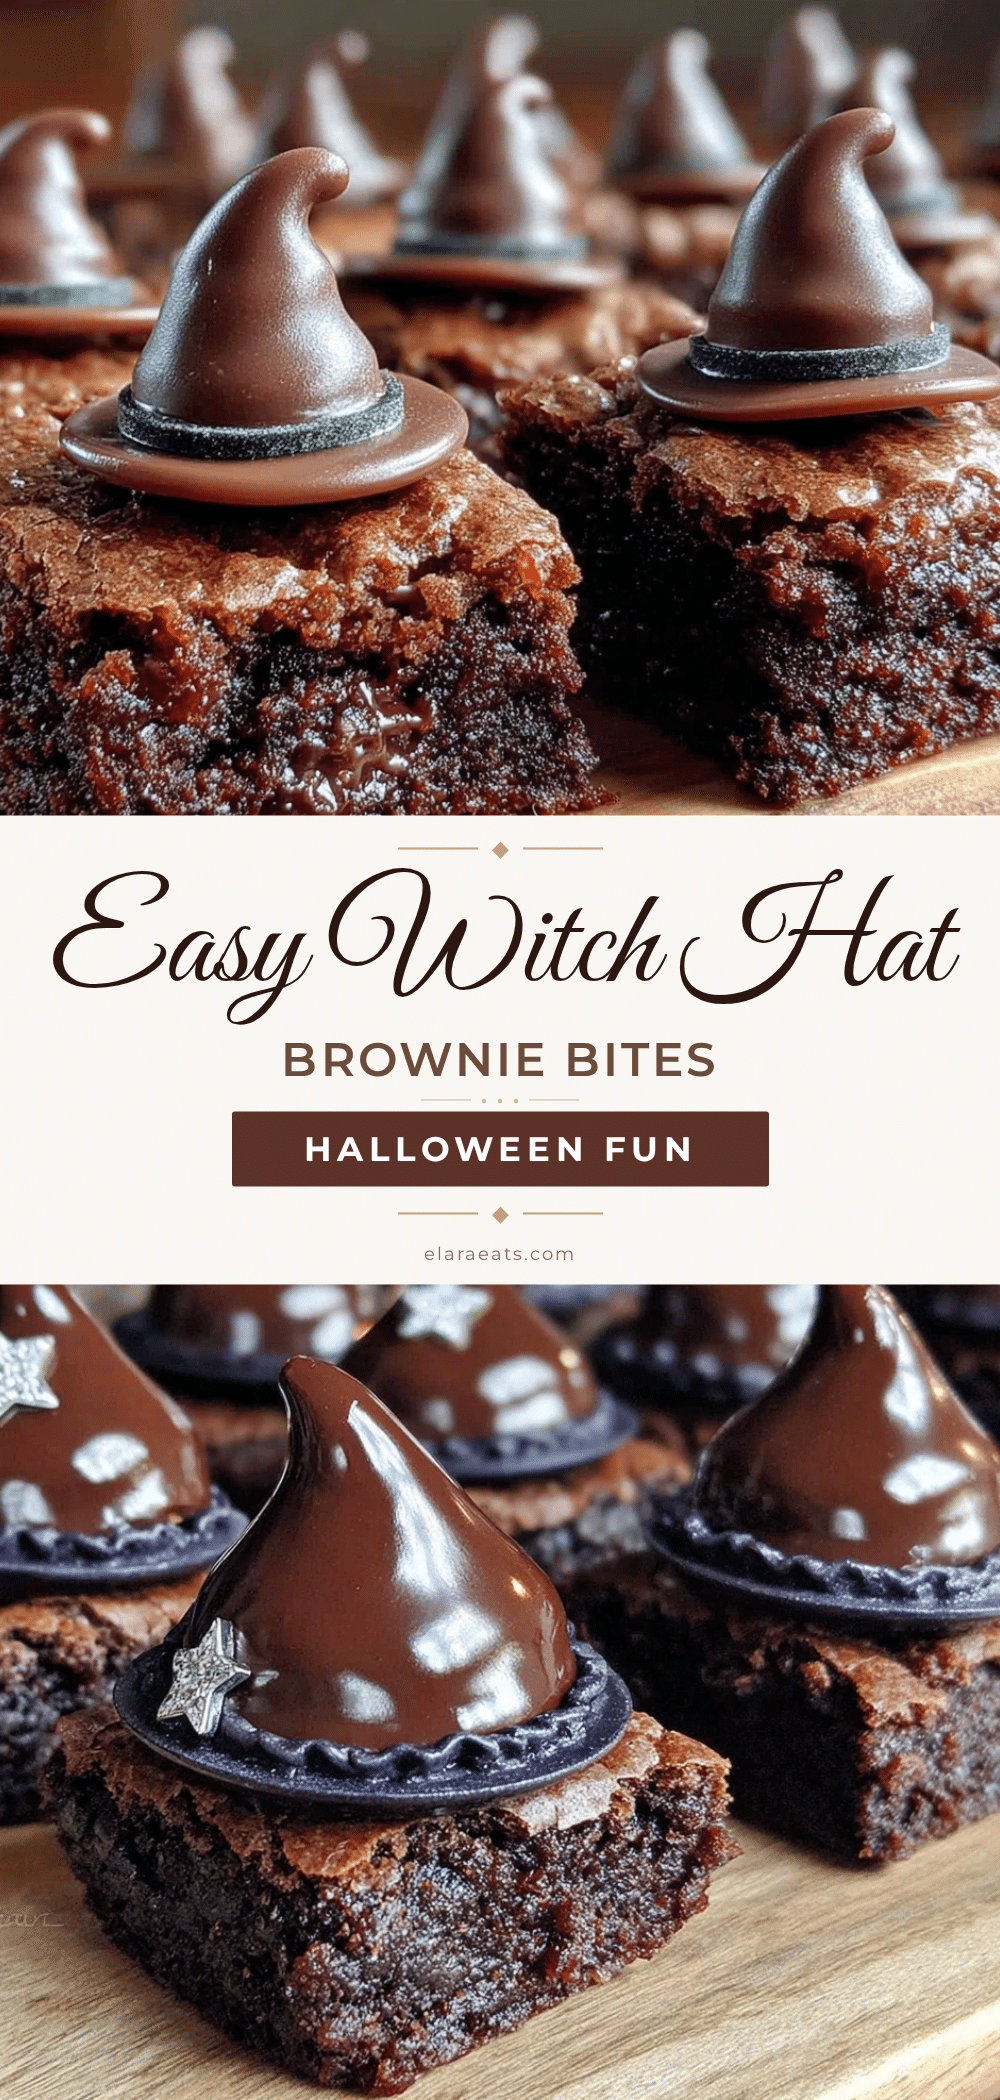
Easy Witch Hat Brownie Bites: Best Halloween Party Treat
These Easy Witch Hat Brownie Bites are a fun and simple Halloween treat made with a box of brownie mix, Hershey’s Kisses, and frosting. They’re quick to assemble, incredibly cute, and perfect for parties.
- Prep Time: 15 minutes
- Cook Time: 12 minutes
- Total Time: 1 hour (including cooling)
- Yield: 24 servings 1x
- Category: Dessert
- Cuisine: American
Ingredients
- 1 box (18.4 oz) brownie mix (fudge-style recommended)
- 1 large egg
- 1/3 cup vegetable oil
- 2 tablespoons water (or brewed coffee for deeper flavor)
- 24 Hershey’s Kisses, unwrapped (milk or dark chocolate)
- 1/2 cup chocolate frosting (store-bought or homemade)
- Orange sprinkles or jimmies (for hat band)
- Green sprinkles (optional, for extra color)
Instructions
- Preheat oven to 350°F (175°C). Generously spray a 24-cup mini muffin tin with non-stick cooking spray.
- In a large bowl, combine brownie mix, egg, oil, and water. Stir until just combined (a few streaks of dry mix are fine).
- Fill each mini muffin cup about 2/3 full using a small cookie scoop or teaspoon.
- Bake for 10-12 minutes, until edges are set and centers look slightly soft. A toothpick inserted in the center should come out with a few moist crumbs.
- Cool in the pan for 5 minutes, then carefully transfer brownie bites to a cooling rack. Cool completely (at least 20 minutes).
- Flip each cooled brownie bite over so the flat bottom faces up.
- Spoon chocolate frosting into a small piping bag or zip-top bag. Snip a tiny corner (about 1/8 inch wide).
- Pipe a small dollop of frosting onto the flat bottom of each brownie bite. Place a Hershey’s Kiss on top (pointy side up) and press gently to secure.
- Pipe a small ring of frosting around the base of the kiss (where it meets the brownie). Immediately dip into orange sprinkles or sprinkle by hand. Tap off excess.
- Let assembled hats sit for 10-15 minutes to allow frosting to set before serving or moving.
Notes
Don’t overbake the brownies; they should be slightly underdone for a fudgy texture that holds the kiss. Ensure brownies are completely cool before assembling to prevent frosting from melting. Use a light hand with frosting to avoid squishing out the sides. Keep kisses at room temperature for best adhesion. For best results, assemble on the day of serving.
Nutrition
- Serving Size: 1 brownie bite
- Calories: 145
- Sugar: 15
- Sodium: 95
- Fat: 7
- Saturated Fat: 3
- Carbohydrates: 20
- Fiber: 1
- Protein: 2
Keywords: witch hat brownie bites, Halloween brownies, easy Halloween treats, brownie bites, Hershey's Kisses brownies, mini muffin brownies


