Love this? Save it for later!
Share the inspiration with your friends
The school Halloween party was in six hours and I’d completely forgotten. My kid had been talking about the classroom celebration for weeks, and somehow, between work deadlines and the general chaos of October, it had slipped my mind until I got the reminder email at 6 AM. Everyone else would be bringing elaborate themed treats—I’d seen the sign-up sheet, and it was packed with promises of homemade caramel apples, professionally decorated sugar cookies, and some kind of pumpkin cheesecake situation that sounded way too fancy for a second-grade party.
I stood in my kitchen at 6:15 AM, staring into the pantry like it might magically produce something impressive. What I actually had was: a half-empty bag of flour, some butter that was definitely room temperature because I’d left it out overnight (honestly, a happy accident), and a giant bowl of leftover Halloween candy that my kid had already sorted into “will eat” and “will trade” piles. The trading pile was substantial—let’s be real, nobody loves those orange-and-black-wrapped things.
So I did what any slightly panicked parent would do. I started chopping candy bars. I mean, candy in cookies is a no-brainer, right? But I wanted something that felt a little more special than regular cookies. Something that would hold up in a lunchbox and maybe, just maybe, stand out next to those Pinterest-perfect creations. The result was these candy cookie bars—and honestly, they stole the show. The other moms asked for the recipe. The teacher sent me a message later that week. And my kid, who is brutally honest about my cooking, declared them “better than the cupcakes.”
That’s the thing about this recipe. It’s born from necessity and a little bit of chaos, but it’s genuinely the best way to use up that post-Halloween candy stash. You know that feeling when you’re staring at a mountain of candy and wondering what to do with it all? Maybe you’ve been there. These bars are the answer—simple, forgiving, and absolutely irresistible.
Why You’ll Love This Recipe
Let me tell you why these candy cookie bars have become my most-requested dessert, even outside of Halloween season. I’ve tested this recipe at least a dozen times, tweaking the ratios and trying different candy combinations, and I can confidently say this version is the winner.
- Quick & Easy: From start to finish, these bars come together in about 35 minutes. No chilling dough, no rolling out cookies, no fussing with individual portions. Just mix, press, and bake.
- Simple Ingredients: You probably have everything except the candy already in your kitchen. Butter, sugar, eggs, flour—the basics that make life easy.
- Perfect for Post-Halloween: This is the ultimate solution for that massive candy surplus. Instead of fighting over who eats what, you transform it all into something everyone loves.
- Crowd-Pleaser: I’ve brought these to potlucks, school events, and family gatherings. They disappear faster than almost anything else I make. Kids and adults both go crazy for them.
- Unbelievably Delicious: The texture is what gets people. You get that soft, chewy cookie base with pockets of melted candy throughout. It’s like a candy bar and a cookie had a beautiful baby.
What makes this recipe different from other candy-loaded desserts is the technique. Instead of just stirring chopped candy into regular cookie dough, I’ve adjusted the butter-to-flour ratio so the base stays soft and doesn’t get tough. The candy melts into little puddles of caramel, chocolate, and nougat, creating these amazing pockets of flavor. It’s not just another cookie recipe—it’s your best version of using up Halloween leftovers.
Honestly, this recipe isn’t just good—it’s the kind that makes you close your eyes after the first bite. It’s comfort food reimagined, turning leftover candy into something that feels intentional and special. Perfect for impressing at the office party without spending hours in the kitchen, or for turning a Tuesday night into something memorable.
What Ingredients You Will Need
This recipe uses simple, wholesome ingredients to create something genuinely special. The magic is in how the candy interacts with the cookie base during baking. Most of these are pantry staples, so you’re probably already halfway there.
For the Cookie Base
- 1 cup (2 sticks) unsalted butter, softened – I use Land O’Lakes because it has a consistent fat content that gives reliable results. Make sure it’s truly softened, not melted—you want it to be cool but give slightly when pressed.
- 1 cup packed light brown sugar – Brown sugar adds moisture and that deep, caramel-like flavor that pairs perfectly with candy. Dark brown sugar works too, but it’ll make the bars a bit more intense.
- 1/2 cup granulated sugar – This balances the brown sugar and helps with spreading. Don’t skip it—the combination is what gives you that chewy-but-not-cakey texture.
- 2 large eggs, room temperature – Room temperature eggs incorporate more evenly into the butter mixture. If you forgot to take them out, place them in a bowl of warm water for 5 minutes.
- 2 teaspoons vanilla extract – Pure vanilla is worth it here. The flavor really comes through in the finished bars.
- 2 1/4 cups all-purpose flour – Spoon and level your flour—don’t scoop straight from the bag or you’ll end up with dry bars.
- 1 teaspoon baking soda – This gives the bars just enough lift without making them puffy.
- 1/2 teaspoon salt – Salt balances the sweetness of the candy. I use fine sea salt.
For the Candy
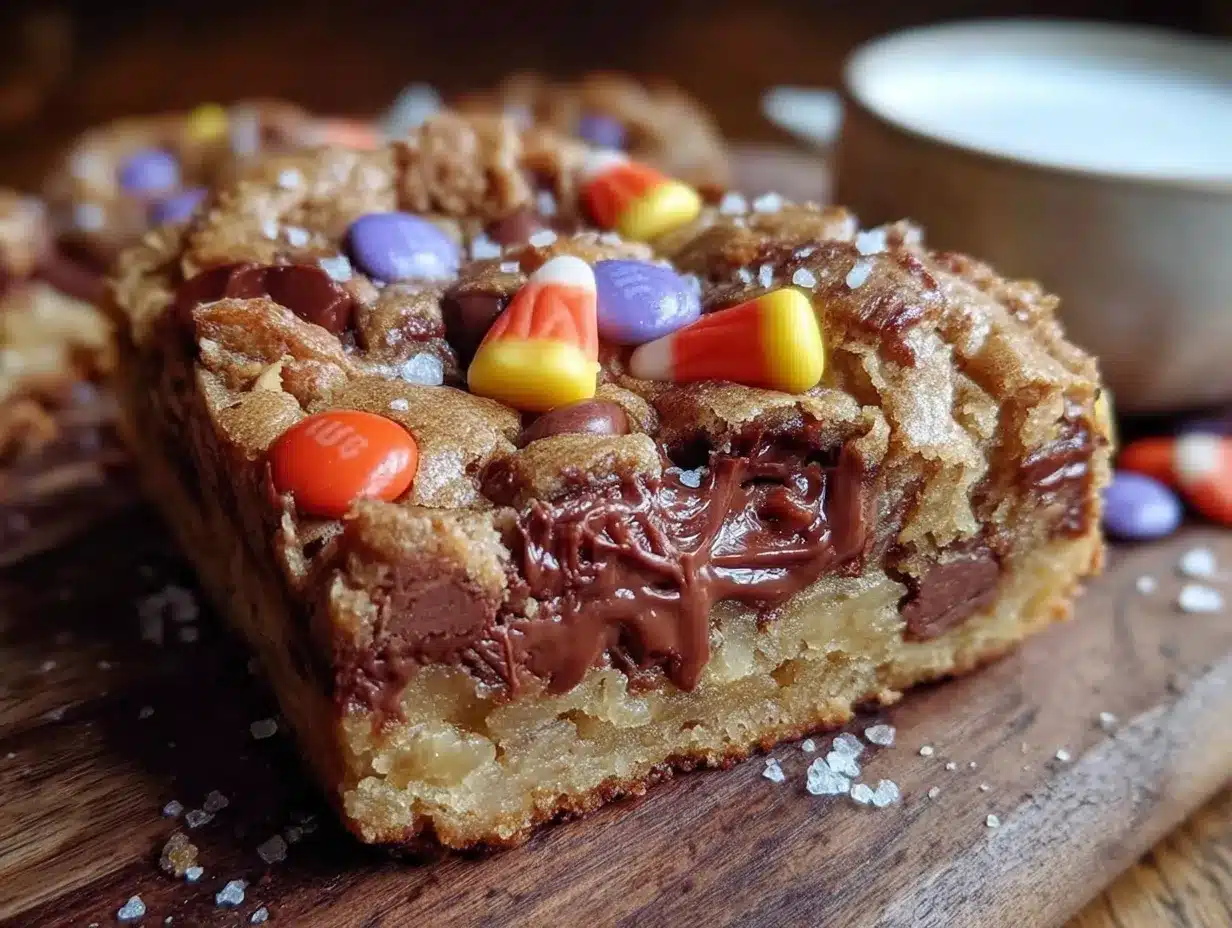
- 2 cups chopped assorted Halloween candy bars – This is where you get creative. I recommend a mix of textures: something chewy (Milky Way, Snickers), something chocolatey (Hershey’s, Kit Kat), and something with caramel (Twix, Rolos). Aim for about 12-15 fun-size bars.
- 1/2 cup semi-sweet chocolate chips (optional) – I add these when my candy stash is heavy on the nougat and light on straight chocolate. They guarantee chocolate in every bite.
Ingredient Selection Tips
When choosing candy for these bars, think about texture. Avoid anything with hard centers or brittle coatings—they don’t melt well and can be unpleasant to bite into. I’ve found that chocolate-covered caramel and nougat candies work best. If you have a lot of peanut butter cups, those are amazing too, just chop them into smaller pieces so they distribute evenly.
For the butter, I really do recommend unsalted. Salted butter can make the final bars taste overly salty because the candy already contains salt. If all you have is salted, reduce the added salt to 1/4 teaspoon.
If you’re making these outside of Halloween, you can buy individual candy bars from the checkout aisle. Just look for ones that are on sale or in variety packs. The recipe is forgiving—use what you have or what you love.
Equipment Needed
You don’t need fancy equipment for these candy cookie bars, which is part of why I love them. Here’s what you’ll need:
- 9×13-inch baking pan – This is the perfect size for bars that are thick but not too thick. Glass or metal both work, but metal tends to give slightly crispier edges. I use a USA Pan because the nonstick coating is reliable and cleanup is easy.
- Parchment paper – Absolutely essential for easy removal. Cut two strips that overhang on opposite sides so you can lift the whole slab out after baking.
- Electric mixer (hand or stand) – You can cream the butter and sugar by hand if you’re feeling ambitious, but an electric mixer makes it much easier. I use my KitchenAid stand mixer, but a hand mixer works perfectly.
- Large mixing bowl – Any large bowl will do. I use a ceramic one because it doesn’t slide around on the counter.
- Sharp chef’s knife – For chopping the candy bars. A dull knife will just smash them, and you want clean cuts. A 6-inch or 8-inch knife is perfect.
- Cutting board – Preferably one that’s dedicated to sweet things. I learned this the hard way after my garlic-scented board flavored a batch of cookies.
- Spatula – For scraping down the bowl and spreading the dough into the pan. A silicone spatula is my go-to.
- Cooling rack – Not strictly necessary, but it helps the bars cool evenly so the bottoms don’t get soggy.
If you don’t have a 9×13 pan, you can use two 8-inch square pans instead. Just reduce the baking time by about 5 minutes and check for doneness earlier. I’ve also made these in a 9-inch round cake pan, and they turned out fine—just a little thicker and with a longer bake time.
Preparation Method
Let me walk you through this step by step. I’ve made these bars enough times to know exactly where things can go wrong, so I’ll share those little tricks along the way.
- Preheat and prep. Preheat your oven to 350°F (175°C). Line your 9×13-inch pan with parchment paper, leaving about 2 inches of overhang on the long sides. This is your handle for lifting the bars out later. Lightly spray the parchment with nonstick spray—just a quick mist.
- Chop the candy. Take your assorted candy bars and chop them into roughly 1/2-inch pieces. Some pieces will be smaller, some larger—that’s fine. The variety in size gives you different textures in the finished bars. If you have any peanut butter cups, quarter them. For Snickers or Milky Way, cut each fun-size bar into 6-8 pieces. Set the chopped candy aside. (Pro tip: If your candy is sticky from being in a warm pantry, pop it in the freezer for 10 minutes before chopping.)
- Cream the butter and sugars. In your large mixing bowl, beat the softened butter, brown sugar, and granulated sugar together on medium speed until light and fluffy. This takes about 3-4 minutes with a stand mixer, maybe 5 with a hand mixer. You’re looking for a color change—it should go from yellow to pale tan, and the texture should look like wet sand. Scrape down the sides of the bowl with your spatula halfway through.
- Add the eggs and vanilla. Add the eggs one at a time, beating well after each addition. The mixture might look a little curdled after the first egg—that’s normal, it’ll come together with the second. Add the vanilla and beat until combined. Scrape the bowl again.
- Mix the dry ingredients. In a separate bowl, whisk together the flour, baking soda, and salt. This ensures the baking soda is evenly distributed—nobody wants a pocket of baking soda in their cookie bar.
- Combine wet and dry. Add the flour mixture to the butter mixture in two additions, mixing on low speed until just combined after each. Stop mixing as soon as you don’t see any more white streaks. Overmixing at this stage develops gluten and makes the bars tough. I usually switch to my spatula for the last few stirs to avoid overworking the dough.
- Fold in the candy. Gently fold in the chopped candy and chocolate chips (if using) with your spatula. The dough will be thick and studded with candy pieces. Don’t overmix—you want distinct chunks of candy, not a uniform paste.
- Press into the pan. Transfer the dough to your prepared pan. It will be thick and slightly sticky. Use your spatula (or lightly greased hands) to press it into an even layer. The dough should reach all the corners. If it’s sticking to your spatula, spray it with a little nonstick spray.
- Bake. Bake for 22-26 minutes, or until the edges are golden brown and the center is set but still soft. The top should look dry and slightly cracked, and a toothpick inserted into the center should come out with a few moist crumbs (not wet batter). I start checking at 22 minutes because ovens vary. My oven runs hot, so mine are usually done at 24 minutes.
- Cool completely. Place the pan on a cooling rack and let the bars cool completely in the pan. This is crucial—if you try to cut them while they’re warm, the candy will be molten and everything will fall apart. I know it’s tempting, but trust me on this. Give them at least 2 hours, or pop the pan in the fridge for 45 minutes if you’re in a hurry.
- Cut and serve. Once completely cool, use the parchment overhang to lift the entire slab out of the pan. Place it on a cutting board and use a sharp knife to cut into squares. I usually do 24 bars (4 rows by 6 rows), but you can make them bigger or smaller depending on your crowd.
Cooking Tips & Techniques
After making these candy cookie bars more times than I can count, I’ve collected some tips that make the process smoother and the results better. Let me share what I’ve learned the hard way.
Don’t overbake. This is the number one mistake people make with any cookie bar. The bars will continue to cook from residual heat after you pull them out of the oven. If they look perfectly done in the oven, they’ll be overdone by the time they cool. Pull them when the center still looks slightly underdone and a toothpick comes out with moist crumbs. You want that soft, chewy texture.
Chill the candy before chopping. I mentioned this earlier, but it’s worth repeating. Cold candy chops cleanly without sticking to your knife or turning into a sticky mess. If your kitchen is warm, this is a game-changer. I learned this after a particularly disastrous batch where the candy melted into a blob on my cutting board.
Mix your candy types. Don’t use just one kind of candy bar. The magic of this recipe is the variety of textures and flavors. A mix of chocolate, caramel, nougat, and peanut butter gives you the best results. I once made a batch with only Kit Kats, and while it was fine, it was missing that gooey factor that comes from caramel-filled bars.
Let the butter soften naturally. I know the microwave is tempting, but melted butter changes the texture of these bars. They’ll spread more and end up thinner and greasier. Take the butter out an hour before you start baking. If you forgot, cut it into small cubes and let it sit for 20 minutes—that speeds things up without melting.
Line the pan properly. That parchment overhang isn’t optional. I’ve made the mistake of not using parchment, and getting the first bar out was a battle. The overhang gives you handles to lift the whole slab out cleanly. Worth the extra 30 seconds of effort.
Use a sharp knife to cut. A dull knife will drag through the candy pieces and make a mess. Run your knife under hot water, dry it off, and make clean cuts. Wipe the blade between cuts for the cleanest edges. This is especially important if you’re serving these at a party where presentation matters.
Variations & Adaptations
One of the best things about this recipe is how adaptable it is. I’ve tried several variations over the years, and they’ve all been delicious in their own way. Here are some of my favorites.
The Peanut Butter Lover’s Version: Swap out half the candy bars for chopped Reese’s cups and add 1/3 cup creamy peanut butter to the dough when you cream the butter and sugars. Reduce the butter to 3/4 cup to compensate. The peanut butter flavor infuses the whole bar, and the pockets of melted peanut butter cup are incredible.
The White Chocolate Raspberry Twist: Use white chocolate-based candy bars (like white Kit Kats or white chocolate Hershey’s) and fold in 1/2 cup freeze-dried raspberries along with the candy. The tartness of the raspberries cuts through the sweetness perfectly. I made this version for a spring brunch and it was a hit.
The Gluten-Free Option: Substitute the all-purpose flour with a 1:1 gluten-free baking flour blend. I’ve had good results with Bob’s Red Mill and King Arthur brands. Make sure your candy bars are also gluten-free—some varieties contain wheat. The texture will be slightly more tender, but still very satisfying.
The Dark Chocolate Upgrade: If you’re not feeding kids, use all dark chocolate candy bars (like dark chocolate Snickers or dark chocolate Hershey’s) and add 1 tablespoon of instant espresso powder to the flour mixture. The coffee intensifies the chocolate flavor without making the bars taste like coffee. This version is dangerously good.
The Vegan Adaptation: Use vegan butter (I like Miyoko’s), flax eggs (1 tablespoon ground flaxseed mixed with 3 tablespoons water per egg), and vegan candy bars. There are several good vegan chocolate bars available now. The texture is slightly less tender but still very good. Let the dough rest for 10 minutes after mixing to allow the flax eggs to thicken.
Serving & Storage Suggestions
These candy cookie bars are versatile when it comes to serving. Here’s how I handle them.
Serving Temperature: Room temperature is best. The texture is perfect—soft and chewy with the candy fully set. If you’ve refrigerated them, let them sit out for 15-20 minutes before serving. I don’t recommend serving them warm because the candy will be too soft and messy.
Presentation Ideas: For parties, I cut them into small squares and arrange them on a platter. A light dusting of powdered sugar makes them look fancy, and a drizzle of melted chocolate over the top takes them to the next level. For Halloween parties, I sometimes cut them into bat or pumpkin shapes using cookie cutters—just cut the shapes from the cooled slab.
Complementary Drinks: These bars pair beautifully with a cold glass of milk (obviously), but also with coffee, hot chocolate, or even a late-harvest dessert wine if you’re serving adults. The sweetness of the bars balances well with something slightly bitter or tart.
Storage Instructions: Store the bars in an airtight container at room temperature for up to 5 days. Layer them with parchment paper between layers to prevent sticking. If your kitchen is warm, refrigerate them—they’ll keep for up to a week in the fridge.
Freezing Instructions: These freeze beautifully. Wrap the entire slab (or individual bars) tightly in plastic wrap, then in foil, and freeze for up to 3 months. To thaw, leave them at room temperature for about 30 minutes. I often make a double batch and freeze one for later—they’re perfect for unexpected guests or last-minute school events.
Flavor Development: Honestly, these bars are even better the next day. The flavors meld together overnight, and the texture relaxes into something even more tender. If you can resist eating them right away, they’re worth waiting for.
Nutritional Information & Benefits
Let’s be real—these are candy cookie bars, so they’re not health food. But they do have some redeeming qualities, and I think it’s good to know what you’re working with.
Estimated Nutritional Values (per bar, based on 24 bars):
- Calories: 220
- Total Fat: 11g
- Saturated Fat: 6g
- Cholesterol: 35mg
- Sodium: 150mg
- Total Carbohydrates: 29g
- Dietary Fiber: 1g
- Sugars: 18g
- Protein: 3g
Health Benefits: On the positive side, these bars contain some protein from the eggs and nuts in the candy bars. The dark chocolate in some candy bars provides antioxidants and flavonoids. And honestly, there’s a mental health benefit to enjoying a treat without guilt—food is meant to be enjoyed.
Dietary Considerations: This recipe contains gluten, dairy, and eggs. For a gluten-free version, see the variations section. For a dairy-free version, use vegan butter and dairy-free chocolate. For an egg-free version, use flax eggs as described above.
Potential Allergens: This recipe contains wheat, milk, eggs, and soy (from the chocolate). Many candy bars also contain peanuts and tree nuts. Always check labels if you’re serving someone with allergies.
My Wellness Perspective: I believe in balance. These bars are a treat, and they should be treated as such. I make them for special occasions, holidays, and when I have leftover candy that needs using up. They’re not an everyday snack, but they’re absolutely worth the calories when you do have them. Life is too short to skip dessert.
Conclusion
These candy cookie bars are proof that sometimes the best recipes come from chaos. That morning in my kitchen, standing in front of an open pantry with no plan and too little time, I stumbled onto something genuinely special. These bars are forgiving, adaptable, and absolutely delicious—everything a good recipe should be.
I love how this recipe turns something that might feel like a problem (too much Halloween candy) into something that feels like a celebration. It’s resourceful without feeling like a compromise. And honestly, it’s just fun to chop up all those different candy bars and see what happens in the oven. Every batch is a little different, depending on what candy you use, and that variety keeps things interesting.
I encourage you to make these your own. Use your favorite candy bars, adjust the mix-ins, play with different chocolate types. The base recipe is solid, but the possibilities are endless. And if you come up with a killer combination, I’d love to hear about it. Drop a comment below and tell me what candy you used—I’m always looking for new ideas.
Go dig through that candy stash and get baking. You won’t regret it. Happy baking, friends!
Frequently Asked Questions
Can I use full-size candy bars instead of fun-size?
Absolutely. One full-size candy bar is roughly equivalent to two fun-size bars. Just chop them into similar-sized pieces. I’ve used full-size Snickers and Twix with great results.
My bars came out too dry. What went wrong?
The most common culprit is overbaking. Remember to pull them when the center still looks slightly underdone. Another possibility is overmixing the dough after adding the flour, which develops too much gluten. Mix just until combined.
Can I make these without a mixer?
Yes, but you’ll need some elbow grease. Cream the butter and sugar with a wooden spoon until light and fluffy—it’ll take about 5-7 minutes of vigorous stirring. Everything else can be mixed by hand easily.
How do I prevent the candy from sinking to the bottom?
This can happen if the dough is too thin or the candy pieces are too heavy. Make sure your dough is thick enough (it should be stiff, not runny) and toss the chopped candy in a tablespoon of flour before folding it in. The flour coating helps suspend the pieces in the dough.
Can I add nuts to this recipe?
Definitely. Chopped pecans or walnuts are great additions. Add about 1/2 cup along with the candy. Toasting the nuts first brings out more flavor—just spread them on a baking sheet and bake at 350°F for 5-7 minutes until fragrant.
Pin This Recipe!
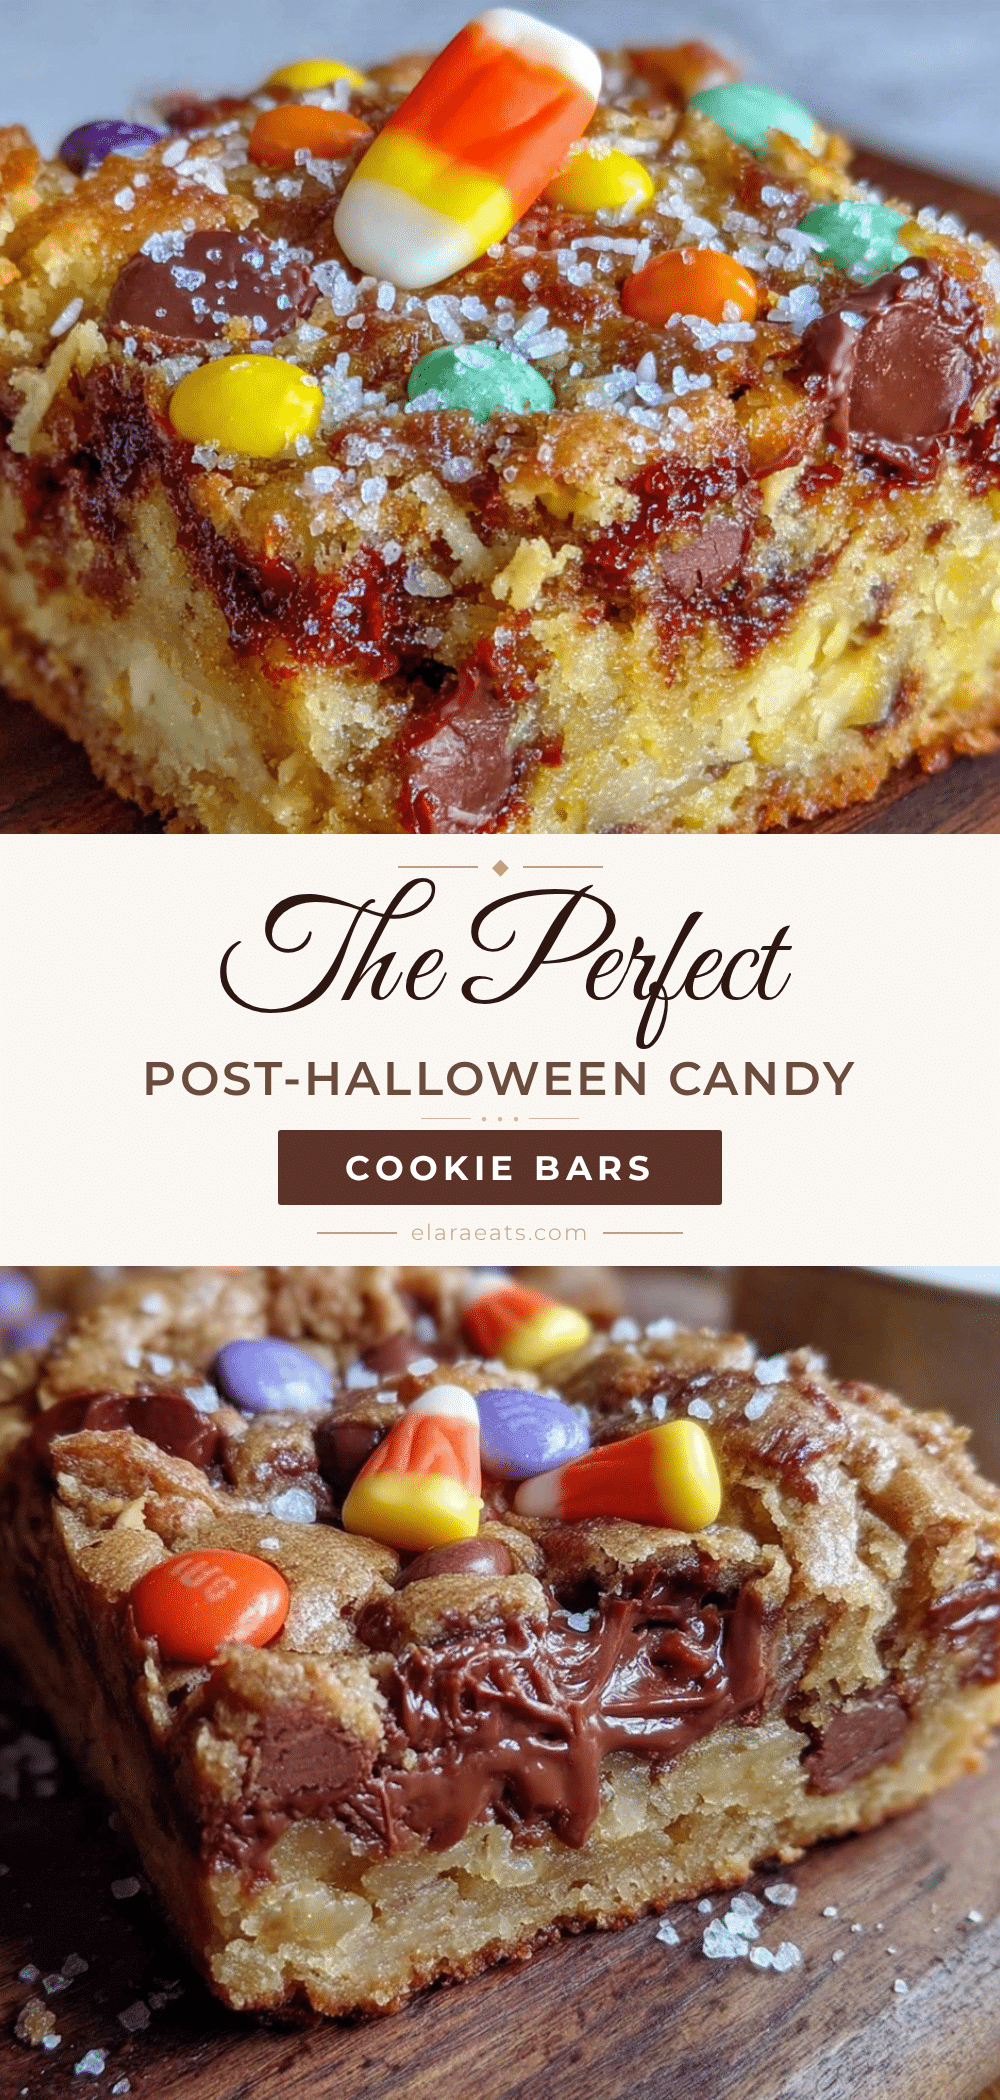
The Perfect Post-Halloween Candy Cookie Bars Recipe
These candy cookie bars are the ultimate solution for using up leftover Halloween candy. Soft, chewy, and packed with pockets of melted chocolate, caramel, and nougat, they come together in about 35 minutes and are a guaranteed crowd-pleaser.
- Prep Time: 15 minutes
- Cook Time: 24 minutes
- Total Time: 2 hours 39 minutes (includes cooling)
- Yield: 24 servings 1x
- Category: Dessert
- Cuisine: American
Ingredients
- 1 cup (2 sticks) unsalted butter, softened
- 1 cup packed light brown sugar
- 1/2 cup granulated sugar
- 2 large eggs, room temperature
- 2 teaspoons vanilla extract
- 2 1/4 cups all-purpose flour
- 1 teaspoon baking soda
- 1/2 teaspoon salt
- 2 cups chopped assorted Halloween candy bars (about 12–15 fun-size bars)
- 1/2 cup semi-sweet chocolate chips (optional)
Instructions
- Preheat oven to 350°F (175°C). Line a 9×13-inch baking pan with parchment paper, leaving about 2 inches of overhang on the long sides. Lightly spray the parchment with nonstick spray.
- Chop the candy bars into roughly 1/2-inch pieces. Set aside.
- In a large mixing bowl, beat the softened butter, brown sugar, and granulated sugar together on medium speed until light and fluffy, about 3-4 minutes. Scrape down the sides of the bowl halfway through.
- Add the eggs one at a time, beating well after each addition. Add the vanilla and beat until combined. Scrape the bowl again.
- In a separate bowl, whisk together the flour, baking soda, and salt.
- Add the flour mixture to the butter mixture in two additions, mixing on low speed until just combined after each. Stop mixing as soon as no white streaks remain.
- Gently fold in the chopped candy and chocolate chips (if using) with a spatula until evenly distributed.
- Transfer the dough to the prepared pan and press into an even layer using a spatula or lightly greased hands.
- Bake for 22-26 minutes, until the edges are golden brown and the center is set but still soft. A toothpick inserted into the center should come out with a few moist crumbs.
- Cool completely in the pan on a cooling rack, at least 2 hours (or refrigerate for 45 minutes).
- Once cool, use the parchment overhang to lift the slab out of the pan. Cut into squares (24 bars recommended) with a sharp knife.
Notes
For best results, chill the candy before chopping to prevent sticking. Do not overbake; pull bars when center still looks slightly underdone. Let bars cool completely before cutting to allow candy to set. Bars are even better the next day as flavors meld.
Nutrition
- Serving Size: 1 bar
- Calories: 220
- Sugar: 18
- Sodium: 150
- Fat: 11
- Saturated Fat: 6
- Carbohydrates: 29
- Fiber: 1
- Protein: 3
Keywords: candy cookie bars, Halloween candy recipe, leftover candy, cookie bars, easy dessert, chocolate, caramel, nougat


