Love this? Save it for later!
Share the inspiration with your friends
There used to be this tiny French bistro tucked away on a side street in Portland called Le Petit Coin. They made a roasted chicken that was honestly life-changing. When they closed their doors suddenly in 2018—the owner retired to Provence, I heard—I felt a real sense of loss. The skin was impossibly crisp, the meat so tender it practically fell apart, and there was this herb butter that pooled on the plate, begging to be sopped up with crusty bread. After seventeen tries—seventeen!—and one particularly disastrous attempt where I used way too much rosemary and it tasted like a Christmas tree, I finally cracked the code. Let me tell you, the secret to that juicy, restaurant-quality chicken breast is all in the compound butter and the resting time. I mean, who knew patience was the most important ingredient? Maybe you’ve been there, chasing a flavor memory that feels just out of reach. This recipe brings it all back. The first time I pulled this from my oven, the smell of garlic and herbs filled the whole house, and I honestly sat down and closed my eyes for that first bite. It was like being back at that little corner table, and I knew I’d finally done it.
Why You’ll Love This Recipe
This isn’t just another chicken breast recipe. After years of testing in my own kitchen—and a few burned dinners I’d rather forget—I’ve perfected a method that delivers consistent, juicy results every single time.
- Incredibly Juicy: The herb butter bastes the chicken from the inside out, preventing that dreaded dry, stringy texture we all hate.
- Simple Ingredients: You probably have most of these pantry staples right now. No fancy grocery store trips required.
- Weeknight Hero: It comes together in under 40 minutes with just 10 minutes of hands-on prep. Perfect for those busy evenings when you still want something special.
- Crowd-Pleaser: I’ve served this for picky kids, dinner guests, and even my mother-in-law. It gets rave reviews every single time.
- Endlessly Versatile: Change up the herbs based on what you have or what season it is. It works beautifully year-round.
What makes this recipe different is the technique. Most recipes just rub butter on top of the chicken. Instead, I carefully loosen the skin and pack the herb butter underneath. This means the butter melts directly into the meat as it cooks, infusing every single bite with flavor and moisture. It’s not just good—it’s the kind of meal that makes you pause mid-bite and just savor the moment. Honestly, it’s comfort food at its finest, but it feels like something you’d order at a nice restaurant.
What Ingredients You Will Need
This recipe uses simple, wholesome ingredients to deliver big flavor. Each component plays a specific role in creating that perfect, juicy chicken breast. Here’s what you’ll need to grab:
For the Herb Butter:
- 4 tablespoons unsalted butter, softened (I use Kerrygold for its rich, creamy taste—it really makes a difference)
- 2 cloves garlic, minced (fresh is best here; the jarred stuff just doesn’t have the same punch)
- 1 tablespoon fresh parsley, finely chopped (flat-leaf parsley has more flavor than curly)
- 1 teaspoon fresh rosemary, finely chopped (go easy—it’s potent and can overpower quickly)
- 1 teaspoon fresh thyme leaves (or ½ teaspoon dried if that’s what you have)
- ½ teaspoon salt (I prefer kosher salt for even seasoning)
- ¼ teaspoon black pepper, freshly ground
- ½ teaspoon lemon zest (adds brightness and cuts through the richness)
For the Chicken:
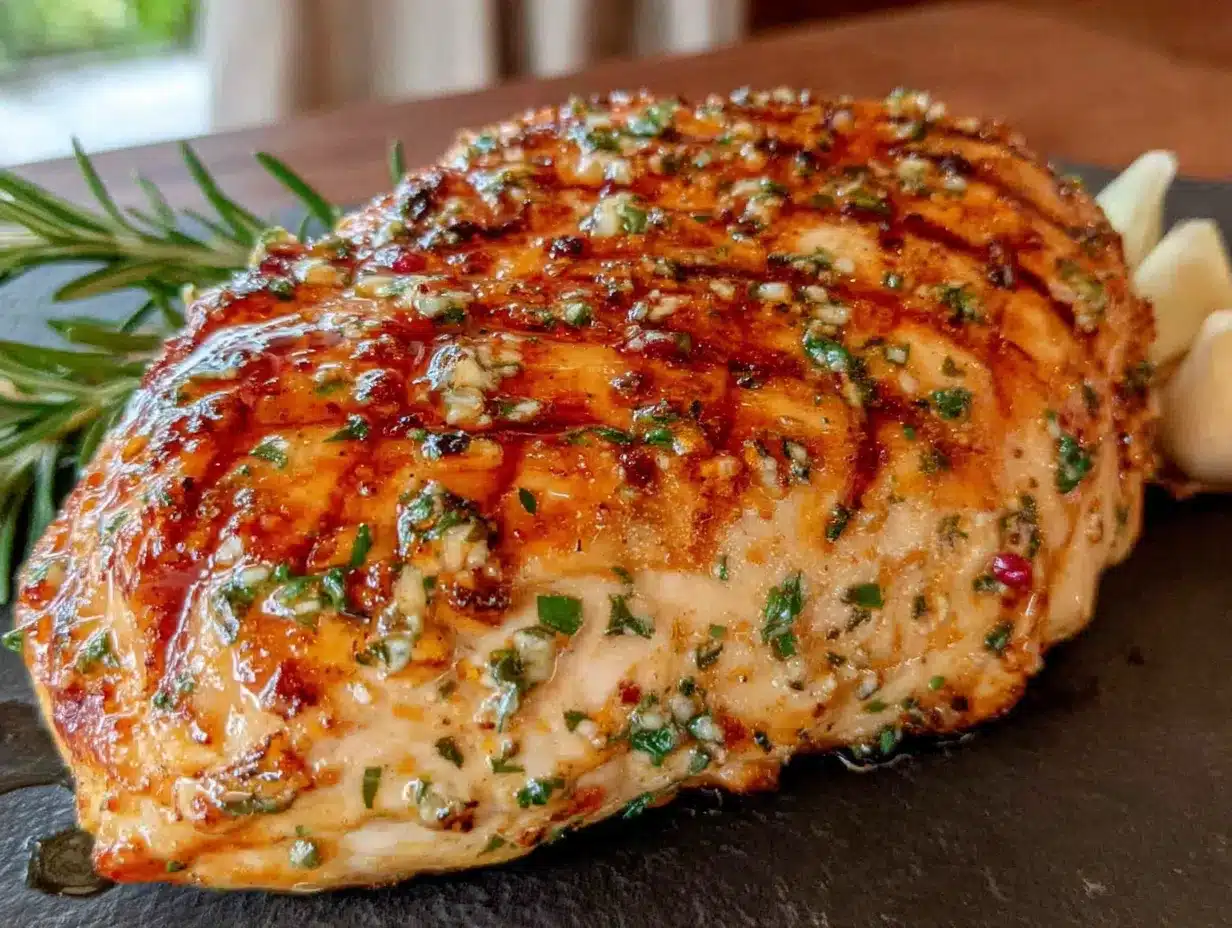
- 2 large boneless, skin-on chicken breasts (about 8 ounces each—skin-on is crucial for moisture)
- 1 tablespoon olive oil (helps the skin get golden and crisp)
- ½ teaspoon salt (for seasoning the outside)
- ¼ teaspoon black pepper
- ½ cup chicken broth (or dry white wine if you’re feeling fancy—adds flavor to the pan juices)
Now, let’s talk about ingredient selection. For the best results, look for chicken breasts that are roughly the same size so they cook evenly. If they’re huge, you might need to adjust your cooking time. I personally prefer organic, free-range chicken when I can find it—the flavor is noticeably better and the texture is more tender. And please, please use fresh herbs if possible. Dried herbs have their place, but for that bright, aromatic flavor that makes this dish special, fresh is non-negotiable. If you only have dried, use about one-third of the amount listed.
Equipment Needed
You don’t need a professional kitchen to pull this off, but having the right tools makes everything easier. Here’s what I use:
- Cast iron skillet or oven-safe baking dish (cast iron gives you the best sear, but any oven-safe pan works)
- Meat thermometer (this is non-negotiable—trust me, I learned the hard way after serving dry chicken one too many times)
- Small bowl (for mixing the herb butter)
- Sharp knife (for mincing garlic and chopping herbs—a dull knife is a dangerous thing)
- Cutting board
- Tongs (for flipping the chicken without piercing the skin)
- Pastry brush (optional, but helpful for spreading the olive oil evenly)
If you don’t have a cast iron skillet, don’t worry. A stainless steel or non-stick oven-safe pan works just fine. Just make sure it can handle high heat on the stovetop. And if you don’t have a meat thermometer, honestly, go buy one. They’re cheap and they’ll save you from ever serving dry chicken again. I’ve had my Thermapen for years and it’s worth every penny.
Preparation Method
Alright, let’s get cooking. This method might look like a few steps, but I promise it’s straightforward. The key is taking your time with the butter—that’s where the magic happens.
- Preheat your oven to 400°F (200°C). Give it a good 15-20 minutes to come to temperature. A properly hot oven is crucial for getting that golden, crispy skin.
- Make the herb butter. In a small bowl, combine the softened butter, minced garlic, chopped parsley, rosemary, thyme, salt, pepper, and lemon zest. Mash it all together with a fork until everything is evenly distributed. The butter should be soft enough to spread easily—if it’s too firm, let it sit at room temperature for another 10 minutes.
- Prep the chicken. Pat the chicken breasts dry with paper towels. This is important—wet skin won’t crisp up. Season both sides with the remaining salt and pepper. Now, here’s the trick: using your fingers, gently loosen the skin from the meat, creating a pocket. Be careful not to tear the skin. Slide about half of the herb butter mixture under the skin of each breast, spreading it evenly. Rub the remaining butter all over the outside of the chicken.
- Sear the chicken. Heat the olive oil in your oven-safe skillet over medium-high heat until it shimmers. Carefully place the chicken breasts skin-side down in the hot pan. Let them cook undisturbed for 3-4 minutes, until the skin is golden brown and crispy. Use tongs to flip them over—don’t use a fork, as piercing the skin will let the juices escape.
- Add the broth. Pour the chicken broth (or wine) around the chicken, not directly over the skin. This creates steam in the oven and keeps the meat moist. The liquid should come about ¼ inch up the sides of the pan.
- Bake. Transfer the skillet to the preheated oven. Bake for 15-20 minutes, depending on the thickness of your chicken. The internal temperature should reach 165°F (74°C) when measured at the thickest part. This is where your meat thermometer comes in—don’t guess!
- Rest. This is the hardest part. Remove the skillet from the oven and transfer the chicken to a cutting board. Let it rest for 5-10 minutes before slicing. I know you’ll want to dig in immediately, but this resting time is what locks in all those juices. Trust the process.
- Make the pan sauce (optional but amazing). While the chicken rests, place the skillet over medium heat. Whisk in a tablespoon of butter or a splash of cream to create a simple, flavorful sauce. Spoon it over the chicken when you serve it.
You’ll know the chicken is done when the skin is deeply golden and crispy, and the juices run clear when you cut into it. The meat should feel firm but still have a little give when pressed. If you see any pink, it needs more time. And remember, carryover cooking will raise the temperature another 5 degrees while it rests, so don’t overbake it.
Cooking Tips & Techniques
I’ve made this recipe more times than I can count, and I’ve learned a few things along the way. Here are my best tips for success:
Don’t skip the sear. I know it’s tempting to just throw everything in the oven and walk away, but that stovetop sear is what gives you that beautiful, crackling skin. It also adds a depth of flavor you just can’t get from baking alone. The Maillard reaction is your friend here—it’s science, but it tastes delicious.
Watch your oven temperature. Every oven runs a little differently. I once made this at my sister’s house and her oven ran 25 degrees hot. The chicken was overcooked on the outside and still raw in the middle. Lesson learned: always check with a thermometer, and if your oven runs hot, reduce the temperature by 25 degrees.
Let the butter soften naturally. I’ve made the mistake of microwaving butter to soften it quickly. It ends up partially melted, and then the herb butter is too runny to stay under the skin. Take the butter out of the fridge 30 minutes before you start cooking. Patience pays off.
Don’t overcrowd the pan. If you’re making more than two chicken breasts, use a larger skillet or cook them in batches. Overcrowding traps steam and prevents the skin from getting crispy. Nobody wants soggy skin.
Rest, rest, rest. I cannot emphasize this enough. The first time I made this, I was so excited I cut into the chicken immediately. All those beautiful juices ran right out onto the cutting board, leaving me with dry meat. Letting it rest allows the juices to redistribute throughout the meat. It’s a game-changer.
Variations & Adaptations
One of the best things about this recipe is how flexible it is. Here are some of my favorite variations:
Herb Swap: Don’t have rosemary or thyme? No problem. Try using tarragon, oregano, or even a teaspoon of dried Italian seasoning. In the summer, I love using fresh basil and chives from my garden. The lemon zest stays, though—it really brightens everything up.
Spicy Kick: Add ¼ teaspoon of red pepper flakes or a pinch of cayenne pepper to the herb butter. It gives the chicken a subtle warmth without overwhelming the other flavors. My husband loves this version.
Creamy Lemon Sauce: After removing the chicken, whisk ¼ cup of heavy cream and an extra squeeze of lemon juice into the pan juices. Simmer for 2 minutes until thickened. It’s rich, tangy, and absolutely divine over rice or mashed potatoes.
Dietary Adaptations: For a dairy-free version, use vegan butter or olive oil instead of butter. The texture will be slightly different, but it’s still delicious. For a lower-fat option, skip the skin and just rub the herb butter directly onto the meat. You’ll lose some crispiness, but you’ll still get plenty of flavor.
Air Fryer Method: Yes, this works in an air fryer! Preheat to 375°F (190°C). Rub the herb butter under the skin, place the chicken in the basket skin-side up, and cook for 12-15 minutes. Check the internal temperature and add 2-3 minutes if needed. The skin gets incredibly crispy this way.
Serving & Storage Suggestions
This chicken is incredibly versatile when it comes to serving. Here’s how I like to enjoy it:
Serving Temperature: Serve the chicken hot, straight from the oven. The skin is at its crispiest right after resting. Spoon some of the pan juices over the top for extra moisture and flavor.
Perfect Pairings: This chicken goes beautifully with almost any side dish. I love it with roasted asparagus and garlic mashed potatoes. Or try it with a simple green salad dressed with lemon vinaigrette. For a heartier meal, serve it over wild rice or creamy polenta. The pan juices make a wonderful sauce for whatever you pair it with.
Storage: Leftover chicken can be stored in an airtight container in the refrigerator for up to 3 days. The skin will lose its crispiness, but the meat will stay moist. To reheat, place the chicken in a 350°F (175°C) oven for 10-15 minutes, or until warmed through. Avoid the microwave—it will make the chicken tough and rubbery.
Freezing: You can freeze the cooked chicken for up to 3 months. Wrap each breast individually in plastic wrap, then place them in a freezer-safe bag. Thaw overnight in the refrigerator before reheating. The texture won’t be quite as good as fresh, but it’s still a great option for meal prep.
Make-Ahead Tip: The herb butter can be made up to 3 days in advance. Keep it covered in the refrigerator, and let it come to room temperature before using. You can also prep the chicken up to 8 hours ahead—just rub the butter under the skin and refrigerate until you’re ready to cook.
Nutritional Information & Benefits
Here’s the approximate nutritional breakdown for one serving (one chicken breast with skin):
| Nutrient | Amount |
|---|---|
| Calories | 385 |
| Protein | 38g |
| Fat | 24g |
| Saturated Fat | 11g |
| Carbohydrates | 2g |
| Fiber | 0g |
| Sugar | 0g |
| Sodium | 620mg |
Chicken breast is an excellent source of lean protein, which is essential for muscle repair and overall health. The herbs in this recipe—parsley, rosemary, and thyme—are packed with antioxidants and anti-inflammatory compounds. Garlic is known for its immune-boosting properties, and lemon zest provides a small dose of vitamin C. While this recipe does contain butter, the portion is moderate, and the healthy fats help your body absorb the fat-soluble vitamins from the herbs. If you’re watching your sodium, you can reduce the salt or use a salt-free herb blend. This recipe is naturally gluten-free and low-carb, making it suitable for a variety of dietary needs.
Conclusion
This juicy herb butter baked chicken breast is more than just a recipe—it’s a little piece of culinary magic that I’m so excited to share with you. It’s the kind of dish that turns an ordinary weeknight dinner into something special without requiring hours in the kitchen. The combination of crispy, golden skin and tender, flavorful meat is honestly unbeatable. I’ve made this for family dinners, lazy Sunday meals, and even when I wanted to impress a date. It never fails.
I’d love to hear how it turns out for you. Did you try a different herb combination? Maybe you added a splash of white wine to the pan? Drop a comment below and let me know. And if you snap a photo, tag me on Pinterest—I love seeing your creations! Remember, cooking is all about experimenting and making recipes your own. Don’t be afraid to tweak the herbs or try a new side dish. This chicken is your canvas. Happy cooking, friends!
Frequently Asked Questions
Can I use boneless, skinless chicken breasts?
Yes, you can, but the results won’t be quite as juicy. The skin helps lock in moisture and creates that crispy texture. If you use skinless breasts, reduce the cooking time by 3-5 minutes and consider covering the pan with foil for the first half of baking to prevent drying out.
How do I know when the chicken is fully cooked without a thermometer?
If you don’t have a meat thermometer, look for clear juices when you cut into the thickest part of the breast. The meat should be white throughout with no pinkness. You can also check that the chicken feels firm to the touch but still has a little spring back when pressed.
Can I prepare this recipe ahead of time?
Absolutely. You can make the herb butter up to 3 days in advance and keep it refrigerated. You can also season the chicken with the butter and refrigerate it for up to 8 hours before cooking. Just let it sit at room temperature for 15 minutes before searing.
What’s the best way to reheat leftover chicken without drying it out?
The oven is your best friend here. Preheat to 350°F (175°C), place the chicken in a baking dish with a splash of chicken broth, and cover with foil. Heat for 10-15 minutes until warmed through. The steam from the broth will keep the meat moist. Avoid the microwave at all costs!
Can I use dried herbs instead of fresh?
Yes, but use about one-third of the amount. Fresh herbs have a brighter, more vibrant flavor that really shines in this recipe. If you’re using dried, crush them between your fingers before adding to the butter to help release their oils. And consider adding a little extra lemon zest to compensate for the missing freshness.
Pin This Recipe!
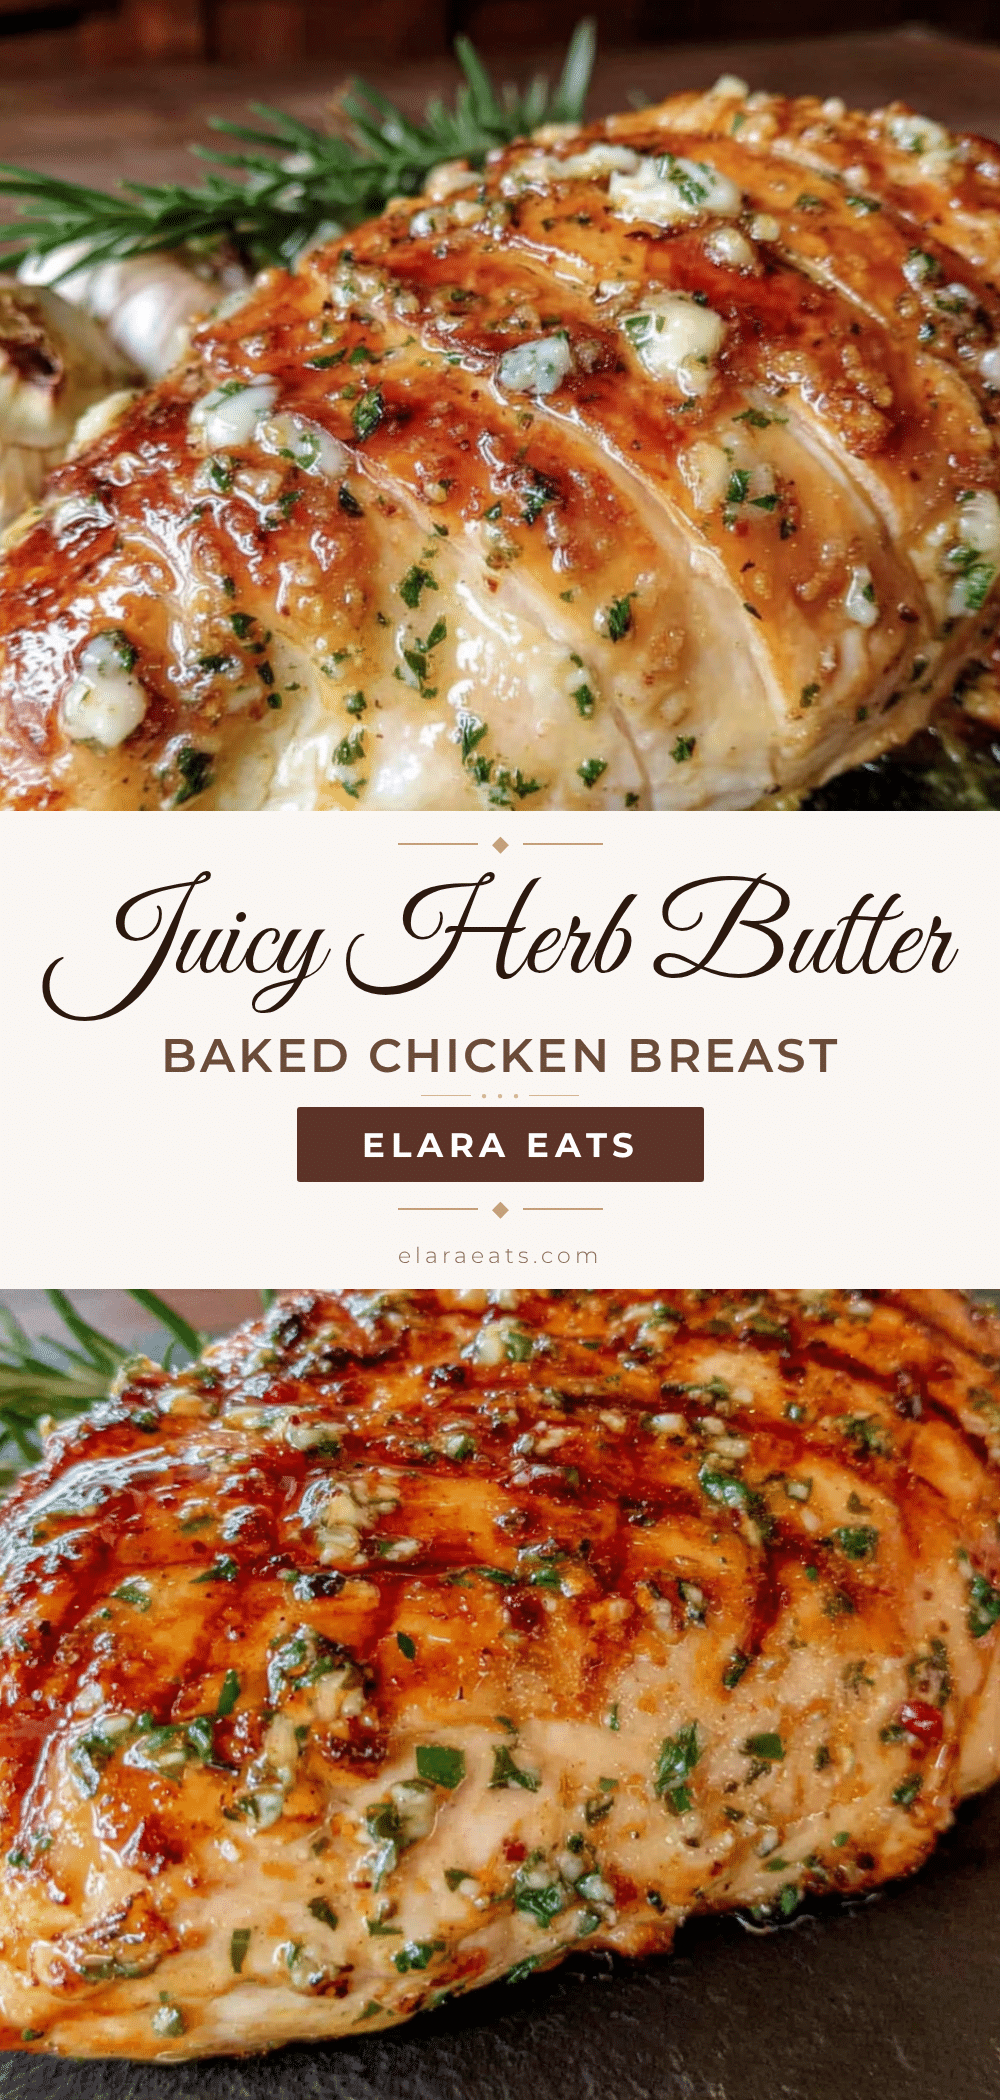
Best Juicy Herb Butter Baked Chicken Breast Recipe

This juicy herb butter baked chicken breast features impossibly crisp skin and tender meat, thanks to a compound butter technique that bastes the chicken from the inside out. A simple yet impressive weeknight dinner that delivers restaurant-quality results in under 40 minutes.
- Prep Time: 10 minutes
- Cook Time: 20 minutes
- Total Time: 30 minutes
- Yield: 2 servings 1x
- Category: Main Course
- Cuisine: American
Ingredients
- 4 tablespoons unsalted butter, softened
- 2 cloves garlic, minced
- 1 tablespoon fresh parsley, finely chopped
- 1 teaspoon fresh rosemary, finely chopped
- 1 teaspoon fresh thyme leaves
- ½ teaspoon salt
- ¼ teaspoon black pepper, freshly ground
- ½ teaspoon lemon zest
- 2 large boneless, skin-on chicken breasts (about 8 ounces each)
- 1 tablespoon olive oil
- ½ teaspoon salt
- ¼ teaspoon black pepper
- ½ cup chicken broth
Instructions
- Preheat your oven to 400°F (200°C). Give it a good 15-20 minutes to come to temperature.
- Make the herb butter: In a small bowl, combine the softened butter, minced garlic, chopped parsley, rosemary, thyme, salt, pepper, and lemon zest. Mash it all together with a fork until evenly distributed.
- Prep the chicken: Pat the chicken breasts dry with paper towels. Season both sides with the remaining salt and pepper. Using your fingers, gently loosen the skin from the meat, creating a pocket. Slide about half of the herb butter mixture under the skin of each breast, spreading it evenly. Rub the remaining butter all over the outside of the chicken.
- Sear the chicken: Heat the olive oil in your oven-safe skillet over medium-high heat until it shimmers. Carefully place the chicken breasts skin-side down in the hot pan. Cook undisturbed for 3-4 minutes, until the skin is golden brown and crispy. Use tongs to flip them over.
- Add the broth: Pour the chicken broth around the chicken, not directly over the skin.
- Bake: Transfer the skillet to the preheated oven. Bake for 15-20 minutes, until the internal temperature reaches 165°F (74°C) at the thickest part.
- Rest: Remove the skillet from the oven and transfer the chicken to a cutting board. Let it rest for 5-10 minutes before slicing.
- Make the pan sauce (optional): While the chicken rests, place the skillet over medium heat. Whisk in a tablespoon of butter or a splash of cream to create a simple sauce. Spoon it over the chicken when serving.
Notes
For best results, use fresh herbs and let the butter soften naturally at room temperature. Don’t skip the sear or the resting time—both are crucial for juicy, flavorful chicken. If using dried herbs, use about one-third of the amount listed. For a dairy-free version, use vegan butter or olive oil. The herb butter can be made up to 3 days in advance.
Nutrition
- Serving Size: 1 chicken breast wit
- Calories: 385
- Sodium: 620
- Fat: 24
- Saturated Fat: 11
- Carbohydrates: 2
- Protein: 38
Keywords: herb butter chicken, baked chicken breast, juicy chicken, crispy skin chicken, easy chicken recipe, weeknight dinner, gluten-free chicken, low-carb chicken


