Love this? Save it for later!
Share the inspiration with your friends
I still remember the afternoon this recipe found me. I was at the community garden, wrestling with a butternut squash that had rolled stubbornly under a bench. An older woman named Gloria, who tended the plot next to mine, watched me fumble for a moment without saying a word. Then she knelt down, scooped it up, and handed it to me with a small, knowing smile. “That one’s special,” she said, tapping the squash’s tough skin. “It’s got a sweetness that needs a little butter and maple to wake it up.” She didn’t give me a written recipe, not then. She just told me how she liked to cook it—slow, with patience, letting the oven do the work. Over the next few weeks, I kept thinking about her words. I started experimenting, adding a pinch of cayenne here, a splash of maple syrup there. The first time I made it, I burned the butter. Honestly, the kitchen smelled like a campfire, and I had to open every window. But the second time? That was the one. The squash came out caramelized at the edges, tender in the middle, and the brown butter sauce was nutty and rich, with just enough maple to feel like a hug. Gloria was right. It was special. Maybe you’ve been there—you taste something and suddenly the whole world feels a little warmer. That’s what this dish does. It’s why I keep making it, especially when the air gets crisp and I need something that feels like coming home.
Why You’ll Love This Recipe
This isn’t just another roasted squash recipe. I’ve tested this one more times than I care to count, tweaking the temperature, adjusting the maple-to-butter ratio, and even trying it with different squash varieties. What I landed on is the version that works every single time. It’s the kind of dish that makes you look like a kitchen hero without the stress.
- Quick & Easy: You only need about 10 minutes of active prep. The oven does the heavy lifting, so you can relax while it roasts.
- Simple Ingredients: Butternut squash, butter, maple syrup, salt, and a few spices. That’s it. No fancy grocery store trips required.
- Perfect for Cozy Nights: This is the side dish you want on a chilly Tuesday or alongside a holiday roast. It fits every occasion that calls for comfort.
- Crowd-Pleaser: I’ve served this to kids, picky eaters, and serious food lovers. It gets quiet at the table, and that’s the highest compliment.
- Unbelievably Delicious: The brown butter adds a nutty depth, while the maple brings a gentle sweetness. The squash gets crispy on the outside and soft on the inside. It’s next-level comfort food.
What makes this version different is the technique. Instead of tossing everything together and hoping for the best, you brown the butter first. That one step changes everything. It turns a simple side dish into something you’ll crave on repeat. And honestly, it’s the kind of recipe that makes you close your eyes after the first bite. It’s comfort food reimagined—simpler, faster, but with the same soul-soothing satisfaction.
What Ingredients You Will Need
This recipe uses a handful of wholesome ingredients to create something that tastes far more complex than it is. Most of these are pantry staples, so you probably already have them on hand.
- Butternut Squash (1 medium, about 2-3 pounds): Look for one that feels heavy for its size with firm, unblemished skin. I prefer using pre-cut cubes from the store when I’m short on time, but whole squash is more economical. You’ll need to peel, seed, and cut it into 1-inch cubes. (If you struggle with peeling, microwave the whole squash for 2 minutes to soften the skin first.)
- Unsalted Butter (4 tablespoons, or 1/2 stick): I use unsalted so I can control the salt level. If you only have salted butter, just reduce the added salt by a pinch. I recommend using a good-quality butter like Kerrygold for the richest brown butter flavor.
- Pure Maple Syrup (3 tablespoons): Please use real maple syrup, not pancake syrup. The flavor is cleaner and less cloying. Grade A dark amber works beautifully here for a deeper taste.
- Olive Oil (1 tablespoon): This helps the squash roast evenly and get those gorgeous caramelized edges. Avocado oil works too if that’s what you have.
- Salt (1/2 teaspoon, plus more to taste): I prefer kosher salt for its clean flavor. Diamond Crystal is my go-to brand.
- Black Pepper (1/4 teaspoon, freshly ground): Freshly ground pepper makes a noticeable difference. Skip the pre-ground stuff if you can.
- Cinnamon (1/2 teaspoon): Adds warmth without overpowering the squash. You can substitute pumpkin pie spice if you want a more complex flavor.
- Cayenne Pepper (1/8 teaspoon, optional): This is my secret ingredient. It doesn’t make the dish spicy—it just wakes up the other flavors. Omit it if you’re sensitive to heat.
- Fresh Sage Leaves (6-8 leaves, optional): Frying these in the brown butter is a game-changer. They get crispy and add an earthy, aromatic note. (I always include them when I’m serving this for company.)
For the best results, use room-temperature ingredients where possible. Cold butter straight from the fridge takes longer to brown and can splatter. Let it sit on the counter for 10 minutes before you start.
Equipment Needed
You don’t need a lot of fancy tools for this recipe. Here’s what I use:
- Large Baking Sheet (18×13 inches): A rimmed baking sheet is best to catch any juices. I use a half-sheet pan from Nordic Ware—it’s sturdy and heats evenly. If you don’t have one, any large oven-safe pan will work, but avoid crowding the squash too much.
- Chef’s Knife (8-inch): A sharp knife makes cutting through butternut squash much safer and easier. Dull knives are more dangerous because they slip. If your knife is getting dull, a quick sharpen on a honing steel helps.
- Vegetable Peeler: A Y-shaped peeler works best for the tough skin of butternut squash. I’ve tried using a paring knife, but the peeler is faster and wastes less flesh.
- Small Saucepan: You’ll need this for browning the butter. A light-colored pan is ideal so you can see the butter change color. I use a stainless steel saucepan for this reason.
- Parchment Paper or Silicone Baking Mat: This prevents sticking and makes cleanup a breeze. If you don’t have either, you can grease the pan lightly with oil.
- Mixing Bowl (medium): For tossing the squash with oil and spices. Any bowl will do, but a wide one makes mixing easier.
- Rubber Spatula: Essential for scraping every last drop of that brown butter sauce onto the squash. Don’t waste a single bit.
If you don’t have a baking sheet, a 9×13 baking dish works in a pinch. The squash won’t get as crispy, but it will still taste delicious.
Preparation Method
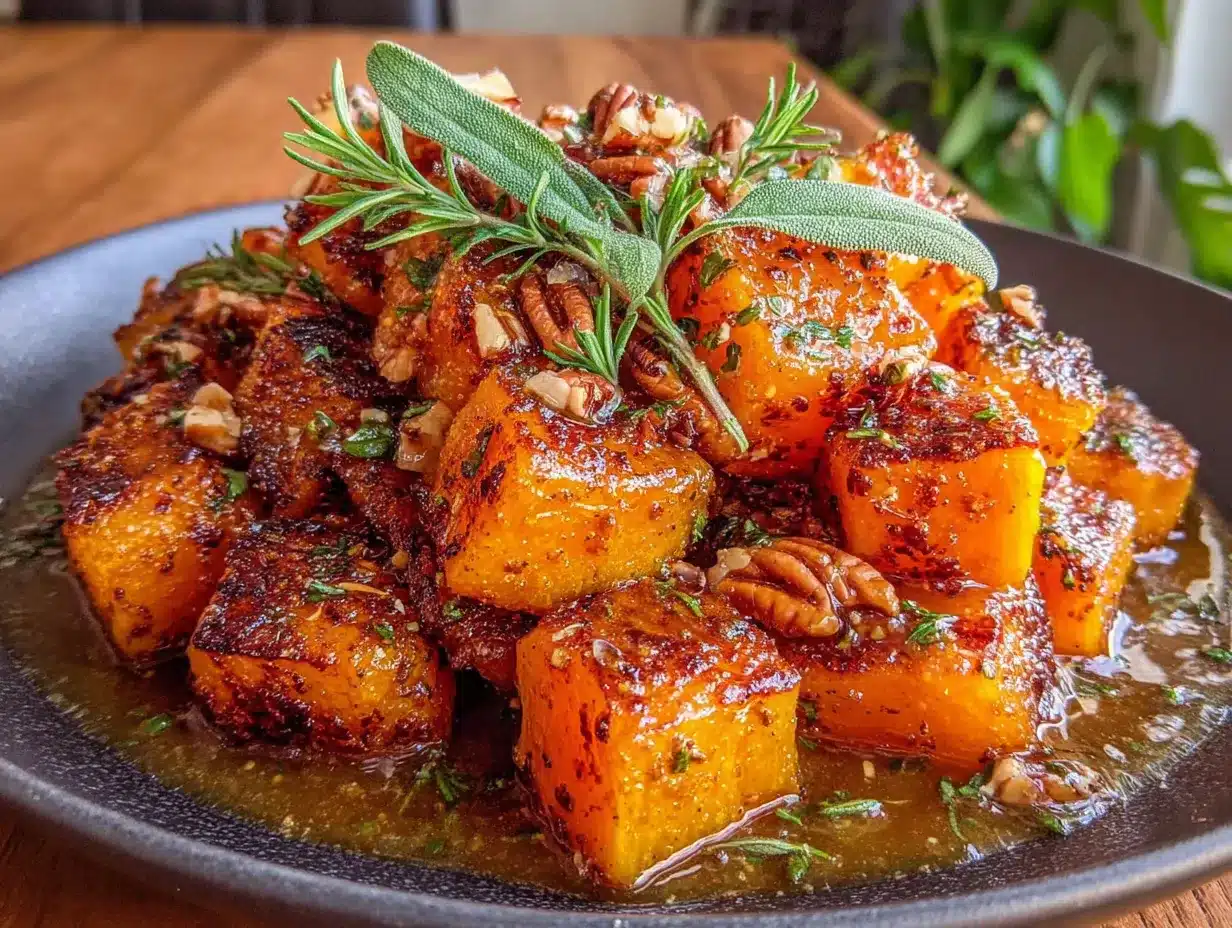
Let’s get cooking. This recipe comes together in about 45 minutes, and most of that is hands-off oven time.
- Preheat your oven to 400°F (200°C). Place the rack in the middle position. While the oven heats, prepare your squash.
- Prep the butternut squash. Using a sharp chef’s knife, cut off both ends of the squash. Stand it upright on a stable cutting board and slice it in half where the narrow neck meets the round bulb. Peel both pieces with a vegetable peeler. Scoop out the seeds and stringy bits from the bulb with a spoon. Cut the squash into 1-inch cubes. (Pro tip: Save the seeds! Toss them with salt and roast them at 350°F for 10-12 minutes for a crunchy snack.)
- Toss the squash with oil and spices. In a medium mixing bowl, combine the cubed squash, olive oil, salt, pepper, cinnamon, and cayenne (if using). Use your hands or a spatula to coat every piece evenly. Spread the squash in a single layer on your parchment-lined baking sheet. Don’t overcrowd—if the pieces are touching too much, they’ll steam instead of roast. Use two sheets if needed.
- Roast the squash for 25-30 minutes. Halfway through, flip the pieces with a spatula so they brown evenly. The squash is done when it’s tender enough to pierce with a fork and the edges are caramelized and golden brown. Every oven runs a little differently, so start checking at 25 minutes.
- Make the maple brown butter. While the squash roasts, place the butter in a small saucepan over medium heat. Swirl the pan occasionally as the butter melts. It will start to foam, then the foam will subside, and you’ll see golden brown specks forming at the bottom. This takes about 3-4 minutes. Watch closely—brown butter can go from perfect to burnt in seconds. When it smells nutty and looks amber, remove it from the heat immediately. Stir in the maple syrup. (If using sage, add the leaves to the hot butter and let them sizzle for 30 seconds before adding the maple.)
- Finish and serve. Transfer the roasted squash to a serving dish. Pour the maple brown butter over the top, scraping the pan with a spatula to get every drop. Toss gently to coat. If you fried sage leaves, arrange them on top as a garnish. Serve immediately while it’s warm and the butter is glossy.
Note: If the brown butter seizes up when you add the maple syrup, don’t panic. Just return the pan to low heat and whisk until smooth. It will come back together.
Cooking Tips & Techniques
I’ve made this recipe enough times to know where things can go sideways. Here’s what I’ve learned the hard way so you don’t have to.
Don’t skip the browning step. The first time I tried this, I just melted the butter and mixed it with maple syrup. It was fine, but it wasn’t special. Browning the butter unlocks a nutty, toffee-like flavor that plain melted butter just can’t match. It’s worth the extra three minutes.
Cut your squash evenly. If some pieces are smaller than others, they’ll burn before the bigger ones are done. Aim for uniform 1-inch cubes. If you end up with some smaller bits, keep an eye on them and remove them early if needed.
Use a light-colored pan for browning butter. I learned this after ruining two batches in a dark non-stick skillet. You need to see the color change clearly. A stainless steel or enameled pan works best.
Multitask wisely. Start the brown butter when the squash has about 10 minutes left in the oven. That way, everything finishes at the same time, and you can serve it hot. Cold brown butter sauce just isn’t the same.
One mistake I still make: Forgetting to stir the squash halfway through. If you skip this step, the bottom gets soft while the top stays pale. Set a timer for 15 minutes so you don’t forget.
Variations & Adaptations
This recipe is flexible. Here are some ways to make it your own.
- Vegan Version: Substitute the butter with a high-quality vegan butter (I like Miyoko’s) or coconut oil. Brown the vegan butter the same way—it won’t brown exactly like dairy butter, but it will still get nutty and delicious. Use maple syrup as usual.
- Spicy Kick: Double the cayenne pepper to 1/4 teaspoon, or add a pinch of red pepper flakes to the brown butter. This pairs beautifully with the sweetness of the maple.
- Herb Swap: If you don’t have sage, try fresh thyme or rosemary. Add a sprig to the butter while it browns, then remove it before pouring over the squash. The flavor is more subtle but still lovely.
- Different Squash: This method works with any winter squash. Try acorn squash (cut into wedges), delicata (no need to peel), or even sweet potatoes. Adjust roasting time as needed—delicata cooks faster, about 20 minutes.
- Maple-Free Option: If you’re out of maple syrup or want less sweetness, use honey or agave nectar. The flavor will change slightly, but it’s still very good. For a savory version, skip the sweetener entirely and add an extra clove of minced garlic to the brown butter.
I once tried this with a sprinkle of toasted pecans on top, and it was incredible. The crunch added a whole new texture. Feel free to experiment—that’s half the fun.
Serving & Storage Suggestions
This dish is best served warm, right after you pour the brown butter over it. The butter stays glossy and the squash is at its crispiest. I like to serve it in a wide, shallow bowl so the sauce pools at the bottom.
What to serve with it: This squash pairs beautifully with roasted chicken, pork chops, or a simple grain bowl. For a cozy vegetarian dinner, serve it over quinoa or farro with a handful of arugula. A glass of crisp white wine or a warm apple cider is the perfect drink pairing.
Storage: Leftovers keep well in an airtight container in the refrigerator for up to 4 days. The squash will soften as it sits, but the flavor actually deepens overnight. To reheat, spread the squash on a baking sheet and warm it in a 350°F oven for 5-7 minutes. The microwave works in a pinch, but the squash will be much softer.
Freezing: You can freeze the roasted squash (without the sauce) for up to 3 months. Thaw overnight in the fridge, then reheat and make fresh brown butter. The sauce doesn’t freeze well—it can separate and become grainy.
One thing I love about this recipe is how the flavors meld. Day-old squash, reheated and drizzled with a little extra maple syrup, tastes almost like a different dish. It’s comforting in a whole new way.
Nutritional Information & Benefits
Butternut squash is one of those ingredients that feels indulgent but is actually packed with good stuff. Here’s a rough breakdown per serving (about 1 cup):
| Nutrient | Amount |
|---|---|
| Calories | 210 |
| Total Fat | 12g |
| Saturated Fat | 7g |
| Carbohydrates | 26g |
| Fiber | 4g |
| Sugar | 12g |
| Protein | 2g |
| Vitamin A | 297% DV |
| Vitamin C | 35% DV |
| Potassium | 582mg |
Butternut squash is rich in vitamin A, which supports eye health and immune function. The fiber helps keep you full and aids digestion. Maple syrup, while still a sugar, contains small amounts of antioxidants and minerals like zinc and manganese. Brown butter adds healthy fats that help your body absorb fat-soluble vitamins from the squash.
This recipe is naturally gluten-free and vegetarian. For a lower-sugar option, reduce the maple syrup to 1 1/2 tablespoons—you’ll still get plenty of sweetness from the roasted squash itself.
Conclusion
This cozy roasted butternut squash with maple brown butter is the kind of recipe that feels like a warm blanket on a cold day. It’s simple enough for a Tuesday night, but special enough for a holiday table. The combination of sweet maple, nutty brown butter, and tender caramelized squash is just unbeatable.
I hope you give it a try and make it your own. Maybe add a little extra cayenne, or throw in some pecans. That’s the beauty of cooking—you get to play. And honestly, that’s what Gloria taught me without ever saying it outright. A recipe is just a starting point. The real magic happens when you make it yours.
If you make this, I’d love to hear about it. Drop a comment below and tell me how it turned out, or share your own twist. And if you’re looking for another cozy side, you might also enjoy this creamy garlic mashed potatoes or this honey glazed carrots. Happy cooking, friends.
Frequently Asked Questions
Can I use frozen butternut squash for this recipe?
Yes, but the texture will be softer and less caramelized. Thaw the squash first and pat it very dry with paper towels to remove excess moisture. Roast at 425°F for 20-25 minutes to encourage browning.
How do I prevent the brown butter from burning?
Keep your eye on it the whole time. Once the butter stops foaming and you see golden specks forming, remove it from the heat immediately. Pour it into a cool bowl if you need to stop the cooking process fast.
Can I make this ahead of time?
You can roast the squash up to 2 days ahead and store it in the fridge. Make the brown butter fresh just before serving for the best texture and flavor. Reheat the squash in the oven at 350°F for 5-7 minutes before adding the sauce.
What can I use instead of maple syrup?
Honey, agave nectar, or brown sugar dissolved in a tablespoon of warm water all work well. Each will change the flavor slightly, but they’ll still be delicious. For a savory version, skip the sweetener and add minced garlic to the brown butter.
Is this recipe keto-friendly?
As written, it’s not keto due to the maple syrup and natural sugars in the squash. For a lower-carb version, replace the maple syrup with a monk fruit sweetener or omit it entirely. The brown butter alone is still fantastic on roasted squash.
Pin This Recipe!
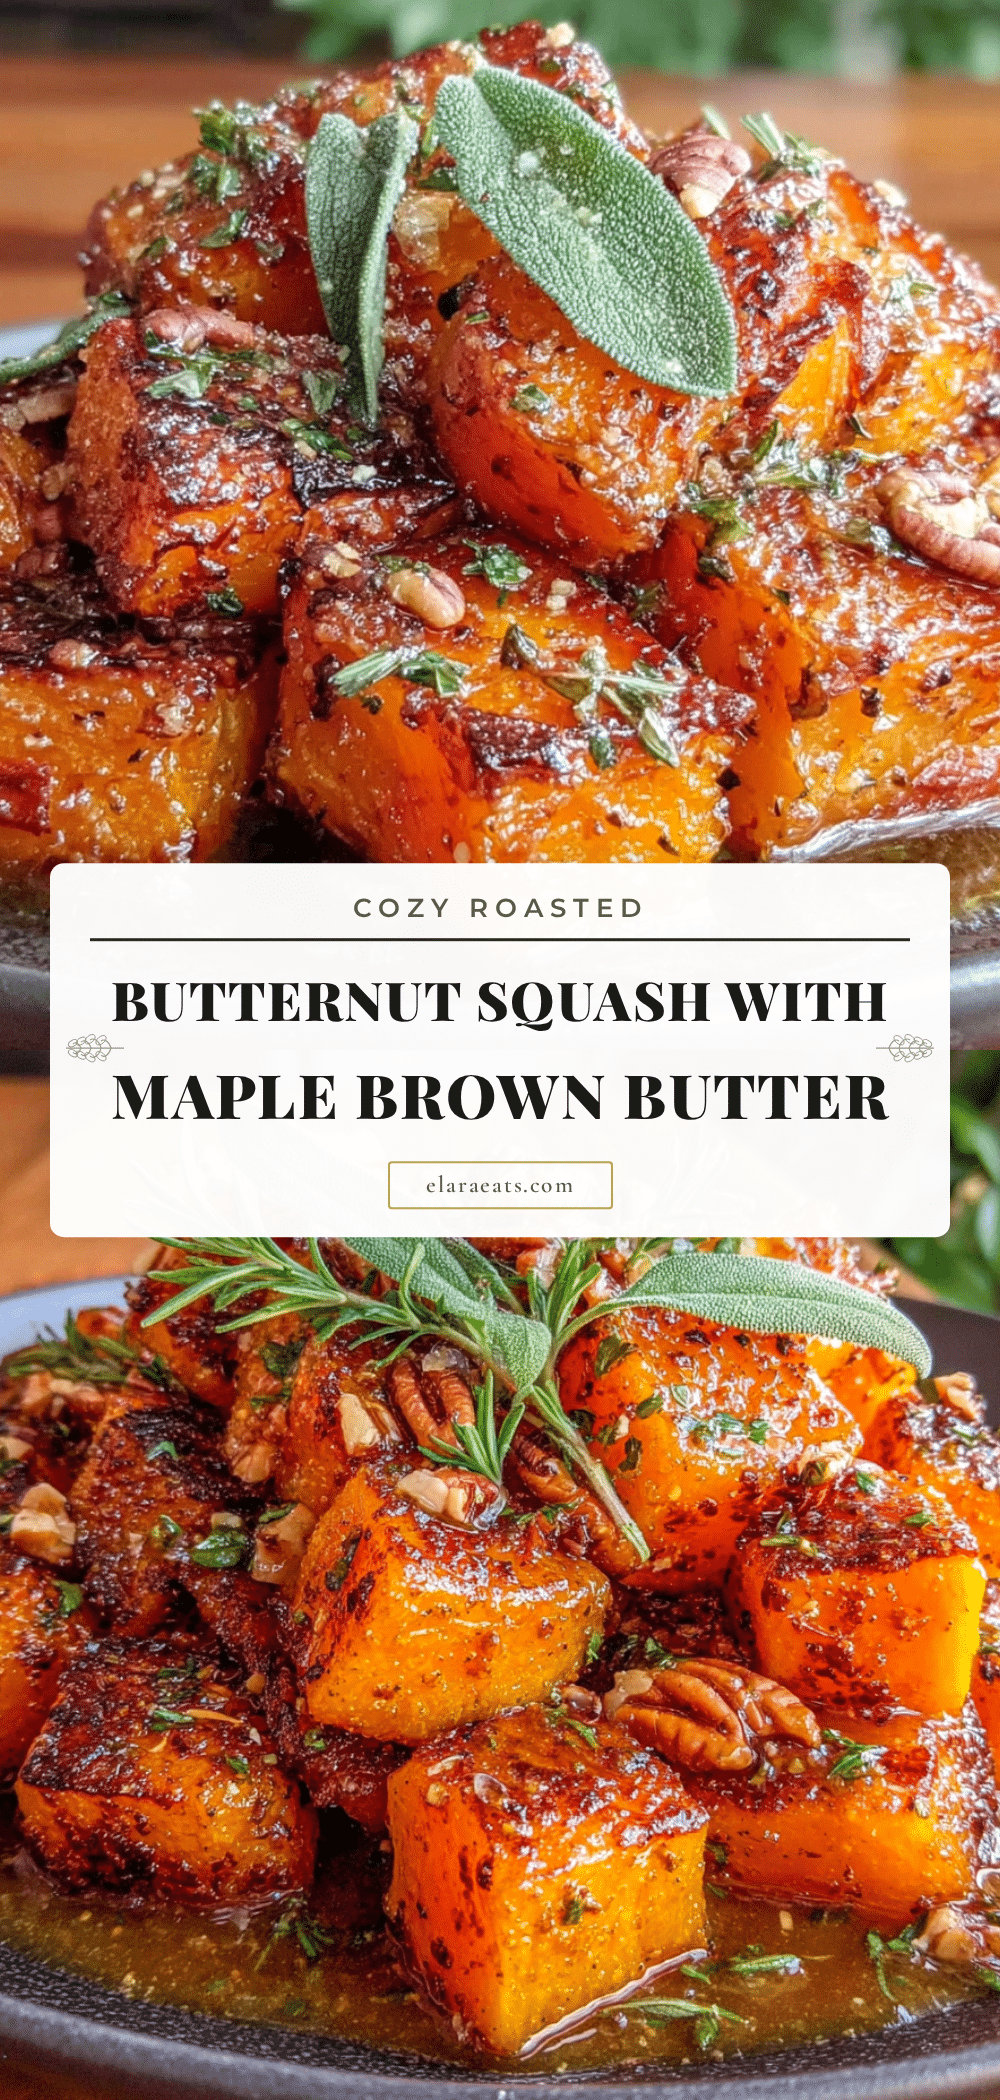
Cozy Roasted Butternut Squash with Easy Maple Brown Butter
This roasted butternut squash with maple brown butter is a simple yet elegant side dish. The squash gets caramelized and tender, while the nutty brown butter and maple syrup create a rich, comforting sauce.
- Prep Time: 10 minutes
- Cook Time: 30 minutes
- Total Time: 45 minutes
- Yield: 4 servings 1x
- Category: Side Dish
- Cuisine: American
Ingredients
- 1 medium butternut squash (about 2–3 pounds), peeled, seeded, and cut into 1-inch cubes
- 4 tablespoons unsalted butter (1/2 stick)
- 3 tablespoons pure maple syrup
- 1 tablespoon olive oil
- 1/2 teaspoon kosher salt, plus more to taste
- 1/4 teaspoon freshly ground black pepper
- 1/2 teaspoon ground cinnamon
- 1/8 teaspoon cayenne pepper (optional)
- 6–8 fresh sage leaves (optional)
Instructions
- Preheat your oven to 400°F (200°C). Place the rack in the middle position.
- Prep the butternut squash: Cut off both ends, stand upright, and slice in half where the narrow neck meets the round bulb. Peel both pieces with a vegetable peeler. Scoop out seeds and stringy bits from the bulb. Cut into 1-inch cubes.
- In a medium mixing bowl, toss the cubed squash with olive oil, salt, pepper, cinnamon, and cayenne (if using) until evenly coated. Spread in a single layer on a parchment-lined baking sheet. Do not overcrowd.
- Roast for 25-30 minutes, flipping halfway through, until tender and caramelized.
- While the squash roasts, make the maple brown butter: In a small saucepan over medium heat, melt the butter, swirling occasionally. It will foam, then subside, and golden brown specks will form at the bottom (about 3-4 minutes). Remove from heat immediately when it smells nutty and looks amber. Stir in the maple syrup. If using sage, add leaves to the hot butter and let sizzle for 30 seconds before adding maple.
- Transfer roasted squash to a serving dish. Pour the maple brown butter over the top, scraping the pan with a spatula. Toss gently to coat. Garnish with fried sage leaves if desired. Serve immediately.
Notes
If the brown butter seizes up when you add the maple syrup, return the pan to low heat and whisk until smooth. For best results, cut squash into uniform 1-inch cubes and use a light-colored pan for browning butter to see the color change clearly.
Nutrition
- Serving Size: 1 cup
- Calories: 210
- Sugar: 12
- Sodium: 300
- Fat: 12
- Saturated Fat: 7
- Carbohydrates: 26
- Fiber: 4
- Protein: 2
Keywords: roasted butternut squash, maple brown butter, fall side dish, easy roasted vegetables, vegetarian, gluten-free


