Love this? Save it for later!
Share the inspiration with your friends
My neighbor, a retired caterer named Eleanor, caught me one October evening wrestling with a giant cheese wheel and a paring knife that had clearly seen better days. She just leaned against her porch railing and watched for a solid minute before saying, “You’re trying too hard. Halloween snacking shouldn’t feel like a chore.” I laughed, mostly because she was right—I was trying to build an elaborate spread for a party that wasn’t even happening. It was just going to be my partner and me, watching Hocus Pocus in our pajamas.
Eleanor shuffled over and showed me her little trick: a single wooden board, a few small bowls, and the rule that nothing on it should require more than one cut. “For two people,” she said, “you don’t need a buffet. You need a moment.” That conversation stuck with me. It wasn’t about the food, honestly—it was about the feeling of sharing something small and intentional. So I took her philosophy and gave it a Halloween twist, and that’s how these cozy mini Halloween charcuterie boards for two were born.
Let me tell you, there’s something magical about sitting on the couch with a tiny board loaded with spooky snacks. It feels like a secret—like you’re in on something cozy that the rest of the world forgot about. Maybe you’ve been there, staring at a mountain of party snacks and wondering why you bought so much. This is the opposite. It’s simple, it’s fun, and it’s exactly enough for two people to feel spoiled without a single leftover to stress about. I keep making this board every October because it turns a regular Tuesday night into a tiny celebration. And honestly, that’s the best kind of Halloween magic.
Why You’ll Love This Recipe
I’ve tested this board about six times now—different cheeses, different crackers, different spooky shapes. I even tried one with a ghost-shaped bell pepper that looked more like a sad cloud. But this version? It’s the one that stuck. It’s the one that feels effortless but still impresses. Here’s why I think you’ll love it too:
- Quick & Easy: You can put this together in under 15 minutes. No cooking, no baking, just arranging and snacking.
- Simple Ingredients: Everything comes from a regular grocery store. No fancy cheese shops or specialty markets required.
- Perfect for a Cozy Night In: Whether it’s Halloween night, a rainy Friday, or just a Tuesday that needs fixing, this board fits right in.
- Crowd-Pleaser: Even picky eaters love it. The mix of salty, sweet, and creamy hits every craving.
- Unbelievably Delicious: The combination of sharp cheddar, smoky salami, and dark chocolate is next-level comfort food. I mean, it’s the kind of snack that makes you close your eyes after the first bite.
What makes this board different from all the other Halloween snack boards out there? It’s the size. It’s built for two people, which means no waste, no stress, and no feeling like you have to feed a crowd. Plus, I use a little trick—cutting the cheese into small bat shapes with a cookie cutter—that adds instant Halloween flair without any complicated carving. It’s comfort food reimagined: spooky, cozy, and perfectly portioned.
What Ingredients You Will Need
This recipe uses simple, store-bought ingredients to deliver a satisfying mix of flavors and textures. The key is balancing savory, sweet, and salty so every bite feels complete. You probably already have some of these in your kitchen, especially if you’re a regular snacker like me.
- Sharp cheddar cheese block (about 4 ounces) – Cut into small bat shapes using a cookie cutter. I like to use a sharp cheddar because its bold flavor stands up well to the other ingredients. If you can find a block with a nice orange color, it looks extra festive.
- Salami slices (about 4 ounces) – Look for a good quality salami, like Genoa or hard salami. Fold each slice into quarters to create little salami roses or just leave them flat for easy grabbing.
- Dark chocolate pieces (about 2 ounces) – Use a bar and break it into irregular shards, or grab a bag of dark chocolate chips. The bitterness pairs beautifully with the cheese.
- Pretzel sticks (a handful) – These add crunch and a salty contrast. I like to use the thin, stick-shaped pretzels because they look like little witch’s broomsticks on the board.
- Red grapes (a small bunch) – They add a pop of color and a burst of sweetness. Plus, they look a bit like eyeballs, which is perfect for Halloween.
- Pumpkin seeds (a small handful) – Roasted and salted pumpkin seeds add a nice crunch and fit the fall theme. You can find them in the snack aisle.
- Dried apricots (about 4-5 pieces) – Their chewy texture and sweetness balance out the salty items. They also look like little orange moons on the board.
- Halloween-themed crackers (about 8-10 pieces) – Look for crackers shaped like bats, pumpkins, or ghosts. If you can’t find them, regular round crackers work just fine.
- Olives (a small handful) – Black or green olives add a briny, savory note. I prefer Kalamata olives for their rich flavor.
- Fresh rosemary sprigs (optional, for decoration) – They add a nice green touch and make the board look more polished. Plus, they smell amazing.
Ingredient tips from my kitchen: For the cheese, I recommend a block of Tillamook sharp cheddar—it cuts cleanly and holds its shape well. If you’re using a bat-shaped cookie cutter, make sure the cheese is cold so the edges stay sharp. For the salami, I’ve found that Boar’s Head Genoa salami has the right balance of fat and flavor. And if you want to swap the dark chocolate for milk chocolate, go ahead—it’s your board, after all.
Equipment Needed
You don’t need much for this recipe, which is part of the charm. Here’s what I use:
- Small wooden or slate board (about 8×10 inches) – Perfect for two people. If you don’t have one, a large dinner plate works just fine.
- Bat-shaped cookie cutter (about 1.5 inches) – This is optional but highly recommended for the cute factor. You can find them at any craft store or online.
- Small bowls or ramekins (2-3) – For holding olives, pumpkin seeds, or any loose items that might roll around.
- Sharp knife – For cutting the cheese and any other ingredients.
- Cutting board – For prepping the ingredients before arranging them.
I’ve tried this board on a ceramic plate, a wooden cutting board, and a slate tile from the hardware store. Honestly, the slate tile was my favorite—it cost about $3 and gives a nice, dark contrast to the colorful ingredients. Just make sure to wash it thoroughly first. If you’re using a wooden board, a quick rub with mineral oil keeps it looking nice.
Preparation Method
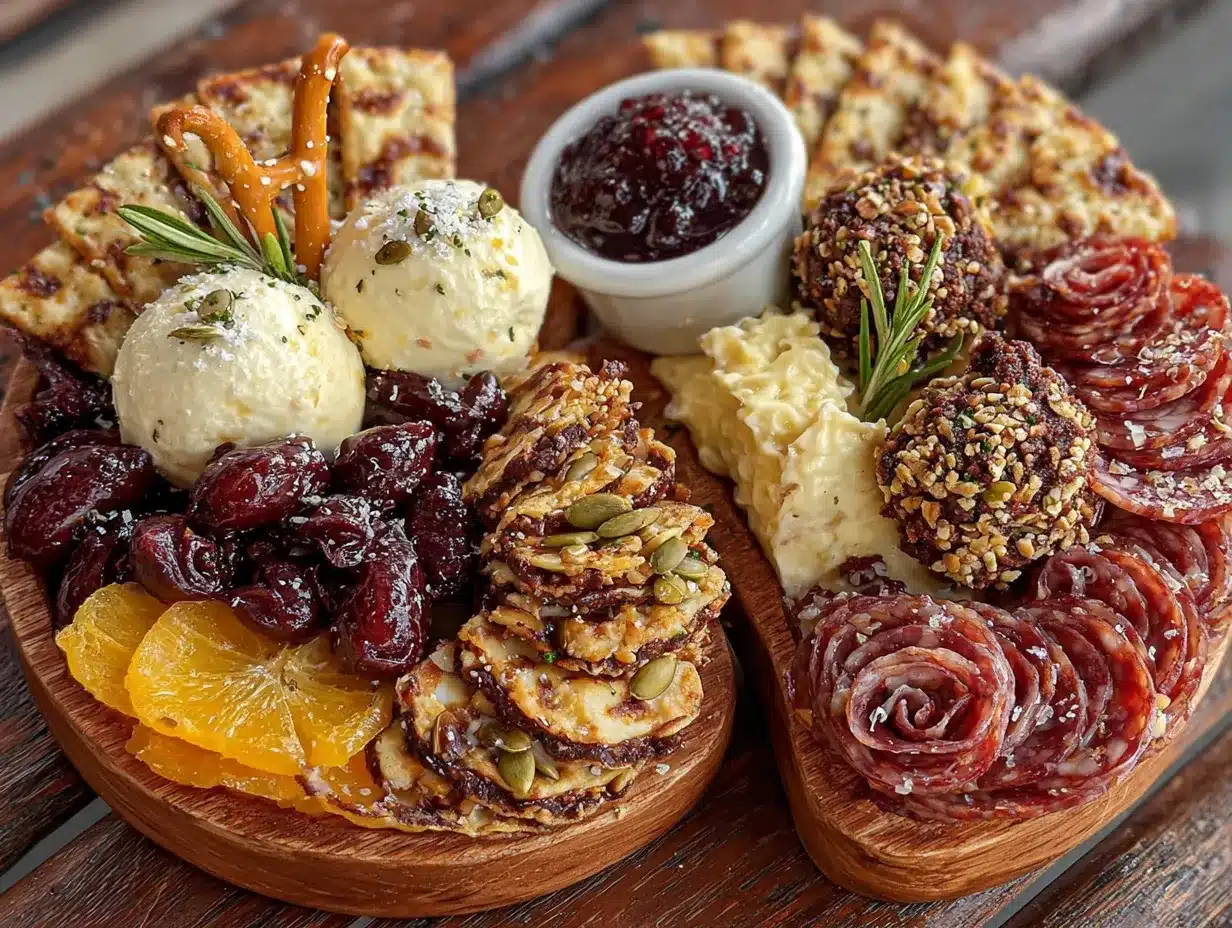
This comes together in about 15 minutes, and most of that time is just arranging things so they look pretty. Here’s how I do it:
- Prep the cheese (3 minutes): Take your cold block of sharp cheddar and cut it into slices about ¼-inch thick. Then, press the bat-shaped cookie cutter into each slice to create little bat shapes. If the cheese starts to get warm and sticky, pop it in the fridge for a few minutes. You should end up with about 8-10 bat shapes. Save the cheese scraps for snacking later—I won’t tell anyone.
- Fold the salami (2 minutes): Take each salami slice and fold it in half, then in half again, so you get a little quarter-circle shape. Arrange them in a small cluster on the board so they look like tiny roses. If you prefer, you can leave them flat—it’s your board.
- Prepare the fruit (2 minutes): Rinse the grapes and pat them dry. Cut the dried apricots in half if they’re large. Break the dark chocolate into irregular shards—I like to keep some pieces bigger for a dramatic look.
- Set up the small bowls (1 minute): Place your small bowls or ramekins on the board. Fill one with olives, one with pumpkin seeds, and one with any loose items you don’t want rolling around.
- Arrange the board (5 minutes): Start by placing the bowls on the board. Then, arrange the cheese bat shapes in a small cluster. Add the salami roses nearby. Scatter the pretzel sticks, crackers, grapes, apricots, and chocolate shards around the board, filling in any empty spaces. The goal is to make it look abundant but not crowded. You should see a little bit of the board peeking through.
- Add the finishing touches (1 minute): Tuck a few fresh rosemary sprigs between the ingredients for a pop of green. Sprinkle the pumpkin seeds over the board for texture. Step back and admire your work—it should look like a tiny, spooky feast.
- Serve immediately: This board is best enjoyed right away, while the cheese is still cold and the crackers are still crunchy. Place it in the center of the table or coffee table and let you and your guest dig in.
A note from my kitchen: The first time I made this, I arranged everything too carefully, and it looked stiff—like a museum display. Now I just scatter things loosely, and it looks much more inviting. Don’t overthink it. If a grape rolls into the cheese zone, that’s fine. It’s supposed to feel cozy, not perfect.
Cooking Tips & Techniques
I’ve made a few mistakes with these boards so you don’t have to. Here’s what I’ve learned:
- Keep the cheese cold. Warm cheese is soft cheese, and soft cheese doesn’t cut cleanly with a cookie cutter. If your kitchen is warm, pop the cheese in the freezer for 10 minutes before cutting.
- Don’t overfill the board. It’s tempting to pile everything on, but a crowded board looks messy and is hard to eat from. Leave a little space between ingredients so each item stands out.
- Balance the flavors. If you’re using a sharp cheese, pair it with something sweet like grapes or apricots. If your salami is very salty, balance it with something mild like the crackers. Think of each bite as a little combination.
- Use the small bowls strategically. Olives and pumpkin seeds like to roll away. Containing them in small bowls keeps the board tidy and makes it easier for your guest to grab a few without chasing them across the table.
- Prep everything before you start arranging. I once tried to cut cheese and arrange grapes at the same time, and I ended up with cheese dust on my grapes. Do all your cutting first, then arrange. It’s faster and cleaner.
The biggest lesson I learned? The first time I made this board, I forgot to put out napkins. We ended up wiping our fingers on the couch cushions—not ideal. So now I always set out small napkins or paper towels next to the board. It’s a small detail, but it makes a big difference.
Variations & Adaptations
This board is endlessly customizable. Here are a few ways I’ve changed it up:
- Vegetarian version: Skip the salami and add more cheese or some marinated artichoke hearts. You can also add roasted red pepper strips for a pop of color and flavor.
- Sweet tooth version: Swap the salami for more chocolate and add some marshmallows or candy corn. It’s less savory, but it’s perfect for a dessert board.
- Gluten-free version: Use gluten-free crackers or rice cakes instead of regular crackers. Most cheeses, meats, and fruits are naturally gluten-free, so you just need to swap the crackers.
- Spicy version: Add some pepperoni or spicy salami, and include a small bowl of pickled jalapeños. The heat pairs surprisingly well with the cold cheese.
- Seasonal swap: In the fall, I add apple slices and candied pecans. In the summer, I use fresh berries and a drizzle of honey. The base formula stays the same, but the flavors change with the season.
My personal favorite variation is the sweet tooth version—I made it for a movie night with my sister, and we ate the whole thing before the opening credits finished. It’s dangerously good.
Serving & Storage Suggestions
This board is best served immediately, at room temperature. The cheese should be cool but not fridge-cold, and the crackers should still have their crunch. I like to place the board on the coffee table with two small plates and two napkins, so we can graze at our own pace.
If you’re serving it as part of a larger meal, it works great as an appetizer before a simple pasta or soup. It also pairs beautifully with a glass of red wine or a warm cup of apple cider. Honestly, it’s flexible enough to fit any cozy occasion.
Storage: If you have leftovers (which is rare in my house), separate the components and store them in airtight containers. The cheese will keep for up to a week in the fridge. The salami and crackers will stay fresh for a few days. Grapes and apricots should be eaten within a day or two. I don’t recommend storing the assembled board—the crackers get soft, and the grapes can make everything soggy.
Reheating: There’s no reheating needed, but if you want to refresh the crackers, you can pop them in a 300°F oven for 3-4 minutes to crisp them up again. Let them cool before adding them back to the board.
One thing I’ve noticed: the flavors actually get better after about 30 minutes at room temperature. The cheese softens slightly, and the salami releases a bit of its oil, which mingles with the fruit. It’s a happy accident that makes the board taste even more cohesive.
Nutritional Information & Benefits
This board is meant to be shared, so the nutritional values are per serving (half of the board). Keep in mind that these are estimates and will vary based on the specific brands and quantities you use.
- Calories: Approximately 450-550 per serving
- Protein: 18-22 grams
- Fat: 28-35 grams
- Carbohydrates: 30-40 grams
- Fiber: 4-6 grams
- Sugar: 15-20 grams
Health benefits: Cheese is a good source of calcium and protein, which support bone health and muscle repair. Dark chocolate contains antioxidants called flavonoids, which are good for heart health. Grapes and apricots provide vitamins A and C, plus fiber for digestion. Pumpkin seeds are rich in magnesium and zinc, which support immune function and sleep quality.
Dietary considerations: This recipe can be made gluten-free by swapping the crackers. It’s naturally low in added sugar (the sweetness comes from fruit and chocolate). If you’re watching your sodium, opt for low-sodium salami and unsalted pumpkin seeds. The main allergens are dairy (cheese) and gluten (crackers), so adjust accordingly for your needs.
I love that this board feels indulgent but actually has some nutritional merit. It’s the kind of snack that satisfies a craving without making you feel heavy afterward.
Conclusion
This cozy mini Halloween charcuterie board for two is more than just a snack—it’s a little ritual. It’s the kind of thing that turns an ordinary evening into something special, without requiring a lot of effort or fancy ingredients. Whether you’re celebrating Halloween, having a quiet date night, or just need a moment of cozy indulgence, this board delivers.
I hope you’ll make it your own. Swap in your favorite cheeses, add your go-to snacks, and don’t be afraid to get creative with the shapes. The bat-shaped cheese is cute, but a ghost-shaped cracker or a spider-web design with pretzel sticks works just as well. The point is to have fun with it and share it with someone you care about.
If you make this board, I’d love to hear about it. Leave a comment below and tell me what spooky snacks you added, or share a photo of your creation. And if you’re looking for more cozy recipes, check out my cozy fall soup recipes or this easy pumpkin dessert for another comforting treat. Happy snacking, and happy Halloween!
Frequently Asked Questions
Can I make this board ahead of time?
Yes, you can prep the ingredients a few hours ahead. Cut the cheese, fold the salami, and wash the fruit, then store everything separately in the fridge. Assemble the board just before serving to keep the crackers crunchy and the cheese fresh.
What if I don’t have a bat-shaped cookie cutter?
No problem! You can use any small Halloween-themed cutter, like a pumpkin or ghost. If you don’t have any cookie cutters, just cut the cheese into small cubes or triangles. It will still taste great—it just won’t be as spooky.
Can I use different types of cheese?
Absolutely. Gouda, brie, or goat cheese would all work well. Just make sure the cheese is firm enough to hold its shape if you’re using a cookie cutter. Softer cheeses like brie are better left in wedges.
How do I make the salami roses?
Take a salami slice and fold it in half, then in half again. Place it on the board with the folded edge facing up, and gently press the bottom to create a small rose shape. It’s easier than it sounds, and it looks fancy with minimal effort.
Can I double this recipe for a party?
Yes, just double or triple the ingredients and use a larger board or platter. The same principles apply—balance the flavors, use small bowls for loose items, and don’t overcrowd the board. It works great for small gatherings.
Pin This Recipe!
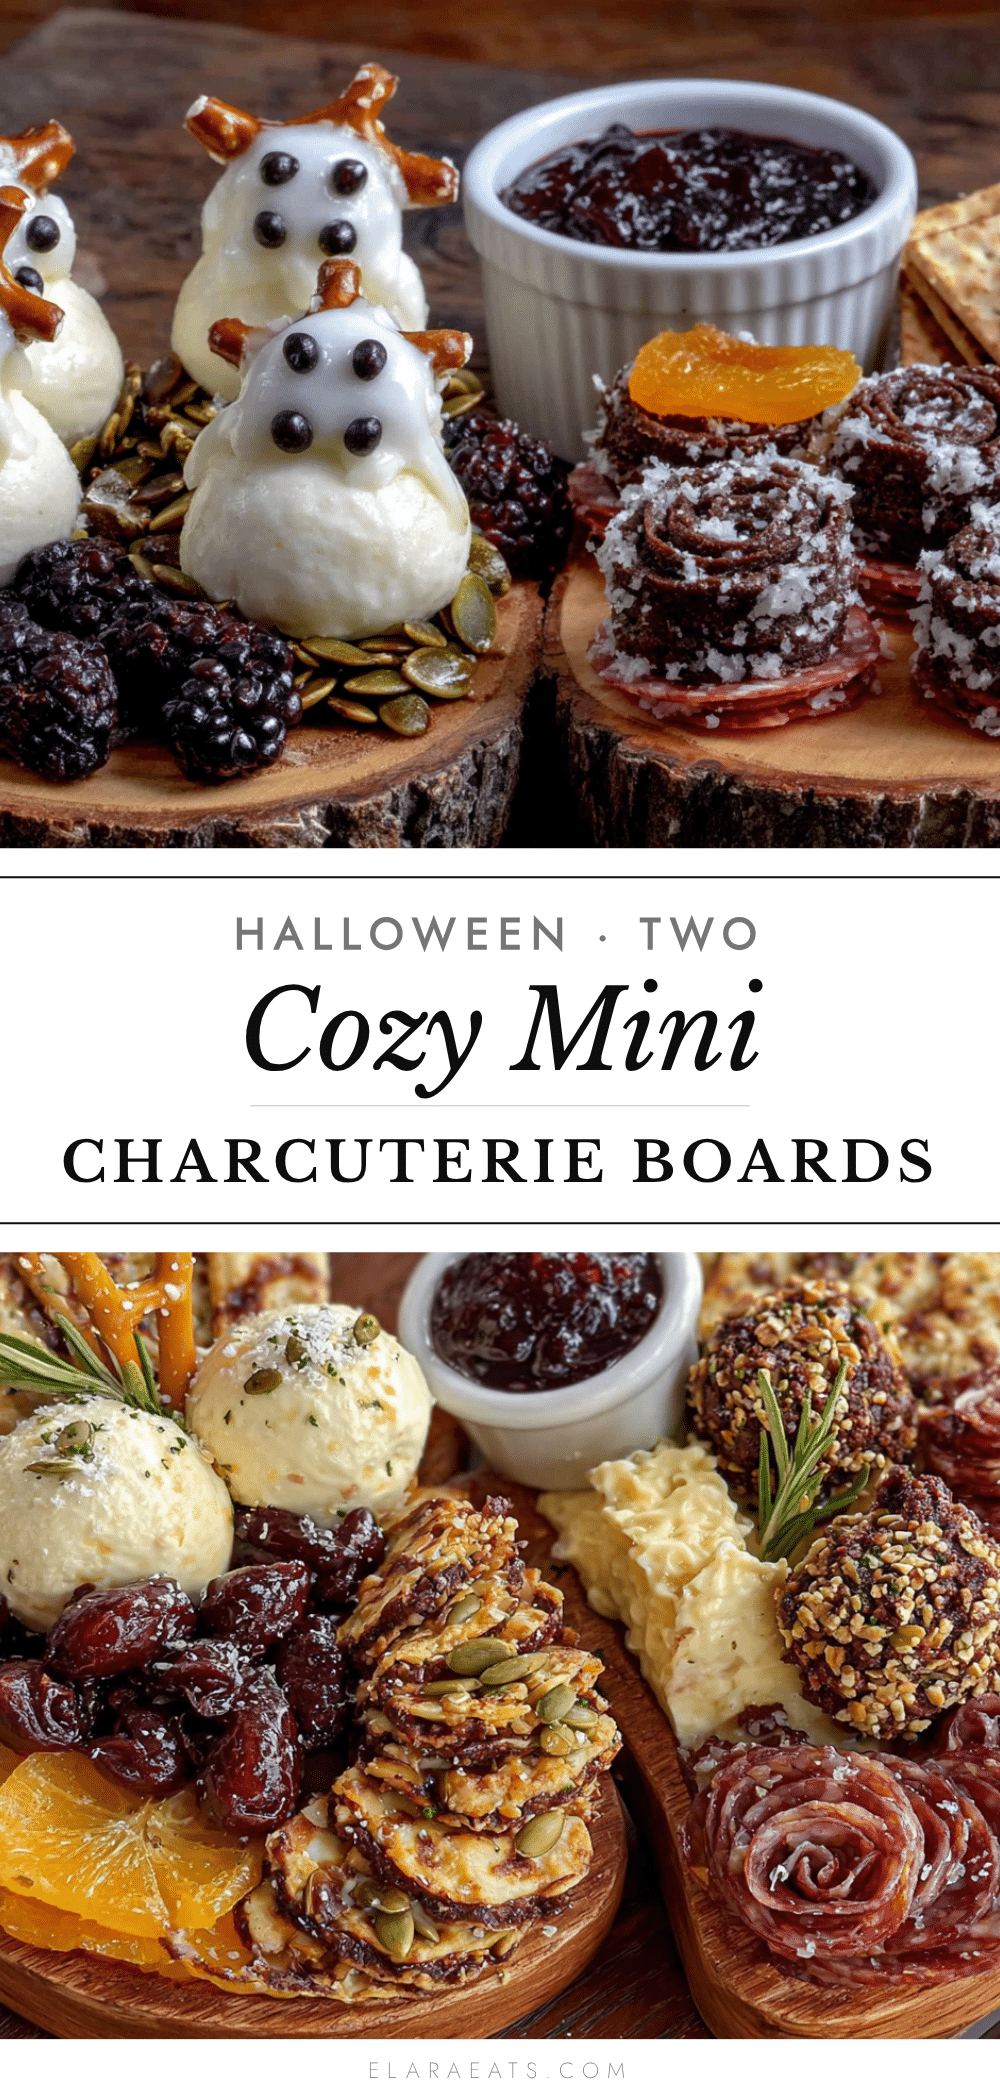
Cozy Mini Halloween Charcuterie Boards for Two
A simple, no-cook Halloween snack board for two, featuring bat-shaped cheddar, salami roses, and a mix of sweet and savory treats. Perfect for a cozy night in.
- Prep Time: 15 minutes
- Cook Time: 0 minutes
- Total Time: 15 minutes
- Yield: 2 servings
- Category: Appetizer
- Cuisine: American
Ingredients
- Sharp cheddar cheese block (about 4 ounces)
- Salami slices (about 4 ounces)
- Dark chocolate pieces (about 2 ounces)
- Pretzel sticks (a handful)
- Red grapes (a small bunch)
- Pumpkin seeds (a small handful)
- Dried apricots (about 4-5 pieces)
- Halloween-themed crackers (about 8-10 pieces)
- Olives (a small handful)
- Fresh rosemary sprigs (optional, for decoration)
Instructions
- Prep the cheese (3 minutes): Take your cold block of sharp cheddar and cut it into slices about ¼-inch thick. Then, press the bat-shaped cookie cutter into each slice to create little bat shapes. If the cheese starts to get warm and sticky, pop it in the fridge for a few minutes. You should end up with about 8-10 bat shapes. Save the cheese scraps for snacking later.
- Fold the salami (2 minutes): Take each salami slice and fold it in half, then in half again, so you get a little quarter-circle shape. Arrange them in a small cluster on the board so they look like tiny roses. If you prefer, you can leave them flat.
- Prepare the fruit (2 minutes): Rinse the grapes and pat them dry. Cut the dried apricots in half if they’re large. Break the dark chocolate into irregular shards.
- Set up the small bowls (1 minute): Place your small bowls or ramekins on the board. Fill one with olives, one with pumpkin seeds, and one with any loose items you don’t want rolling around.
- Arrange the board (5 minutes): Start by placing the bowls on the board. Then, arrange the cheese bat shapes in a small cluster. Add the salami roses nearby. Scatter the pretzel sticks, crackers, grapes, apricots, and chocolate shards around the board, filling in any empty spaces. The goal is to make it look abundant but not crowded.
- Add the finishing touches (1 minute): Tuck a few fresh rosemary sprigs between the ingredients for a pop of green. Sprinkle the pumpkin seeds over the board for texture.
- Serve immediately: This board is best enjoyed right away, while the cheese is still cold and the crackers are still crunchy. Place it in the center of the table or coffee table and let you and your guest dig in.
Notes
Keep the cheese cold for clean cuts. Don’t overfill the board; leave space between ingredients. Prep all ingredients before arranging. Set out napkins for easy cleanup.
Nutrition
- Serving Size: Half of the board
- Calories: 450550
- Sugar: 1520
- Fat: 2835
- Carbohydrates: 3040
- Fiber: 46
- Protein: 1822
Keywords: Halloween charcuterie board, mini charcuterie board, snack board for two, Halloween snacks, easy appetizer, no-cook recipe


