Love this? Save it for later!
Share the inspiration with your friends
My neighbor Jen wasn’t making a big deal of it. I’d stopped by to grab a book she was lending me, and the smell hit me before I even got to her screen door. It was that kind of savory, cheesy, home-cooked smell that makes your stomach do a little flip. She was standing at her stove, wooden spoon in one hand, phone wedged between her ear and shoulder, stirring something that looked like pure comfort in a single pan. She waved me in like it was nothing, pointed at the pot, and mouthed, “Leftovers, you want some?”
Honestly, I was a little offended at first. This smelled like a Sunday dinner that took hours. But no, she just shrugged and said it was her “desperate Tuesday night thing.” She called it her cheesy beef and rice skillet. I stood there eating a bowlful over her kitchen island while she finished her call, and I think I may have made a weird noise at one point. It was that good. And she was so nonchalant about it, like she hadn’t just changed my entire weeknight dinner game.
I’ve been making it ever since, and let me tell you, it’s become my own desperate Tuesday night thing. Maybe you’ve been there—staring into the fridge at 5:30 PM with no plan and a hungry family. This is the recipe that saves you every single time. It’s cheesy, it’s beefy, it’s got rice, and it all comes together in one skillet in about twenty minutes. No fancy ingredients, no complicated steps. Just honest, good food that makes everyone at the table happy.
Why You’ll Love This Recipe
I’ve tested this cheesy beef and rice skillet more times than I can count, tweaking the cheese blend, playing with the rice-to-beef ratio, and even trying it with different kinds of ground meat. What I landed on is the version that works every single time, and here’s why it’s a keeper.
- Quick & Easy: From start to finish, you’re looking at about 20 minutes. That’s faster than takeout. Seriously, by the time you’d be scrolling through delivery apps, this dinner is on the table.
- Simple Ingredients: You probably have most of this in your pantry right now. Ground beef, rice, cheese, a few seasonings, and some broth. No weird specialty items that you’ll use once and forget about.
- Perfect for Busy Weeknights: This is the definition of a weeknight hero. It’s the meal you make when you have zero energy but still want something that feels like a real dinner.
- Crowd-Pleaser: Kids love it. Adults love it. Even my picky eater friend who “doesn’t do casseroles” asked for the recipe. It’s just universally good.
- Unbelievably Delicious: The cheese gets all melty and stretches when you scoop it up. The beef is seasoned just right. The rice soaks up all that savory goodness. It’s comfort food that actually delivers.
What makes this version different from the rest? It’s the technique. Most recipes have you cook the rice separately, but this one cooks the rice right in the skillet with the beef and broth. That means the rice absorbs all those beefy, savory flavors instead of just being a bland side. It’s a small change that makes a huge difference. And the cheese? I use a blend of sharp cheddar and Monterey Jack because the sharpness cuts through the richness of the beef, while the Jack gives you that perfect melt.
This isn’t just another weeknight dinner. It’s the kind that makes you close your eyes after the first bite. It’s comfort food reimagined—simpler, faster, but with the same soul-soothing satisfaction that makes you feel like everything’s going to be okay.
What Ingredients You Will Need
This recipe uses simple, wholesome ingredients to deliver bold flavor and satisfying texture without the fuss. Most of these are pantry staples you already have, which is exactly what makes this cheesy beef and rice skillet so reliable.
For the Skillet Base
- 1 pound ground beef (80/20 works best for flavor, but lean works too)
- 1 tablespoon olive oil (just a little to get things going)
- 1 medium yellow onion, diced (about 1 cup)
- 3 cloves garlic, minced (fresh is best, but jarred works in a pinch)
- 1 cup long-grain white rice (uncooked, rinsed briefly)
- 2 cups beef broth (low-sodium so you can control the salt)
- 1 can (14.5 oz) diced tomatoes, undrained (fire-roasted adds a nice touch)
- 1 teaspoon chili powder (adds warmth, not heat)
- 1/2 teaspoon smoked paprika (for that subtle smoky depth)
- 1/2 teaspoon salt (plus more to taste)
- 1/4 teaspoon black pepper
For the Cheesy Finish
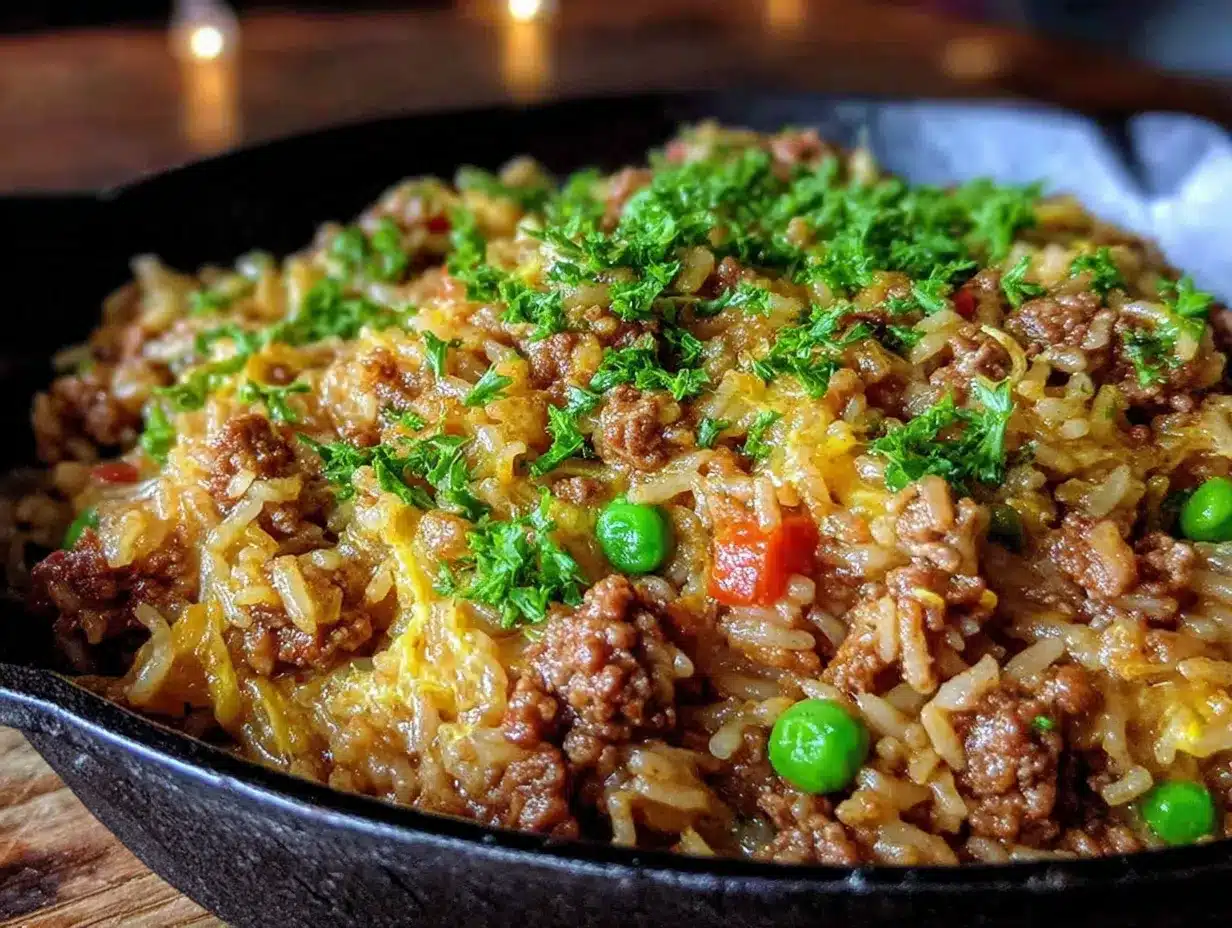
- 1 cup shredded sharp cheddar cheese (I prefer Tillamook or Cabot for flavor)
- 1 cup shredded Monterey Jack cheese (use a block and shred it yourself for the best melt)
- Optional garnish: fresh parsley or green onions, chopped
A few notes on ingredient choices. I’ve tried this with ground turkey, and it works, but the beef really brings the richness here. If you want to go leaner, add a drizzle of olive oil to compensate for the lack of fat. For the rice, stick with long-grain white rice—brown rice takes too long to cook and will throw off the timing. And please, shred your own cheese. The pre-shredded stuff has anti-caking agents that prevent it from melting smoothly. Trust me on this one, I learned the hard way when I ended up with a grainy, clumpy mess.
If you’re out of beef broth, chicken broth works fine. You’ll lose a little depth, but it’s still delicious. And if you want a little heat, toss in a pinch of cayenne or a diced jalapeño with the onions.
Equipment Needed
One of the best things about this cheesy beef and rice skillet is that it doesn’t require a lot of fancy equipment. Here’s what you’ll need:
- Large skillet or Dutch oven (12-inch with a lid is ideal. I use my trusty cast iron skillet, but a non-stick works great too)
- Wooden spoon or spatula (for breaking up the ground beef)
- Chef’s knife (for dicing the onion and mincing garlic)
- Cutting board
- Measuring cups and spoons
- Box grater (if you’re shredding your own cheese, which you should)
- Lid (your skillet needs a lid for the rice to cook properly)
If you don’t have a lid that fits your skillet, a sheet of aluminum foil crimped tightly around the edges works perfectly. I’ve done it more times than I’d like to admit. Also, a splatter screen can be helpful when browning the beef, but it’s not essential. Just be prepared for a little mess.
Preparation Method
Let me walk you through this step by step. I’ve made this cheesy beef and rice skillet so many times that I could do it in my sleep, but I’ll try to explain it like you’re standing right next to me in the kitchen.
- Start with the aromatics. Heat the olive oil in your large skillet over medium-high heat. Add the diced onion and cook for about 3 minutes, stirring occasionally, until it’s soft and translucent. You’ll know it’s ready when it smells sweet and the edges are just starting to brown.
- Brown the beef. Add the ground beef to the skillet with the onions. Break it up with your wooden spoon into small crumbles. Let it cook undisturbed for about 2 minutes to get a nice sear, then start stirring. Cook for another 4-5 minutes until the beef is fully browned and no longer pink. If there’s a lot of excess fat, carefully spoon most of it out, leaving about a tablespoon for flavor.
- Add the garlic and seasonings. Stir in the minced garlic, chili powder, smoked paprika, salt, and pepper. Cook for about 30 seconds until the garlic is fragrant. Don’t skip this step—raw garlic is harsh, but this quick cook mellows it out beautifully.
- Add the rice and liquids. Pour in the rinsed rice and stir it around for about a minute to toast it slightly. This helps the rice hold its shape better during cooking. Then add the beef broth and the undrained diced tomatoes. Stir everything together, scraping up any browned bits from the bottom of the pan. That’s where so much flavor lives.
- Bring to a boil, then simmer. Turn the heat up to high and bring the mixture to a rolling boil. Once it’s boiling, reduce the heat to low, cover the skillet with your lid, and let it simmer gently for about 15 minutes. Don’t peek! Every time you lift that lid, steam escapes and your rice might not cook evenly.
- Check the rice. After 15 minutes, remove the lid carefully. The rice should be tender and most of the liquid should be absorbed. If the rice is still a little firm, add another 2 tablespoons of broth or water, cover, and cook for 2-3 more minutes. If it looks dry but the rice is still hard, add a splash more liquid.
- Add the cheese. Turn off the heat. Sprinkle the shredded cheddar and Monterey Jack evenly over the top of the skillet. Don’t stir it in yet—just let it sit on top. Cover the skillet again for about 2 minutes. The residual heat will melt the cheese into a glorious, gooey blanket.
- Finish and serve. Remove the lid and give everything a gentle stir to incorporate the melted cheese. The cheese should be stretchy and smooth. Taste and adjust salt or pepper if needed. Garnish with fresh parsley or green onions if you’re feeling fancy, but honestly, it’s perfect as is.
A quick note: If you like a little crunch on top, you can pop the skillet under the broiler for 1-2 minutes after adding the cheese. Just make sure your skillet is oven-safe. I’ve done this with my cast iron, and it creates a beautiful golden-brown crust that’s absolutely irresistible.
Cooking Tips & Techniques
Over the many times I’ve made this cheesy beef and rice skillet, I’ve learned a few things the hard way. Let me save you some trouble.
Don’t rush the browning. I know we’re going for quick here, but letting the beef sit undisturbed for those first couple of minutes is crucial. If you stir it constantly, it stews instead of sears. That browning is where the deep, savory flavor comes from. It’s called the Maillard reaction, and it’s basically magic for your taste buds.
Watch your heat during the simmer. I once got distracted and left the heat a little too high. The liquid boiled away too fast, and the rice was still crunchy while the bottom started burning. Low and slow is the way to go. If you hear more than a gentle simmer, turn it down.
Rinse your rice. This is one of those steps that seems optional but really isn’t. Rinsing the rice removes excess starch that can make your skillet gummy. Just put it in a fine-mesh strainer and run cold water over it for about 30 seconds until the water runs clear-ish.
Shred your own cheese. I mentioned this before, but it bears repeating. The pre-shredded bags have cellulose (a fancy word for wood pulp) to keep the shreds from clumping. That same stuff prevents the cheese from melting into a smooth, cohesive layer. You’ll get a better melt, better flavor, and better texture if you shred it yourself. It takes two minutes.
Let it rest before serving. After you add the cheese and cover it, give it those full 2 minutes. I know you’re hungry, but this short rest allows the cheese to fully melt and the flavors to meld together. It also lets the rice absorb any last bits of liquid, so you don’t end up with a soupy bottom.
Variations & Adaptations
This cheesy beef and rice skillet is incredibly forgiving. I’ve played around with it quite a bit, and here are some variations that turned out great.
Tex-Mex Version
Add a can of drained black beans and a cup of frozen corn along with the tomatoes. Swap the cheddar for a Mexican cheese blend, and top with fresh cilantro and a squeeze of lime. It’s like a deconstructed burrito bowl in a skillet.
Low-Carb Adaptation
Swap the rice for cauliflower rice. You’ll need to adjust the liquid—use only 1 cup of broth instead of 2, and cook for about 8-10 minutes instead of 15. The cauliflower won’t absorb liquid the same way rice does, so keep an eye on it. It’s not quite the same, but it scratches the itch when you’re watching your carbs.
Spicy Kick
Add a diced jalapeño with the onions, use pepper Jack cheese instead of Monterey Jack, and throw in a teaspoon of hot sauce along with the broth. My husband loves this version, and I have to admit, it’s pretty addictive.
Vegetarian Option
Skip the beef and use a plant-based ground meat substitute or two cans of drained black beans. Use vegetable broth instead of beef broth. The texture is different, but the flavor is still fantastic. I’ve served this to friends who didn’t even notice the meat was missing.
Cheesy Beef and Rice Soup
Add an extra cup of broth and a can of cream of mushroom soup for a soupier version. It’s not quite a skillet anymore, but it’s incredible on a cold night with some crusty bread for dipping. I accidentally discovered this when I added too much broth one time, and it was a happy accident.
Serving & Storage Suggestions
This cheesy beef and rice skillet is best served hot, right after the cheese has melted. Scoop it into bowls and let everyone add their own toppings if they want. A dollop of sour cream, some sliced green onions, or a dash of hot sauce are all great options.
For sides, a simple green salad with a tangy vinaigrette cuts through the richness perfectly. Or serve it with some warm tortillas and a side of refried beans for a full Tex-Mex meal. I’ve also been known to just eat it straight from the skillet with a spoon, and I’m not ashamed.
Storage: Let any leftovers cool completely, then transfer to an airtight container. It will keep in the refrigerator for up to 4 days. The flavors actually get better as they meld together overnight.
Reheating: The microwave works fine for individual portions. Add a splash of water or broth before reheating to keep the rice from drying out. For larger portions, reheat in a covered skillet over medium-low heat with a tablespoon of water. Stir occasionally until heated through. The cheese might not be as stretchy the second time around, but it’s still delicious.
Freezing: This freezes surprisingly well. Portion it into freezer-safe containers and freeze for up to 3 months. Thaw overnight in the refrigerator and reheat as directed. I like to freeze individual portions for those days when I need a quick lunch.
One thing to note: the rice will continue to absorb liquid as it sits, so leftovers will be a bit firmer than the original. That’s normal. Just add a little extra broth when reheating to bring back some moisture.
Nutritional Information & Benefits
Here’s the approximate nutritional breakdown for one serving of this cheesy beef and rice skillet (based on 6 servings):
| Nutrient | Amount per Serving |
|---|---|
| Calories | 485 |
| Protein | 28g |
| Fat | 22g |
| Saturated Fat | 10g |
| Carbohydrates | 42g |
| Fiber | 2g |
| Sugar | 4g |
| Sodium | 680mg |
This dish offers a solid balance of protein from the beef and cheese, and carbohydrates from the rice for sustained energy. The tomatoes provide a good dose of vitamin C and lycopene, an antioxidant linked to heart health. The onions and garlic are great for immune support, and the cheese adds calcium for bone health.
If you’re watching your sodium, use low-sodium broth and go easy on the added salt. You can also swap the cheddar for a reduced-fat version to cut some of the saturated fat. For a lighter meal, serve it with a big side of steamed broccoli or a green salad.
This isn’t a health food, but it’s a balanced meal that fits into a sensible eating plan. It’s real food made from real ingredients, and that’s something to feel good about.
Conclusion
This cheesy beef and rice skillet has become a staple in my kitchen for good reason. It’s the recipe I turn to when I’m tired, when I’m busy, and when I just need something that works. It’s forgiving enough for beginners but satisfying enough for experienced cooks who just want a good meal without the fuss.
I love that I can make it with ingredients I almost always have on hand. I love that it comes together in one pan. But mostly, I love that every single time I make it, someone at the table sighs with contentment after that first bite. That’s the kind of cooking that matters.
Go ahead and make it your own. Add your favorite vegetables, switch up the cheese, dial up the spice, or keep it simple. However you make it, I hope it becomes your own desperate Tuesday night thing too.
I’d love to hear how it turns out for you! Drop a comment below and let me know what variations you tried. Did you add black beans? Swap the cheese? Make it extra spicy? Share your creation—I’m always looking for new ideas to try myself. Happy cooking!
Frequently Asked Questions
Can I use ground turkey instead of beef?
Absolutely. Ground turkey works well, though it’s leaner so you might want to add a tablespoon of olive oil for moisture. The flavor will be slightly milder, so you can bump up the seasonings a bit.
Can I make this in an Instant Pot?
Yes, you can. Use the sauté function to brown the beef and onions, then add the remaining ingredients except the cheese. Pressure cook on high for 5 minutes, then quick release. Stir in the cheese at the end.
What if my rice is still crunchy after 15 minutes?
Add 2-3 tablespoons of broth or water, cover, and cook for another 2-3 minutes on low heat. Different rice brands and stovetops can vary, so don’t worry if you need a little extra time.
Can I use brown rice instead of white rice?
Brown rice requires a longer cooking time and more liquid. If you want to use it, increase the broth to 2 1/2 cups and cook for about 35-40 minutes. You’ll also need to add more liquid if it evaporates too quickly.
How do I prevent the cheese from becoming greasy?
Use block cheese and shred it yourself. Pre-shredded cheese has anti-caking agents that can cause it to separate and become greasy. Also, don’t overheat the cheese—just let it melt gently with the residual heat after turning off the burner.
Pin This Recipe!
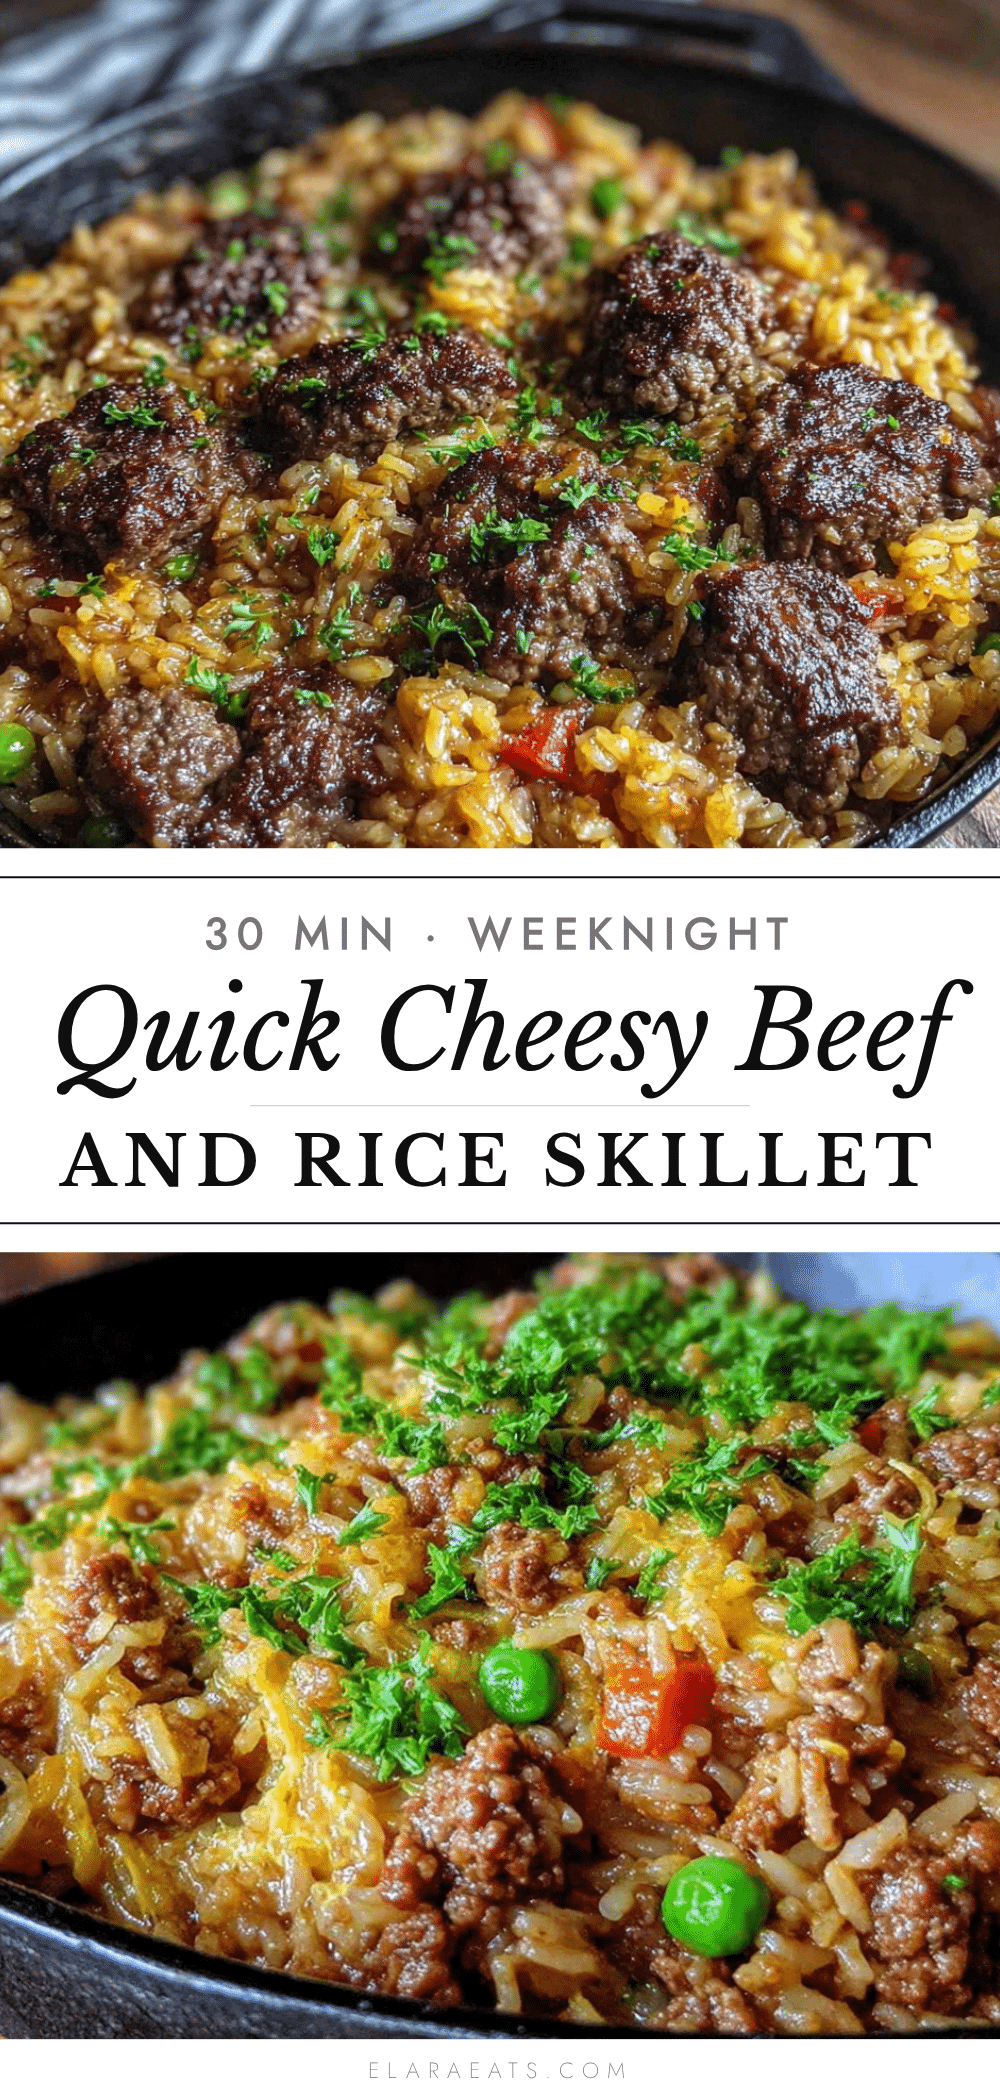
Quick Cheesy Beef and Rice Skillet: Easy 20-Minute Dinner

This cheesy beef and rice skillet is a quick, one-pan dinner that comes together in about 20 minutes. It’s packed with savory ground beef, tender rice, and a blend of melted cheeses, making it a perfect weeknight meal that the whole family will love.
- Prep Time: 5 minutes
- Cook Time: 15 minutes
- Total Time: 20 minutes
- Yield: 6 servings 1x
- Category: Main Course
- Cuisine: American
Ingredients
- 1 pound ground beef (80/20 works best)
- 1 tablespoon olive oil
- 1 medium yellow onion, diced (about 1 cup)
- 3 cloves garlic, minced
- 1 cup long-grain white rice, uncooked and rinsed
- 2 cups low-sodium beef broth
- 1 can (14.5 oz) diced tomatoes, undrained (fire-roasted preferred)
- 1 teaspoon chili powder
- 1/2 teaspoon smoked paprika
- 1/2 teaspoon salt
- 1/4 teaspoon black pepper
- 1 cup shredded sharp cheddar cheese
- 1 cup shredded Monterey Jack cheese
- Optional garnish: fresh parsley or green onions, chopped
Instructions
- Heat olive oil in a large skillet over medium-high heat. Add diced onion and cook for about 3 minutes until soft and translucent.
- Add ground beef to the skillet. Break it up with a wooden spoon and let it cook undisturbed for 2 minutes to sear, then stir and cook for another 4-5 minutes until fully browned. Spoon out excess fat, leaving about 1 tablespoon.
- Stir in minced garlic, chili powder, smoked paprika, salt, and pepper. Cook for 30 seconds until fragrant.
- Add rinsed rice and stir for about 1 minute to toast slightly. Pour in beef broth and undrained diced tomatoes. Stir, scraping up any browned bits from the bottom.
- Bring to a rolling boil over high heat, then reduce heat to low, cover, and simmer gently for 15 minutes. Do not lift the lid.
- After 15 minutes, check the rice. If still firm, add 2 tablespoons of broth or water, cover, and cook for 2-3 more minutes.
- Turn off the heat. Sprinkle shredded cheddar and Monterey Jack evenly over the top. Cover and let sit for 2 minutes until cheese is melted.
- Remove lid, gently stir to incorporate cheese. Garnish with parsley or green onions if desired. Serve hot.
Notes
For best results, shred your own cheese from a block to avoid anti-caking agents that prevent smooth melting. If you don’t have a lid, use aluminum foil crimped tightly around the skillet. For a crunchy top, broil the skillet for 1-2 minutes after adding cheese (ensure skillet is oven-safe). Leftovers can be stored in an airtight container in the refrigerator for up to 4 days or frozen for up to 3 months.
Nutrition
- Serving Size: 1 serving
- Calories: 485
- Sugar: 4
- Sodium: 680
- Fat: 22
- Saturated Fat: 10
- Carbohydrates: 42
- Fiber: 2
- Protein: 28
Keywords: cheesy beef and rice skillet, one-pan dinner, quick weeknight meal, ground beef recipe, easy dinner


