Love this? Save it for later!
Share the inspiration with your friends
It was 10:47 PM on a random Wednesday in mid-October, and I had a bag of jumbo eggs staring at me from the counter. I wasn’t planning to make anything spooky that night. Honestly, I was supposed to be meal-prepping for the week like a responsible adult. But my phone buzzed with a text from my sister—she was hosting a last-minute Halloween party for her daughter’s preschool class the next morning and needed “something cute but not too creepy.” I said I’d help, hung up, and looked at those eggs again. I didn’t have black food coloring or those fancy decorating gels you see on Instagram. What I did have was a jar of pitted black olives from the back of the pantry and a weird, tired idea that arrived fully formed: spider legs.
Maybe you’ve been there—staring down a holiday that sneaks up on you, needing a recipe that looks like you tried way harder than you actually did. That’s exactly where this recipe comes in. These Easy Spider Deviled Eggs for Halloween are the kind of thing that makes people say “Wow, you made those?” while you smile mysteriously and say nothing about the 15 minutes it actually took. The black olive spiders perched on top of creamy, classic deviled eggs are equal parts cute and creepy—perfect for little kids who think spiders are cool and adults who just want a solid deviled egg without the fuss.
The odd hours mattered that night. Something about the late night loosened the usual rules. I stopped overthinking and just started boiling. By midnight, I had a platter of the most ridiculous, wonderful, spider-covered eggs sitting in my fridge, and I knew I’d stumbled onto something I’d make every single October from then on. Let me tell you, waking up the next morning and seeing those little olive arachnids staring back at me from the fridge made me laugh out loud. And that’s exactly the energy you want for Halloween.
Why You’ll Love This Recipe
These Easy Spider Deviled Eggs for Halloween are the ultimate no-stress party trick. I’ve tested this recipe through three different Halloween parties, two preschool events, and one very skeptical husband who now requests them every year. Here is why they work so well:
- Quick & Easy: From start to finish, you’re looking at about 30 minutes of active time. The eggs boil while you prep the olives, and assembly takes maybe 5 minutes. Perfect for those “I forgot it’s Halloween week” moments—we’ve all been there.
- Simple Ingredients: You need eggs, mayo, mustard, and a jar of whole black olives. That’s it. No special trips to a fancy grocery store, no weird ingredients you’ll never use again. The olives do double duty as both the spider bodies and the legs.
- Perfect for Halloween Parties: Whether it’s a classroom party, a work potluck, or a spooky movie night at home, these eggs fit right in. They’re not too gory for little kids but still festive enough for adults who appreciate a good pun.
- Crowd-Pleaser: Deviled eggs are already a universal favorite—adding a silly spider on top just makes people smile. I’ve watched kids who swear they hate olives eat these because the spider is “too funny to pass up.”
- Unbelievably Delicious: Here is the thing—they taste exactly like perfect classic deviled eggs. The olive adds a salty, briny pop that actually works beautifully with the creamy filling. It’s not just a gimmick; it’s genuinely good.
What makes this recipe different from the hundreds of other spider deviled eggs out there? It’s the technique for cutting the olives. I spent way too long figuring out the fastest way to slice those little legs without losing my mind. I’ll share that trick in the method section, and trust me, it’s a game-changer. This isn’t just another version—it’s the one that makes you wonder why you ever struggled with olive spiders before.
What Ingredients You Will Need
This recipe uses simple, everyday ingredients to create something that looks way more complicated than it actually is. You probably already have most of these in your kitchen right now. Here is what you will need:
For the Deviled Eggs
- 12 large eggs (room temperature works best for even boiling, but cold is fine if you’re in a rush)
- 1/3 cup mayonnaise (I prefer Duke’s for its tangy flavor, but Hellmann’s works great too)
- 1 tablespoon yellow mustard (or Dijon if you want a sharper kick)
- 1 teaspoon white vinegar (adds brightness and helps the filling hold together)
- 1/4 teaspoon salt (plus more for the boiling water)
- 1/8 teaspoon black pepper (freshly ground if you have it)
- 1/2 teaspoon paprika (for garnish, plus extra for that classic deviled egg look)
For the Spider Decorations
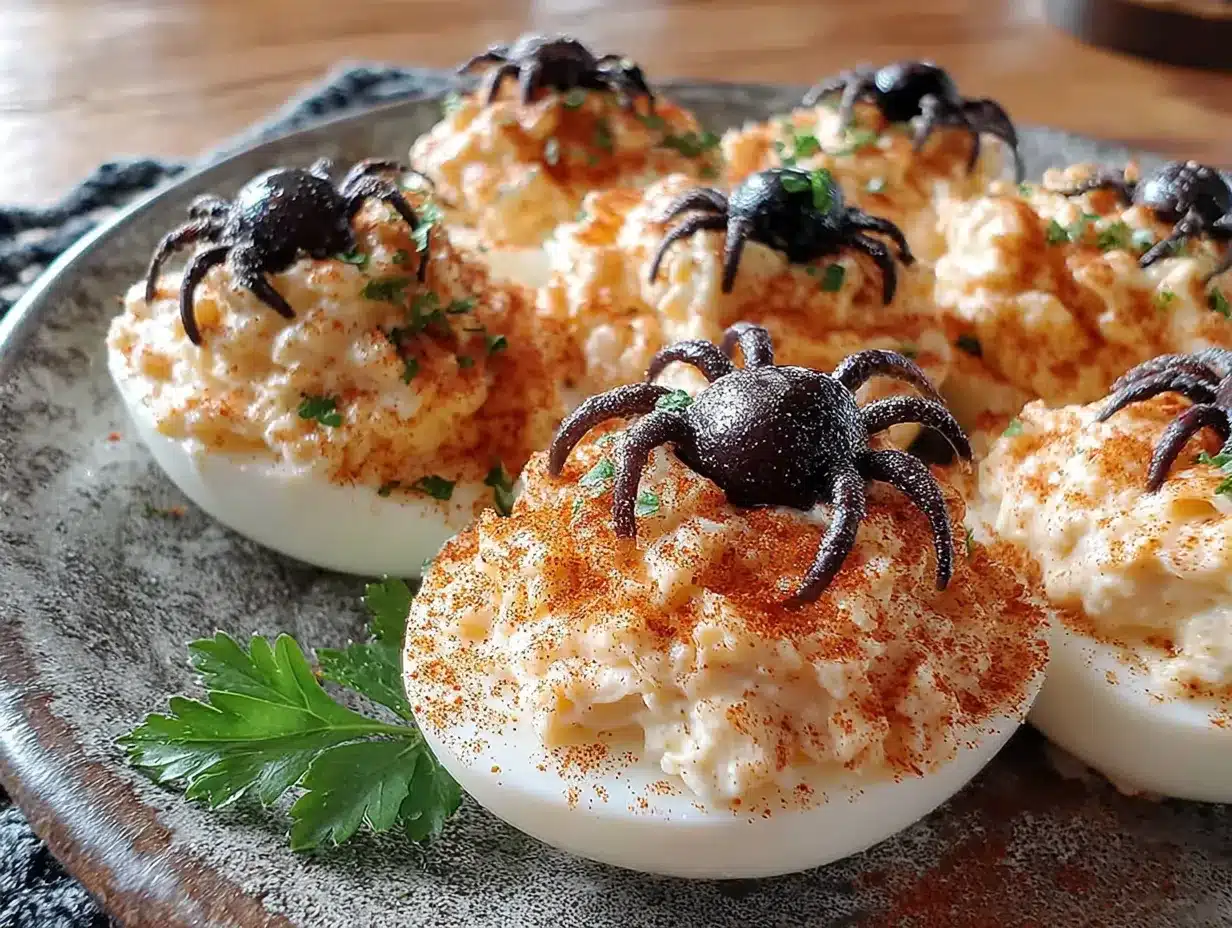
- 1 can (6 ounces) whole pitted black olives (look for large, firm olives—the jumbo ones make better spiders)
- 1/4 cup cream cheese, softened (optional, for “gluing” the spider eyes—but you can also just press them on)
Ingredient Tips: When you’re buying olives for this recipe, avoid the sliced or pre-chopped varieties. You need whole olives so you can cut them into the spider shapes. I’ve tried using kalamata olives for a more dramatic look, and while they taste great, they’re softer and harder to cut cleanly. Stick with basic canned black olives—they’re firm, cheap, and the color contrast against the yellow egg is perfect for the Halloween vibe.
If you want to make these dairy-free, skip the cream cheese for the eyes and just press the olive pieces directly onto the egg. They’ll stick fine once the filling is slightly chilled. For a healthier twist, you can swap half the mayonnaise for plain Greek yogurt. The filling will be a little tangier, but it still tastes delicious and holds up well.
Equipment Needed
You don’t need any fancy tools for these Easy Spider Deviled Eggs for Halloween, which is honestly my favorite part. Here is what you’ll need:
- Large pot (big enough to hold 12 eggs in a single layer without crowding)
- Medium mixing bowl (for the filling)
- Cutting board and sharp paring knife (a sharp knife makes all the difference for clean olive cuts)
- Slotted spoon (for lowering eggs into boiling water and fishing them out)
- Piping bag or zip-top bag (for filling the eggs neatly—a zip-top bag with the corner snipped off works perfectly)
- Small spoon (for scooping out the yolks)
- Serving platter (a dark-colored plate makes the spiders pop, but any platter works)
I tried using a melon baller once to scoop the yolks, and honestly, it was more trouble than it was worth. A regular teaspoon does the job just fine. If you don’t have a piping bag, don’t stress—a small zip-top bag with a tiny hole cut in the corner gives you way more control than trying to spoon the filling in. I learned that lesson after making a mess of my first batch.
Preparation Method
Let me walk you through this step by step. I’ve made these Easy Spider Deviled Eggs for Halloween more times than I can count, so I’ve got all the little tricks to share.
Step 1: Boil the Eggs
Place your 12 eggs in a large pot in a single layer. Cover them with cold water by about an inch. Add a generous pinch of salt—this helps the shells peel easier later. Bring the water to a rolling boil over high heat. Once it’s boiling hard, cover the pot, turn off the heat completely, and let it sit for exactly 12 minutes. Set a timer—I’ve forgotten before, and gray yolks are not the vibe you want for a pretty platter.
Step 2: Ice Bath
While the eggs are cooking, fill a large bowl with ice and cold water. When the timer goes off, use your slotted spoon to transfer the eggs immediately to the ice bath. Let them chill for at least 10 minutes. This stops the cooking process and makes the shells way easier to peel. I’ve skipped this step when I was in a hurry, and I regretted every stubborn piece of shell that stuck to the egg white.
Step 3: Peel and Halve the Eggs
Gently tap each egg on the counter to crack the shell all over, then peel under cold running water. The water helps slide the shell off cleanly. Pat the peeled eggs dry with a paper towel. Using your sharp knife, slice each egg in half lengthwise. Carefully pop the yolks into your mixing bowl and arrange the whites on your serving platter.
Step 4: Make the Filling
Add the mayonnaise, mustard, vinegar, salt, and pepper to the bowl with the yolks. Mash everything together with a fork until it’s completely smooth—no lumps allowed. Taste it and adjust the seasoning. I always add a tiny pinch more salt because eggs can handle it. If the filling seems too thick, add another teaspoon of mayo. Too thin? Pop it in the fridge for 10 minutes to firm up.
Step 5: Prepare the Olive Spiders
Here is the trick I promised. Drain your can of black olives and pat them dry on paper towels. You need two types of olive pieces for each spider:
- The Body: Slice about 12 olives in half crosswise (through the middle, not lengthwise). These round, domed halves will be the spider bodies. Set them aside.
- The Legs: Take the remaining olives and slice them lengthwise into thin strips. Each olive should give you 4 to 5 strips. You need 8 legs per spider, so plan accordingly. I usually cut about 24 olives total to have plenty of legs.
Don’t stress if your strips aren’t perfectly even—spiders have slightly wonky legs in real life anyway. It adds to the charm.
Step 6: Assemble the Spiders
Spoon your filling into your piping bag or zip-top bag and snip off a small corner. Pipe a generous swirl of filling into each egg white half. Don’t be shy—you want the filling to mound up a bit so the spider has something to sit on. Take one of your olive body halves and gently press it into the center of the filling. Now, arrange 8 olive leg strips around each body—4 on each side, sticking out at angles like spider legs. Press them gently into the filling so they stay put.
Step 7: Add the Eyes
For the eyes, take a few of the remaining olive leg strips and cut them into tiny dots. If you have cream cheese, dab a tiny bit on the back of each eye dot and stick it onto the front of the spider body. No cream cheese? Just press them on—the filling will hold them. Two tiny eyes per spider, and you’re done.
Step 8: Garnish and Chill
Sprinkle a light dusting of paprika over the entire platter. This gives the eggs that classic deviled egg look and adds a little color contrast against the black olives. Cover the platter loosely with plastic wrap and refrigerate for at least 30 minutes before serving. This helps everything set and makes the spiders more stable.
Cooking Tips & Techniques
I’ve made plenty of mistakes with these Easy Spider Deviled Eggs for Halloween so you don’t have to. Here are the things I wish someone had told me:
Don’t overboil the eggs. I know I said 12 minutes, but I mean it. If you leave them in the hot water too long, the yolks turn that unappetizing gray-green color. Set a timer and stick to it. If you’re at high altitude, you might need an extra minute—test one egg first.
Peel under running water. This is non-negotiable for pretty eggs. The water gets under the shell and helps it slide off without gouging the egg white. I’ve peeled hundreds of eggs, and this is the only method that consistently gives me smooth, blemish-free whites.
Make the filling ahead of time. You can boil and peel the eggs, make the filling, and cut the olives all a day in advance. Store the whites, filling, and olive pieces separately in the fridge. Assemble everything right before you serve. This is a lifesaver for party prep.
Keep the spiders stable. If your olive legs keep falling off, your filling might be too stiff. Add a tiny splash of vinegar or milk to loosen it up. The filling acts like glue for the olive pieces, so you want it creamy but not runny.
Use a dark serving platter. This is purely aesthetic, but it makes a huge difference. The black olives and yellow eggs pop beautifully against a dark background. I use a black slate board, and people always comment on how dramatic it looks.
Variations & Adaptations
These Easy Spider Deviled Eggs for Halloween are surprisingly flexible. Here are some ways to make them your own:
Spicy Spider Eggs: Add 1/2 teaspoon of sriracha or a pinch of cayenne pepper to the filling. The heat contrasts beautifully with the cool, creamy texture and the salty olive. I made these for a grown-up Halloween party, and they disappeared faster than the regular ones.
Avocado Deviled Spider Eggs: Replace half the mayonnaise with mashed ripe avocado. The filling turns a lovely pale green, which looks extra spooky against the black olives. Add a squeeze of lime juice to keep the avocado from browning. These are also dairy-free and a bit healthier.
Bacon Spider Eggs: Crumble crispy bacon over the top of the filling before adding the spider. The smoky, salty crunch is incredible with the creamy egg and briny olive. I call these “spiders in a blanket,” and they’re always the first to go.
Gluten-Free & Keto-Friendly: This recipe is naturally gluten-free and low-carb. The eggs and olives are perfect for keto diets. Just double-check your mayonnaise label—some brands add sugar or starch.
Mini Spider Eggs: Use quail eggs instead of chicken eggs for bite-sized spiders. You’ll need to adjust the boiling time to about 4 minutes. They look ridiculously cute and are perfect for fancy appetizer spreads.
Serving & Storage Suggestions
These Easy Spider Deviled Eggs for Halloween are best served chilled, straight from the fridge. The cold filling holds the spider legs in place better, and the contrast between the cool, creamy egg and the room-temperature olive is perfect.
Presentation Ideas: Arrange the eggs on a dark platter in a circular pattern, like a spider web. You can even pipe a thin line of black olive paste or balsamic glaze in a web pattern on the plate before adding the eggs. For extra drama, place a few whole olives around the edges as “spider eggs” waiting to hatch.
What to Serve With Them: These eggs pair beautifully with other Halloween appetizers. I love serving them alongside a bowl of creamy pumpkin soup, some crispy sweet potato fries, or a platter of roasted vegetables. For drinks, a crisp white wine or a dark stout beer complements the rich, savory flavors.
Storage Instructions: Store any leftover eggs in an airtight container in the refrigerator for up to 2 days. The olive legs might soften slightly, but they’ll still look presentable. Do not freeze deviled eggs—the texture of the filling becomes grainy and watery when thawed.
Reheating: You actually don’t want to reheat these. Serve them cold. If you’ve stored them, let them sit at room temperature for about 10 minutes before serving to take the chill off, but keep them cool.
Flavor Development: Honestly, these eggs taste even better the next day. The flavors meld together overnight, and the filling becomes more flavorful. Just add the olive spiders right before serving so they stay fresh and crisp.
Nutritional Information & Benefits
While these are a treat for Halloween, they actually have some solid nutritional points. Here’s the breakdown per serving (2 spider eggs):
- Calories: Approximately 180-200
- Protein: 12 grams
- Fat: 14 grams (mostly healthy fats from eggs and olive oil in the mayo)
- Carbohydrates: 2 grams
- Fiber: 0.5 grams
- Sugar: 1 gram
Health Benefits: Eggs are a fantastic source of high-quality protein, choline (great for brain health), and vitamin D. Black olives provide healthy monounsaturated fats and antioxidants. This recipe is naturally low in carbs and sugar, making it suitable for keto and low-carb diets. If you use avocado in the variation, you’ll add fiber and potassium.
Dietary Considerations: This recipe is naturally gluten-free and nut-free. For a dairy-free version, skip the cream cheese for the eyes. For a lower-fat option, use light mayonnaise or substitute half with Greek yogurt. Always check your mayonnaise label for hidden sugars if you’re strictly keto.
Potential Allergens: Eggs are the primary allergen here. Olives are generally safe, but some people with sensitivities to fermented foods might react. If you’re serving a crowd, label the platter clearly.
Frequently Asked Questions
Can I make these spider deviled eggs a day ahead?
Absolutely. I actually recommend it for parties. Boil the eggs, make the filling, and cut the olives up to 24 hours in advance. Store everything separately in the fridge. Assemble the eggs with the spider decorations about an hour before serving so the olives stay fresh and crisp.
How do I keep the olive legs from falling off?
The key is the filling consistency. If it’s too thick, the legs won’t stick. Make sure your filling is creamy and smooth. Press the legs gently but firmly into the filling, and chill the assembled eggs for at least 30 minutes. The cold filling acts like cement.
Can I use different olives for the spiders?
Yes, but stick with firm olives. Kalamata olives work but are softer and harder to cut cleanly. Green olives stuffed with pimentos are too small and the red pimento looks odd. Jumbo black olives are your best bet for big, dramatic spiders.
How do I get perfectly peeled hard-boiled eggs?
Use older eggs—they peel easier than fresh ones. Add salt and a splash of vinegar to the boiling water. Shock them in an ice bath immediately after cooking. Peel under cold running water. If you’re still struggling, try steaming the eggs instead of boiling—it works like magic.
Can I make these spider deviled eggs without mayonnaise?
Yes! Substitute the mayonnaise with mashed avocado, plain Greek yogurt, or even hummus for a different flavor profile. The texture will be slightly different, but they’ll still hold together and taste great. I’ve made an avocado version that was a huge hit.
Conclusion
These Easy Spider Deviled Eggs for Halloween have become my go-to party trick, and I think they’ll become yours too. They’re the perfect blend of silly and delicious—the kind of recipe that makes people smile before they even take a bite. And then they take a bite and realize it’s actually a really good deviled egg, which is the best kind of surprise.
I love that this recipe doesn’t take itself too seriously. It’s Halloween, after all. We’re here to have fun, eat good food, and maybe scare each other a little bit. These spider eggs check all those boxes without requiring a culinary degree or a trip to a specialty store. You can make them with your kids, your friends, or just for yourself on a quiet October night when the craving for something spooky hits.
So go ahead—grab those eggs and that jar of olives. Give it a try. And when you do, come back and tell me how it went. Did your kids love them? Did they disappear at your party? Did you come up with a variation I haven’t tried yet? I’d love to hear about it. Drop a comment below, share a photo, or tag me in your spider egg creations. Happy Halloween, and happy cooking!
Pin This Recipe!
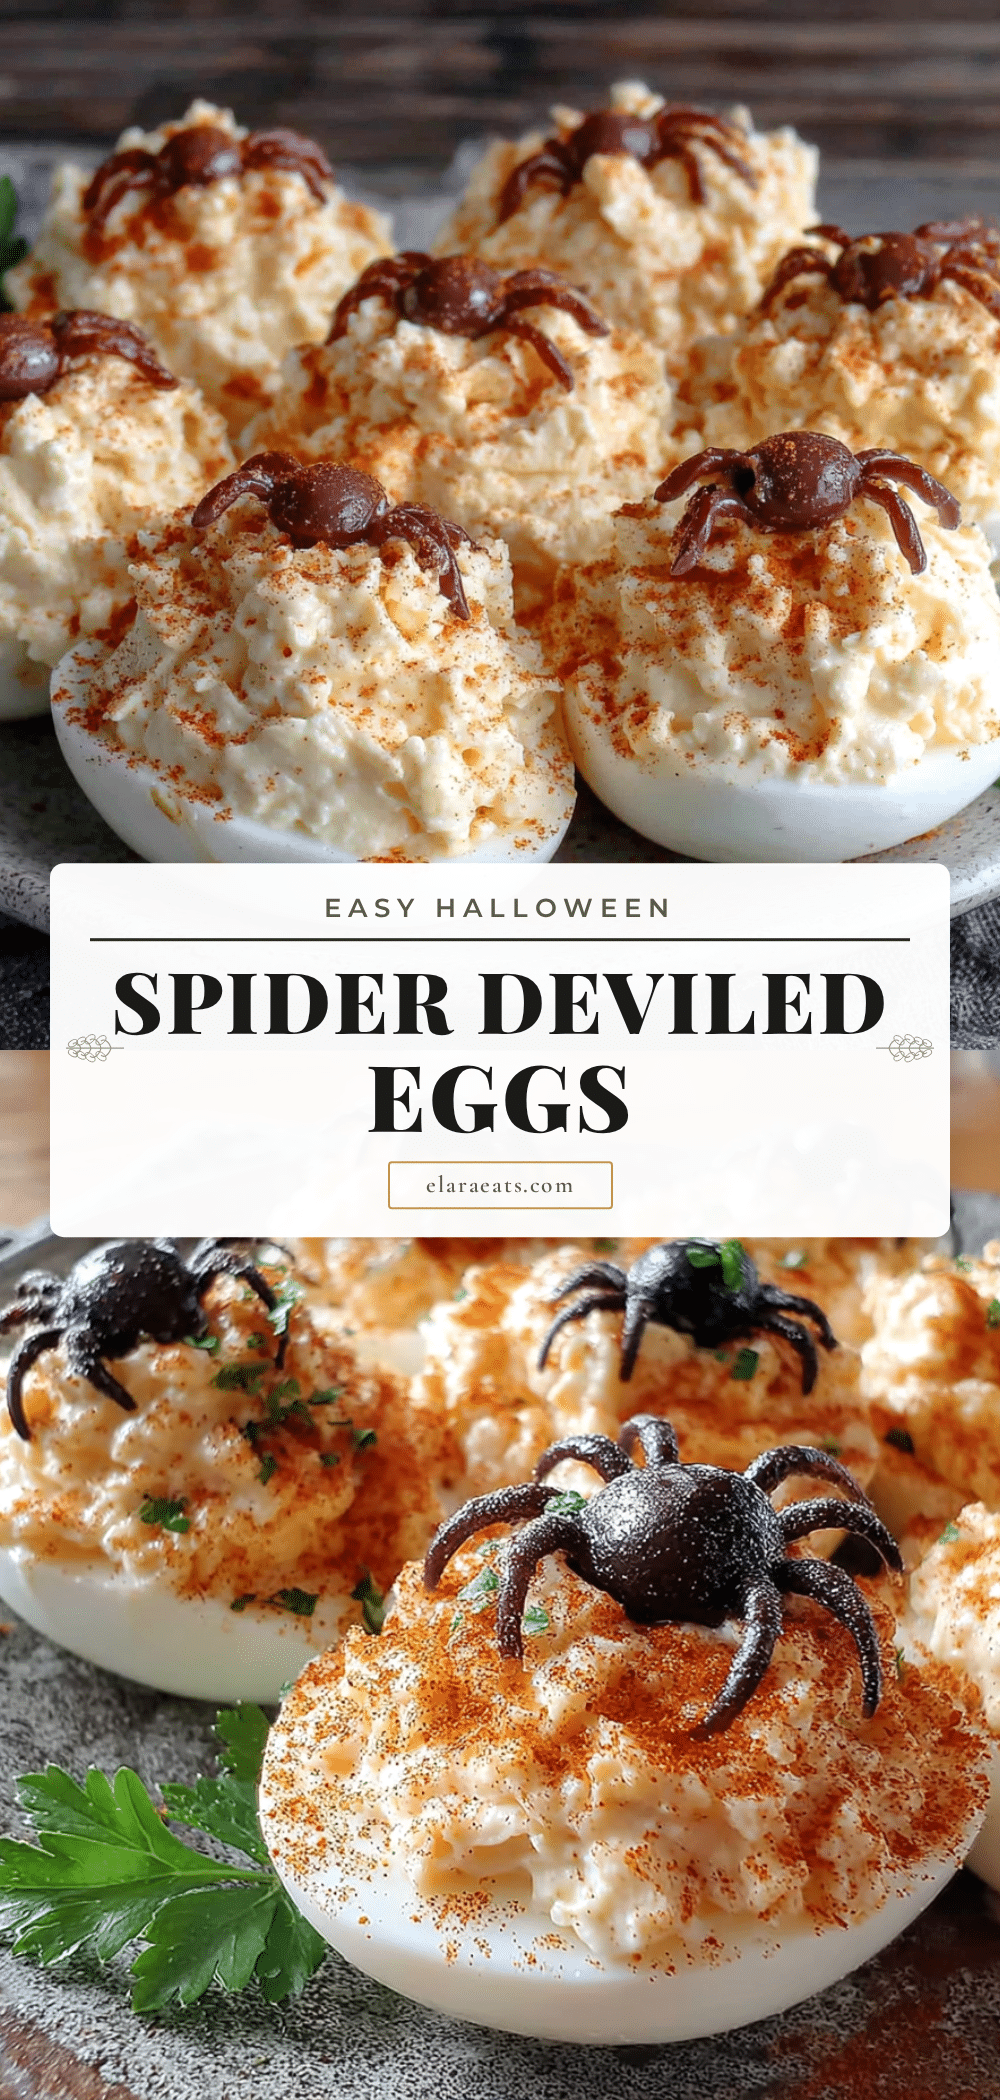
Easy Spider Deviled Eggs: Perfect Halloween Appetizer

These Easy Spider Deviled Eggs for Halloween are the ultimate no-stress party trick. Black olive spiders perched on top of creamy, classic deviled eggs are equal parts cute and creepy—perfect for little kids who think spiders are cool and adults who just want a solid deviled egg without the fuss.
- Prep Time: 15 minutes
- Cook Time: 12 minutes
- Total Time: 30 minutes
- Yield: 24 deviled eggs (12 servings of 2 eggs each) 1x
- Category: Appetizer
- Cuisine: American
Ingredients
- 12 large eggs (room temperature works best for even boiling, but cold is fine if you’re in a rush)
- 1/3 cup mayonnaise (I prefer Duke’s for its tangy flavor, but Hellmann’s works great too)
- 1 tablespoon yellow mustard (or Dijon if you want a sharper kick)
- 1 teaspoon white vinegar (adds brightness and helps the filling hold together)
- 1/4 teaspoon salt (plus more for the boiling water)
- 1/8 teaspoon black pepper (freshly ground if you have it)
- 1/2 teaspoon paprika (for garnish, plus extra for that classic deviled egg look)
- 1 can (6 ounces) whole pitted black olives (look for large, firm olives—the jumbo ones make better spiders)
- 1/4 cup cream cheese, softened (optional, for ‘gluing’ the spider eyes—but you can also just press them on)
Instructions
- Place your 12 eggs in a large pot in a single layer. Cover them with cold water by about an inch. Add a generous pinch of salt. Bring the water to a rolling boil over high heat. Once it’s boiling hard, cover the pot, turn off the heat completely, and let it sit for exactly 12 minutes.
- While the eggs are cooking, fill a large bowl with ice and cold water. When the timer goes off, use your slotted spoon to transfer the eggs immediately to the ice bath. Let them chill for at least 10 minutes.
- Gently tap each egg on the counter to crack the shell all over, then peel under cold running water. Pat the peeled eggs dry with a paper towel. Using your sharp knife, slice each egg in half lengthwise. Carefully pop the yolks into your mixing bowl and arrange the whites on your serving platter.
- Add the mayonnaise, mustard, vinegar, salt, and pepper to the bowl with the yolks. Mash everything together with a fork until it’s completely smooth. Taste it and adjust the seasoning.
- Drain your can of black olives and pat them dry on paper towels. Slice about 12 olives in half crosswise (through the middle, not lengthwise) for the spider bodies. Take the remaining olives and slice them lengthwise into thin strips for the legs. Each olive should give you 4 to 5 strips.
- Spoon your filling into your piping bag or zip-top bag and snip off a small corner. Pipe a generous swirl of filling into each egg white half. Take one of your olive body halves and gently press it into the center of the filling. Arrange 8 olive leg strips around each body—4 on each side, sticking out at angles like spider legs.
- For the eyes, take a few of the remaining olive leg strips and cut them into tiny dots. If you have cream cheese, dab a tiny bit on the back of each eye dot and stick it onto the front of the spider body. No cream cheese? Just press them on.
- Sprinkle a light dusting of paprika over the entire platter. Cover the platter loosely with plastic wrap and refrigerate for at least 30 minutes before serving.
Notes
Don’t overboil the eggs—set a timer for exactly 12 minutes. Peel under running water for best results. Make the filling ahead of time and store separately. Use a dark serving platter for dramatic presentation. The eggs taste even better the next day.
Nutrition
- Serving Size: 2 spider eggs
- Calories: 180200
- Sugar: 1
- Sodium: 300
- Fat: 14
- Saturated Fat: 3
- Carbohydrates: 2
- Fiber: 0.5
- Protein: 12
Keywords: Halloween appetizer, spider deviled eggs, easy Halloween recipe, deviled eggs, spooky snacks, party appetizer, black olive spiders


